Connection
Open Connection from the Manage group in the left navigation.
Connection setup differs by warehouse type:
| Warehouse type | Network access |
|---|---|
| SaaS | Choose Public Link (internet, secured by IP allowlist) or PrivateLink (private backbone inside your VPC). |
| BYOC | Your cloud network provides connectivity. Manage data-plane access via the Public Access Allowlist. |
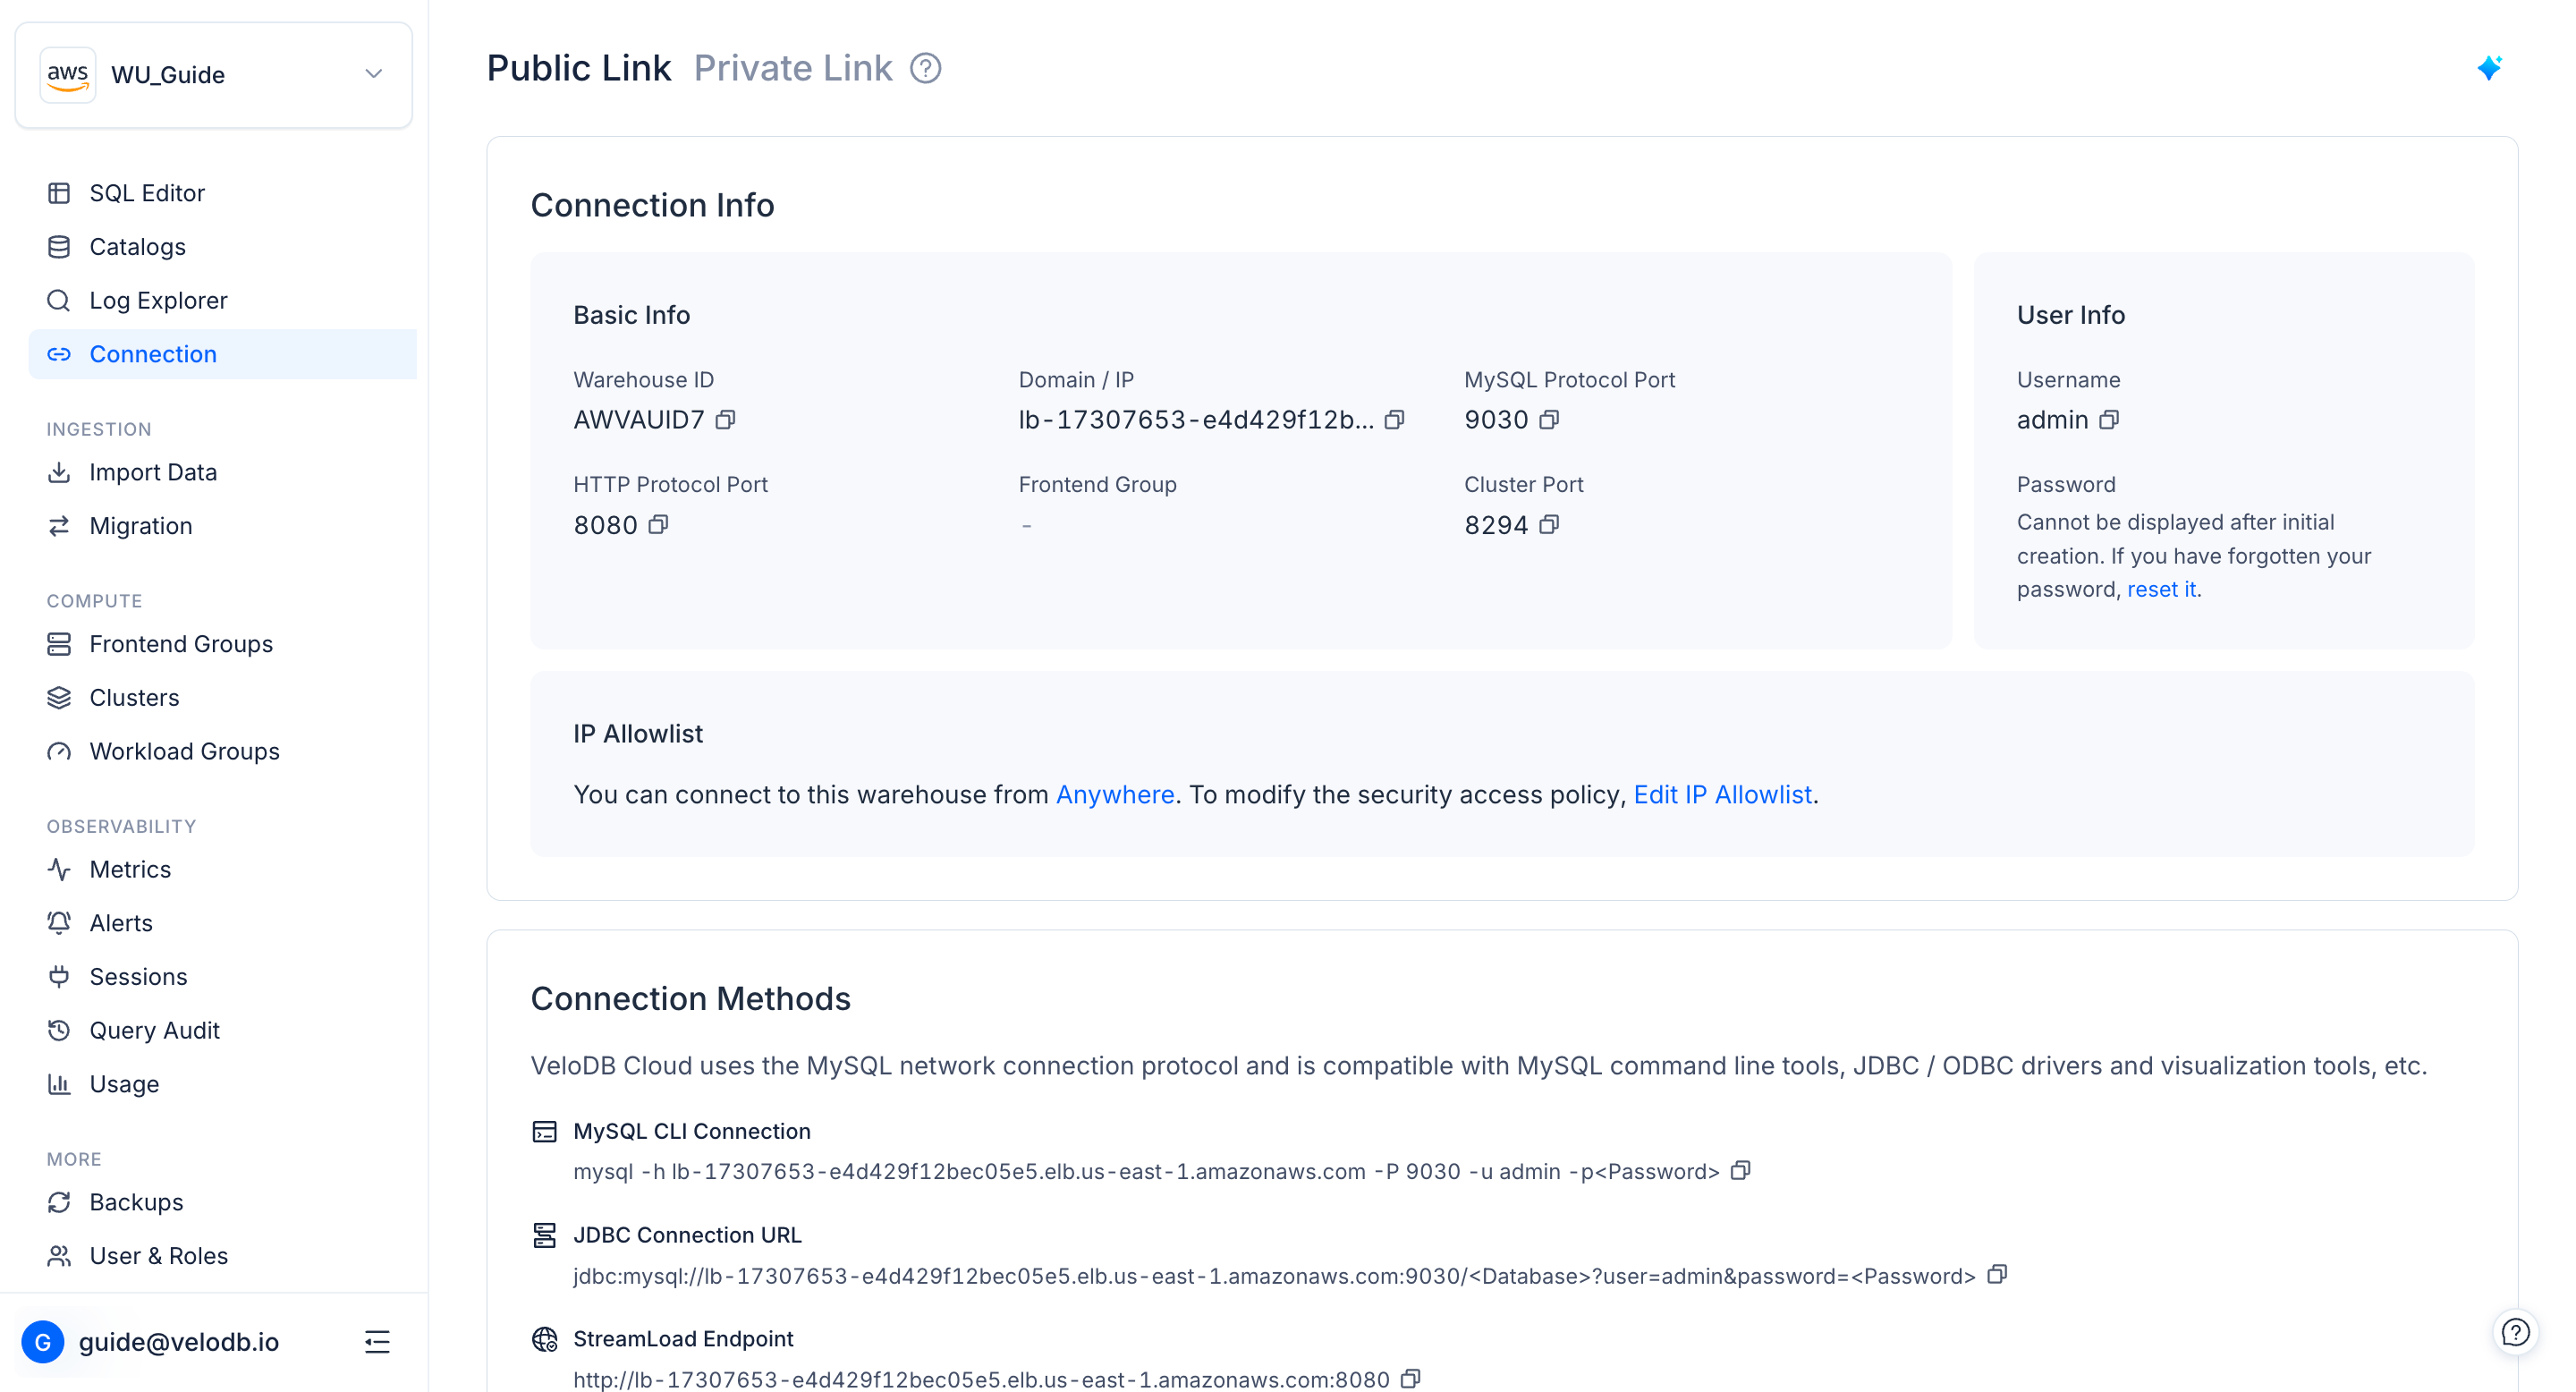
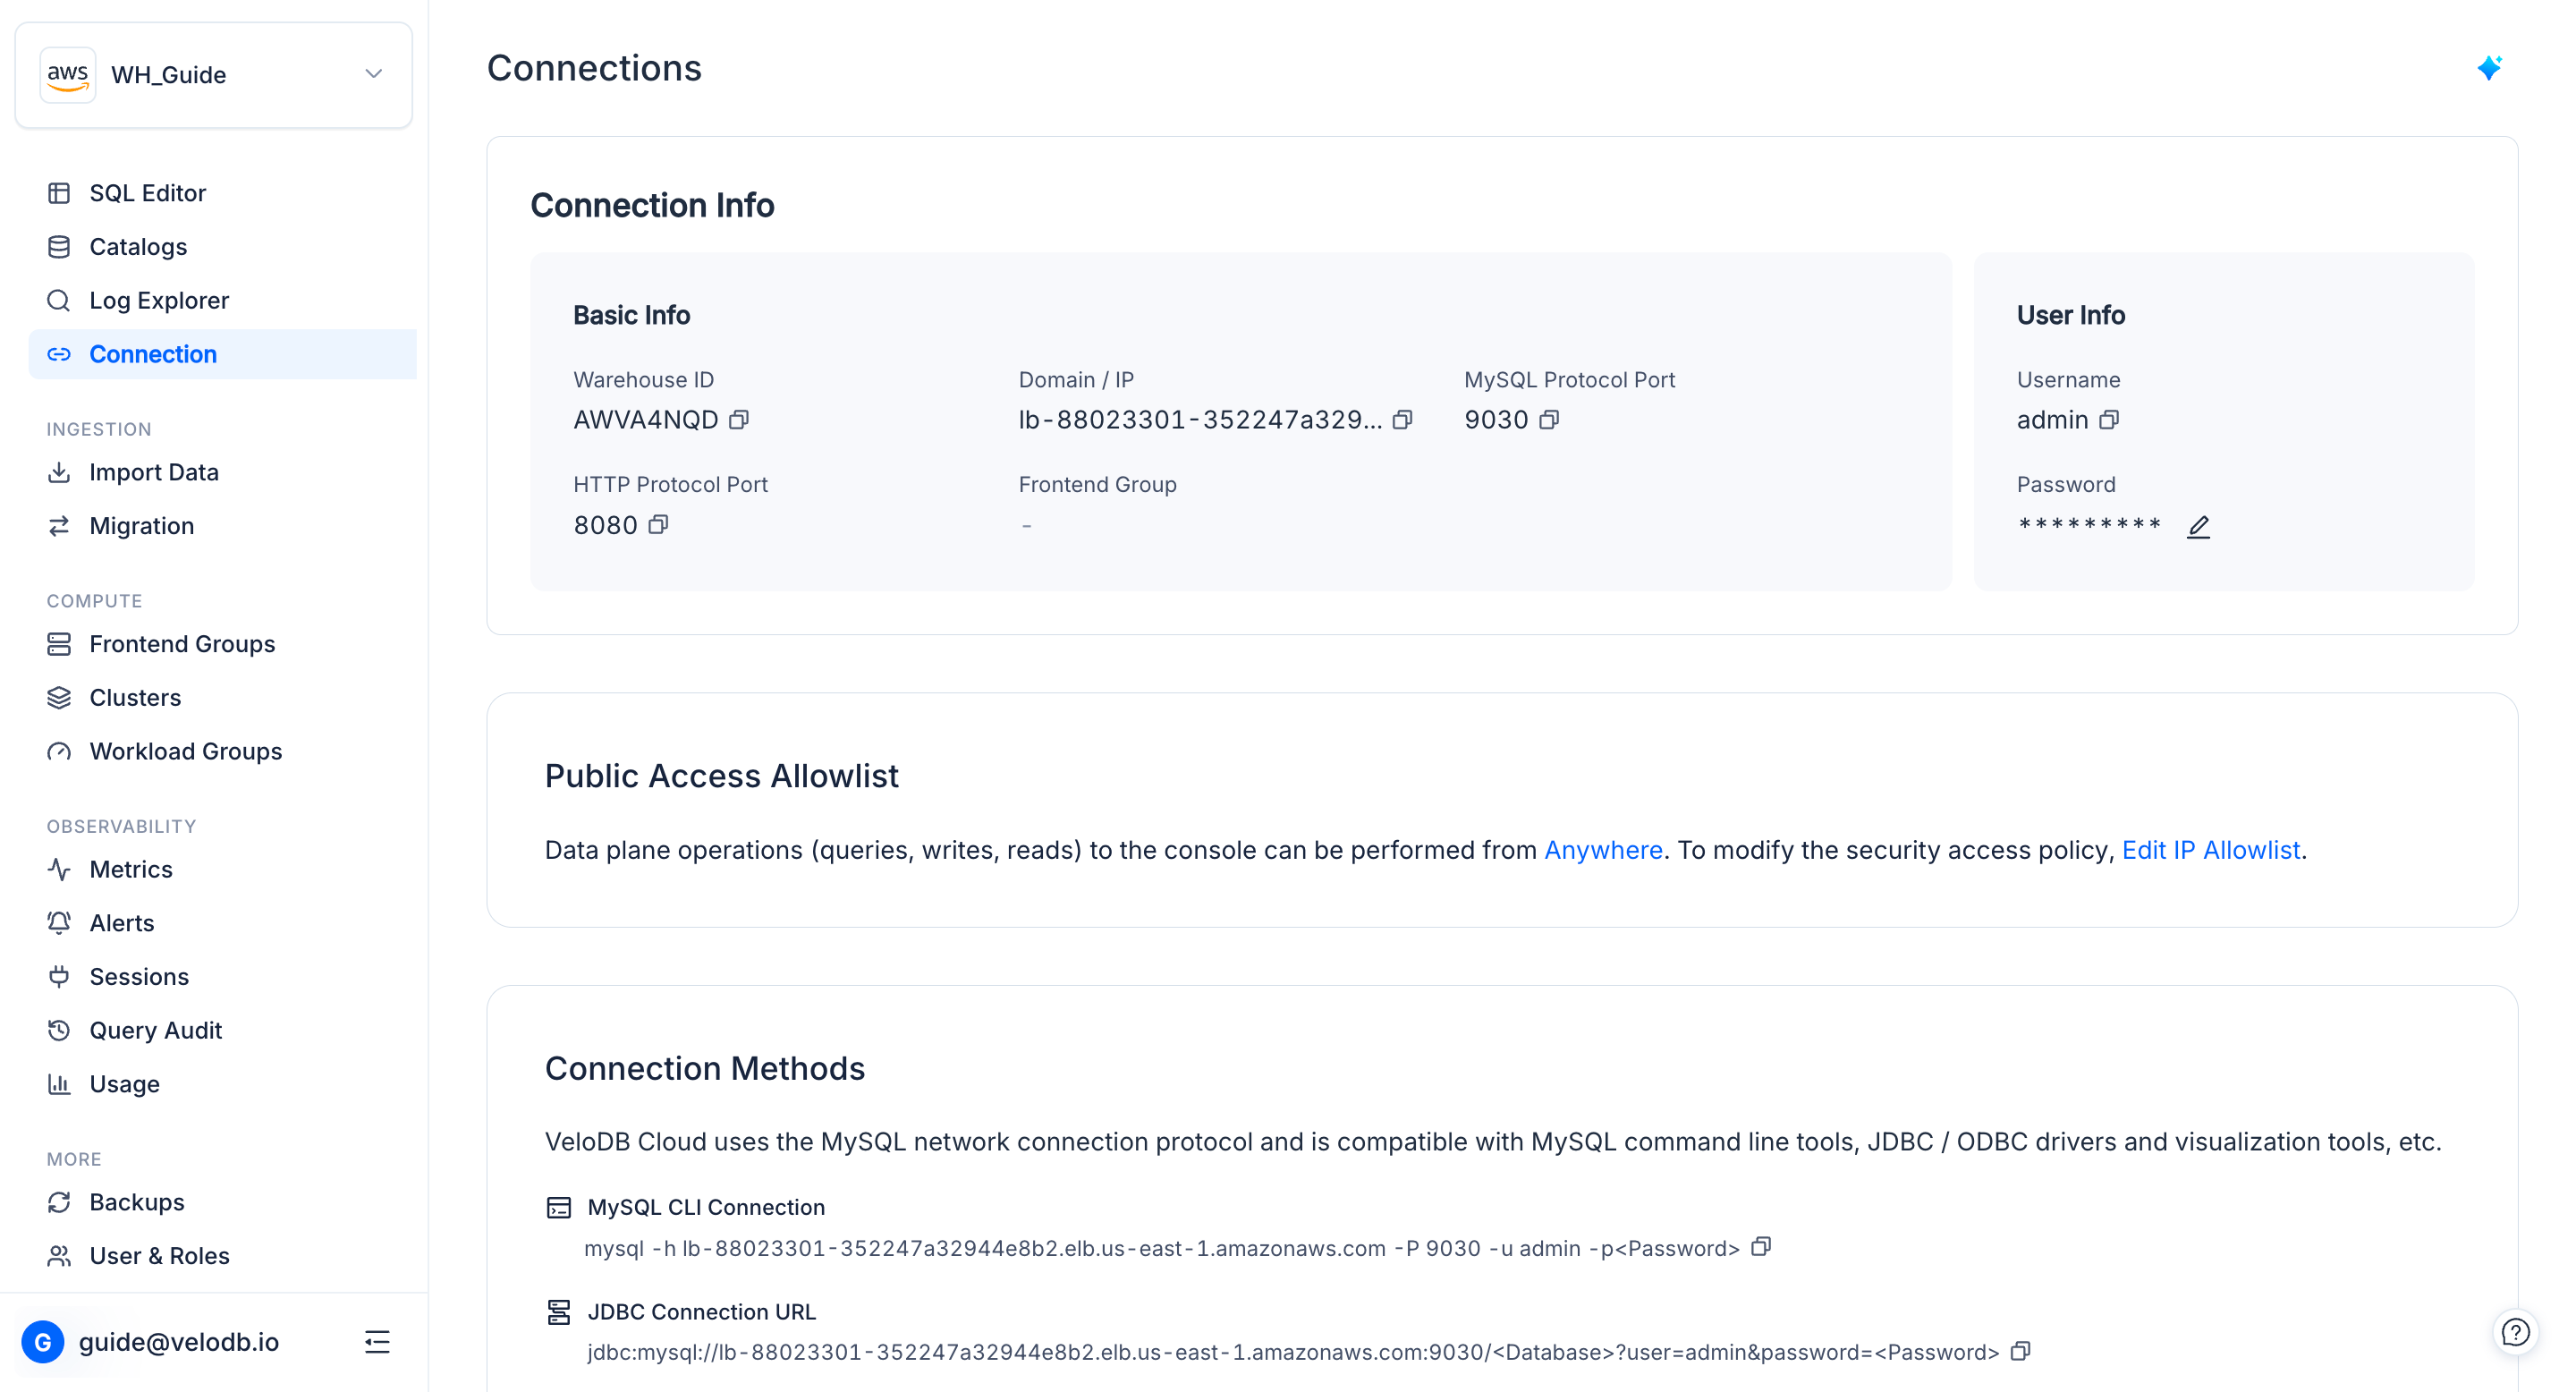
Connection Info
The Connection Info panel shows the details your applications need to connect to the warehouse.
| Field | Description |
|---|---|
| Warehouse ID | Unique identifier for the warehouse. |
| Domain / IP | Hostname or IP address for MySQL and HTTP connections. |
| MySQL Protocol Port | Default: 9030. |
| HTTP Protocol Port | Default: 8080. |
| Username | Database username. The default admin user is admin. |
| Password | Database password. Click the edit icon to reset it. |
Public Link
SaaS warehouses only. Public Link exposes the warehouse over the public internet, secured by an IP allowlist.
On the Connection page, switch to the Public Link tab. The IP Allowlist section shows the current access policy. Click Edit IP Allowlist to add or remove source IPs and CIDR blocks.
Note The default entry is
0.0.0.0/0, which allows access from anywhere. Remove it and add your real source IPs as soon as possible to reduce exposure.
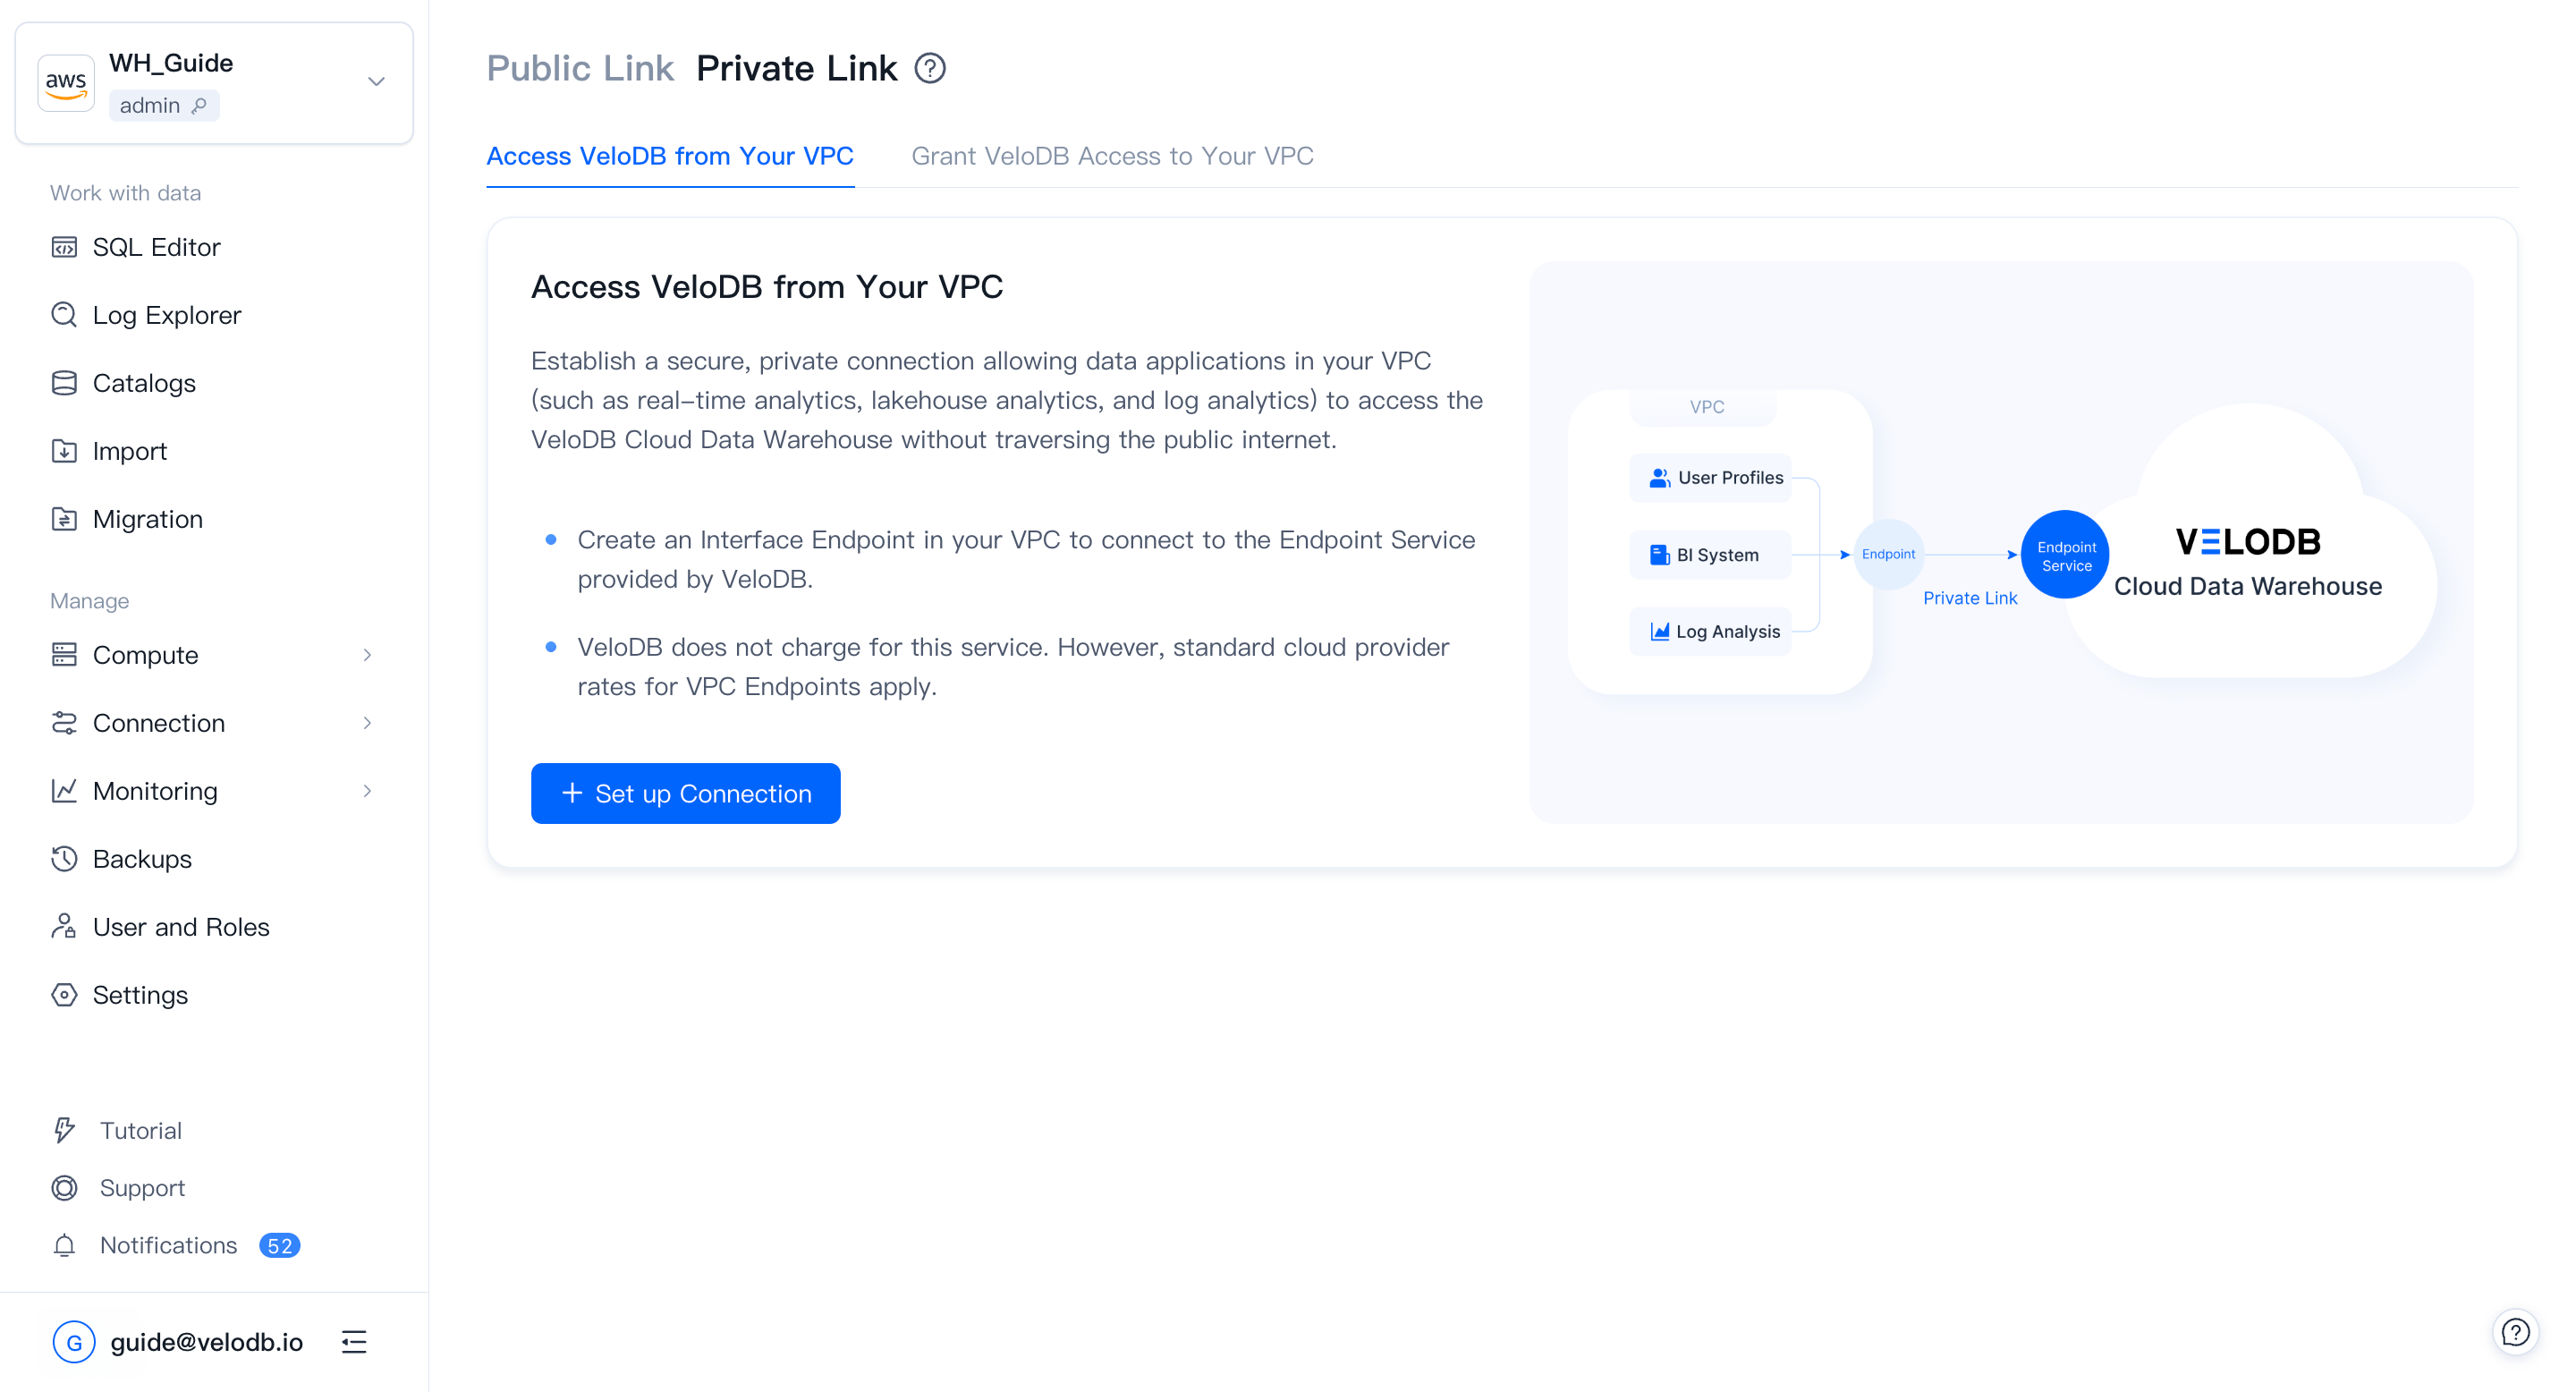
PrivateLink
SaaS warehouses only. PrivateLink lets applications inside your own VPC access VeloDB Cloud across VPC boundaries over a private network, simplifying network architecture and avoiding the risks of public access.
A PrivateLink connection has two ends: an Endpoint Service (the publisher side) and an Endpoint (the consumer side). Depending on who is connecting to whom, the two ends are owned differently:
- Access VeloDB from your VPC — VeloDB Cloud owns and manages the Endpoint Service; you create and manage the Endpoint in your own VPC.
- VeloDB accesses your VPC — you own the Endpoint Service in your VPC; VeloDB Cloud creates and manages the Endpoint.
Note VeloDB Cloud does not charge extra for PrivateLink, but you pay the cloud provider for endpoint instances and traffic.
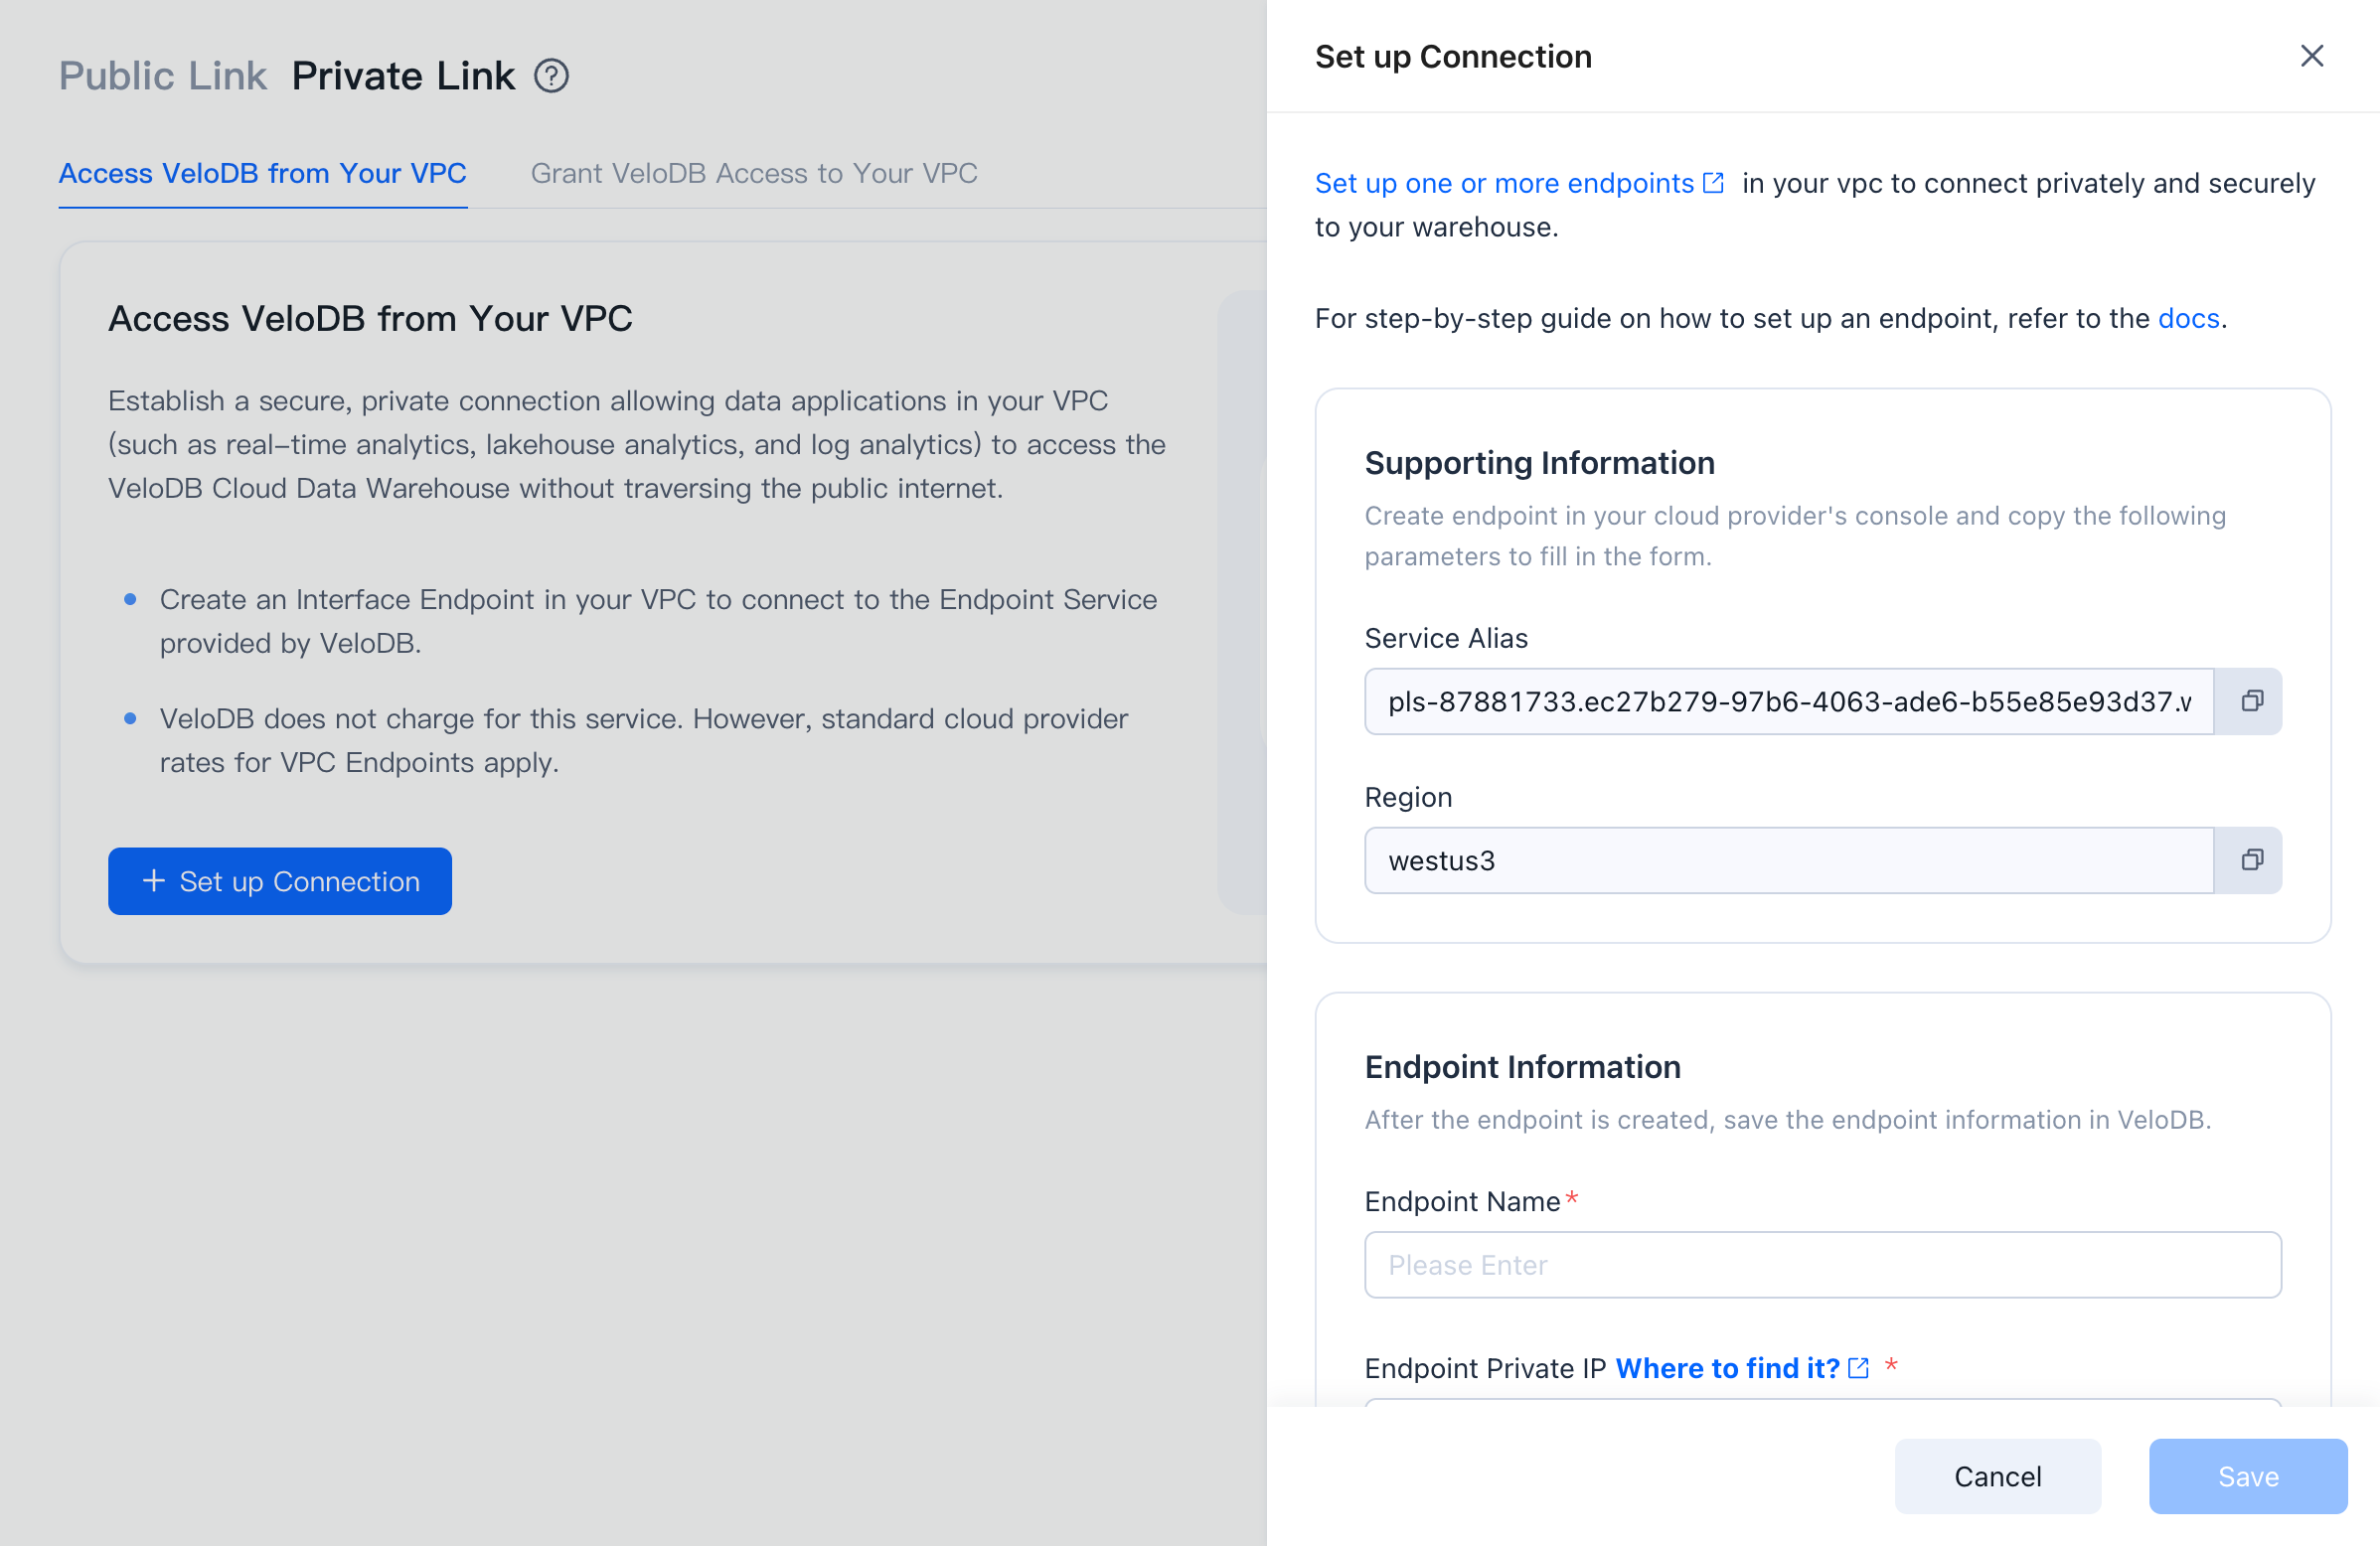
Access VeloDB from your VPC
Use this direction to let reporting tools, BI, log-analytics jobs, and other applications inside your VPC reach the VeloDB Cloud warehouse.
On AWS
-
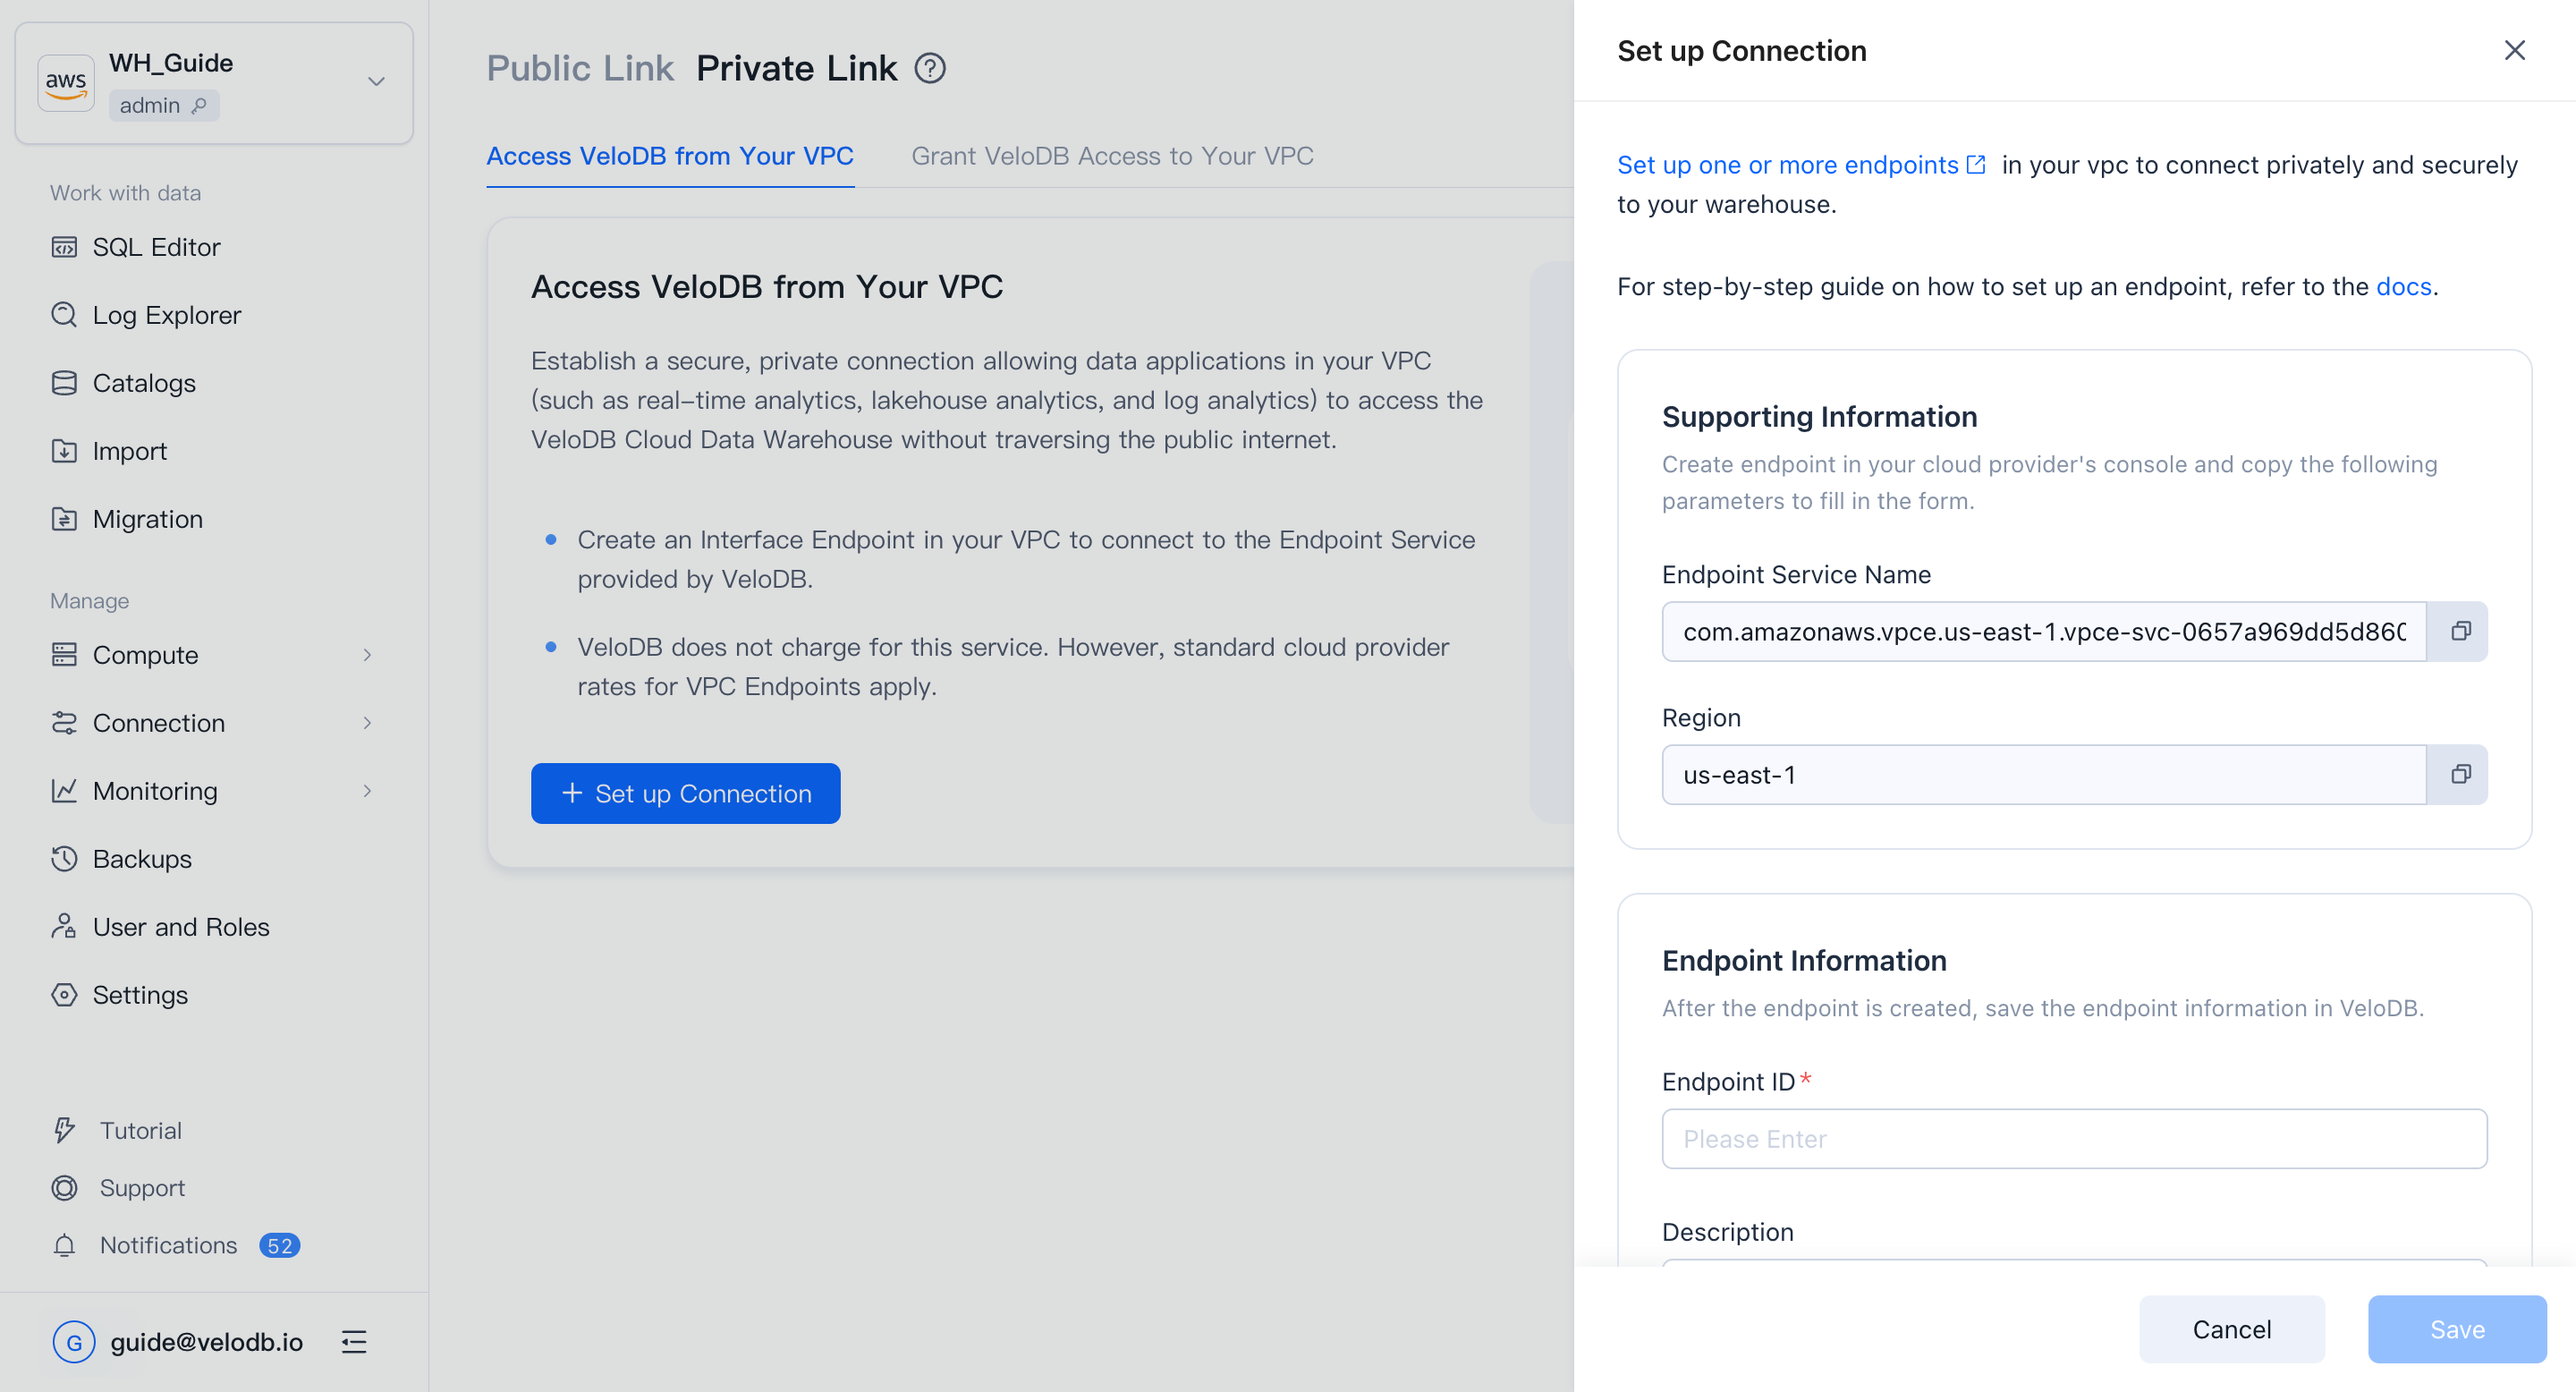
On the target warehouse, open Connection → Private Link, click Set up Connection under Connect Your VPC to VeloDB.
-
Click Set up one or more endpoints to open AWS PrivateLink and create an endpoint.
-
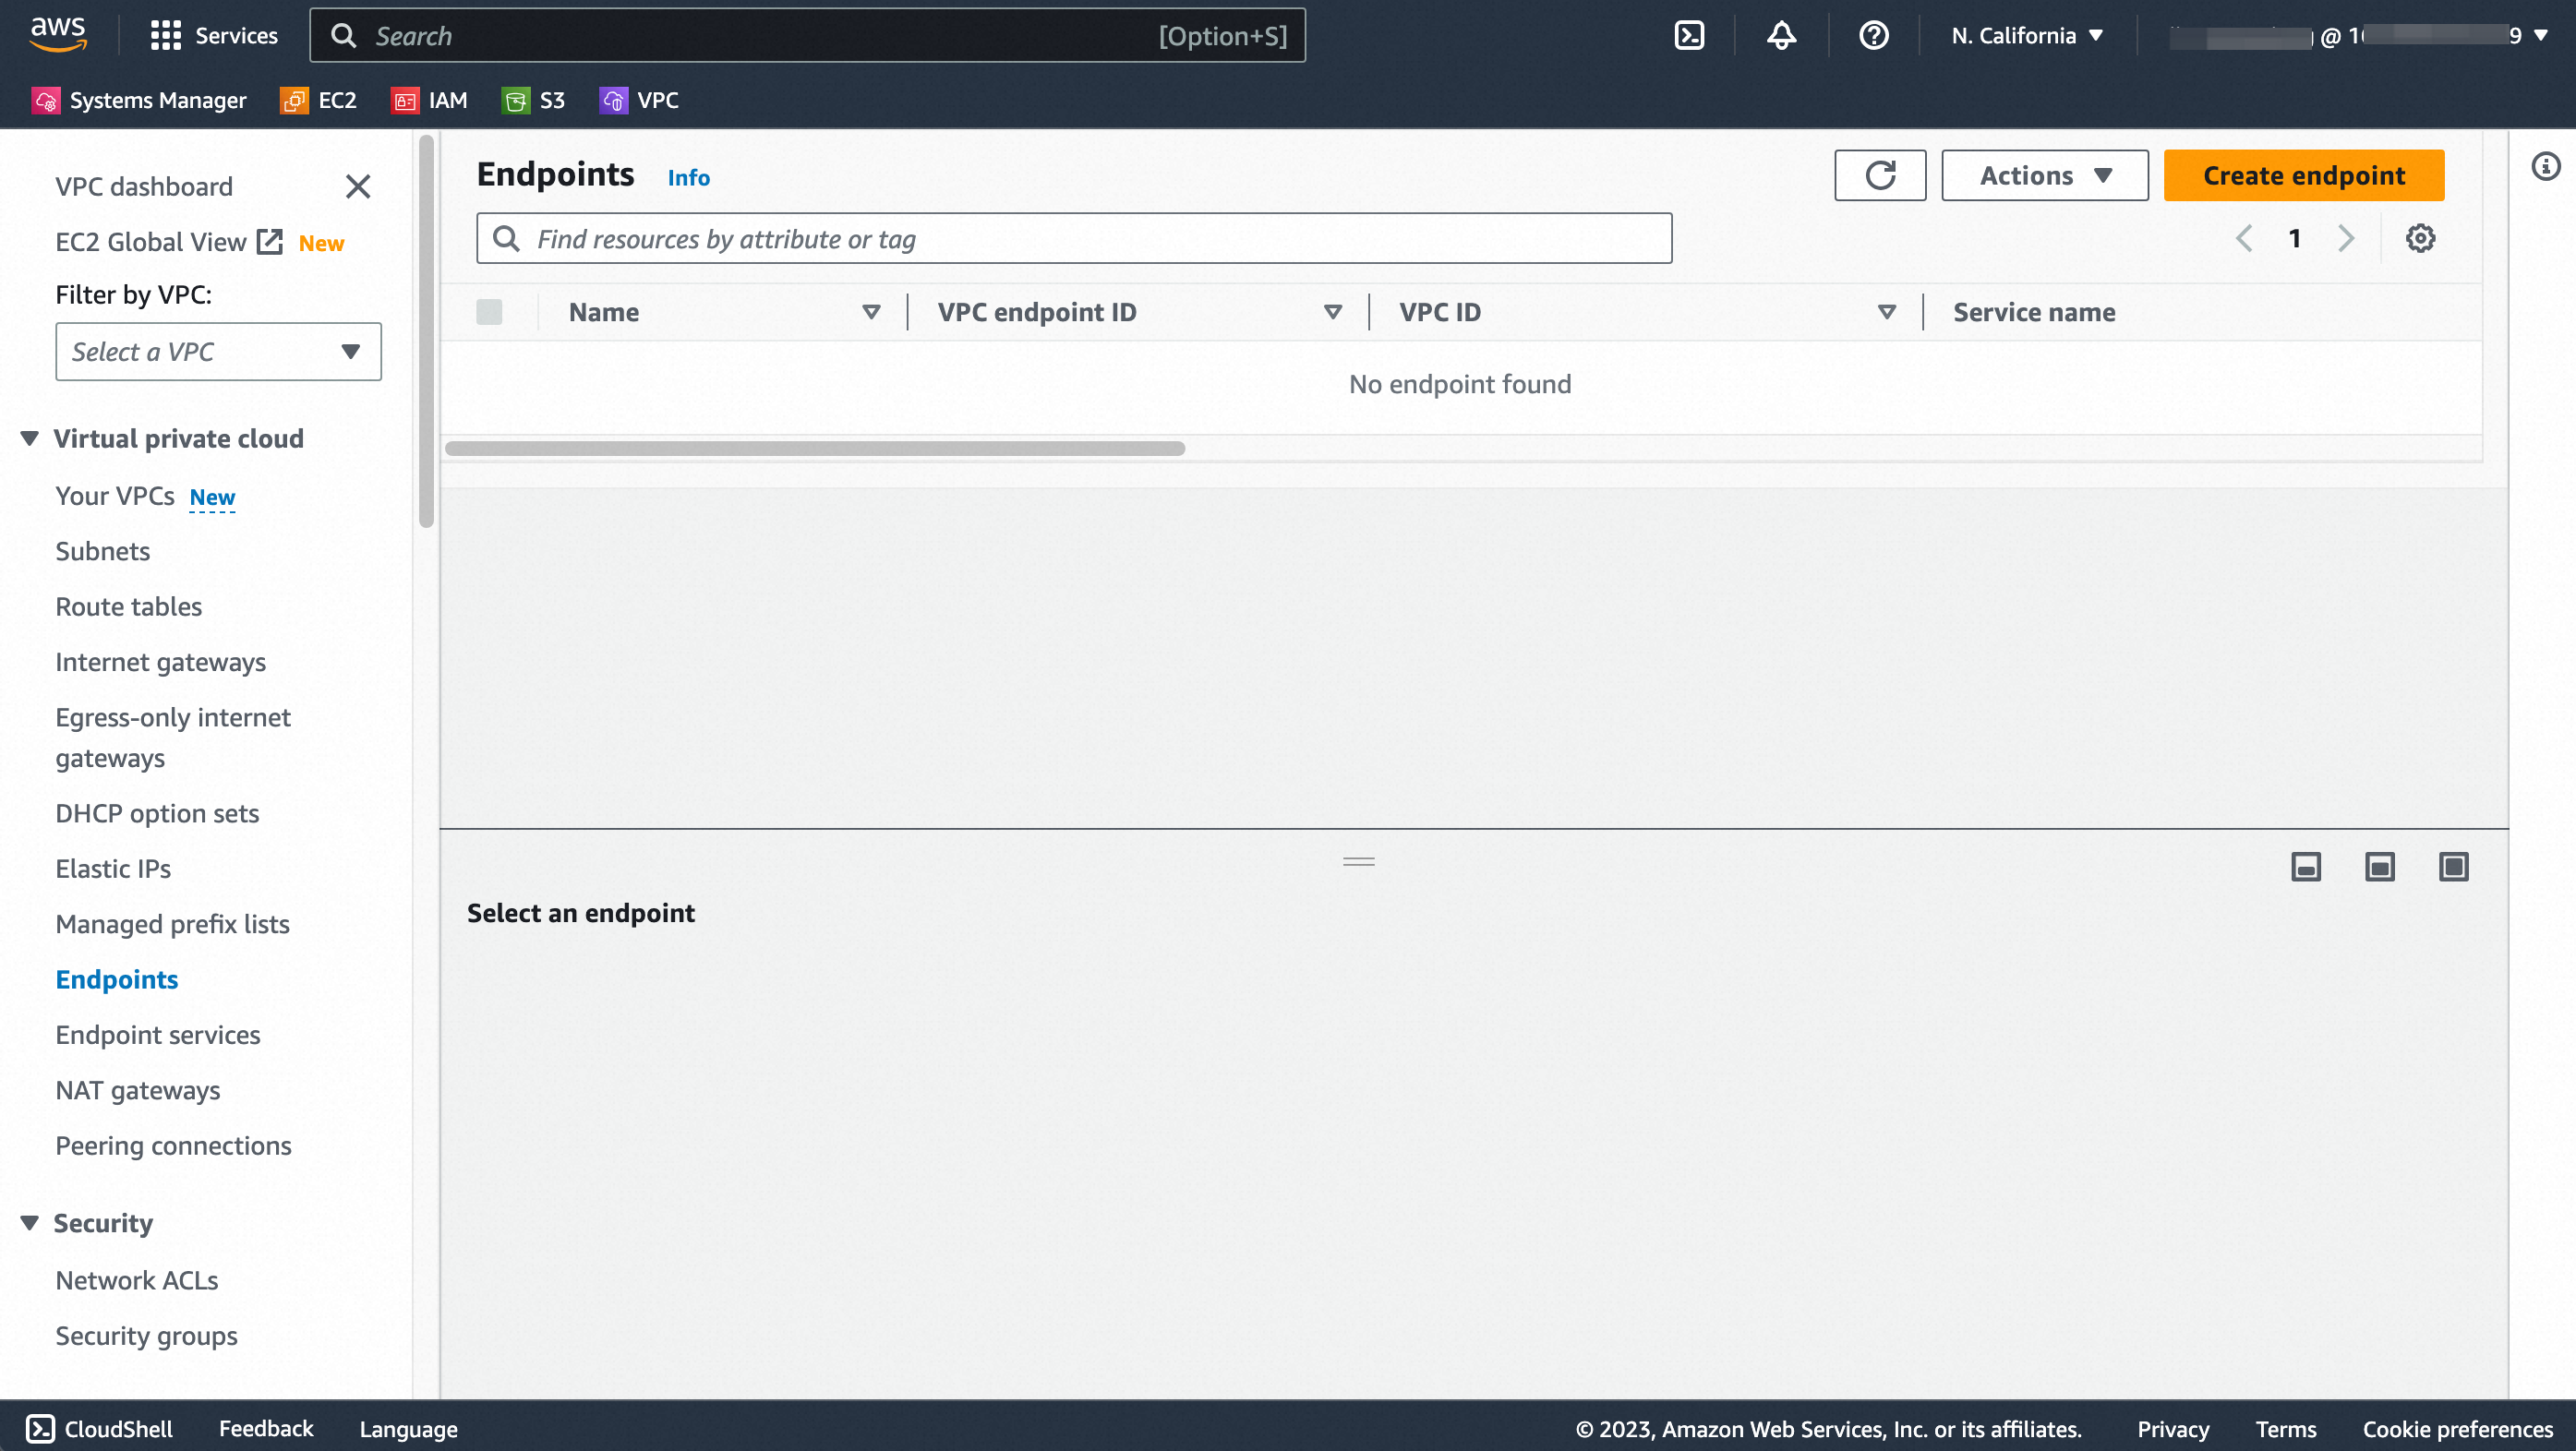
In the AWS PrivateLink console, make sure the region matches the VeloDB warehouse's region (PrivateLink is region-scoped), then click Create endpoint.
Note Sign in to AWS with a principal that has been allow-listed to access the VeloDB endpoint service, or service-name verification will fail.
-
Fill in the endpoint form:
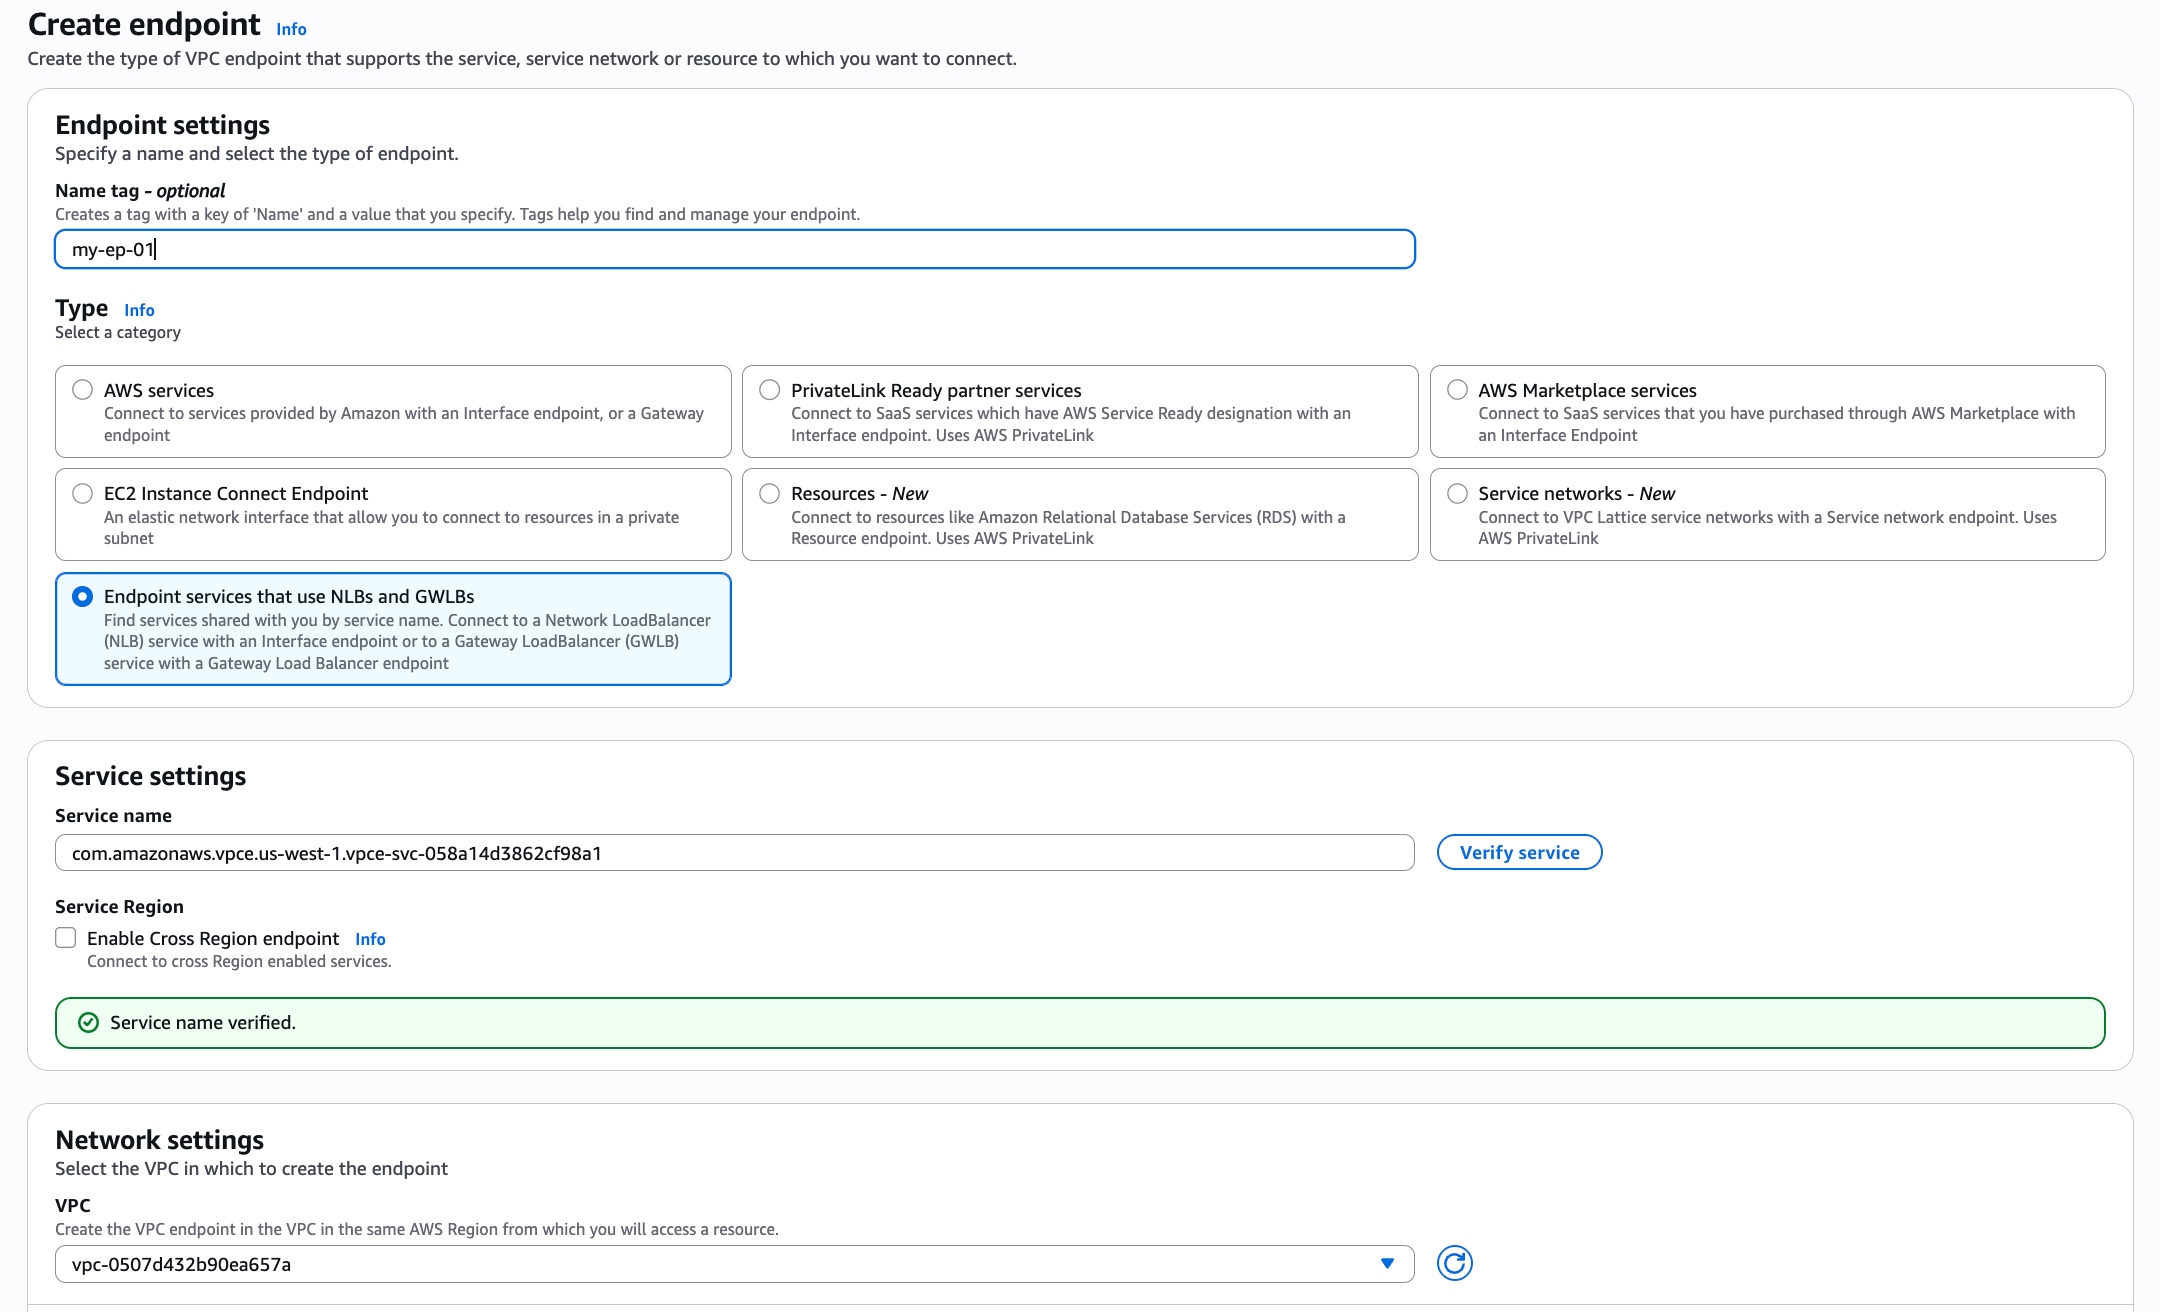
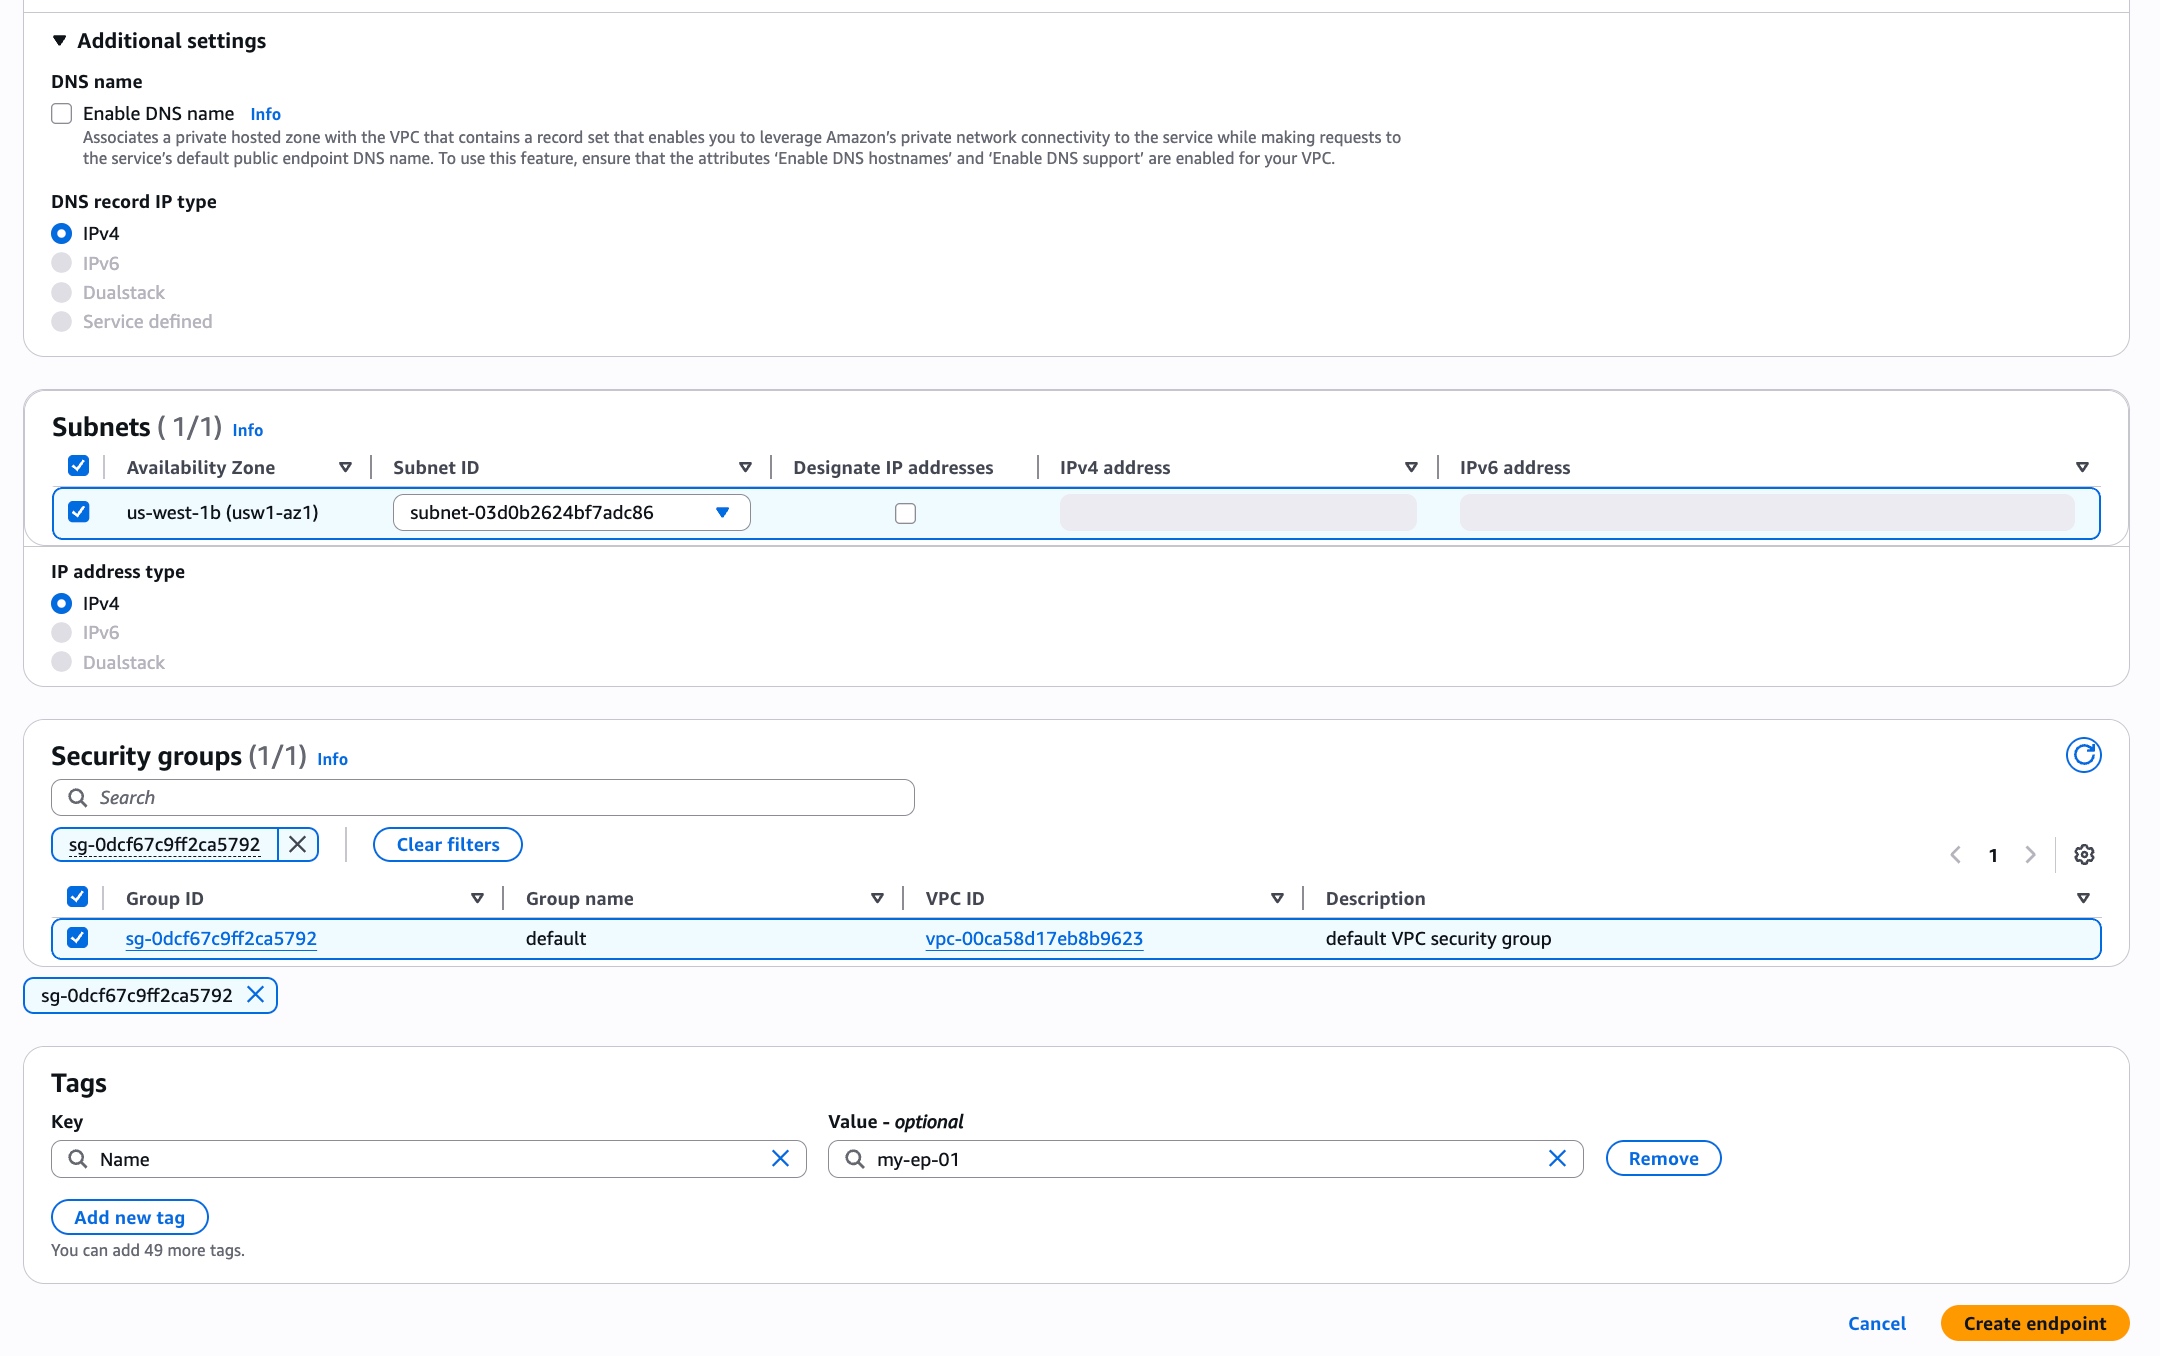
Parameter Description Name tag Optional. Tag with key Nameand a value of your choice.Service category Required. Pick Endpoint services that use NLBs and GWLBs. Service name Required. Copy the Service Name from the Endpoint Service information panel in VeloDB Cloud, paste it here, and click Verify service. VPC Required. The VPC to create the endpoint in. Subnets Required. Same AZ as VeloDB's endpoint service (PrivateLink restriction). Pick a suitable subnet. Security groups Required. The rules must allow the protocol and port used by the warehouse and the source IP of your application. Tags Optional. -
When the endpoint status changes from Pending to Available, the private-link handshake is done.
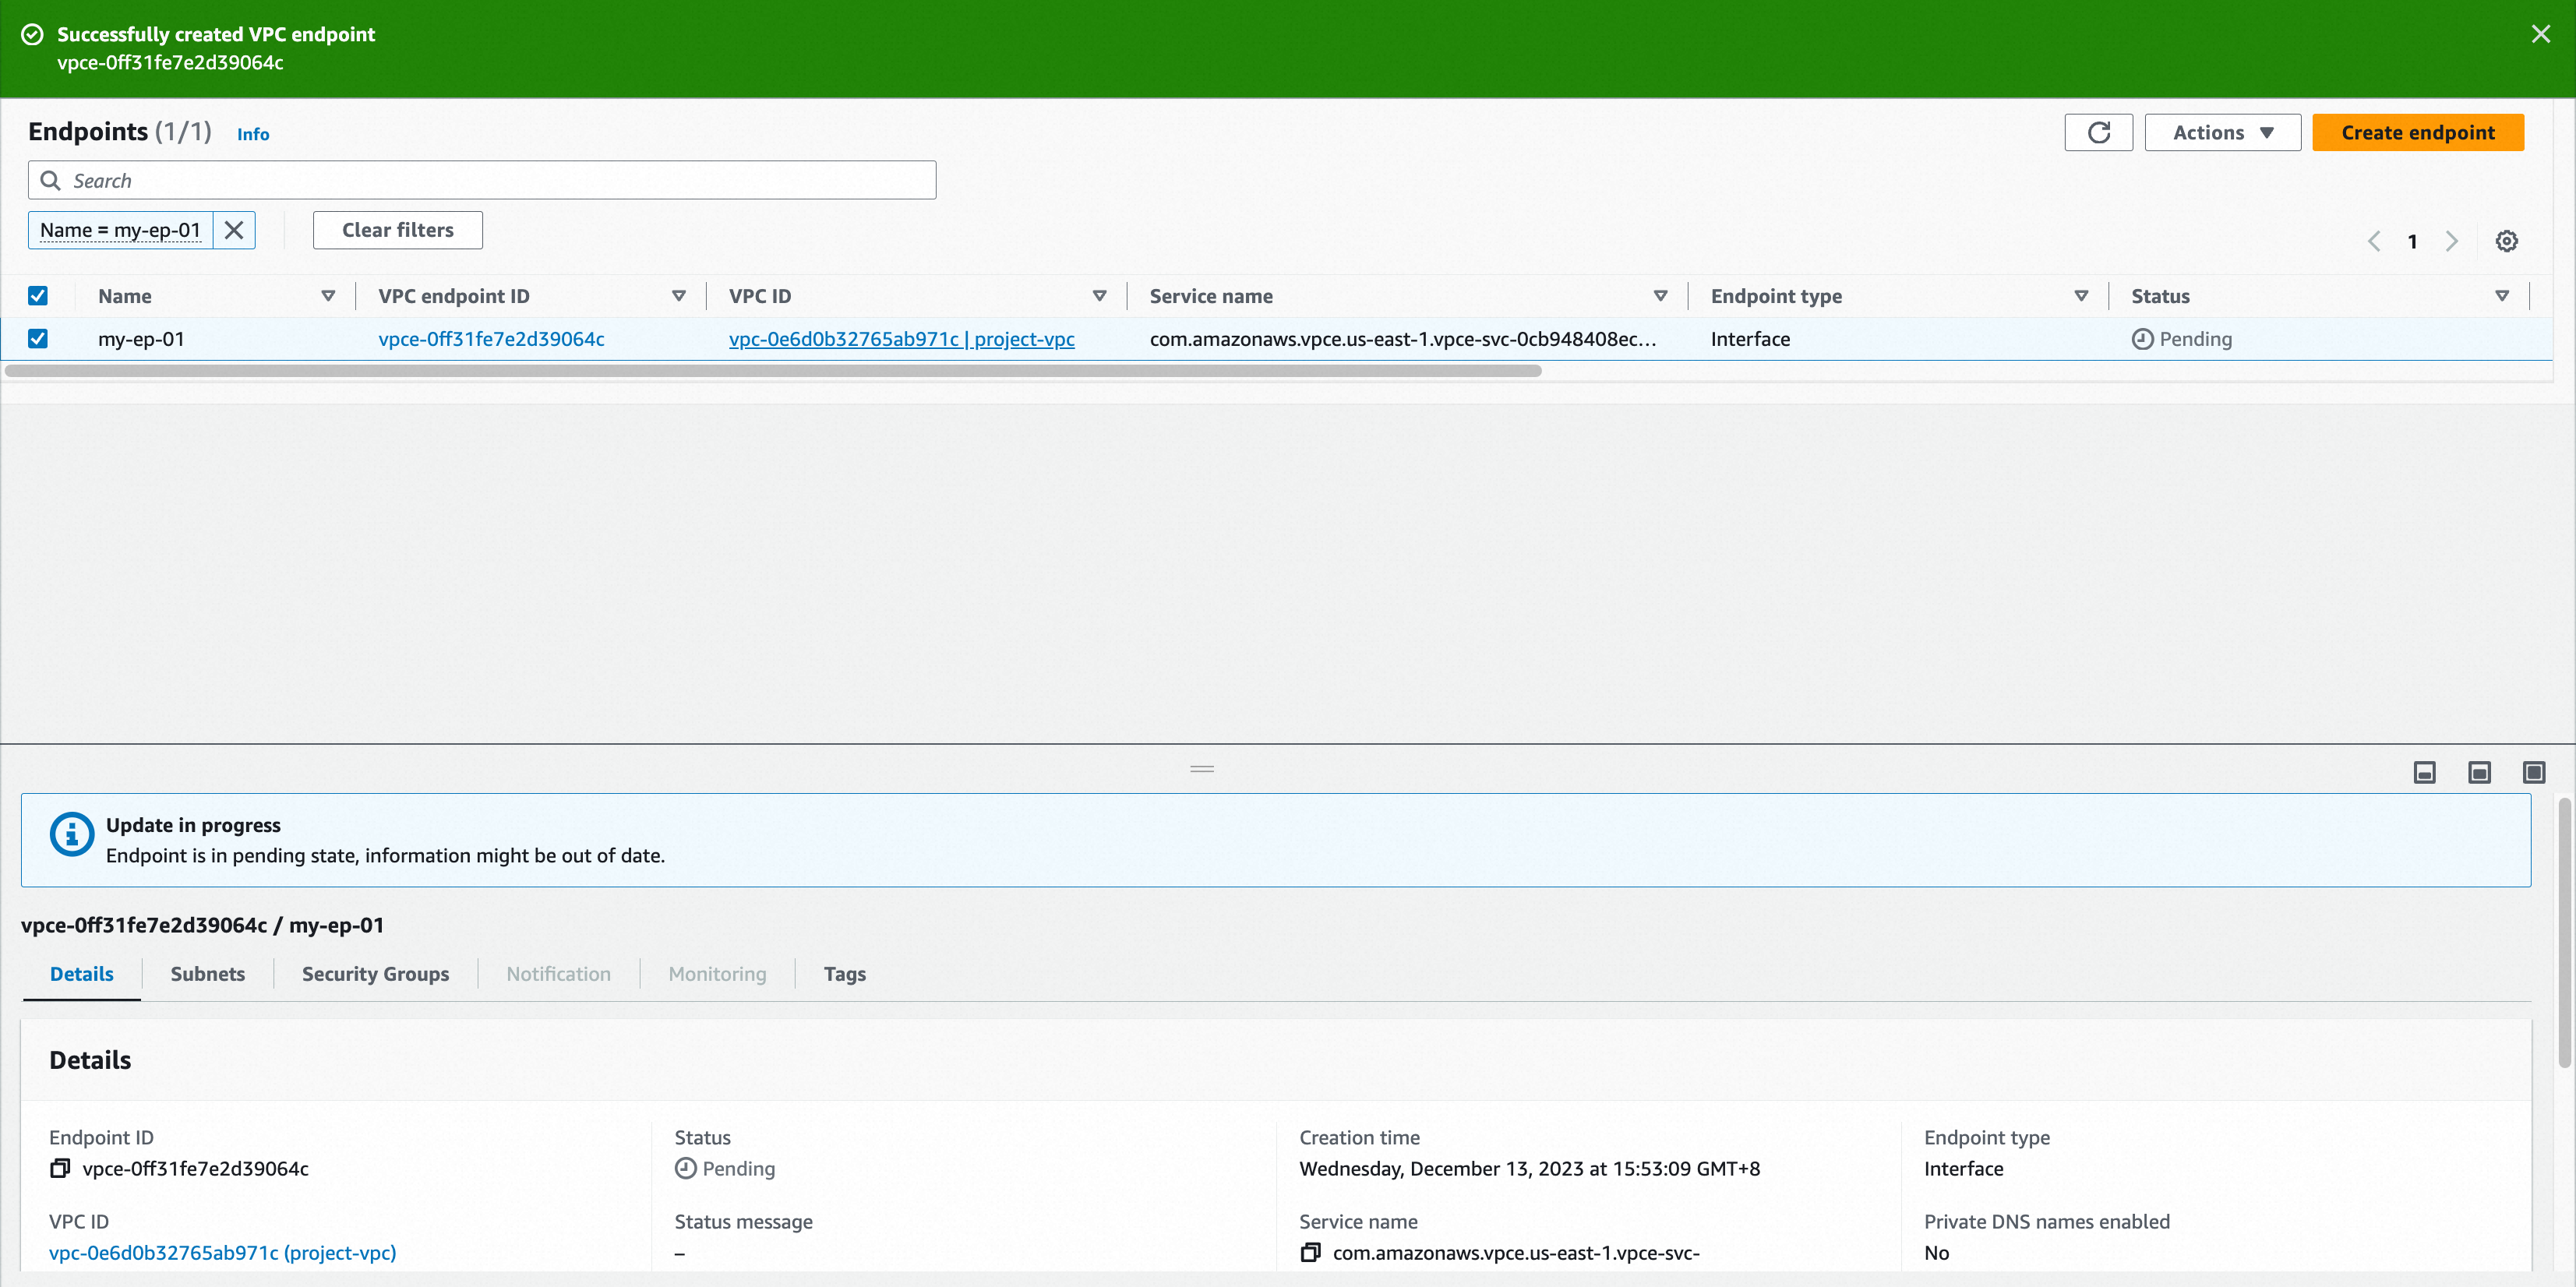
-
Refresh the VeloDB Cloud Connection page — the endpoint list shows the connection details.
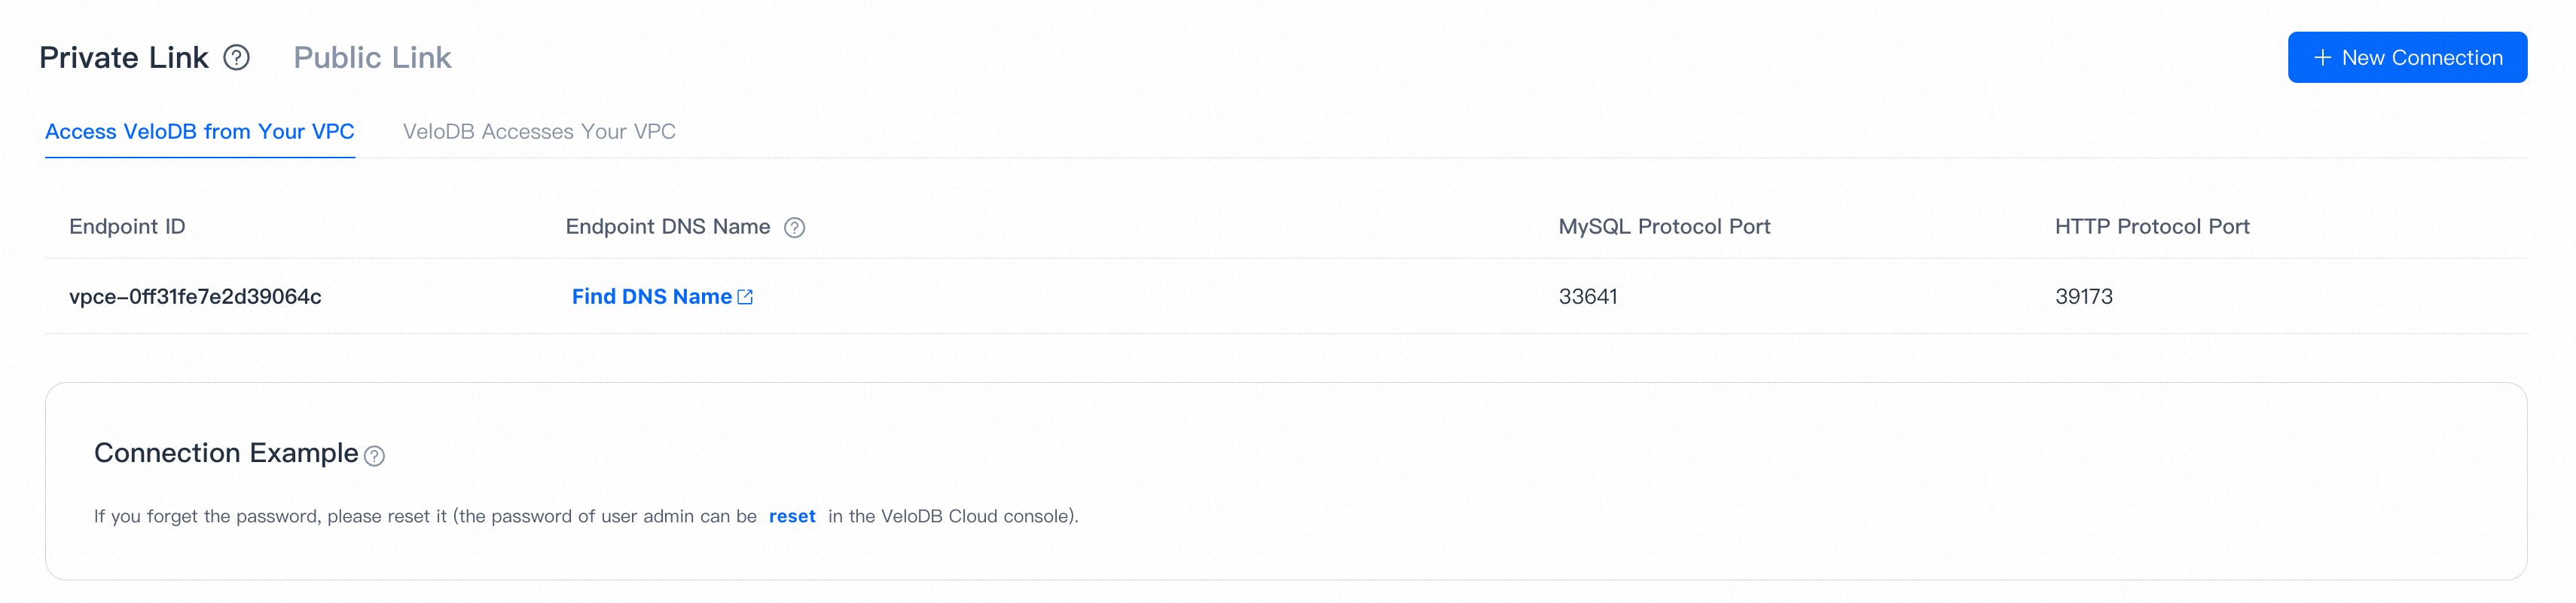
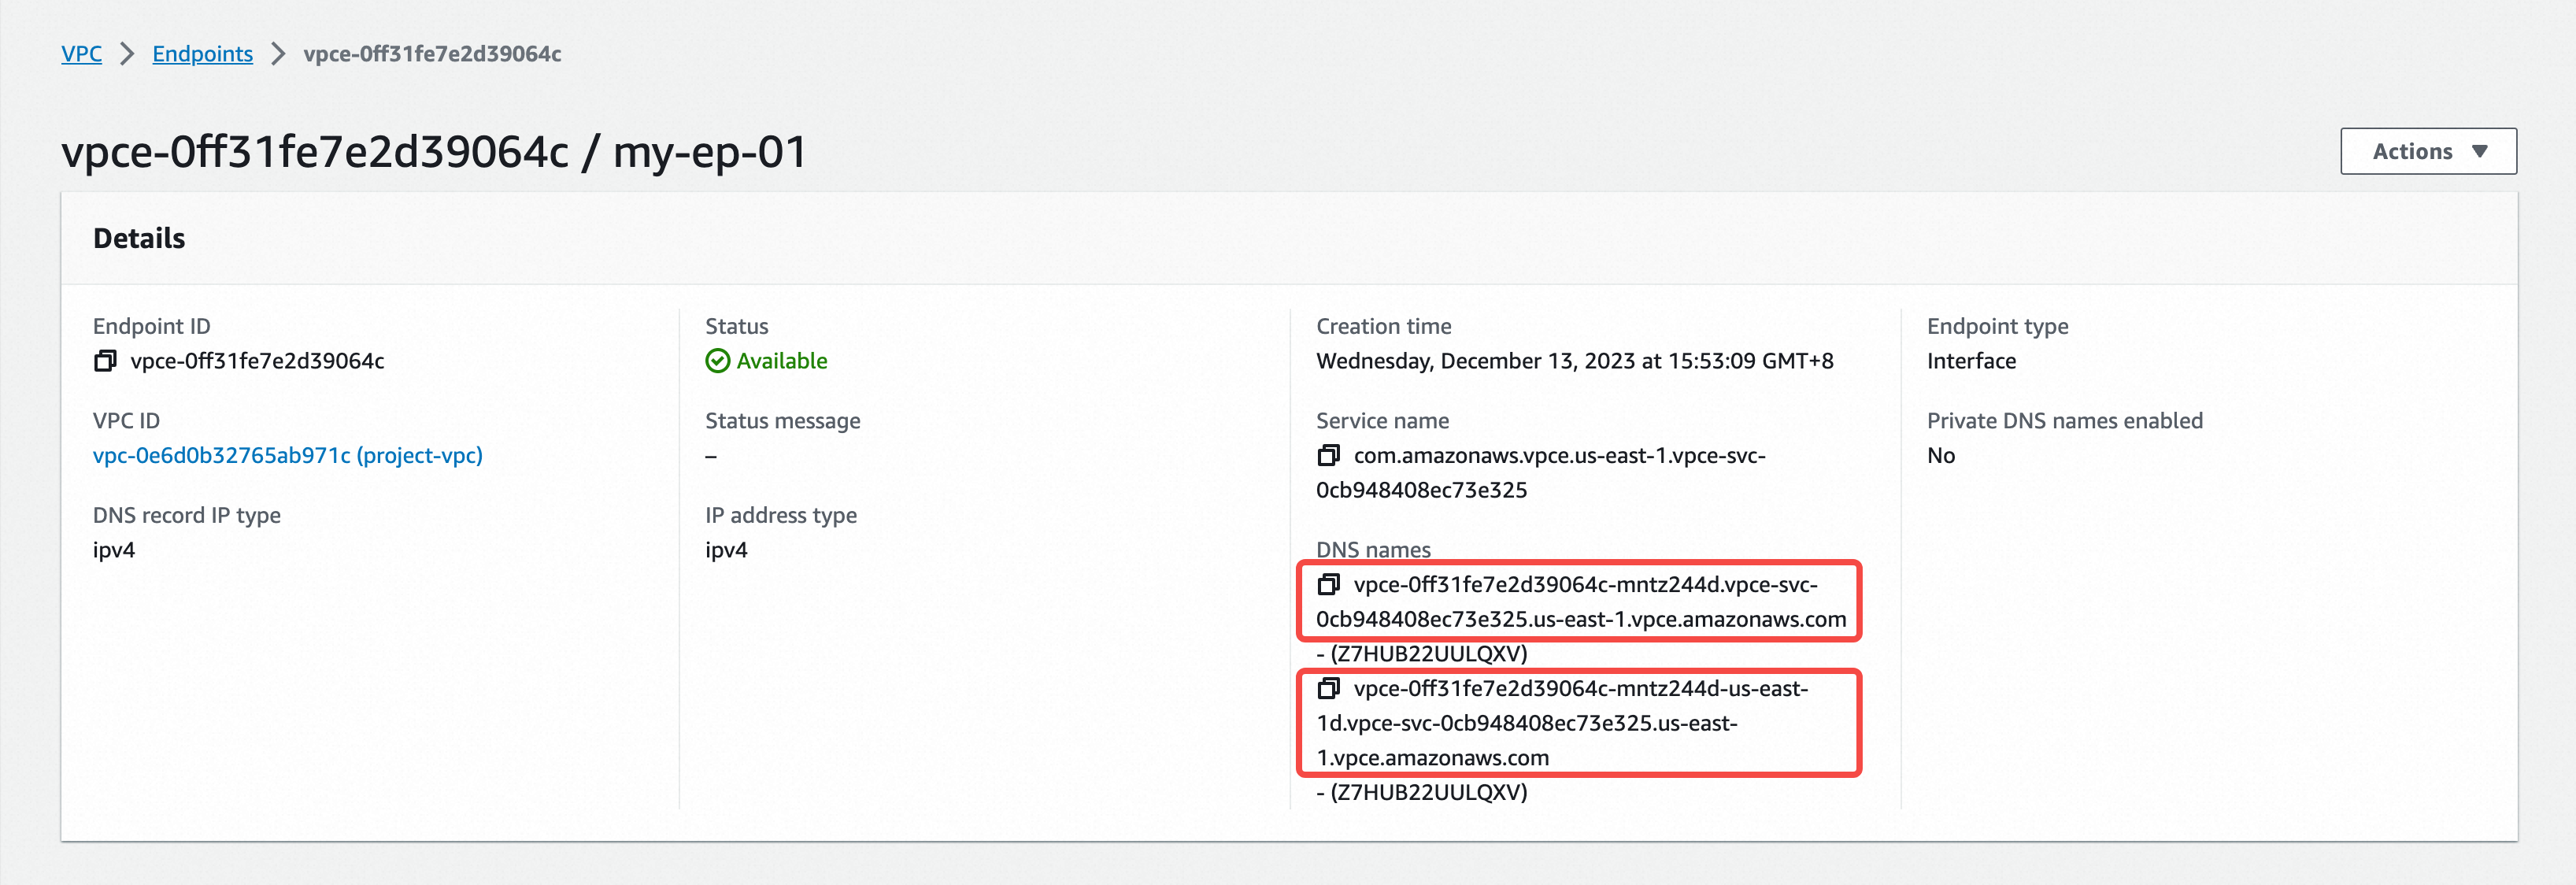
Note Click Find DNS Name to open the endpoint detail page in AWS, grab the DNS Name, and use it to access the warehouse.
-
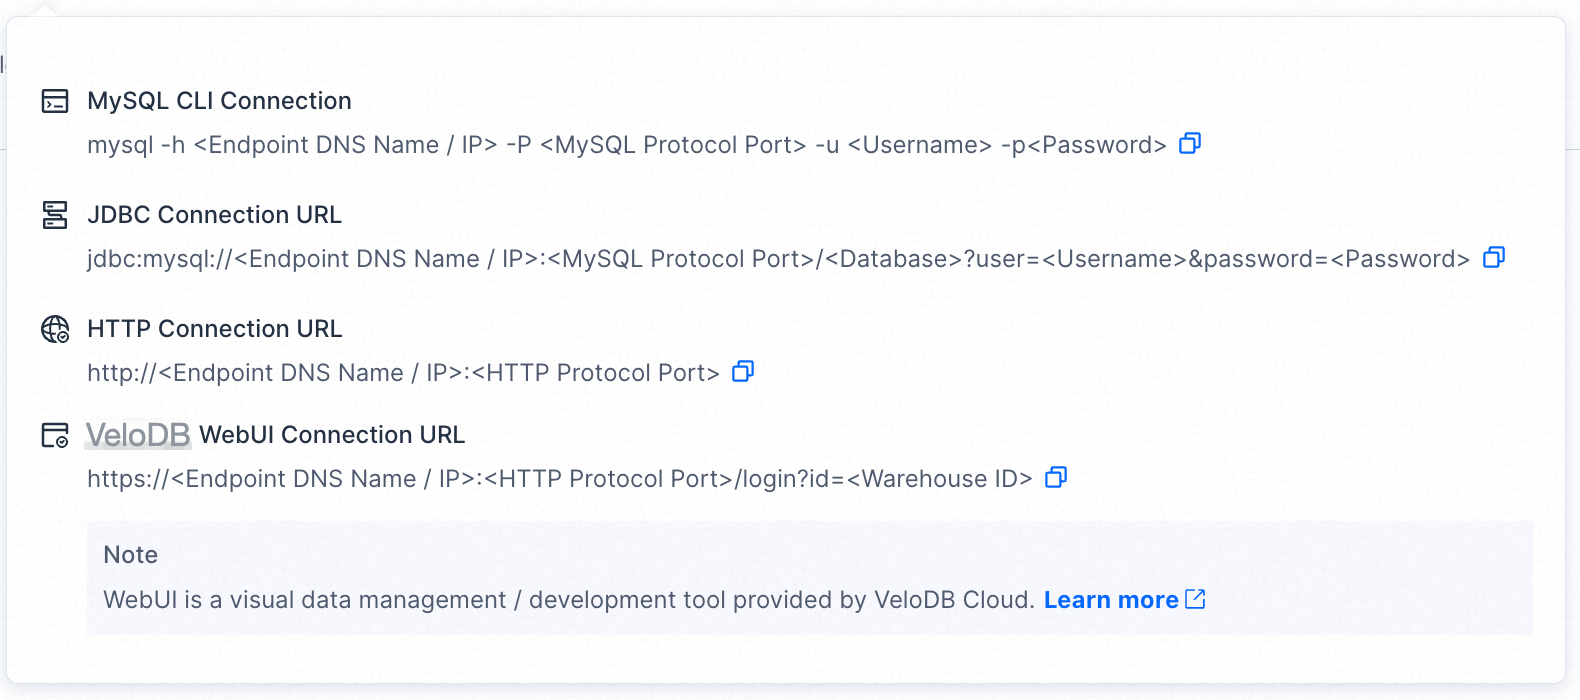
Applications connect to the warehouse via that DNS name using MySQL or HTTP. The Connection Examples popover on the Connection page shows ready-made snippets.
Note
- VeloDB Cloud uses two independent account systems: Console accounts (sign in to the web console) and Database accounts (used to connect to the warehouse). This section is about database accounts.
- For the first connection, use the admin user. You can initialize or reset its password from the Settings page.
On Azure
-
On the target warehouse, open Connection → Private Link, click New Connection under Access VeloDB from Your VPC.
-
Click Set up one or more endpoints to open Azure PrivateLink.
-
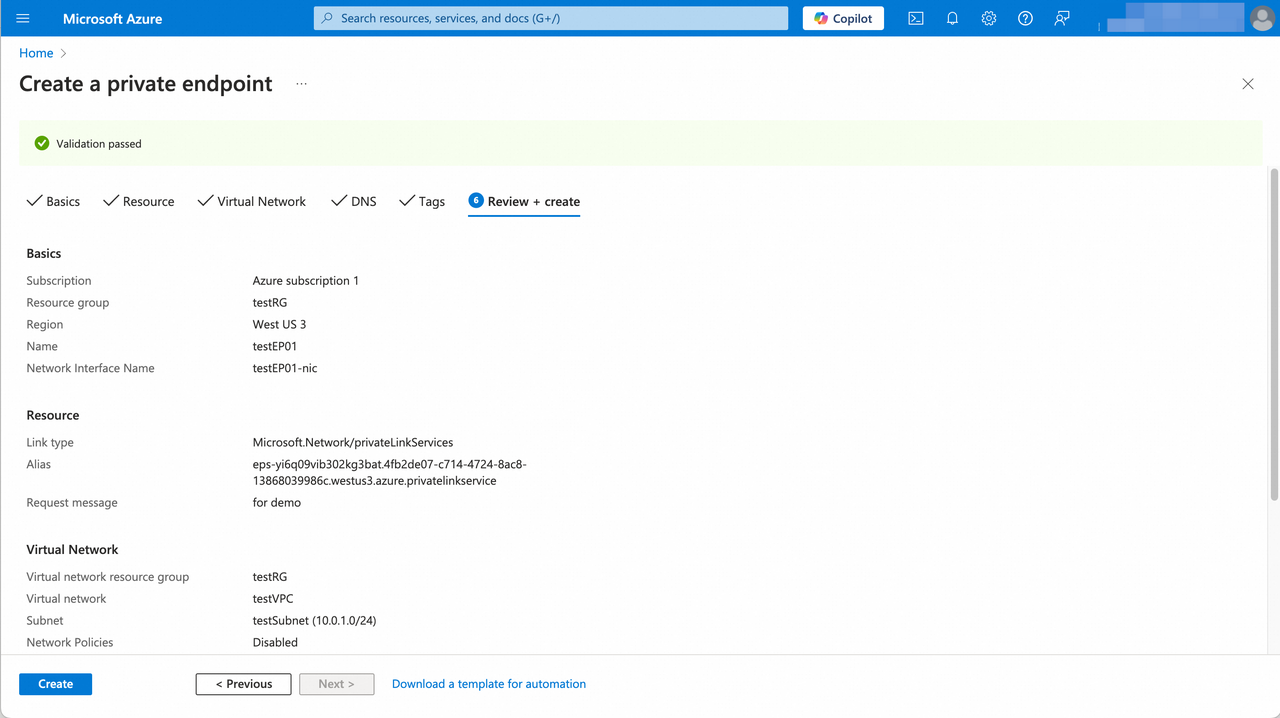
In the Basics tab, make sure the region matches the VeloDB warehouse and fill in the form, then click Next: Resource.
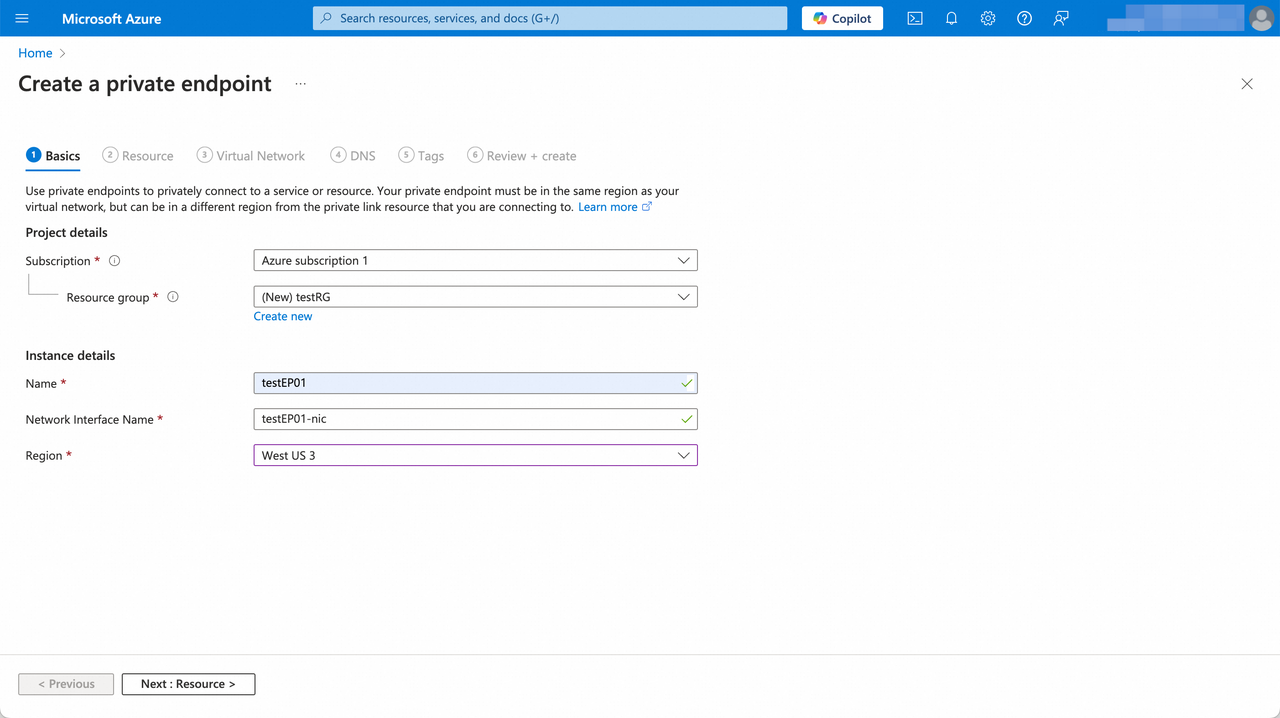
Parameter Category Description Subscription Project details Subscription to use for access. Resource group Project details Resource group for the private endpoint. Create one if none is suitable. Name Instance details Private endpoint instance name. Network Interface Name Instance details Auto-generated from the instance name; editable. Region Instance details Must match the warehouse region. -
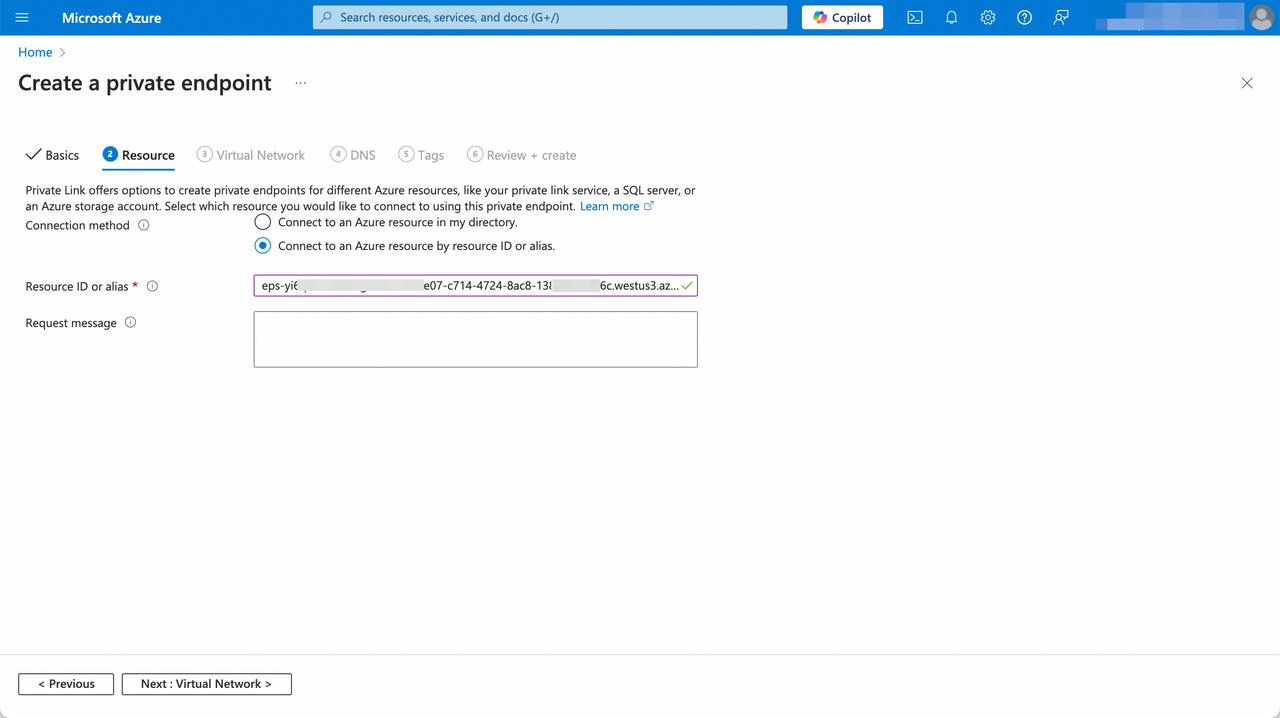
In the Resource tab, choose Connect to an Azure resource by resource ID or alias, paste the Service Alias from the VeloDB endpoint service information panel, and click Next: Virtual Network.
-
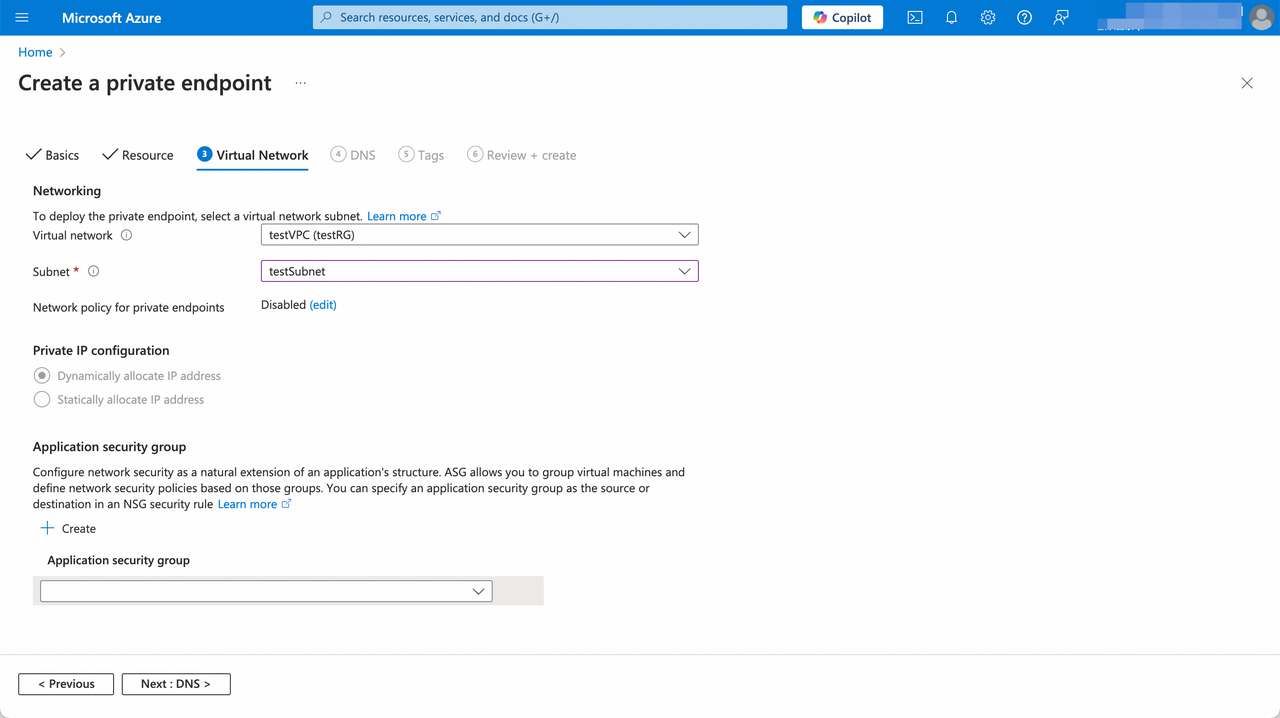
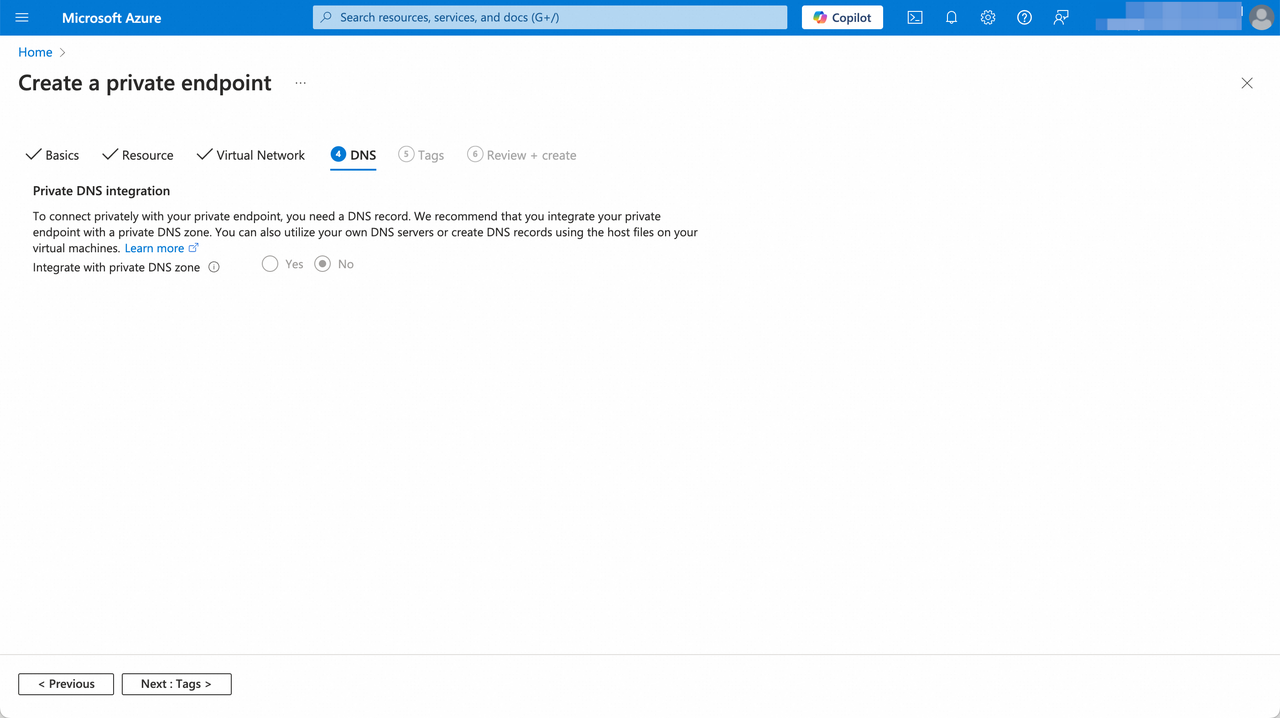
In the Virtual Network tab, pick the VNet and subnet for the endpoint and click Next: DNS.
-
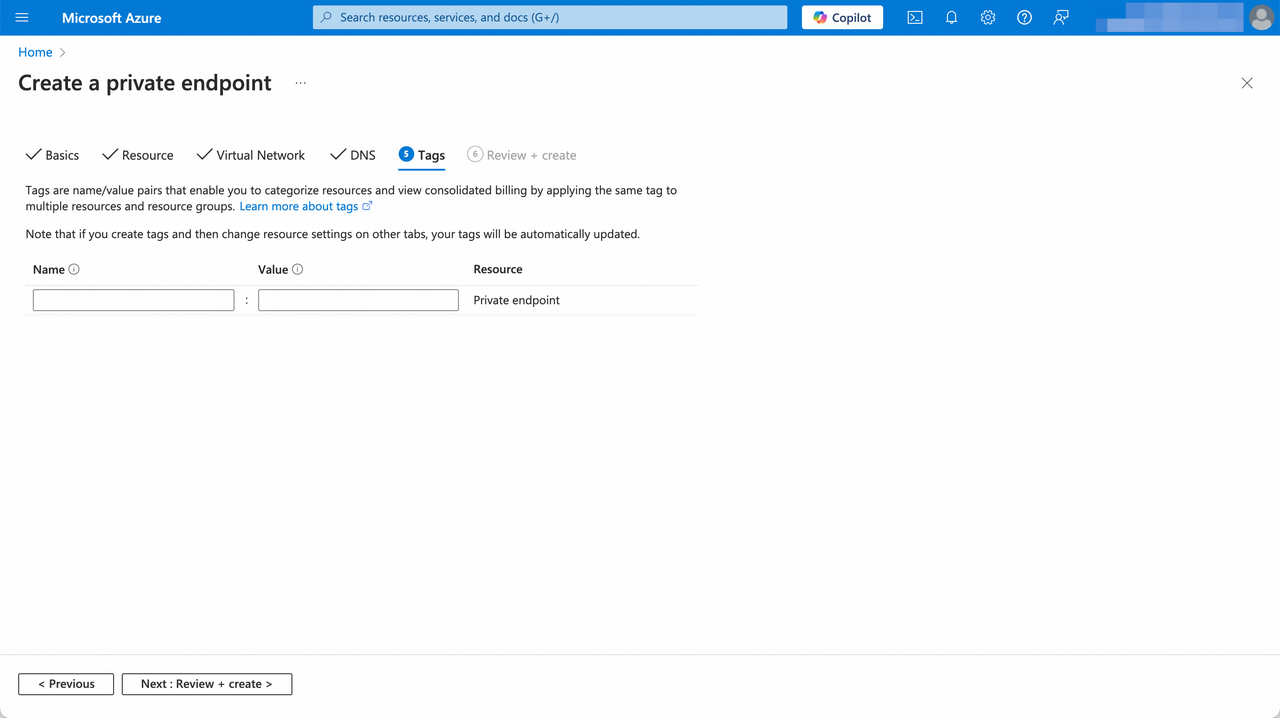
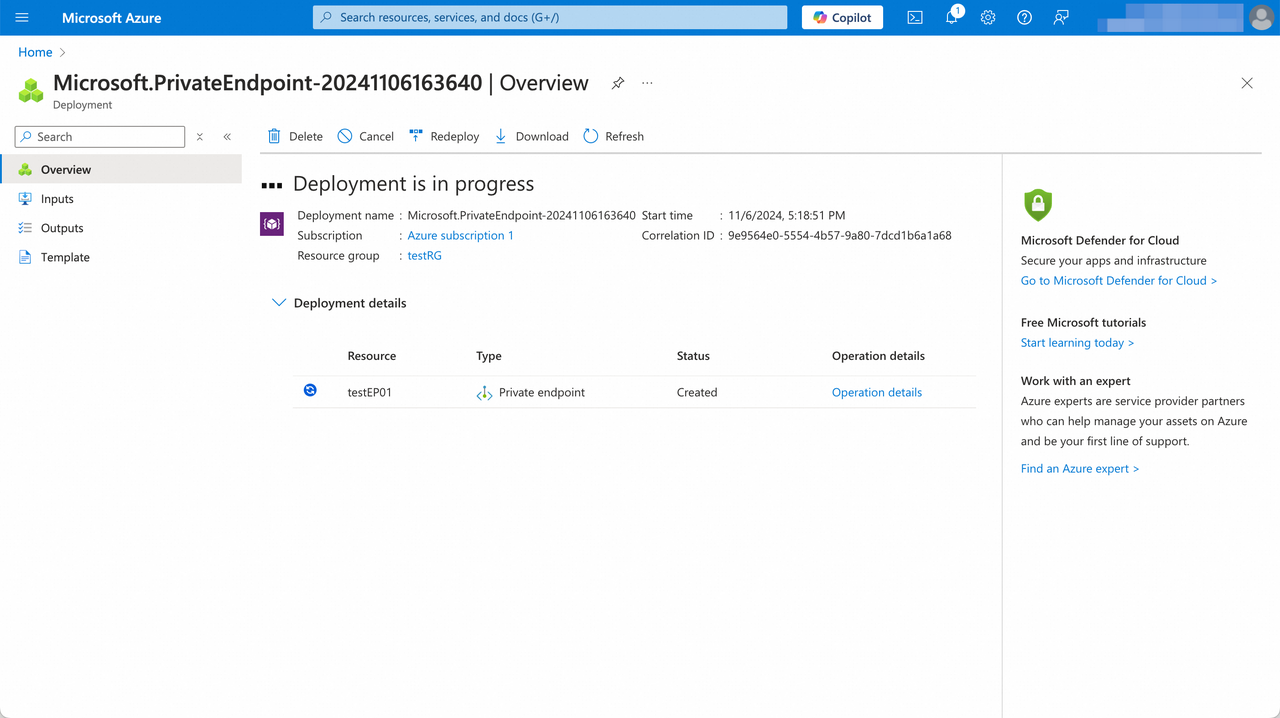
On the DNS and Tags tabs, keep the defaults (you need a DNS record to connect privately — see Azure's Private DNS guidance). Review and click Create.
-
When the endpoint status changes from Created to OK, the handshake is done.
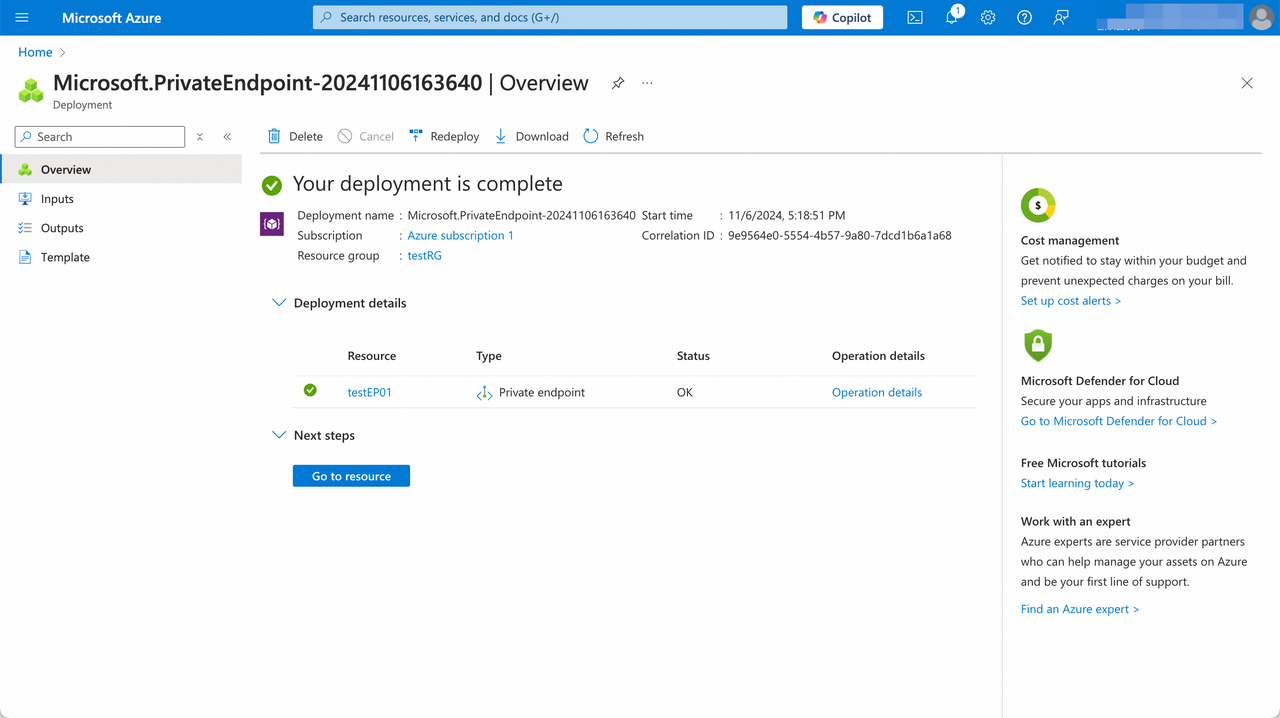
-
Refresh the VeloDB Cloud Connection page — the endpoint list shows the connection details.
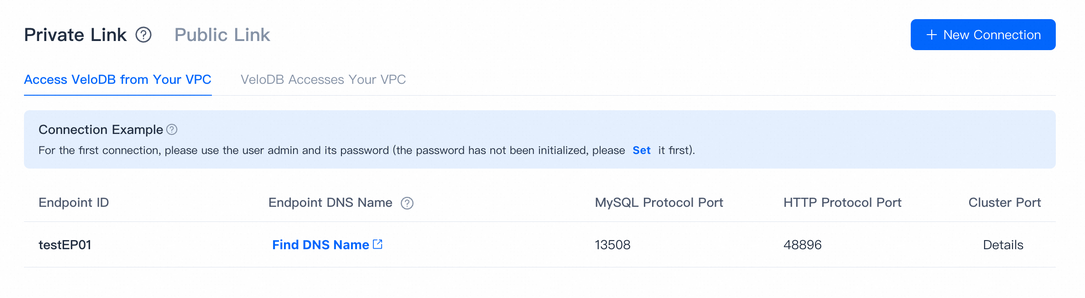
-
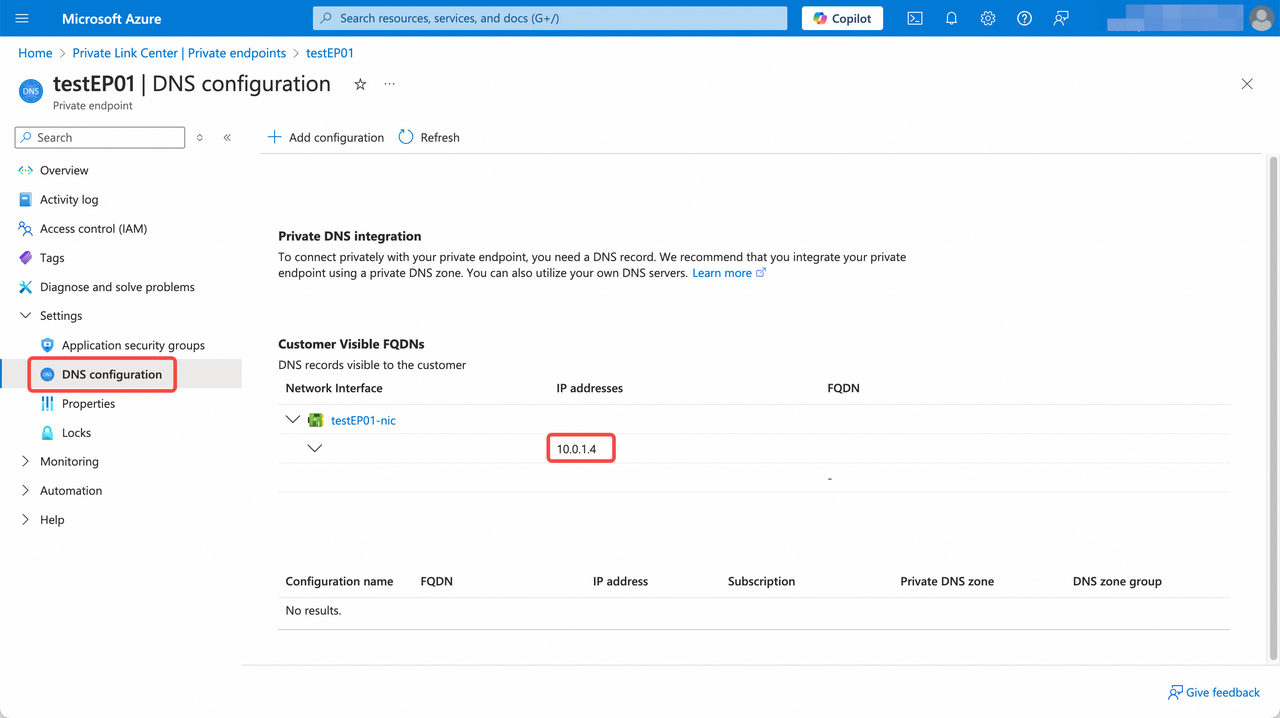
Click Find DNS Name in the endpoint list to get the IP or DNS name of the endpoint.
-
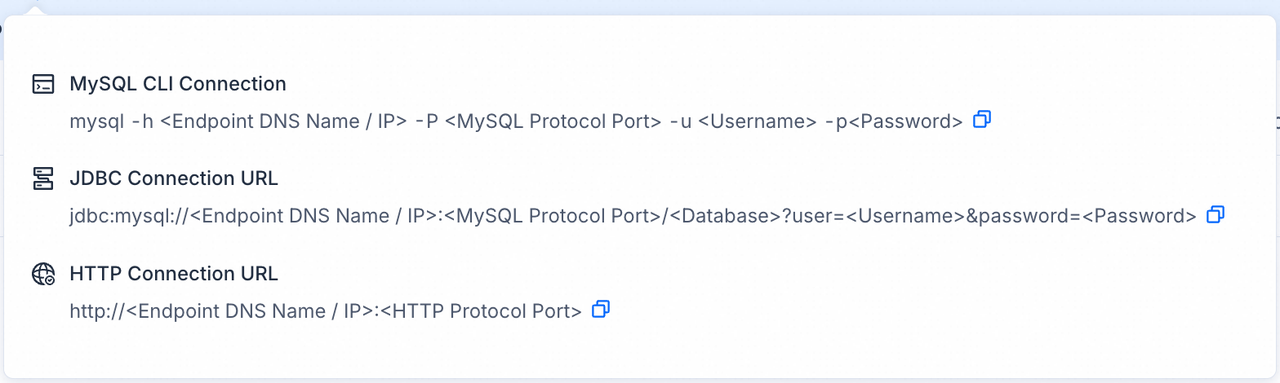
Use the Connection Examples popover on the Connection page for snippets covering MySQL and HTTP.
VeloDB accesses your VPC
Use this direction when VeloDB needs to read from resources inside your VPC — for example, a data source for import.
Note Endpoint instance and traffic fees generated by VeloDB's access to the private network are currently not charged to users.
On AWS
-
On the target warehouse, open Connection → Private Link, click New Connection under Grant VeloDB Access to Your VPC.
-
The page displays the Current Region of the warehouse and the ARN of VeloDB. Click Set up endpoint services to open the AWS PrivateLink console.

-
In the AWS console, open VPC → Endpoint services, switch to the same region as the warehouse, and click Create endpoint service.
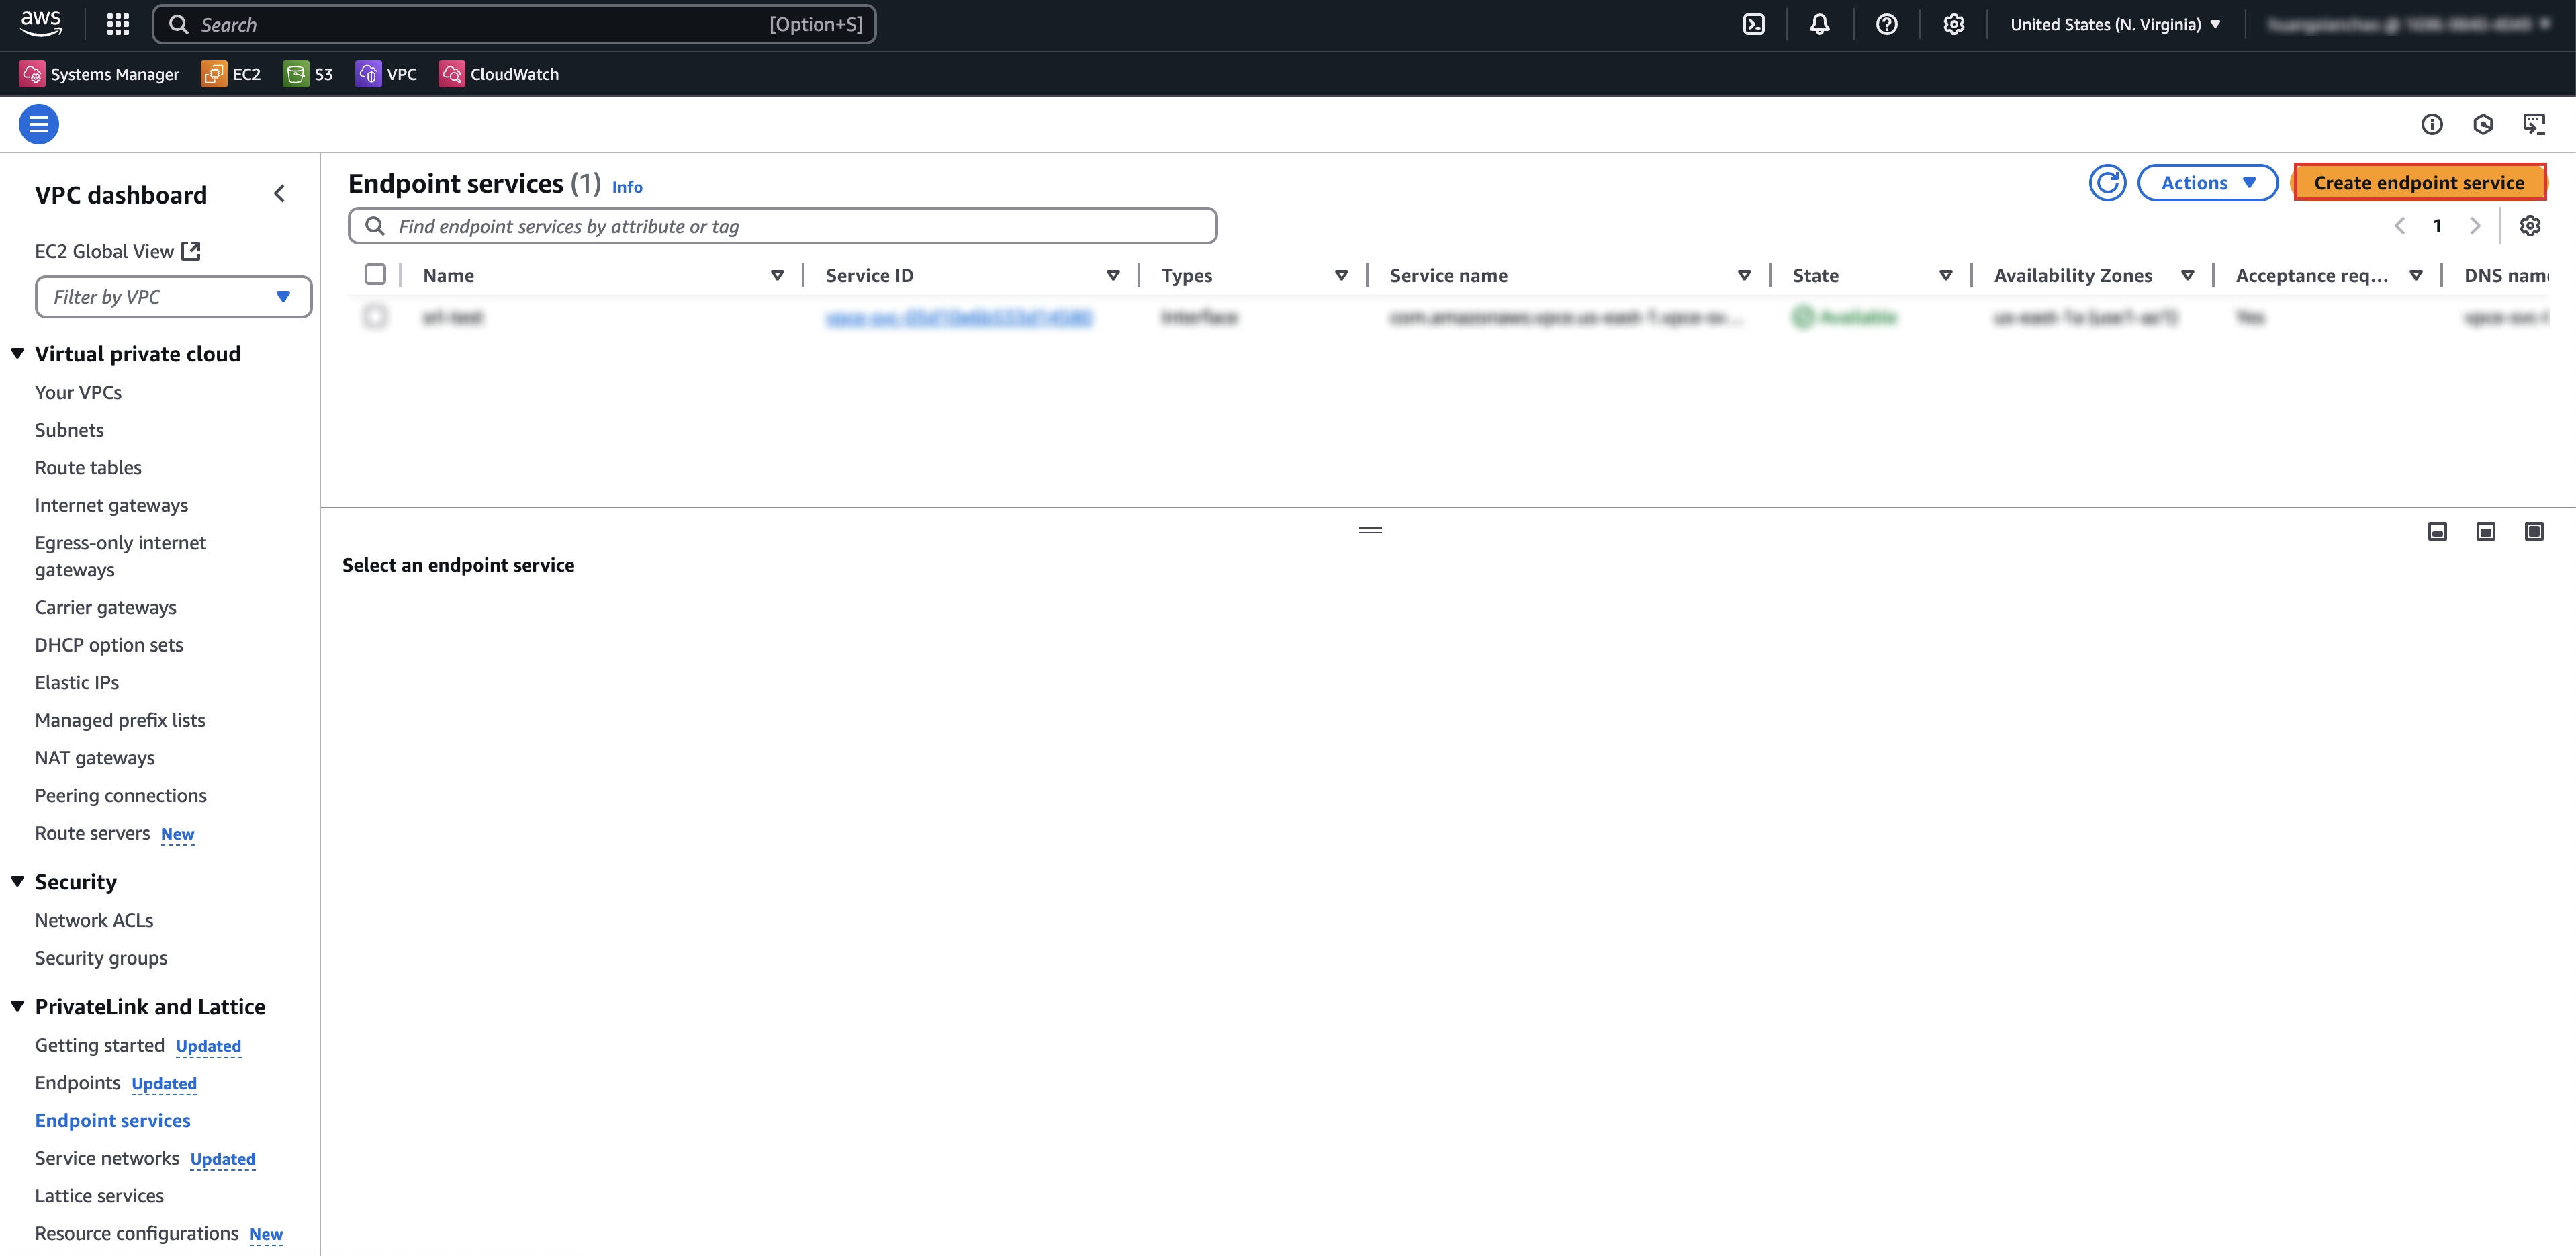
-
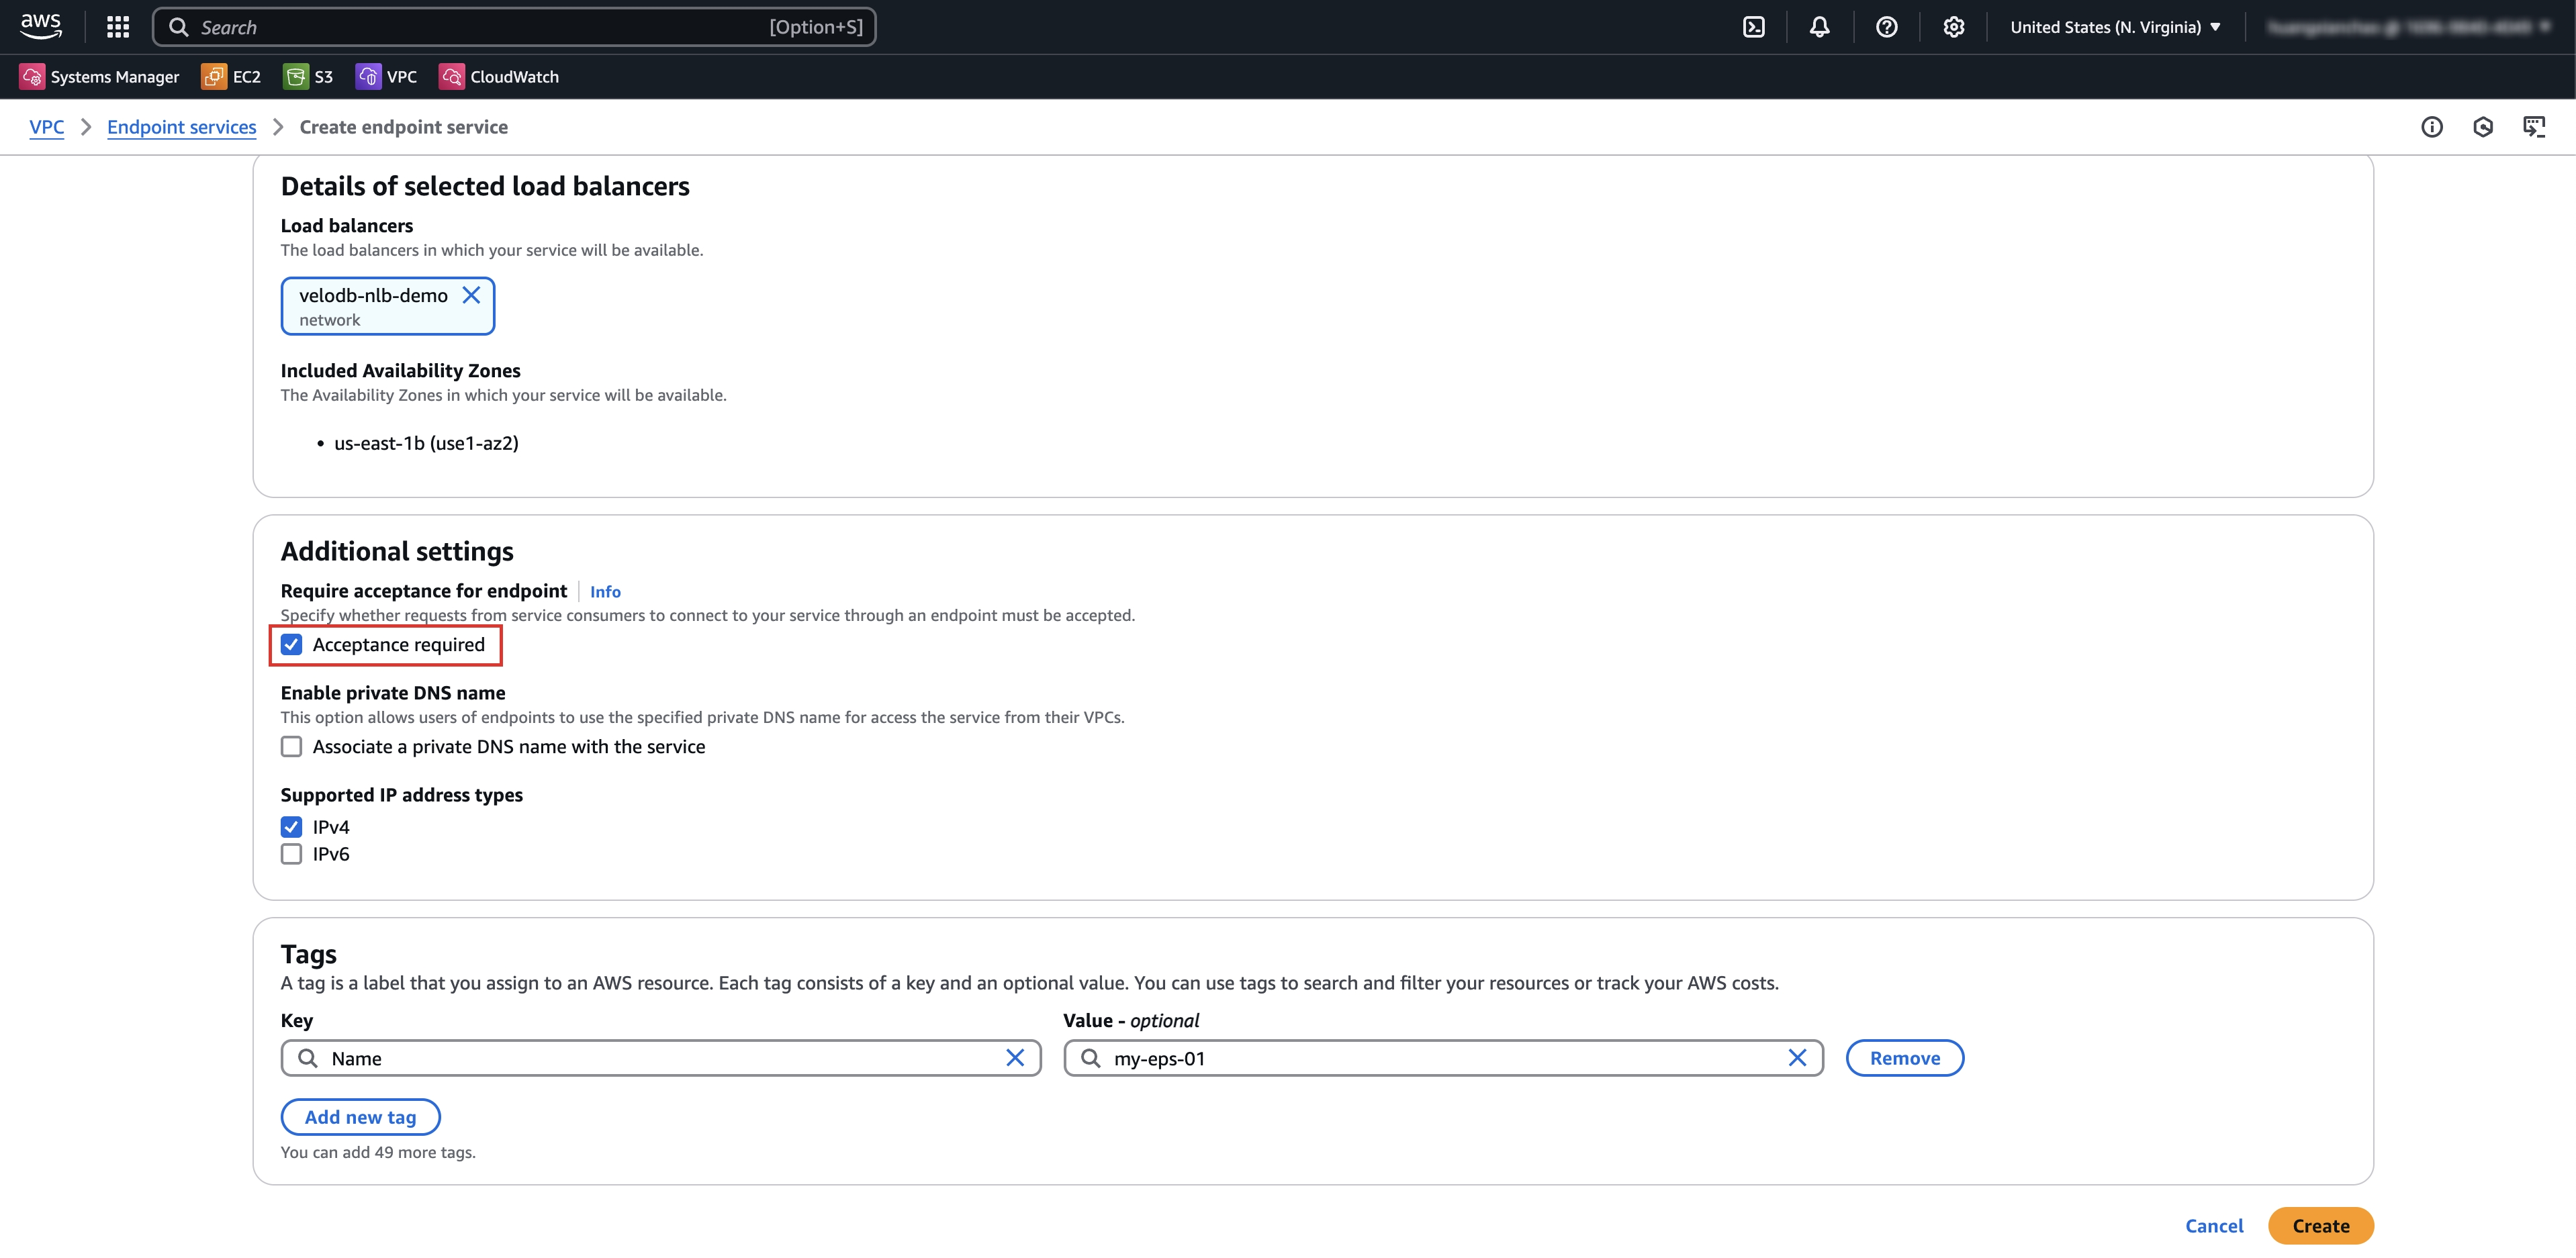
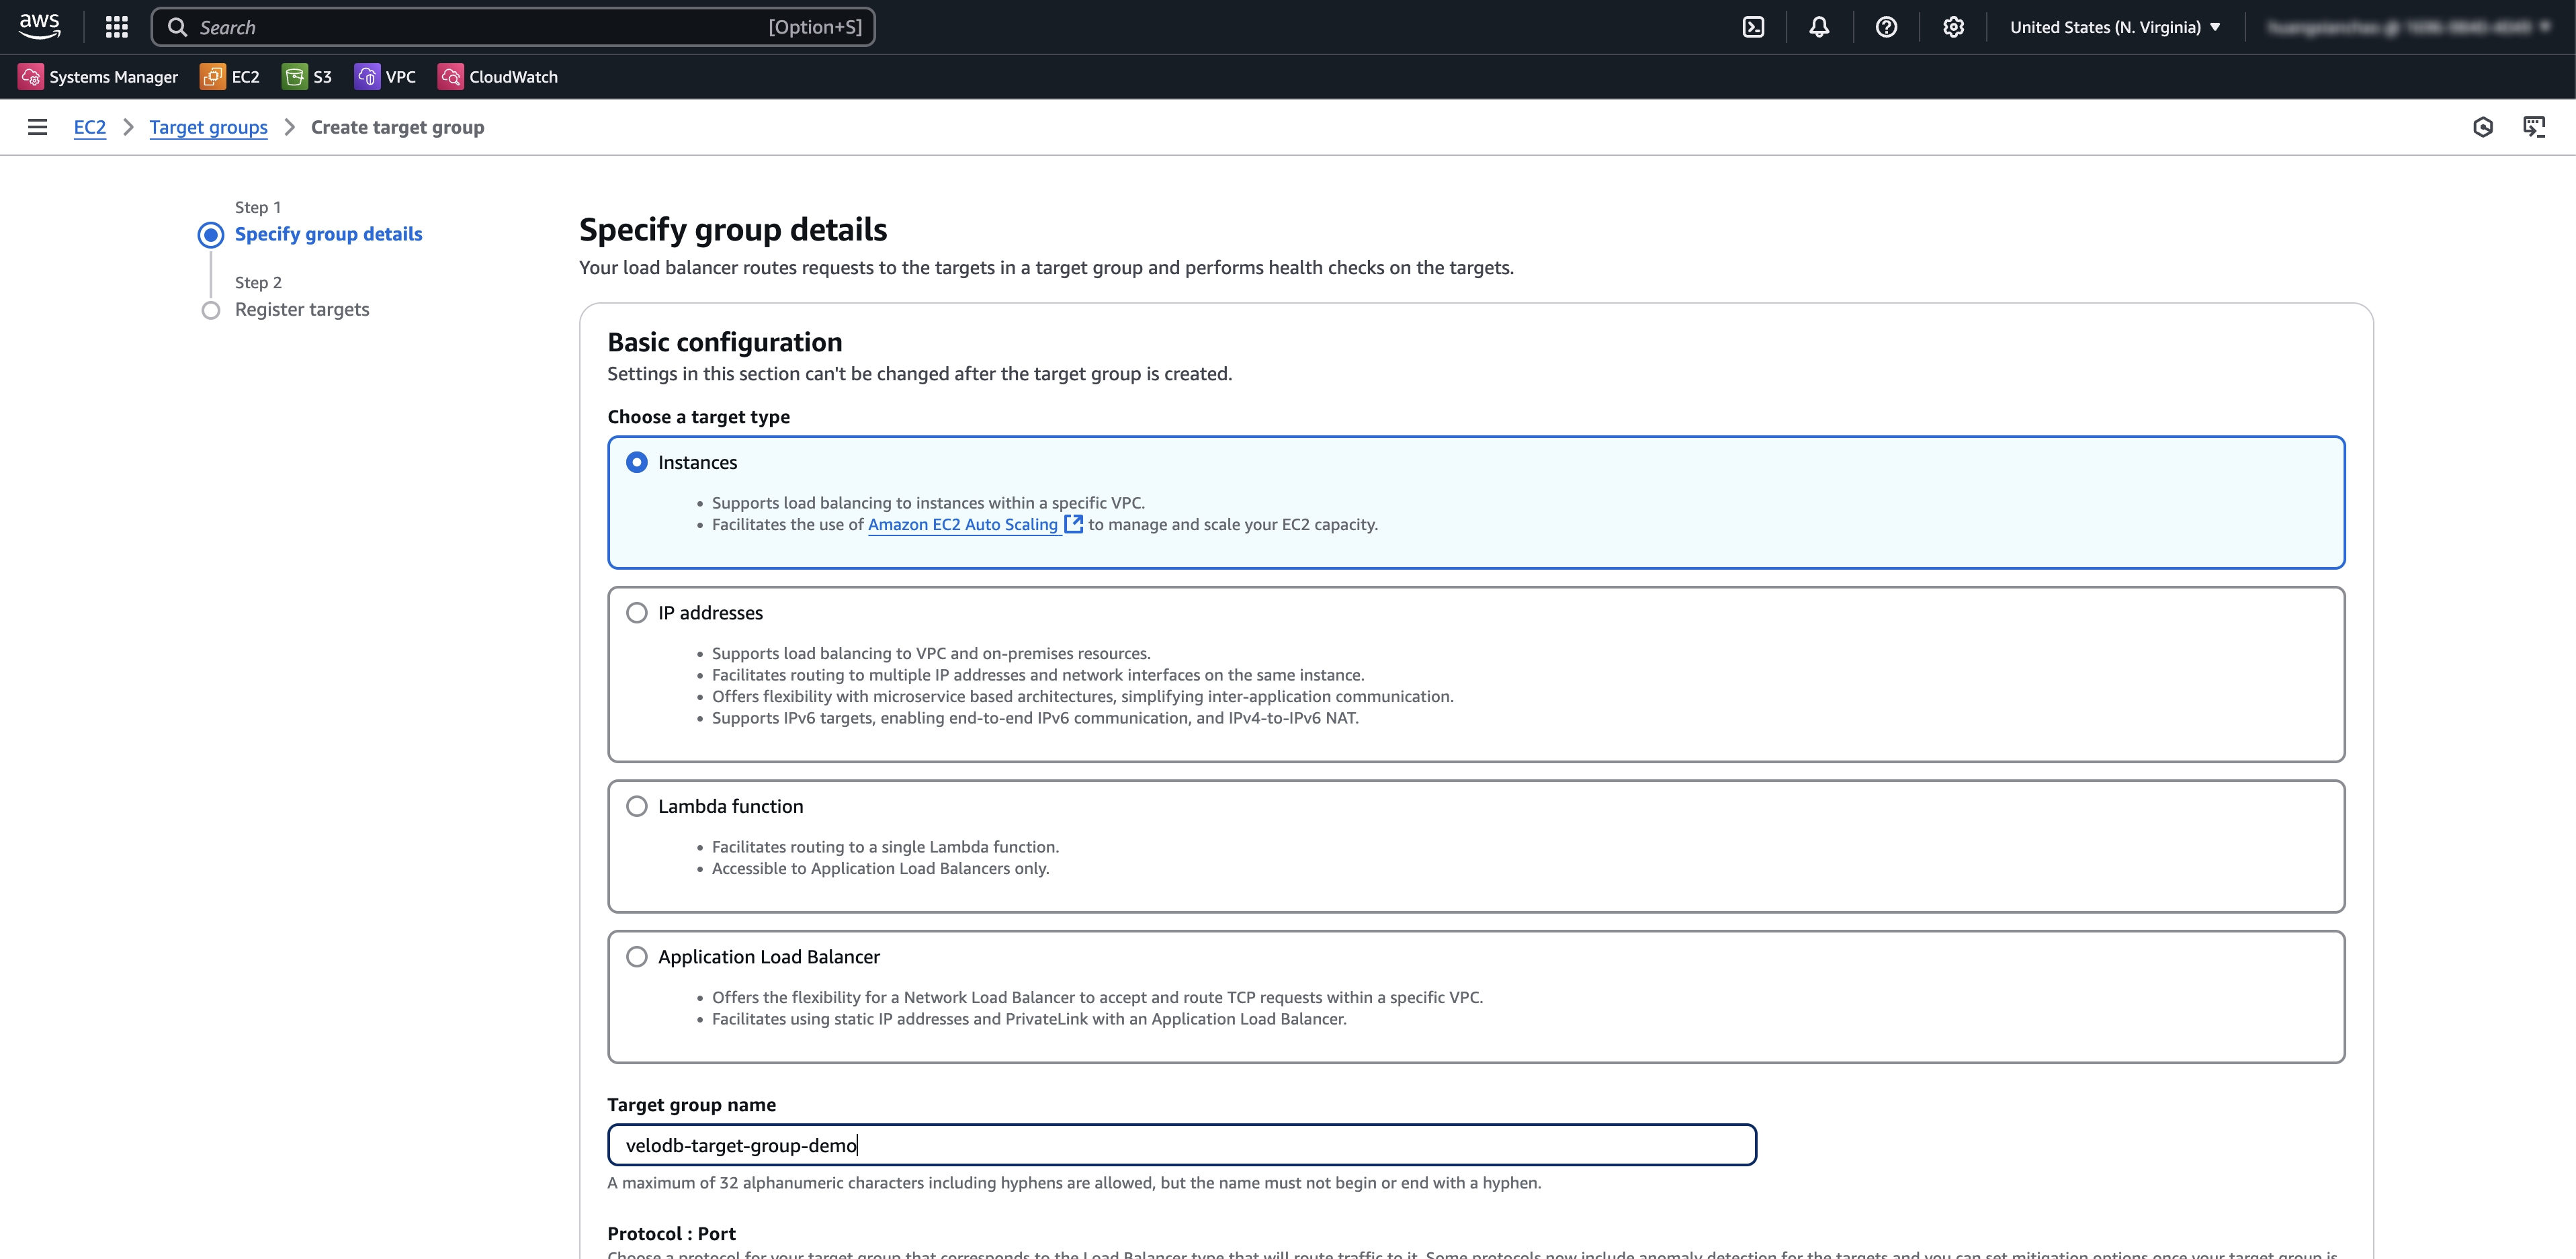
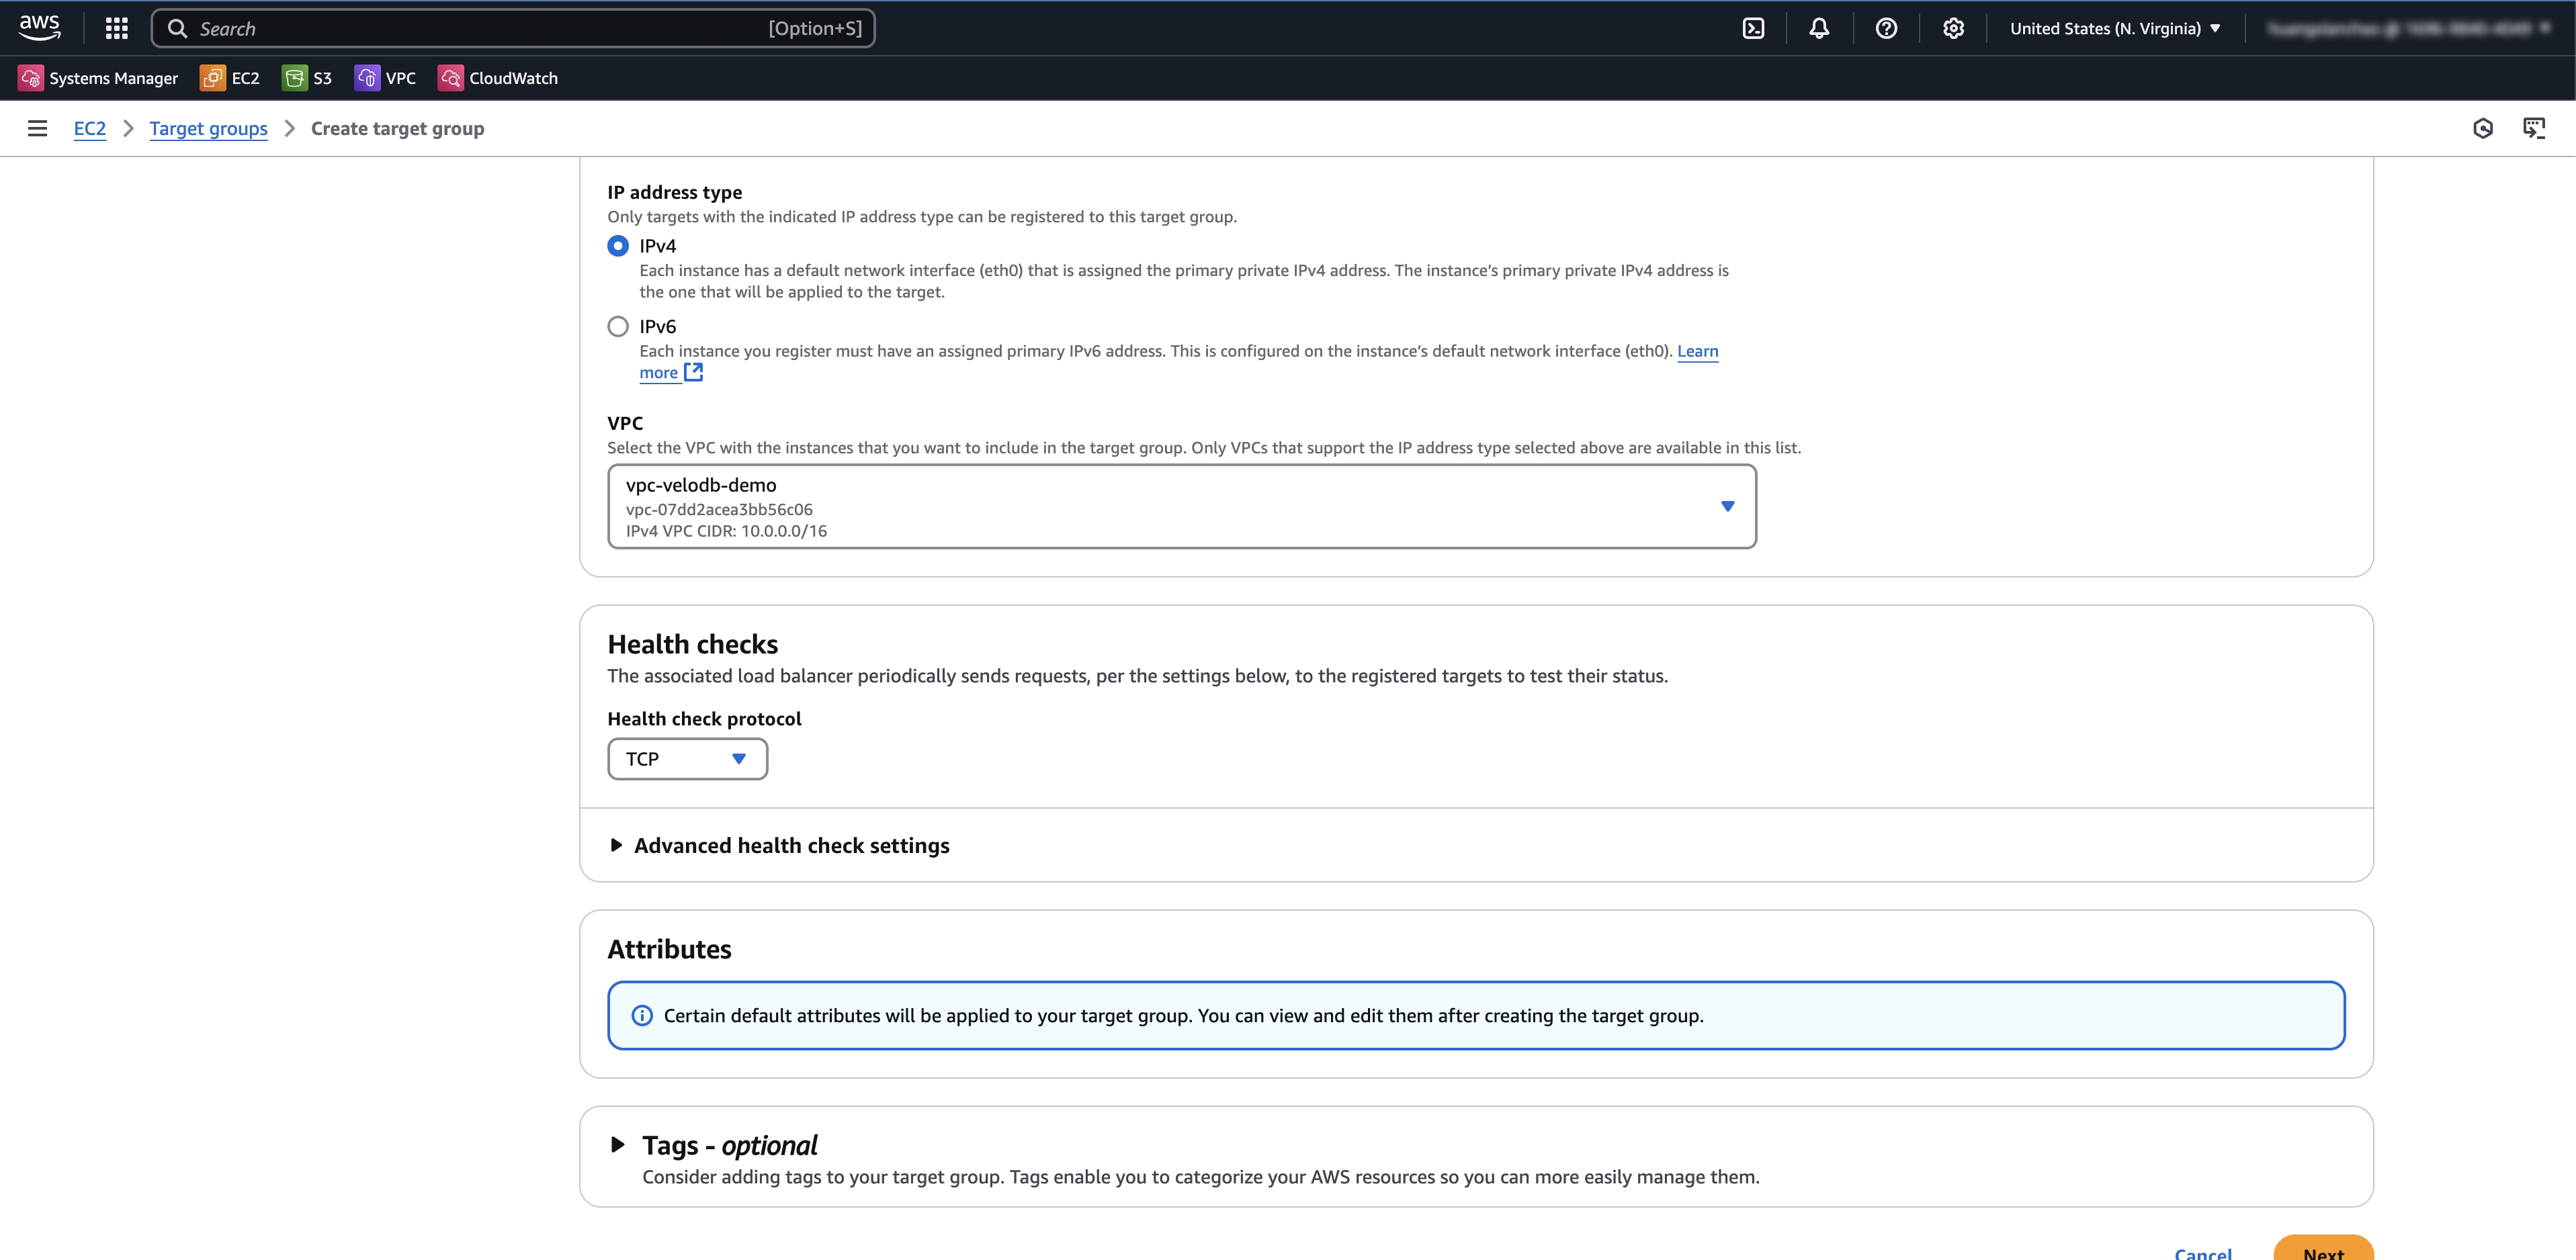
Configure the endpoint service and click Create.
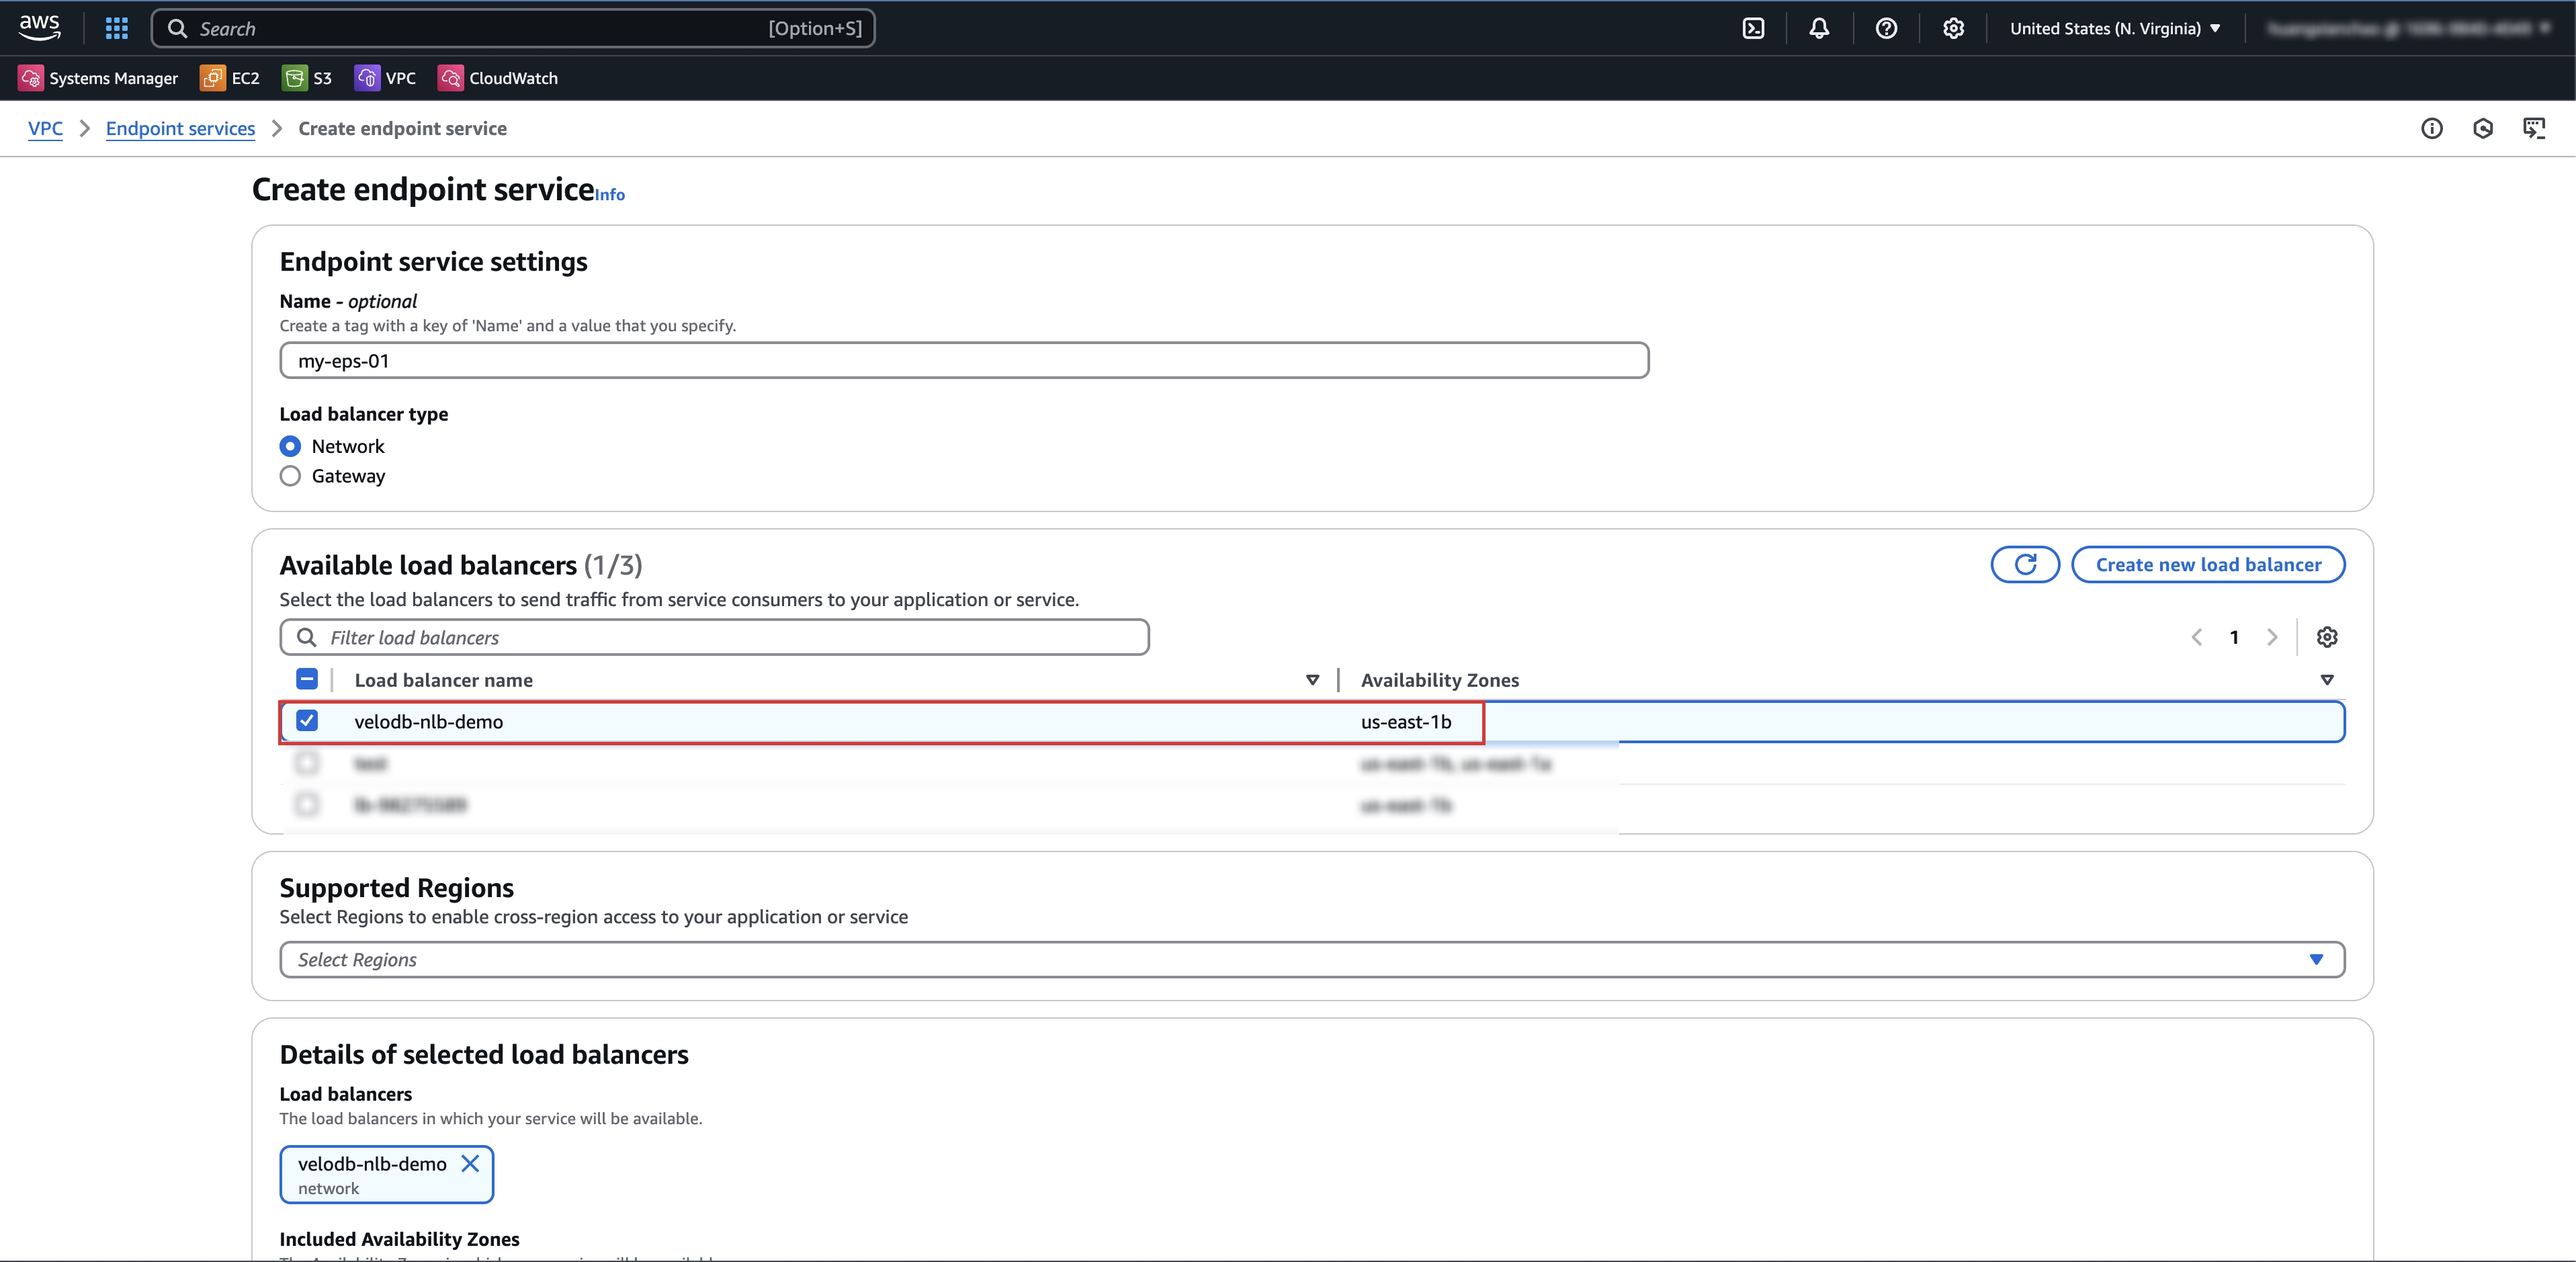
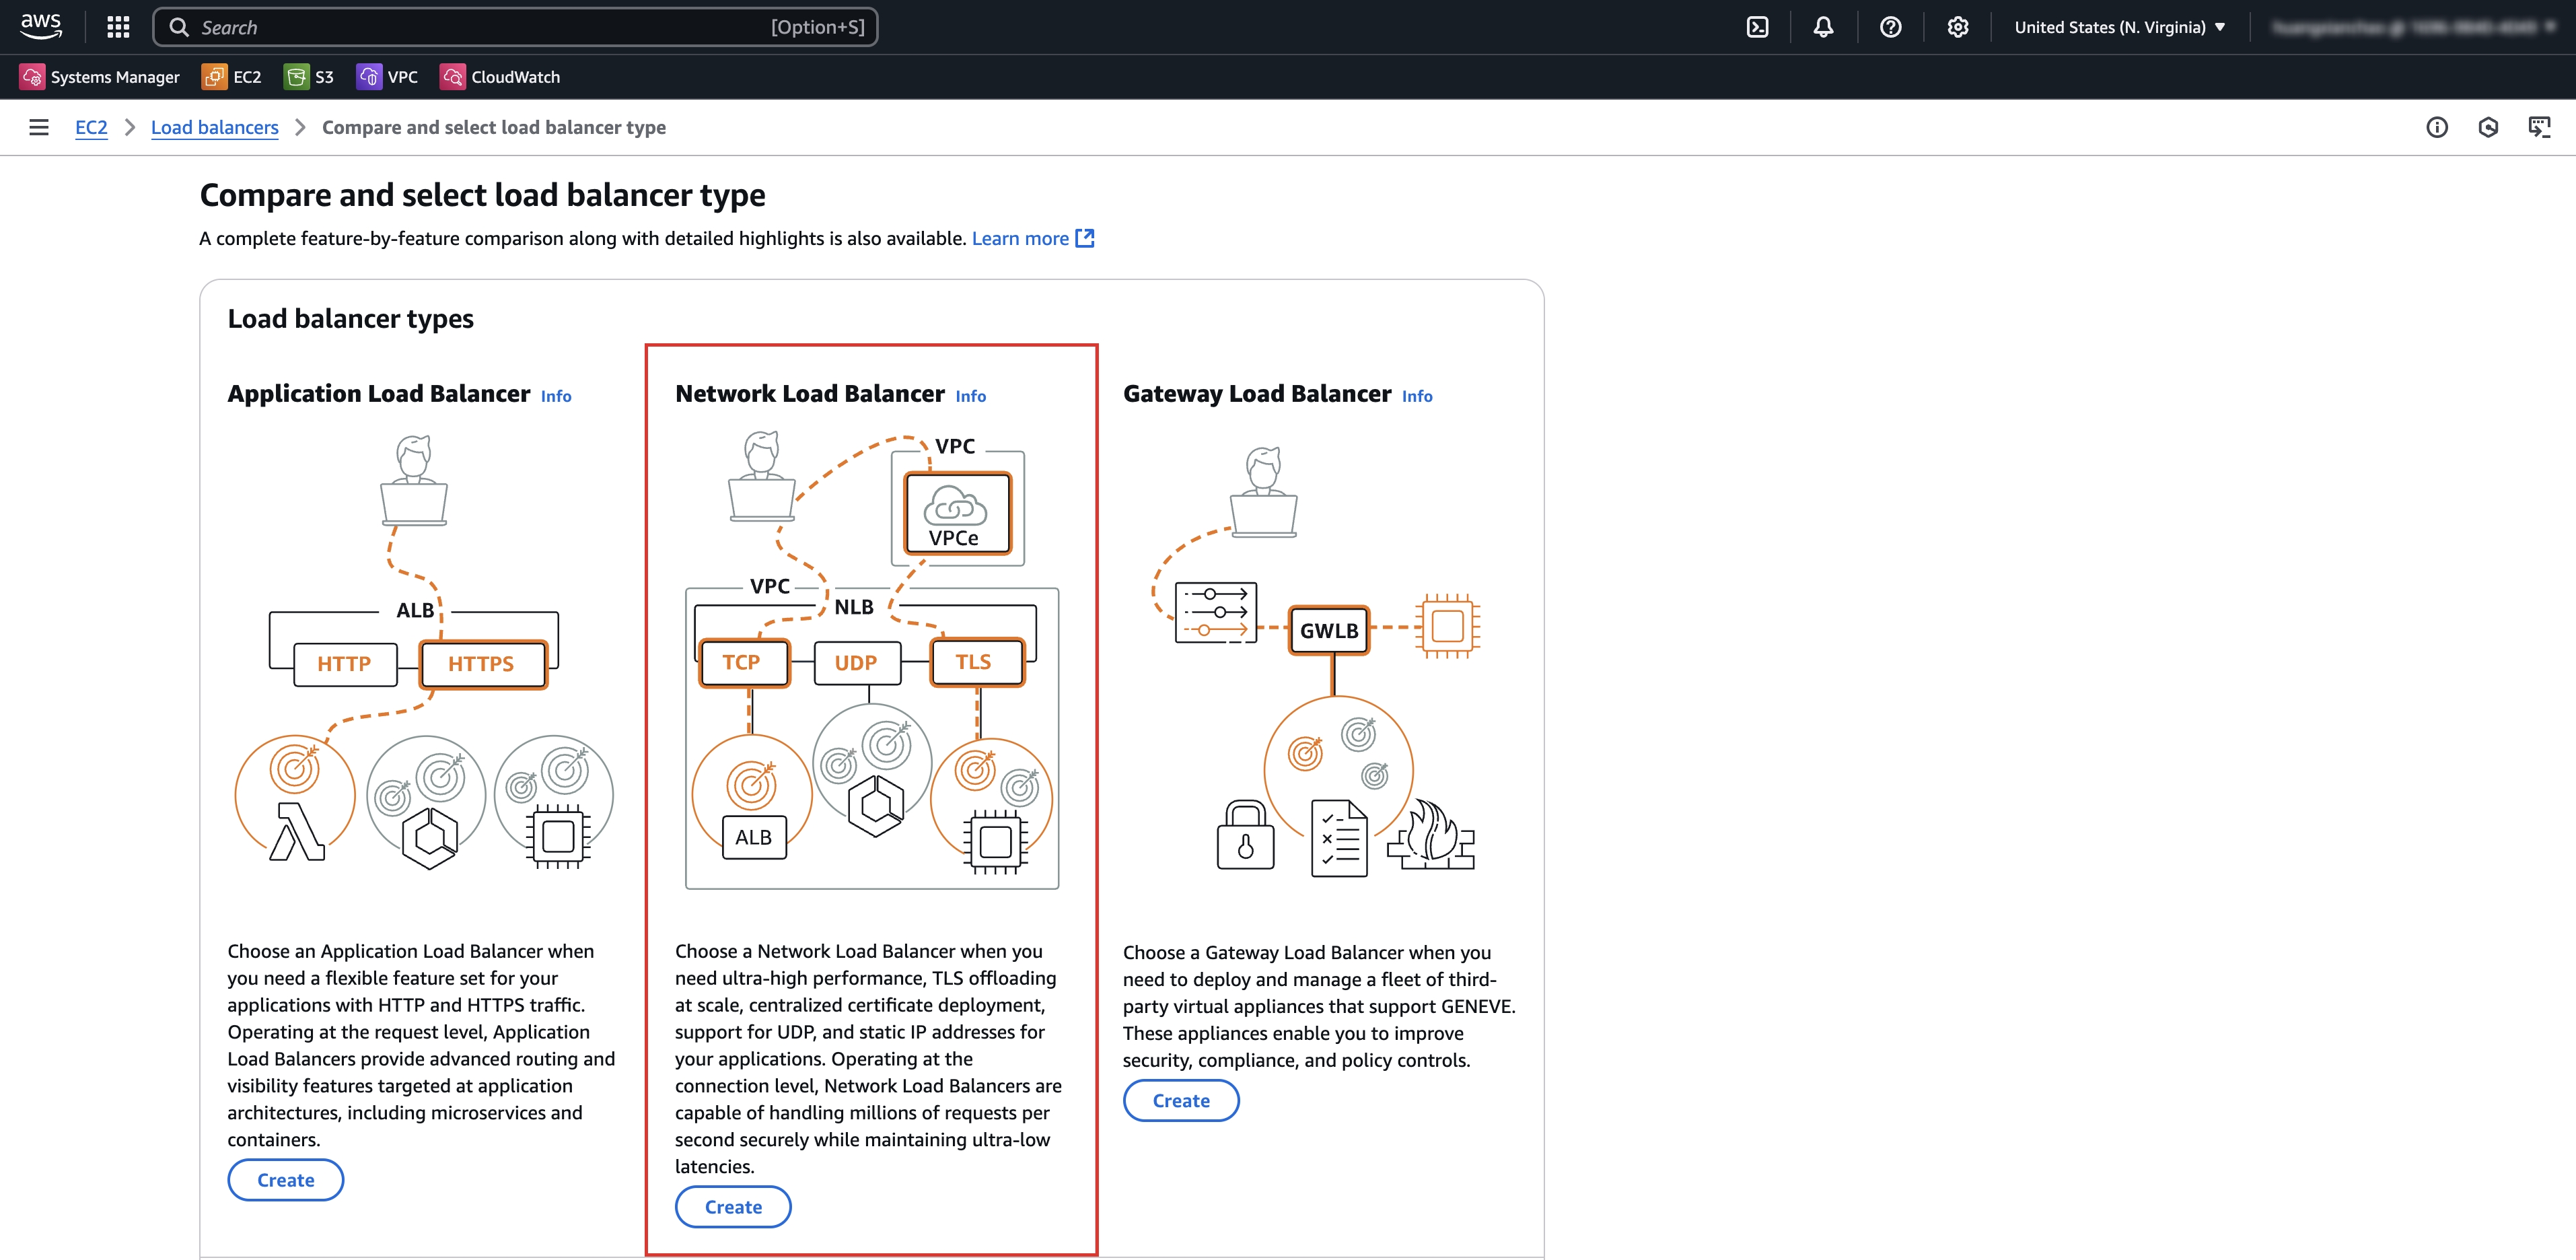
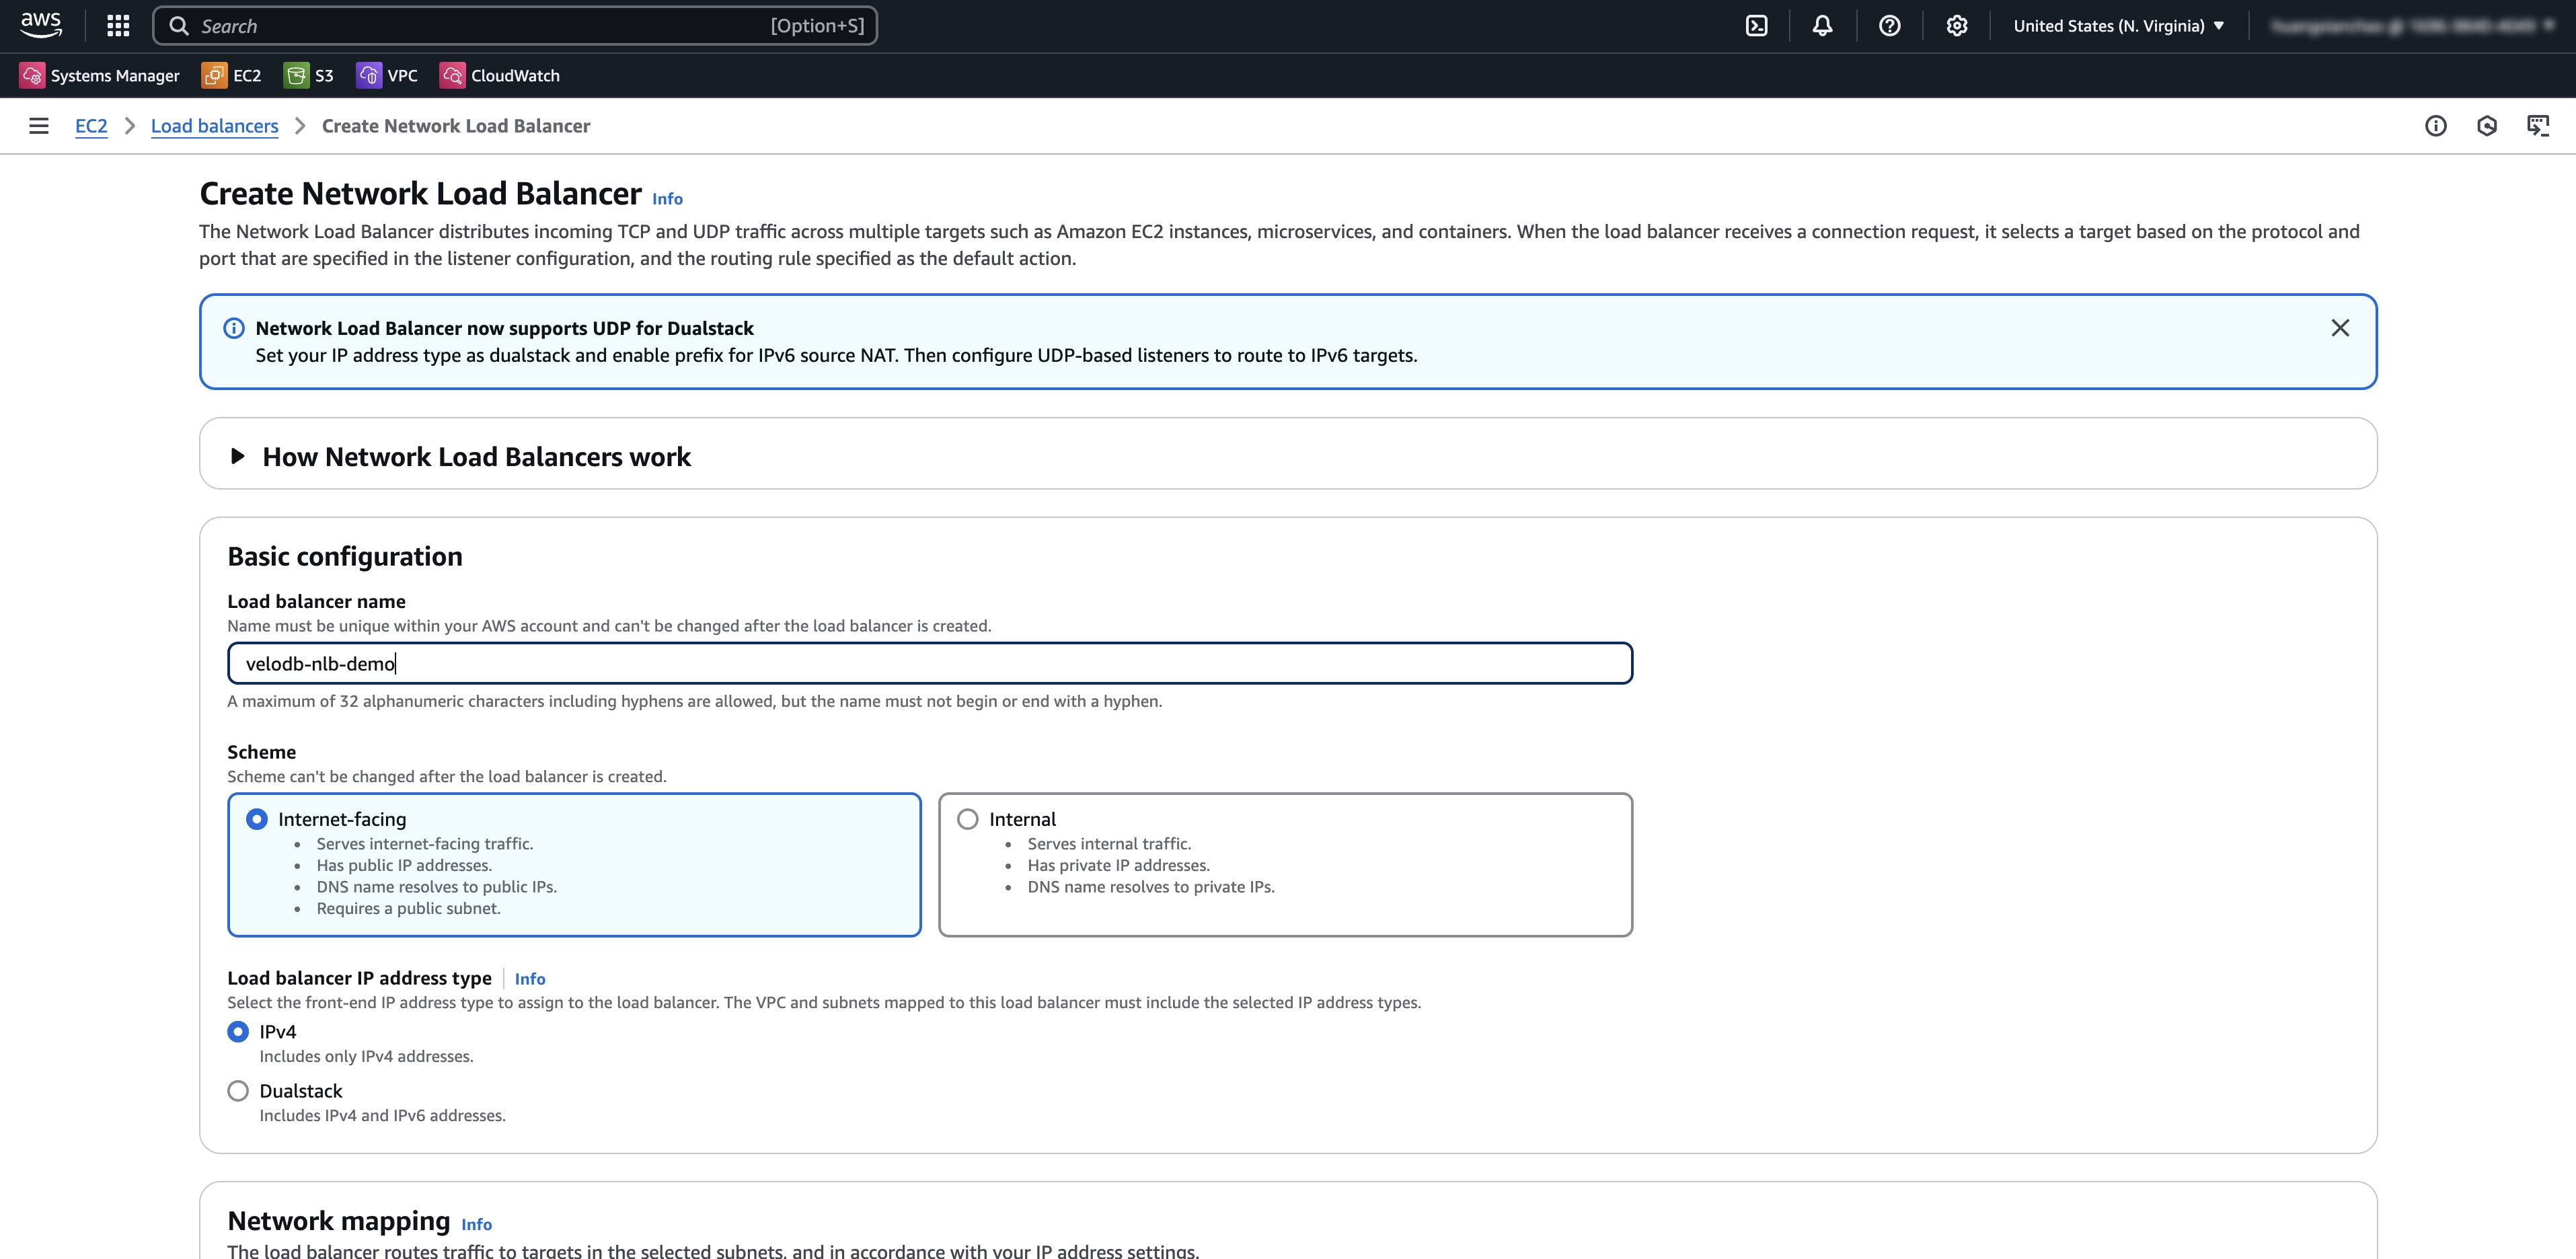
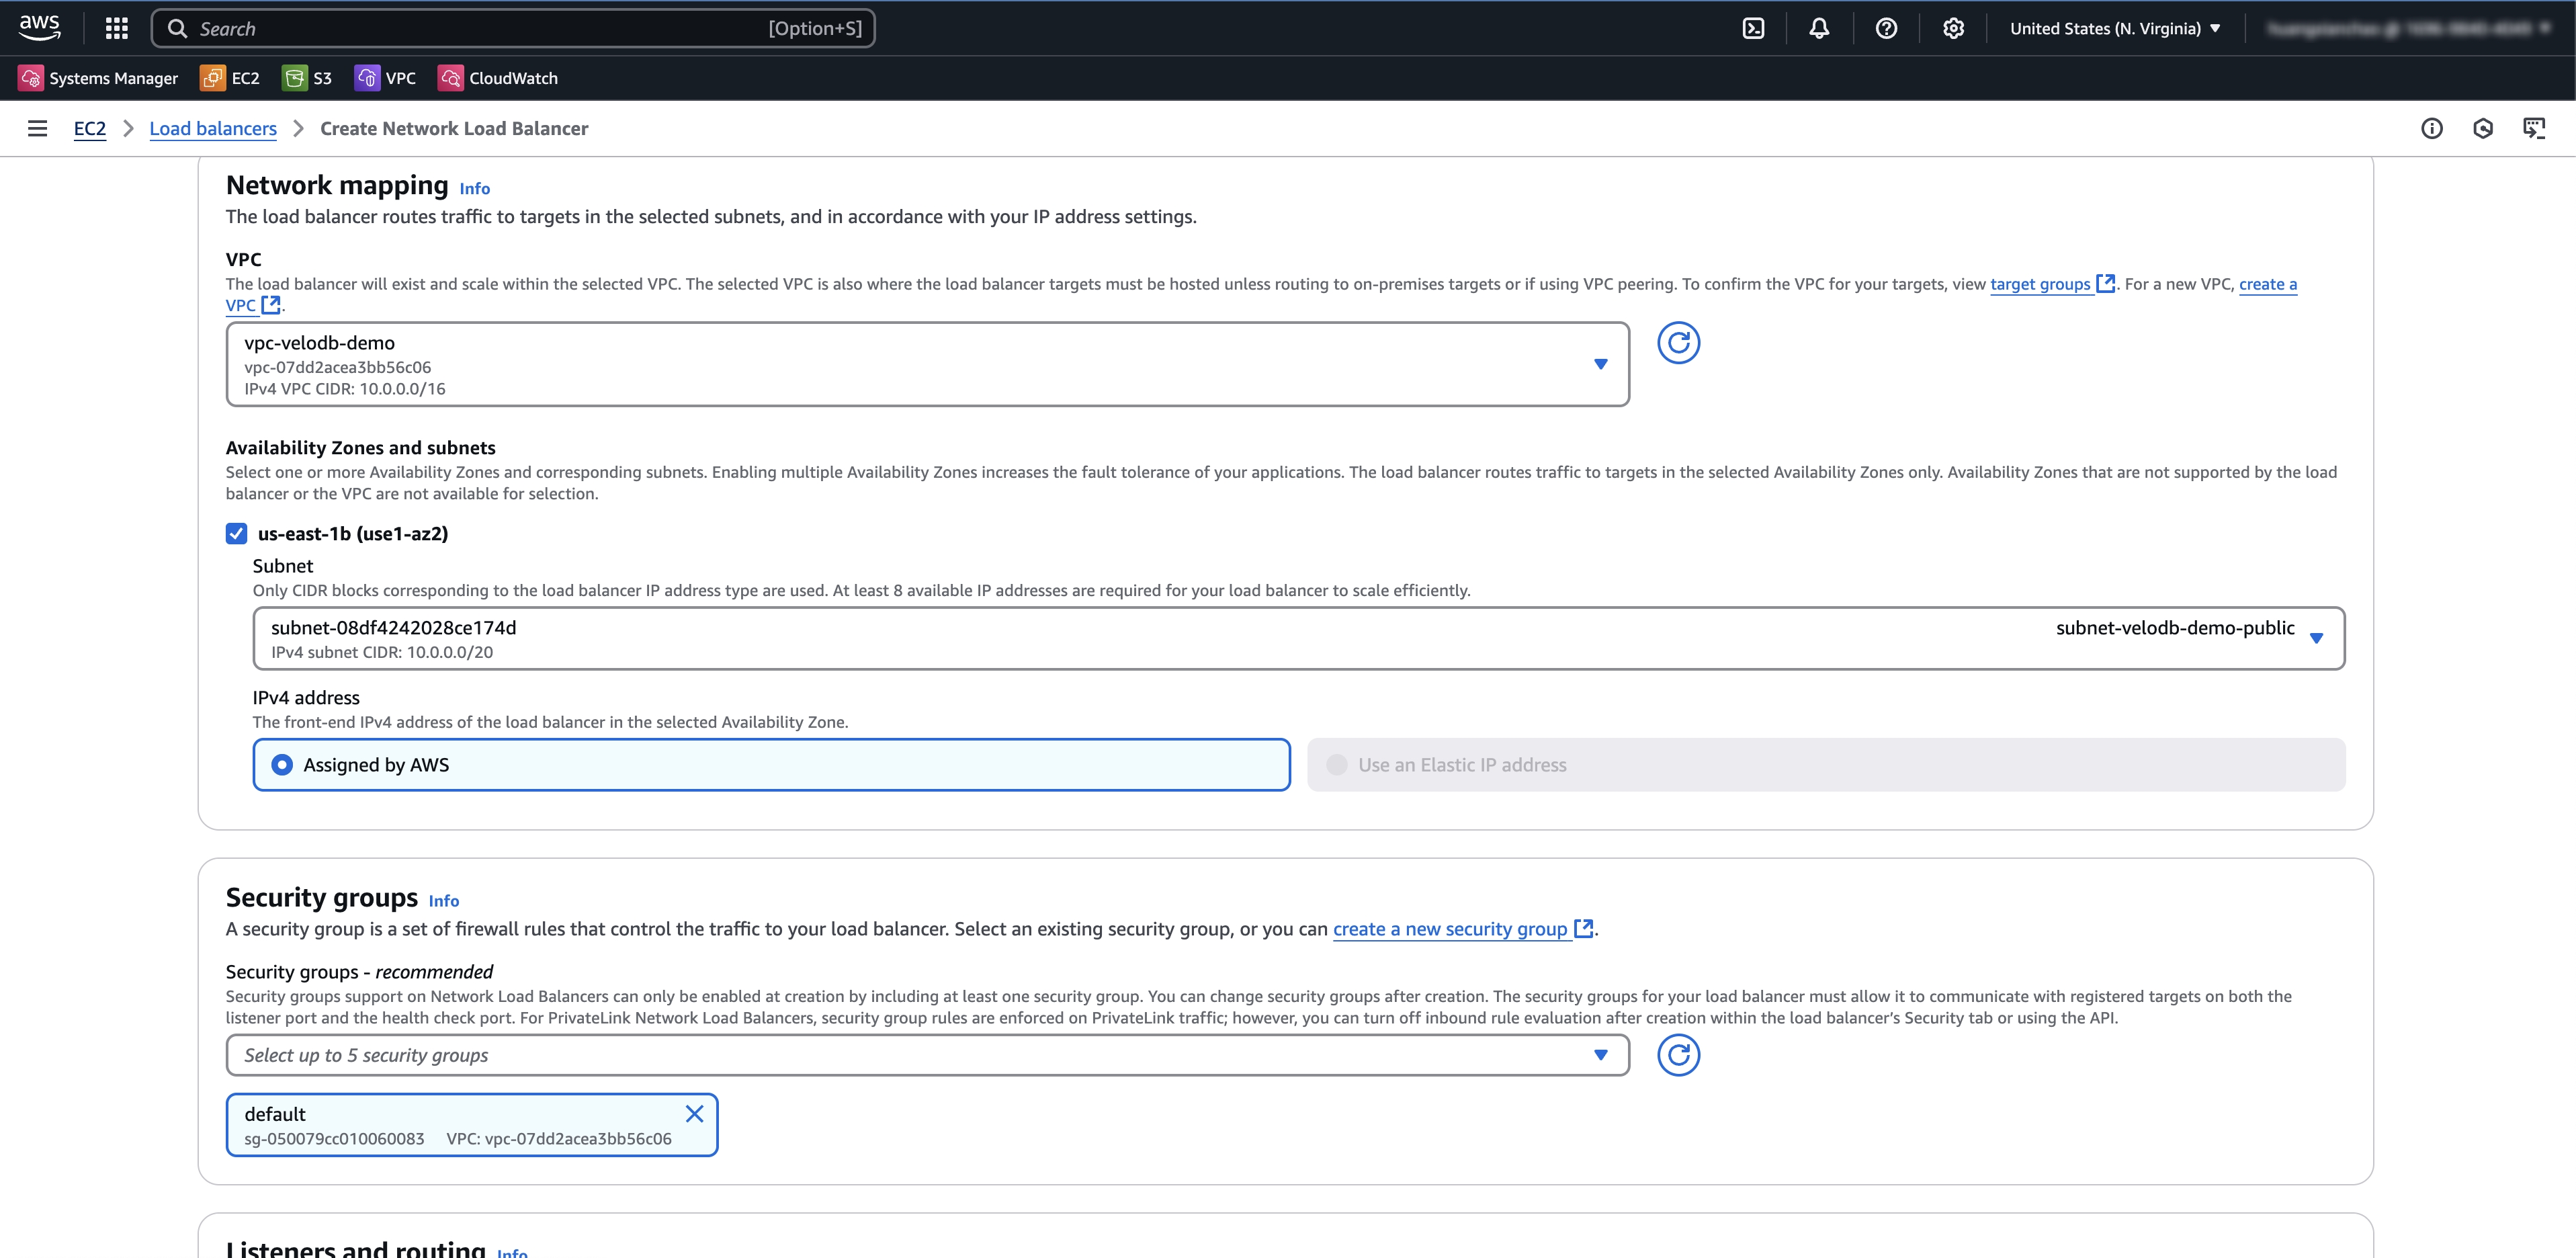
If there is no suitable network load balancer, click Create Network Load Balancer first, then filter and select it.
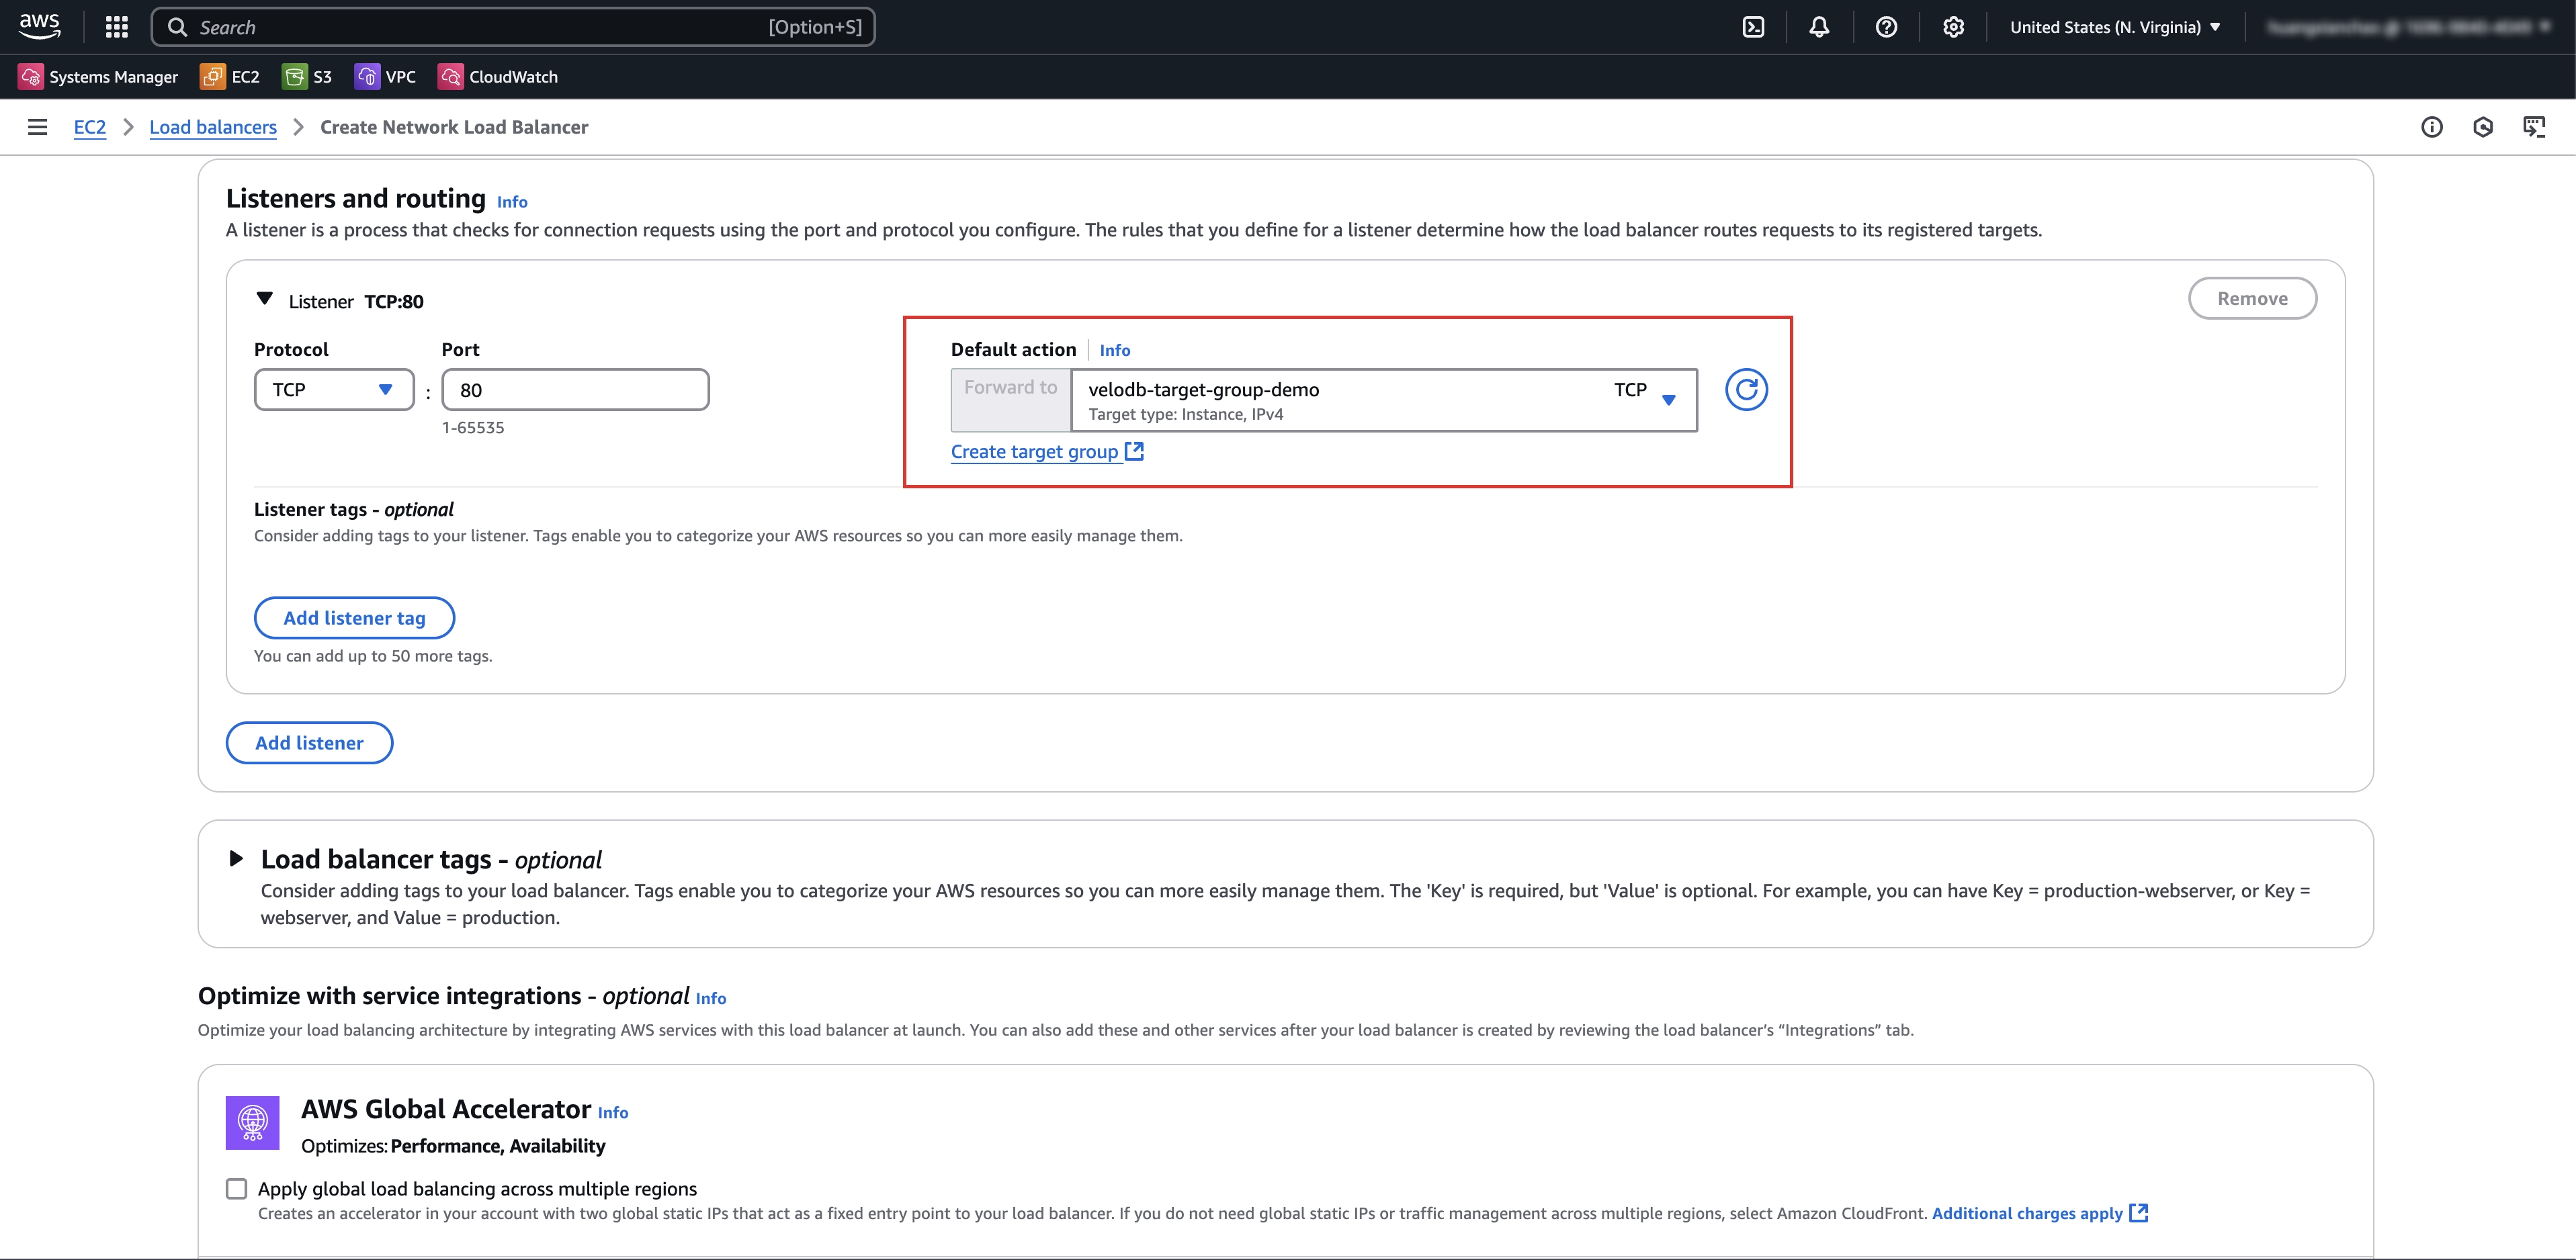
If there is no suitable target group, click Create Target Group first, then refresh and select it.
-
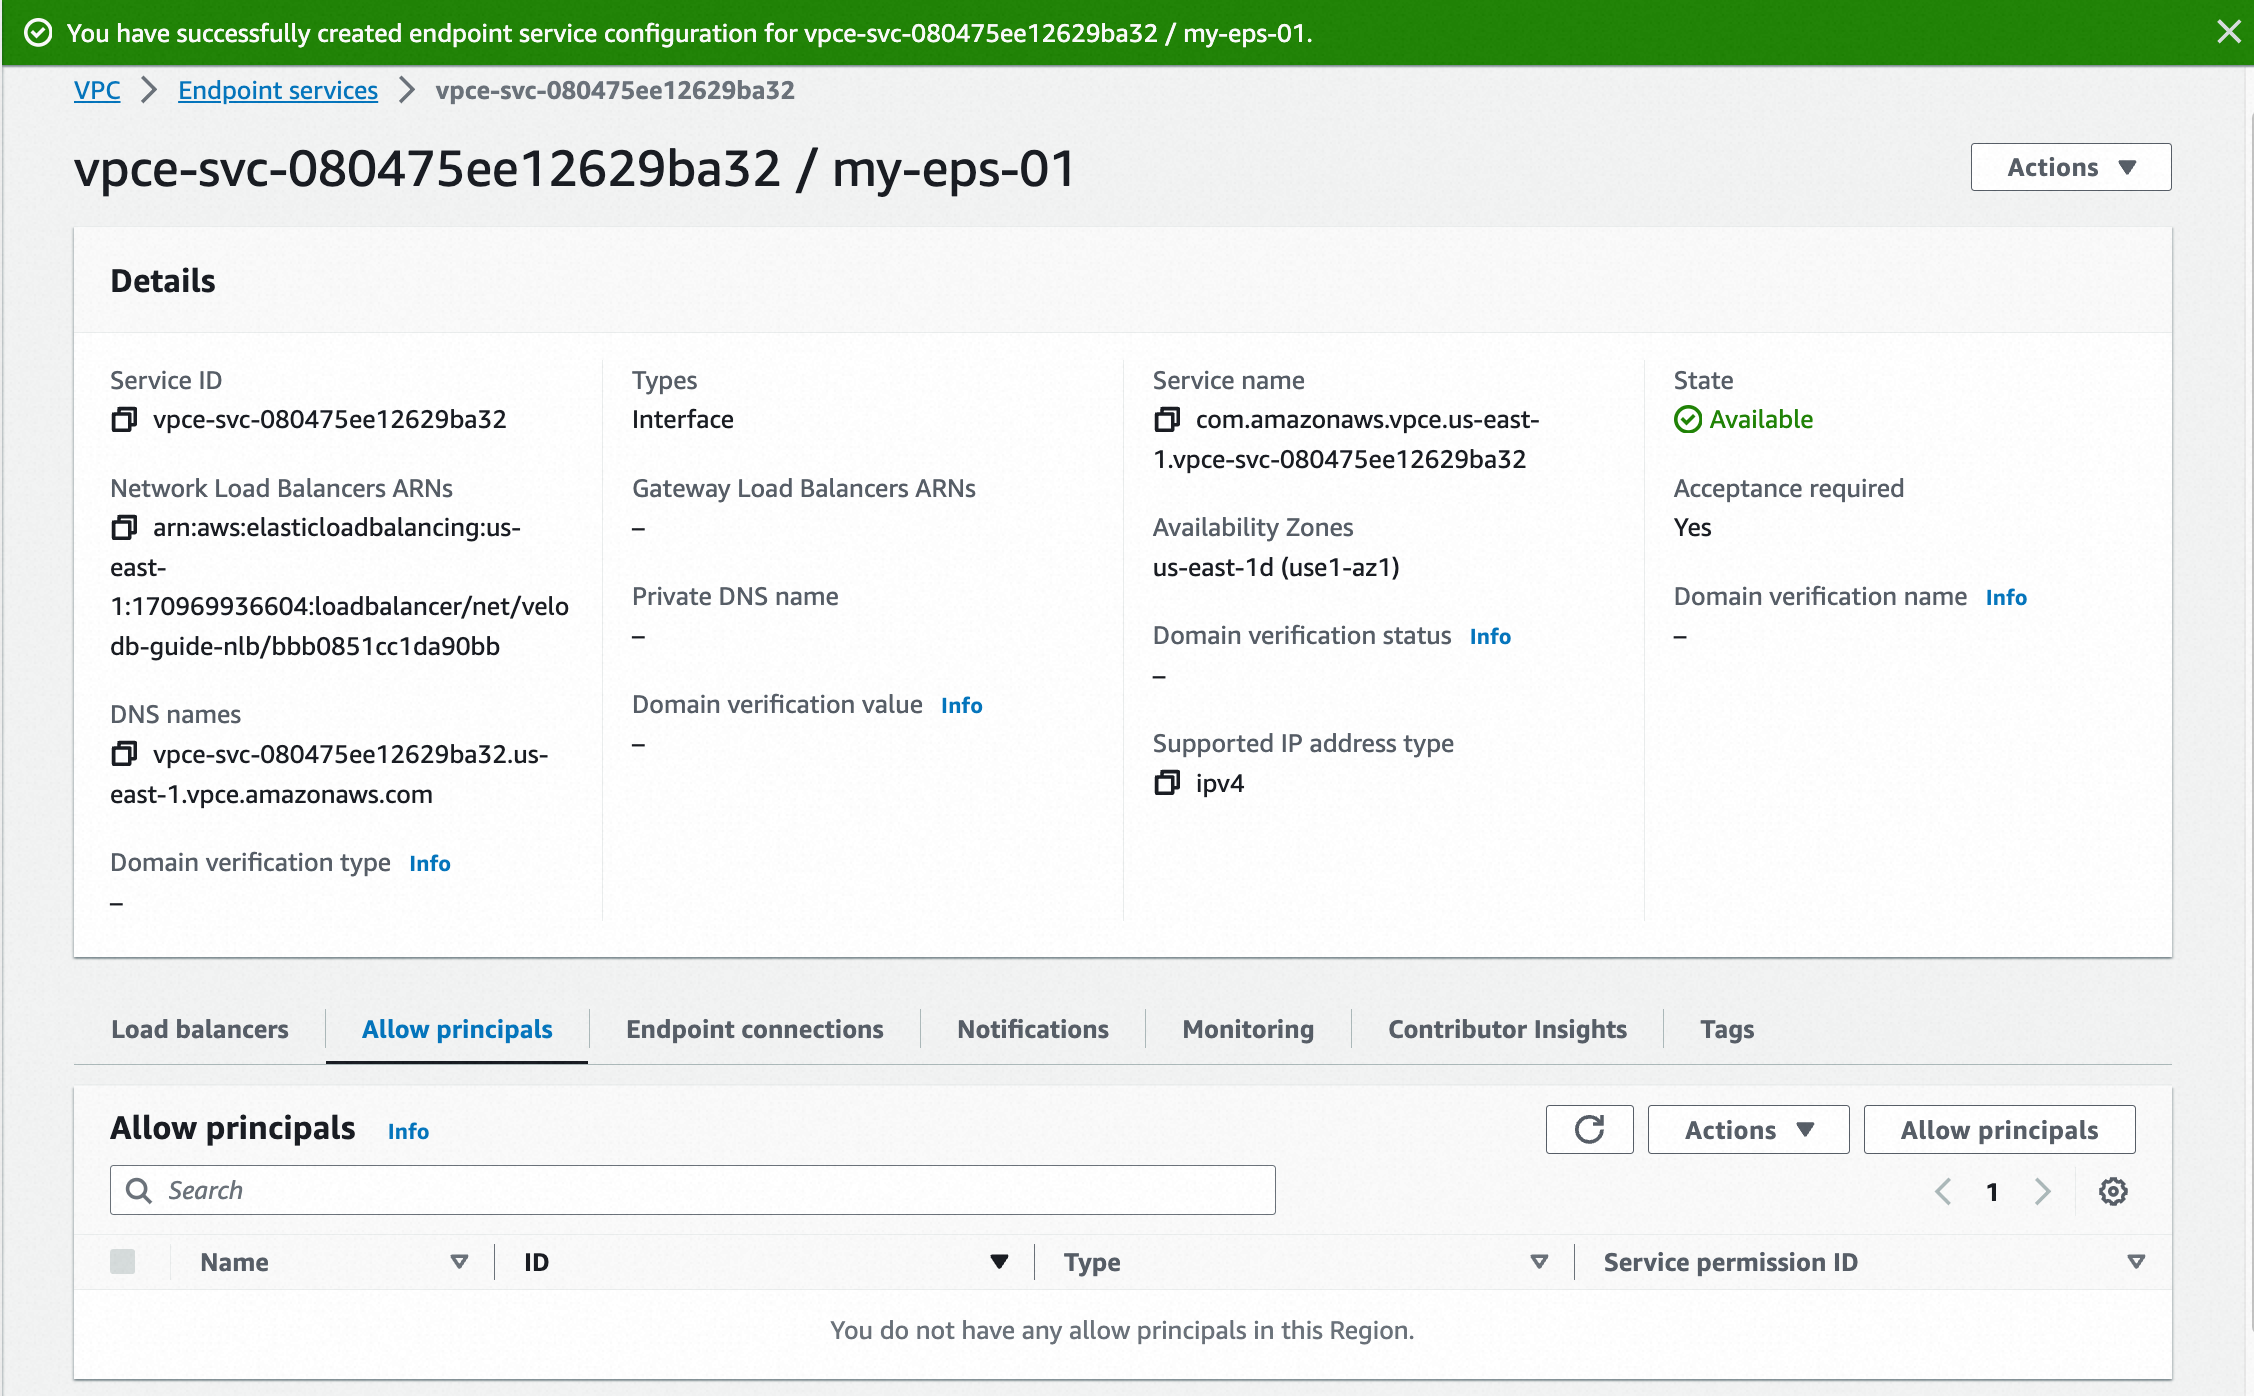
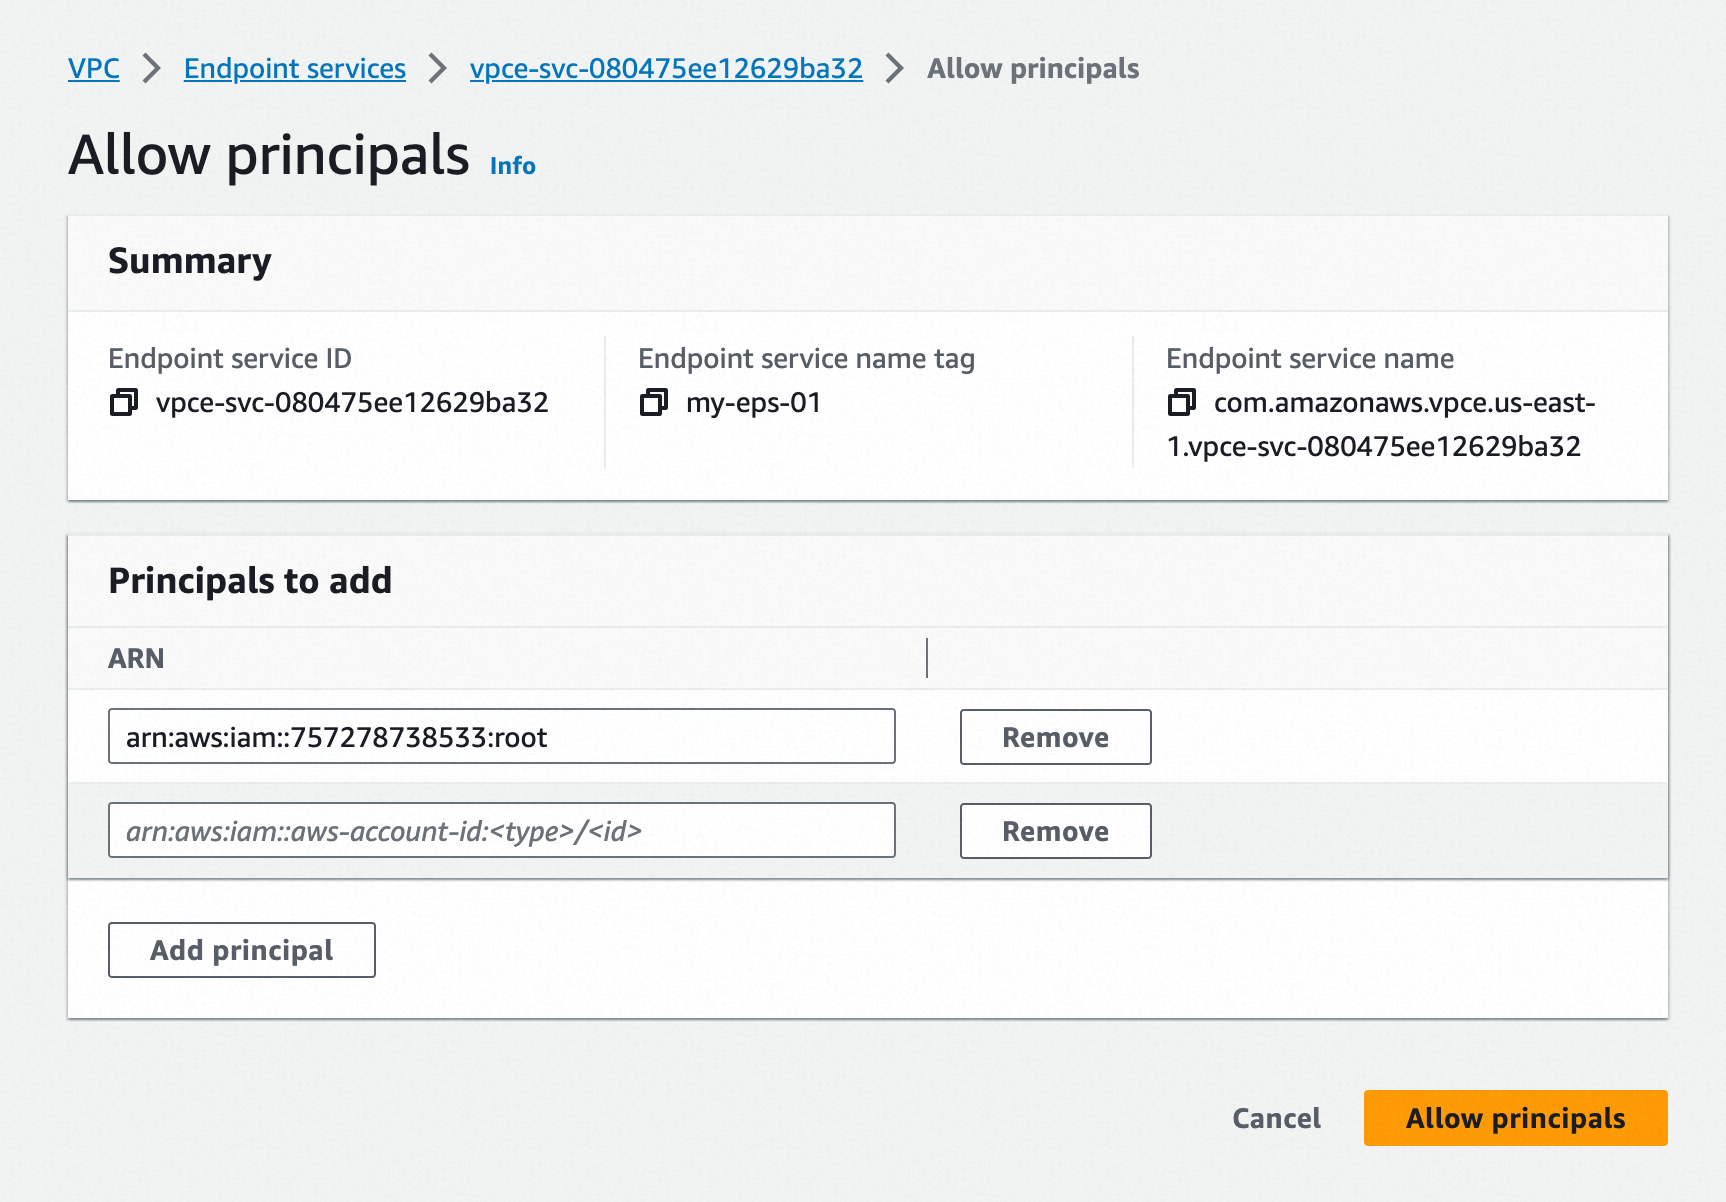
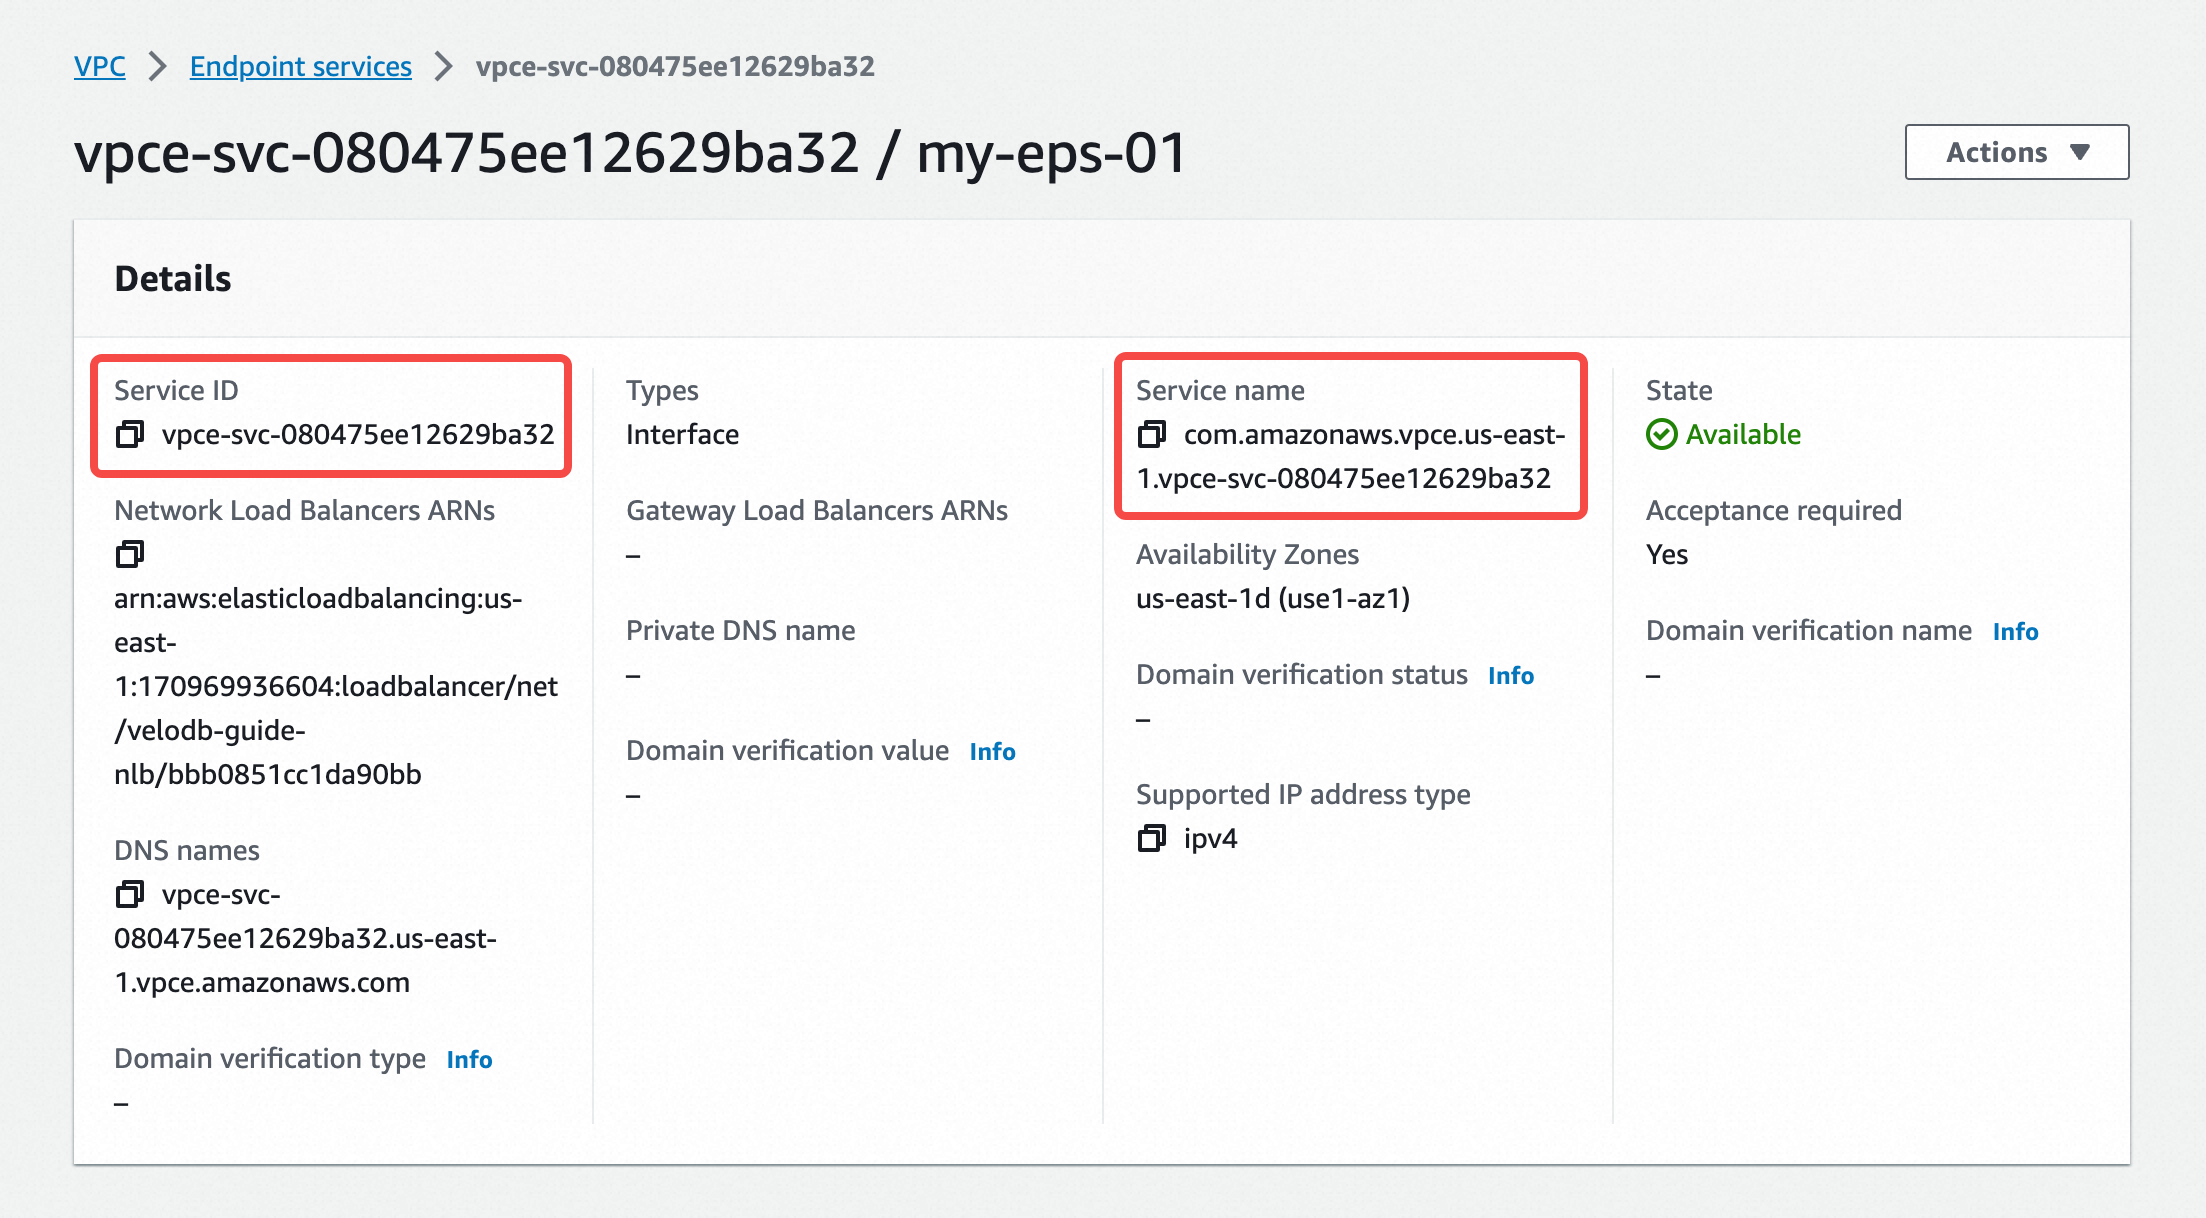
In the endpoint service's Allow principals tab, add ARN of VeloDB.
-
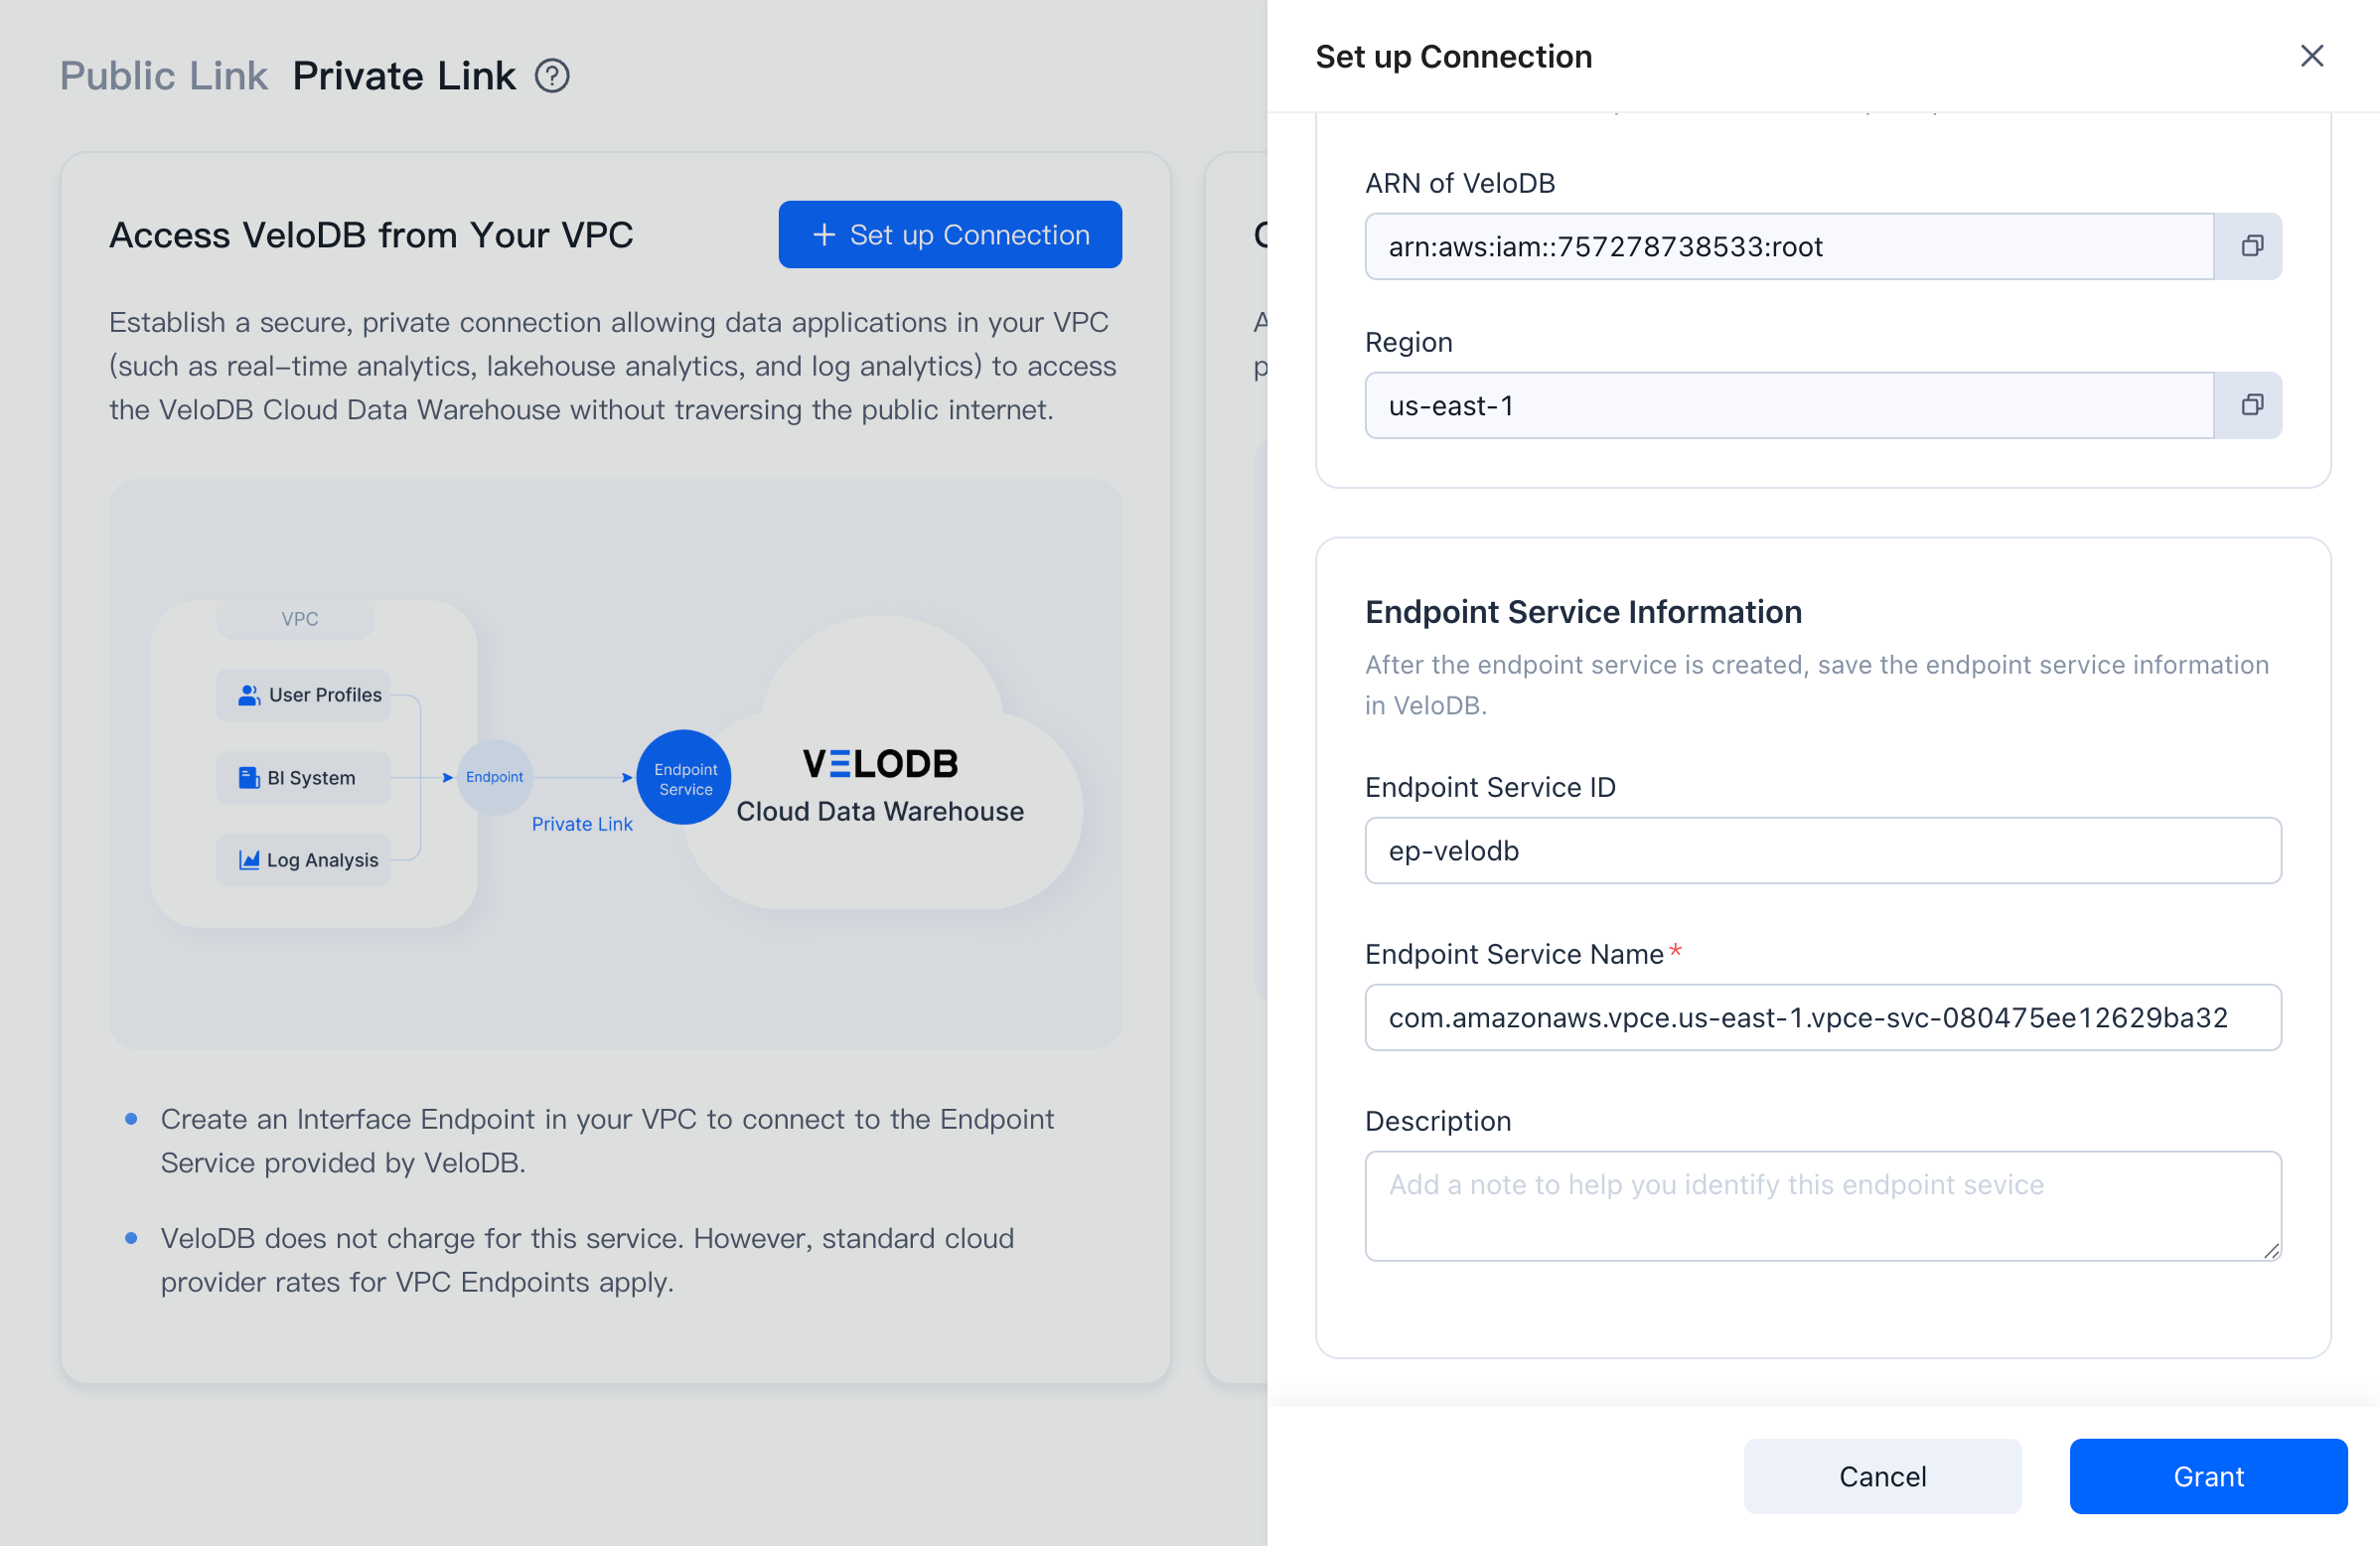
Copy the Service ID and Service Name from the endpoint service details page and paste them into the VeloDB Cloud Endpoint Service registration page.
-
After registration, give the endpoint a name and click Create Now.
-
In the endpoint service's Endpoint connections tab, accept the endpoint connection request.

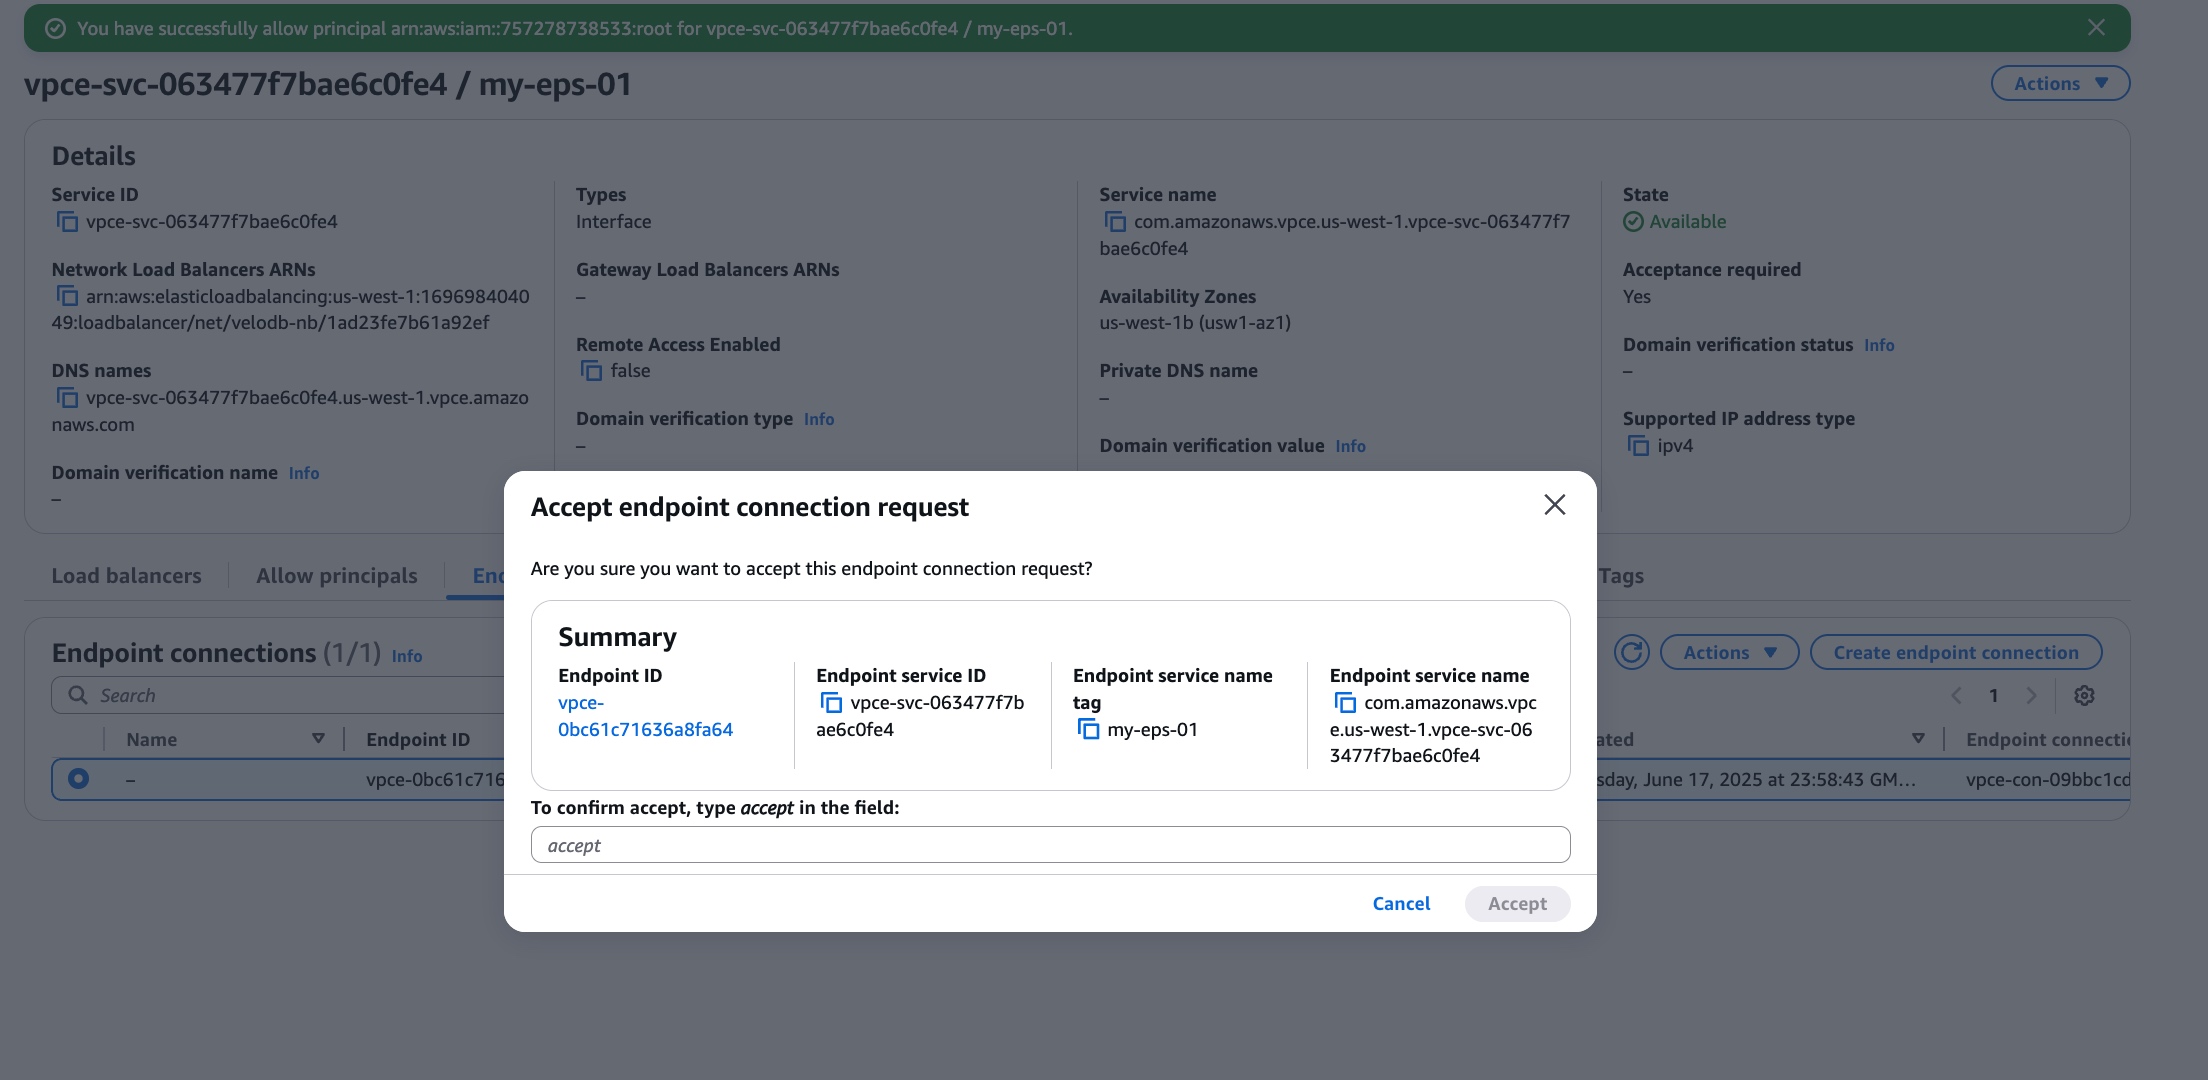
-
Refresh and wait for the endpoint status to change from pendingAcceptance to available.

On Azure
-
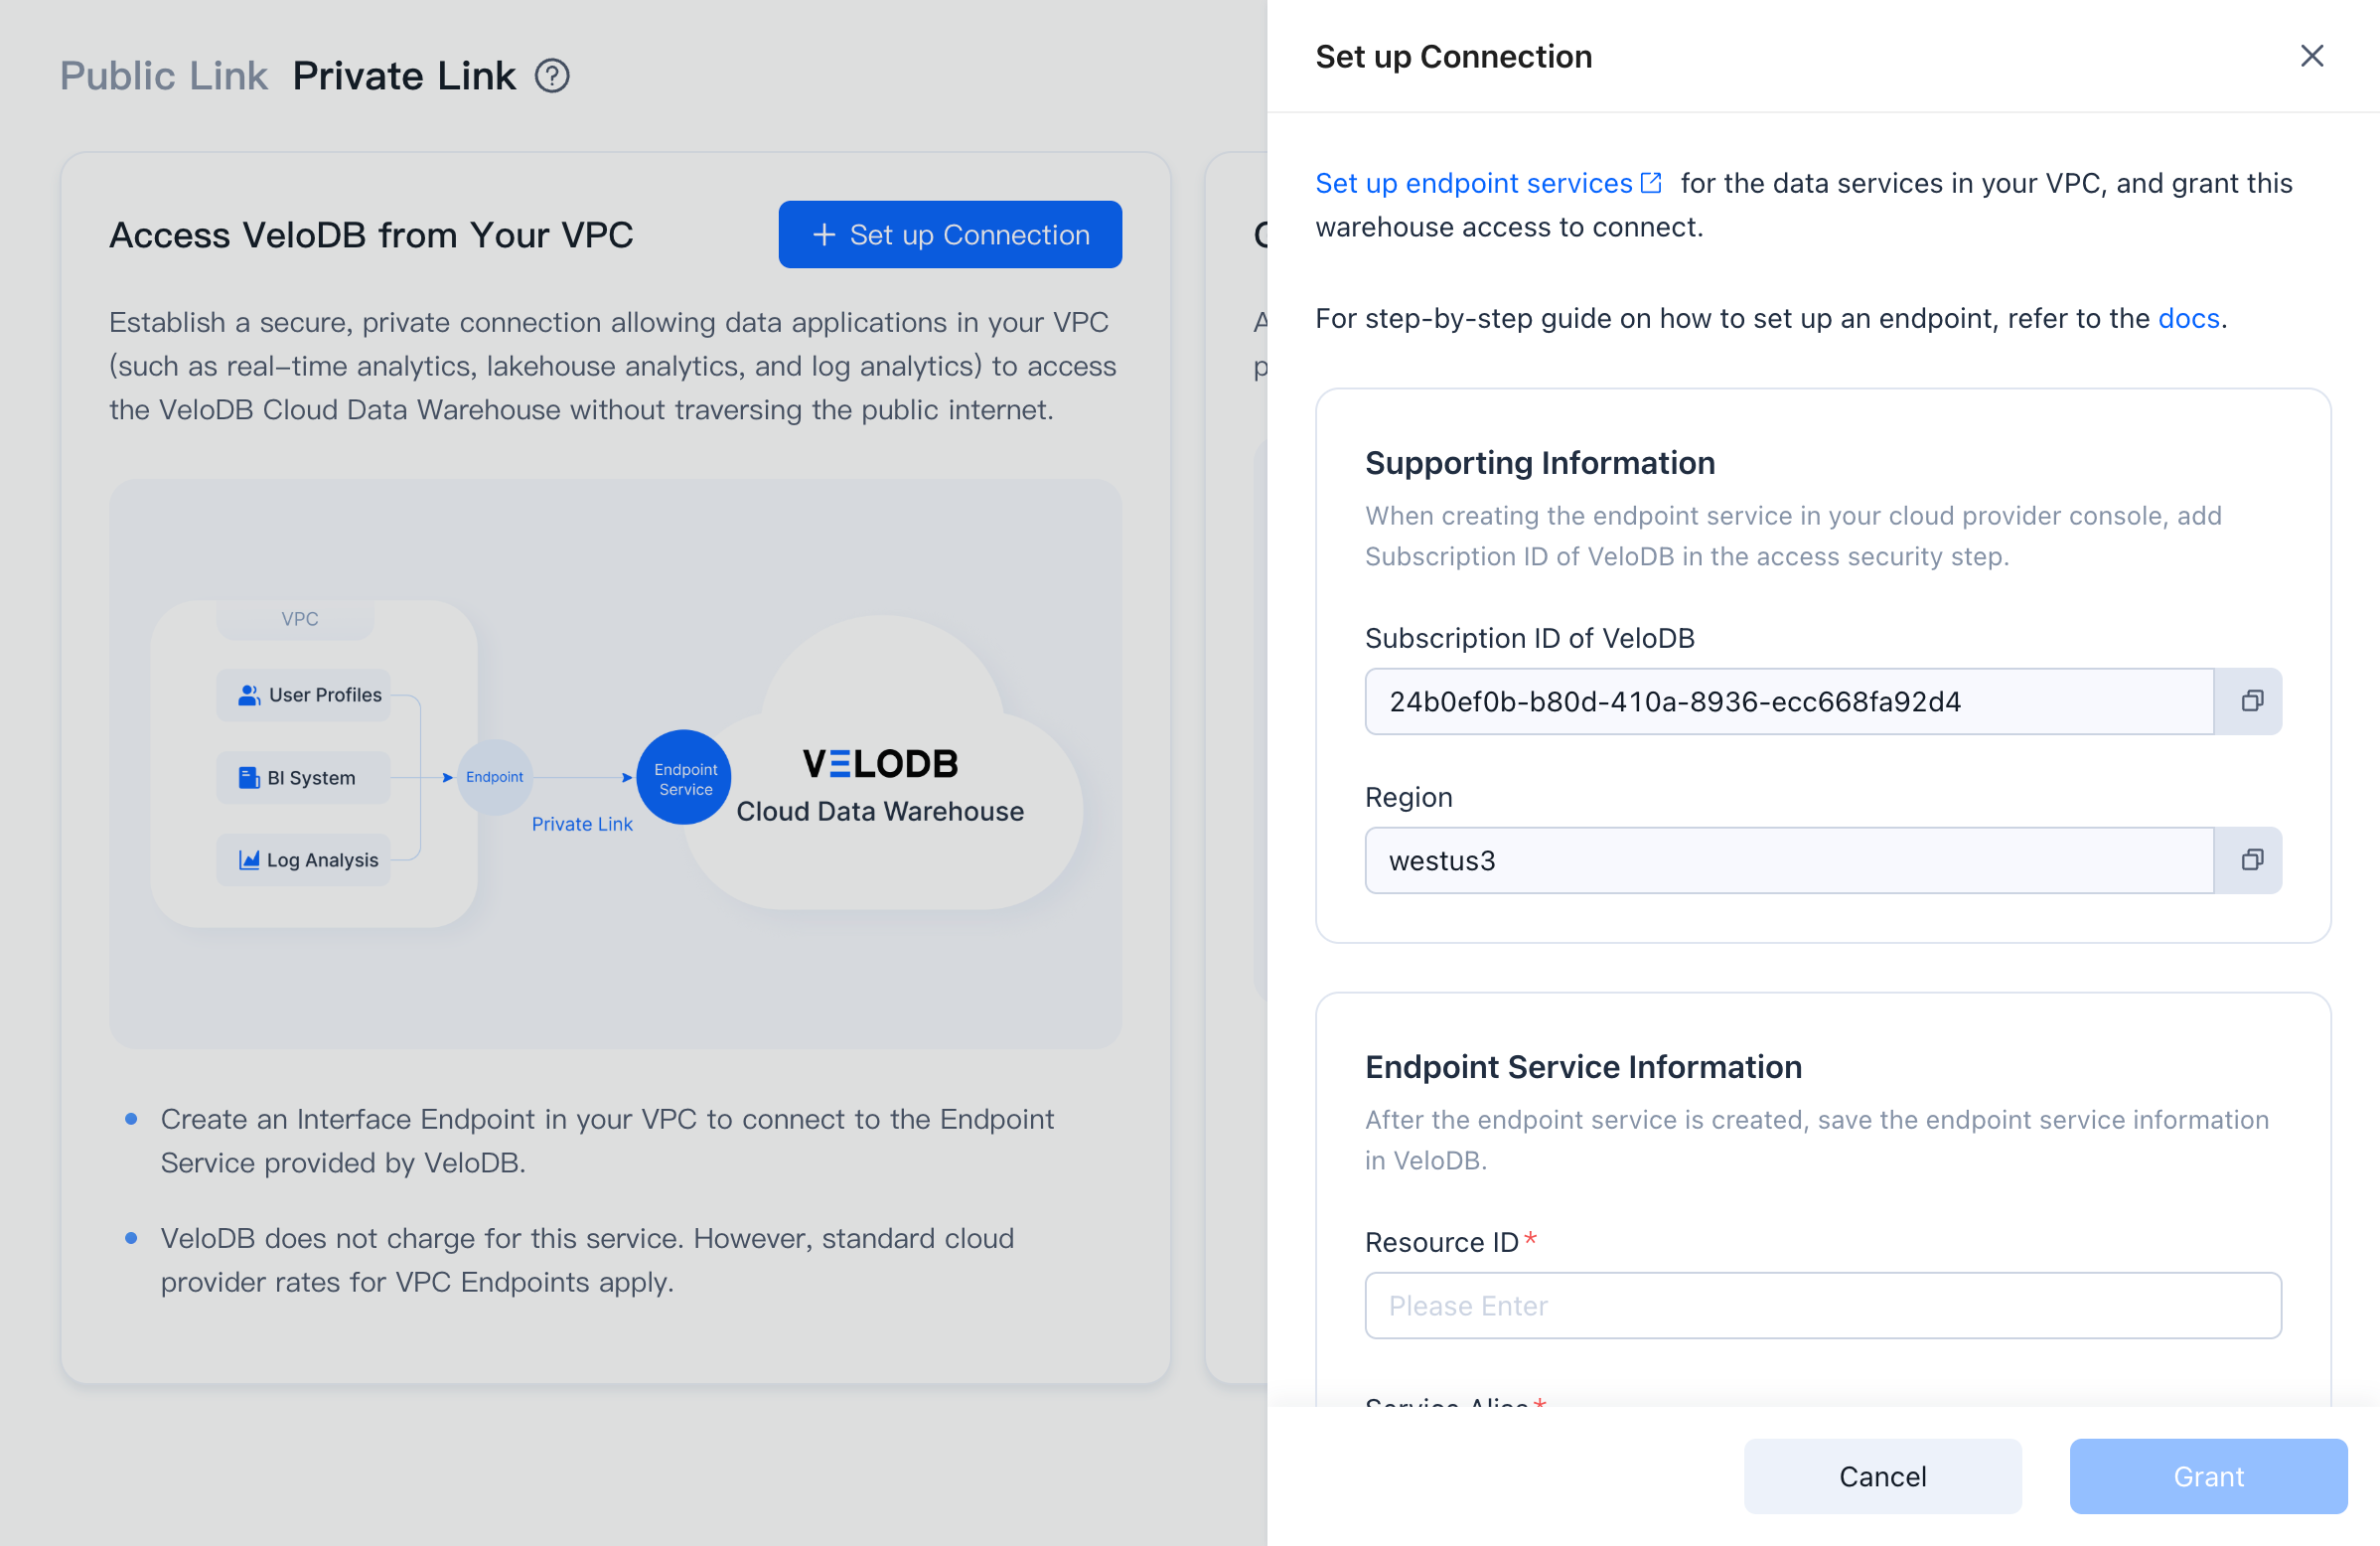
On the target warehouse, open Connection → Private Link, click Set up Connection under Grant VeloDB Access to Your VPC.
-
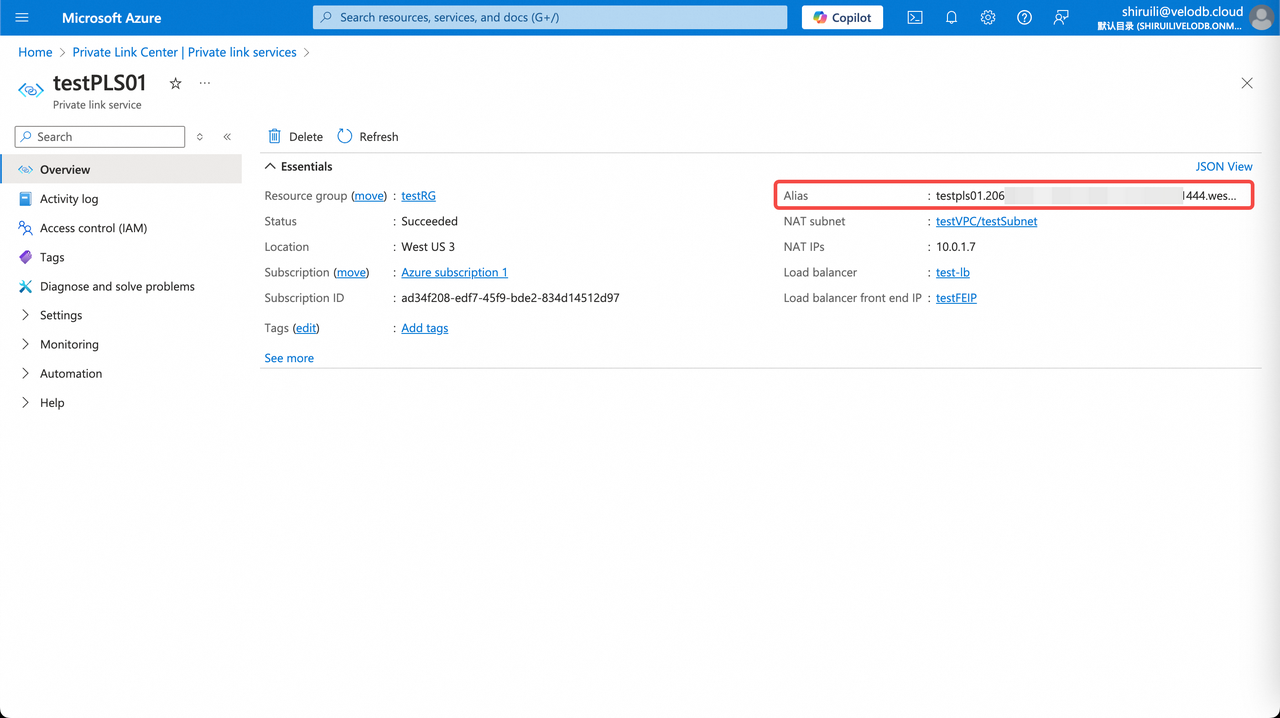
The page shows the Current Region and the Subscription ID of VeloDB. Click Set up endpoint services to open the Azure Private Link Service console.
-
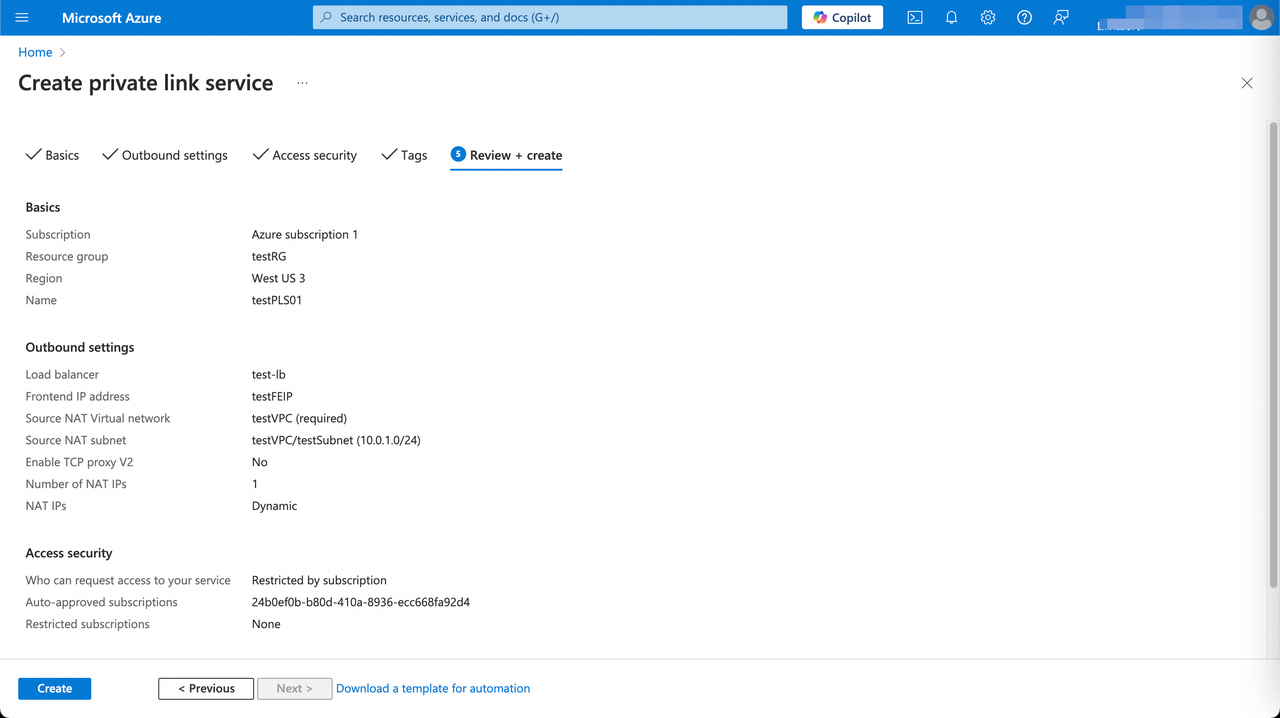
In the Basics tab, make sure the region matches the warehouse and fill in the form, then click Next: Outbound settings.
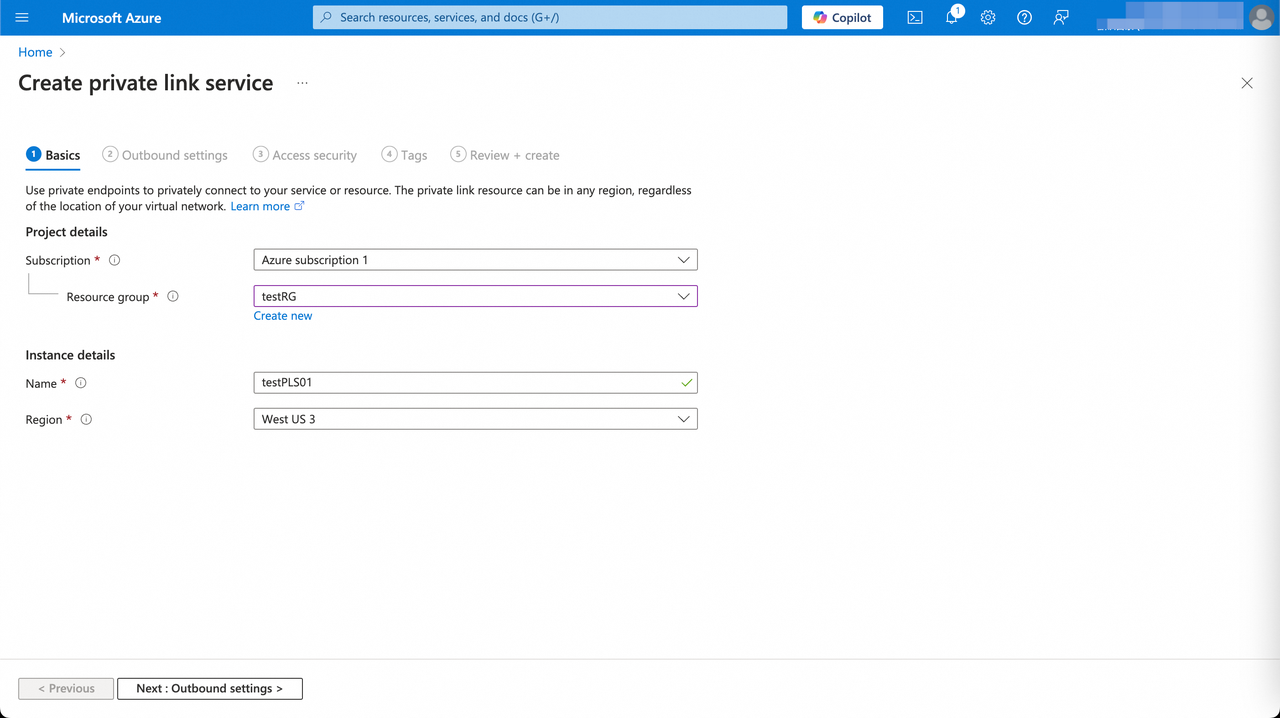
Parameter Category Description Subscription Project details Subscription for the Private Link Service. Resource group Project details Resource group to put the Private Link Service in. Name Instance details Private Link Service instance name. Region Instance details Must match the warehouse region. -
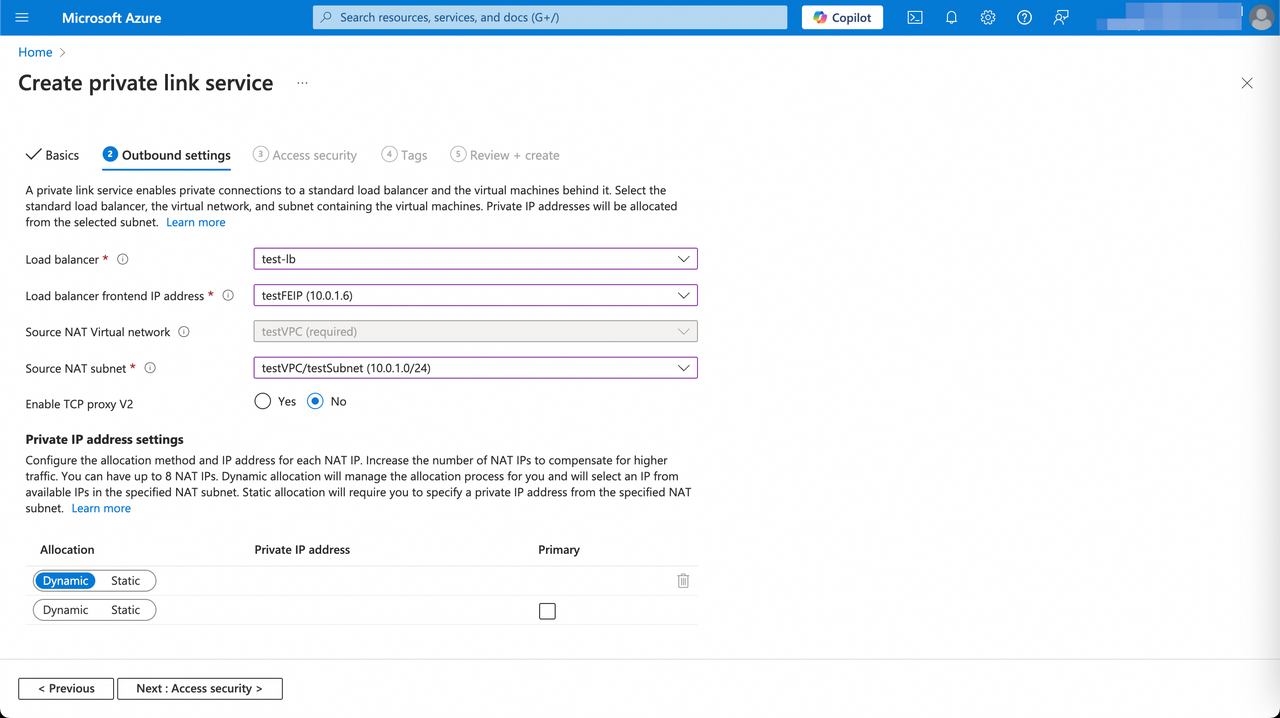
On Outbound settings, select the load balancer, front-end IP, and source NAT network / subnet, then click Next: Access Security.
-
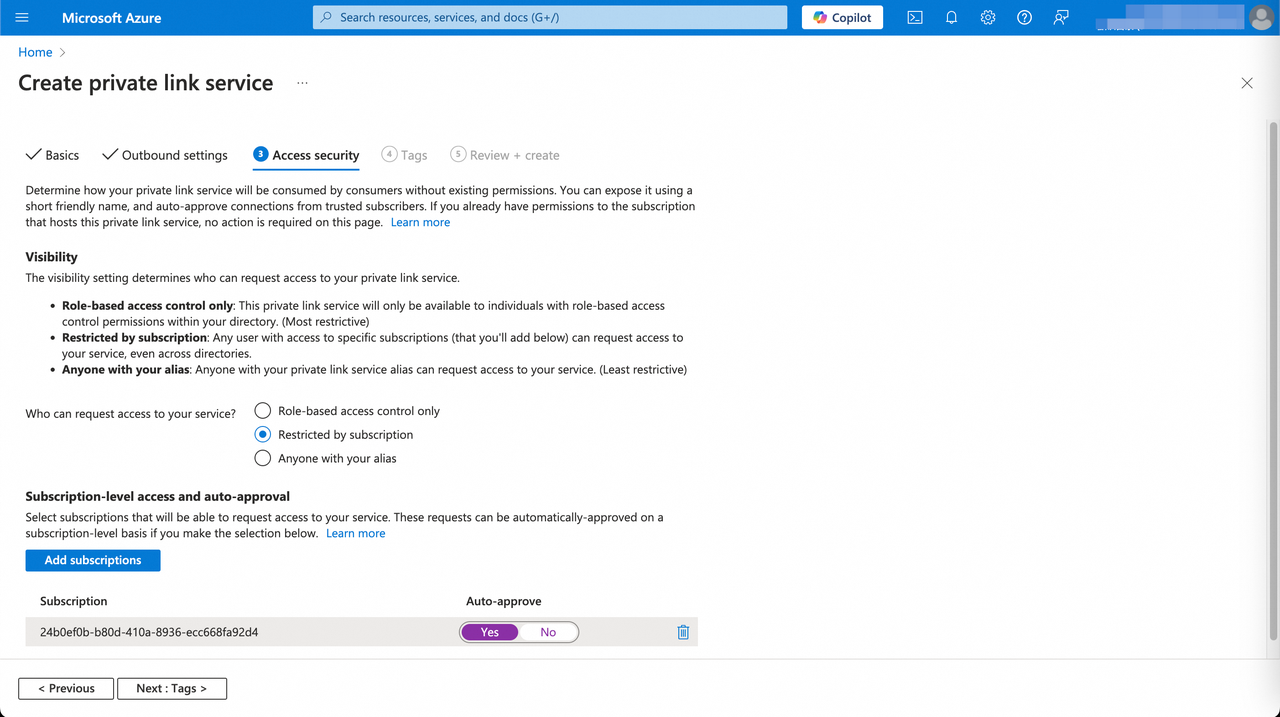
On Access Security, set Restricted by subscription, add the Subscription ID of VeloDB to the allowlist, set auto-approve to Yes, then click Next: Tags.
-
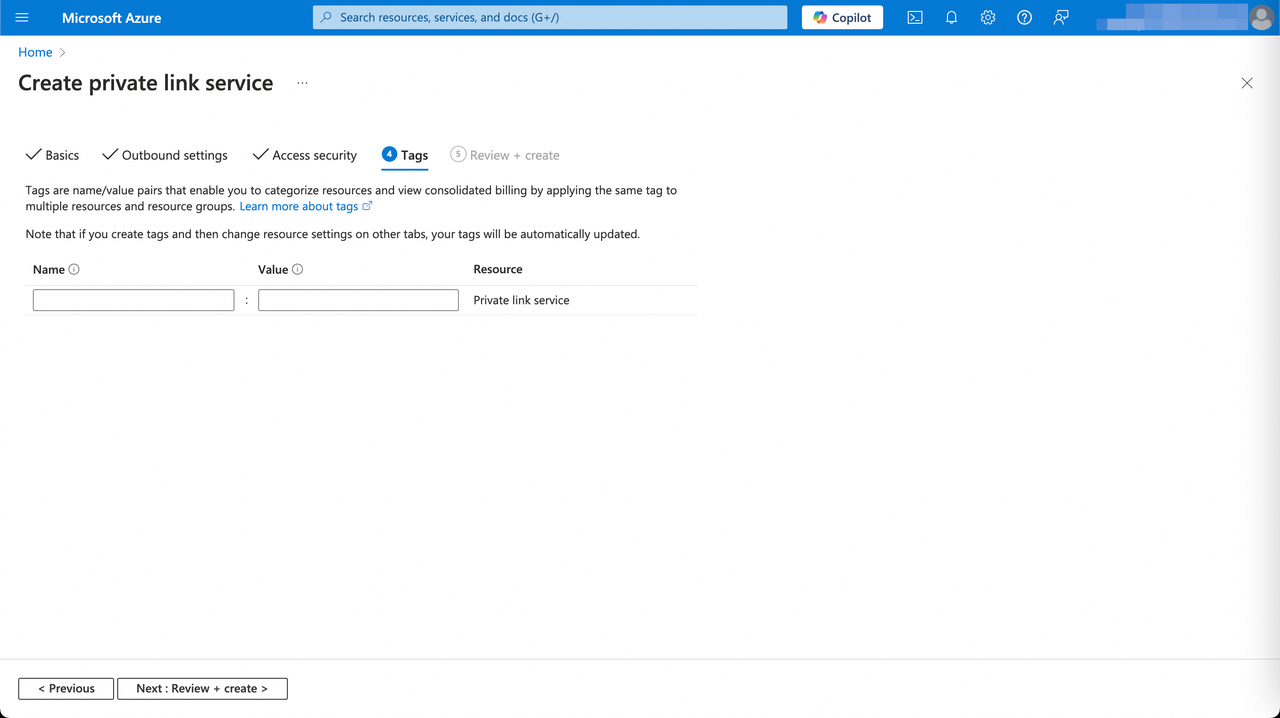
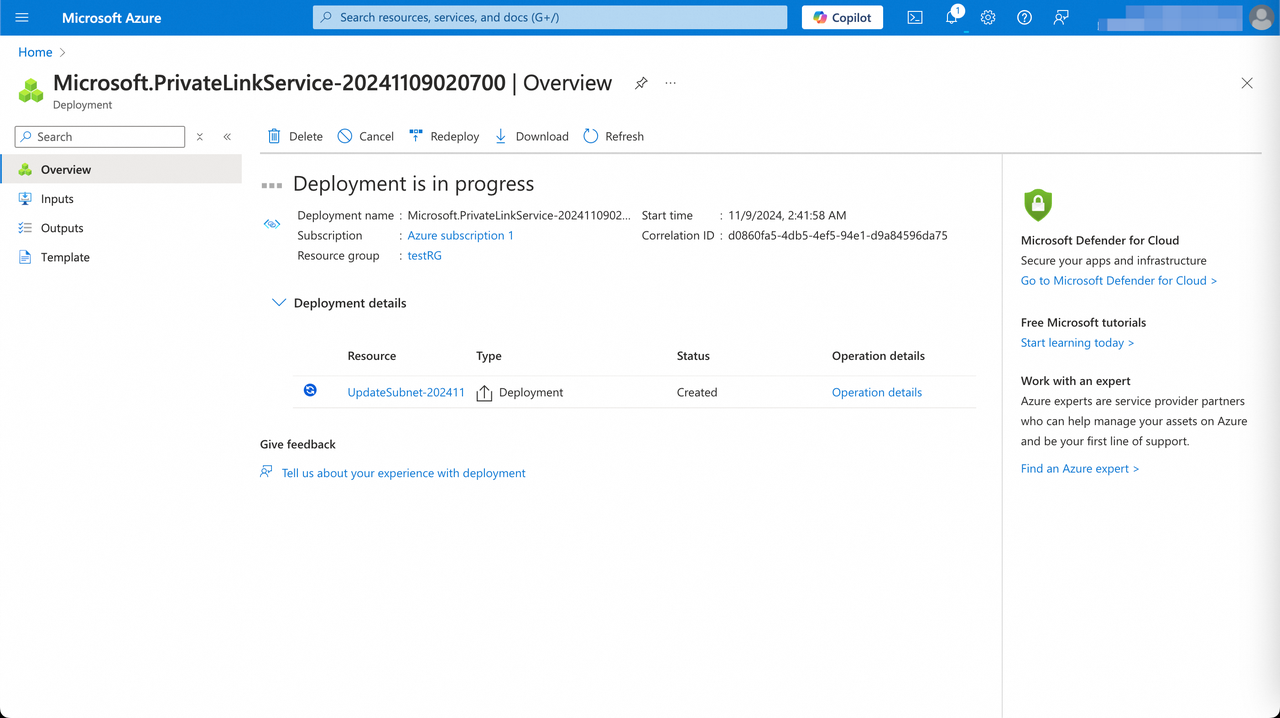
On Tags, keep defaults. Review and click Create.
-
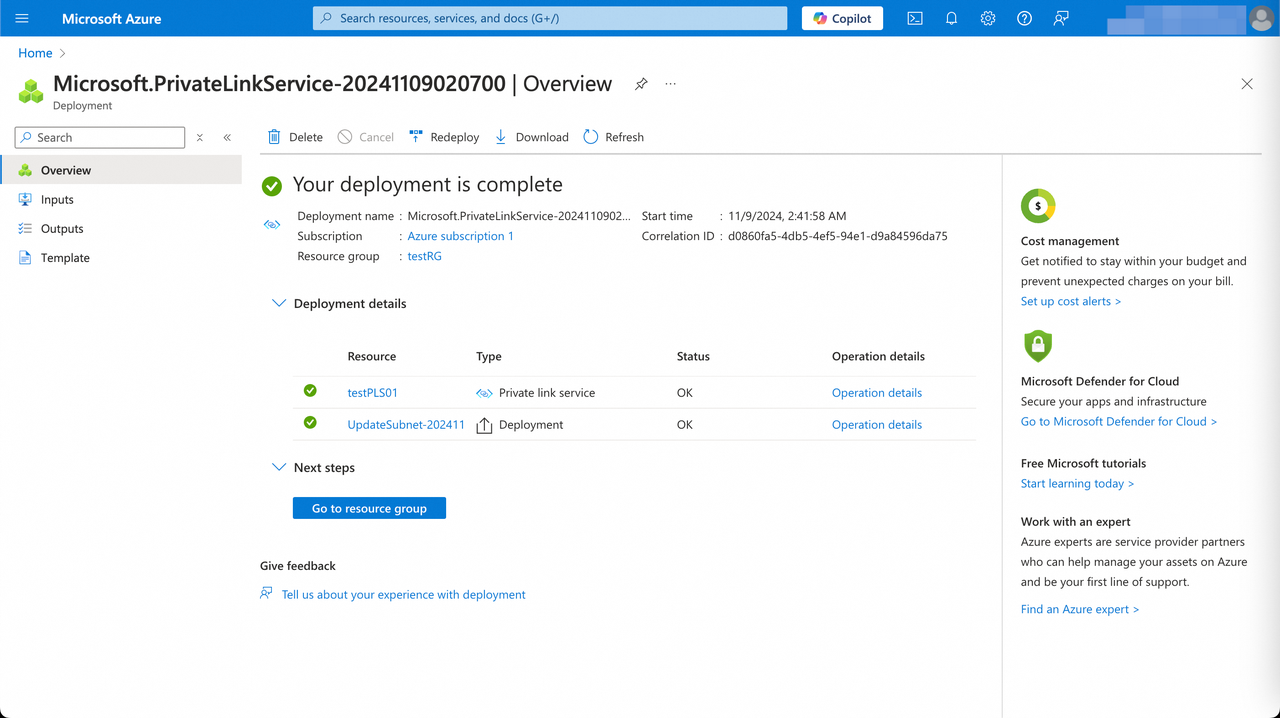
When the status changes from Created to OK, the service is ready.
-
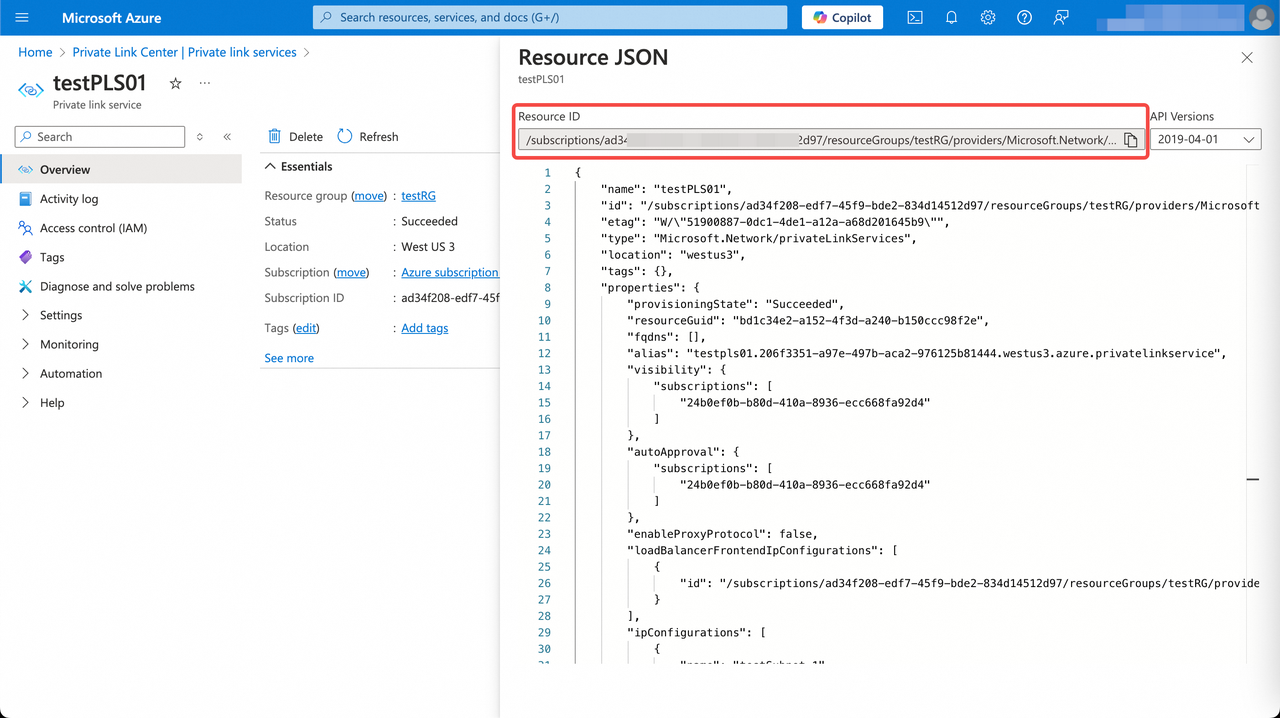
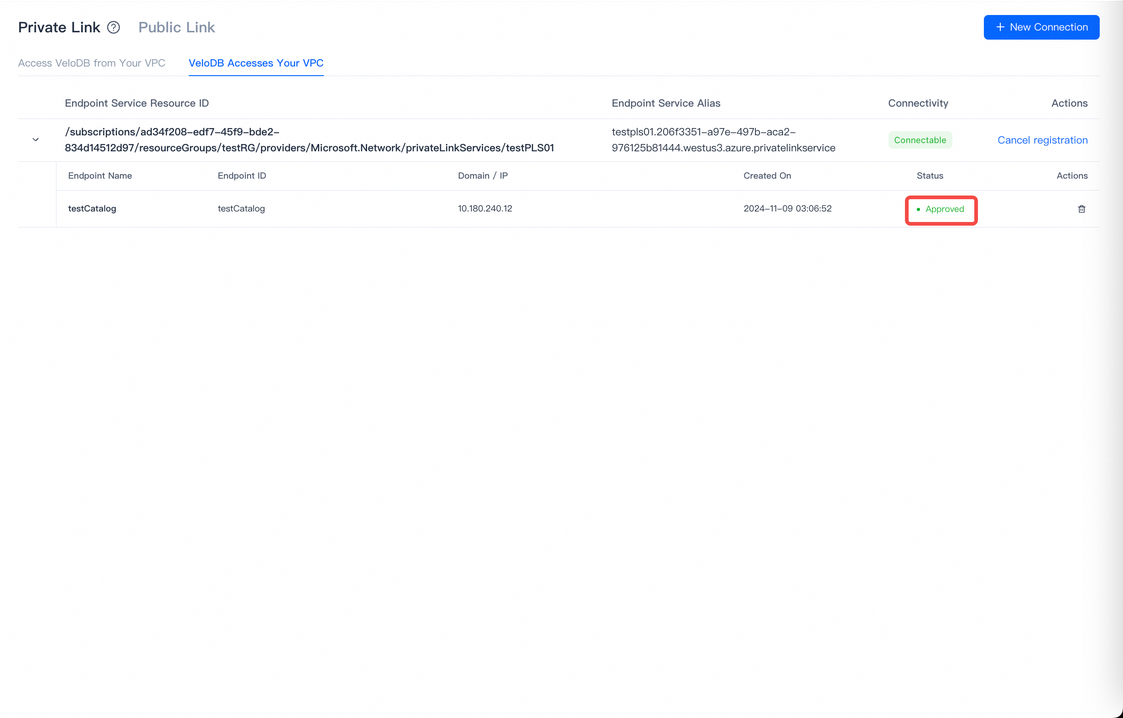
Copy the Resource ID and Alias from the Private Link Service details page and paste them into VeloDB Cloud's Endpoint Service registration page.
-
After registration, give the endpoint a name and click Create Now.

-
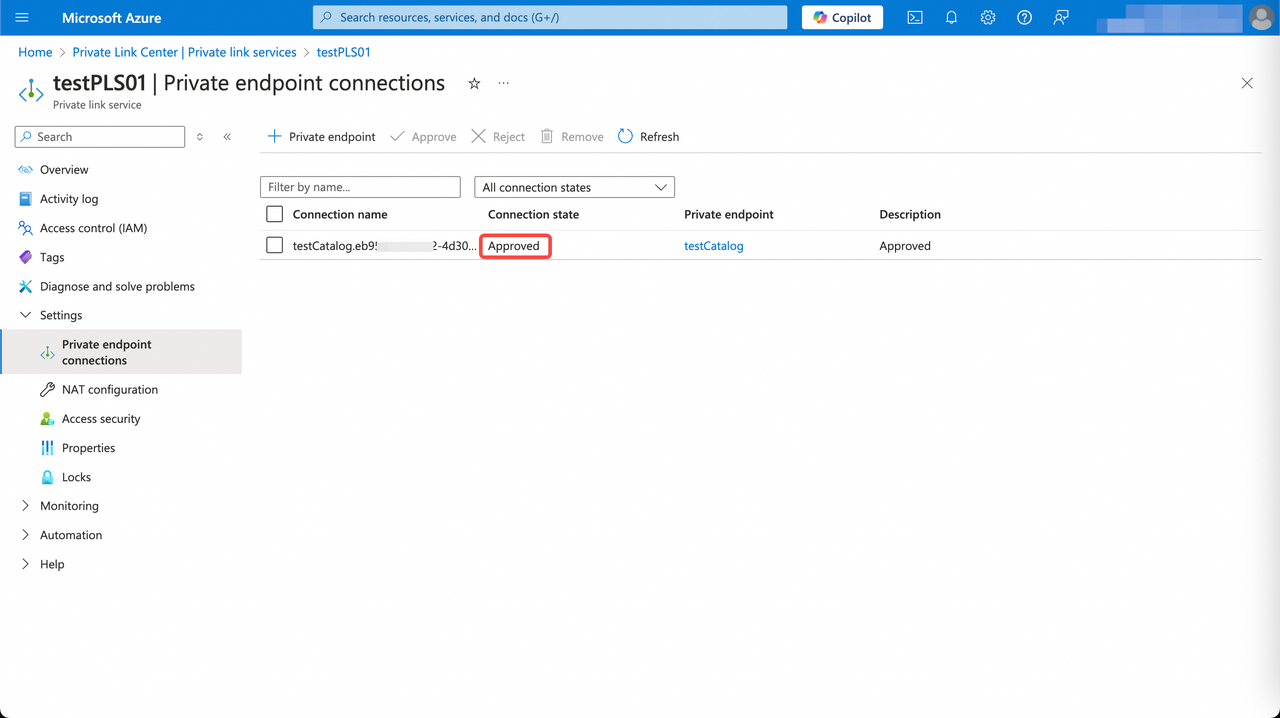
Refresh and wait for the endpoint status to change from pendingAcceptance to Approve.
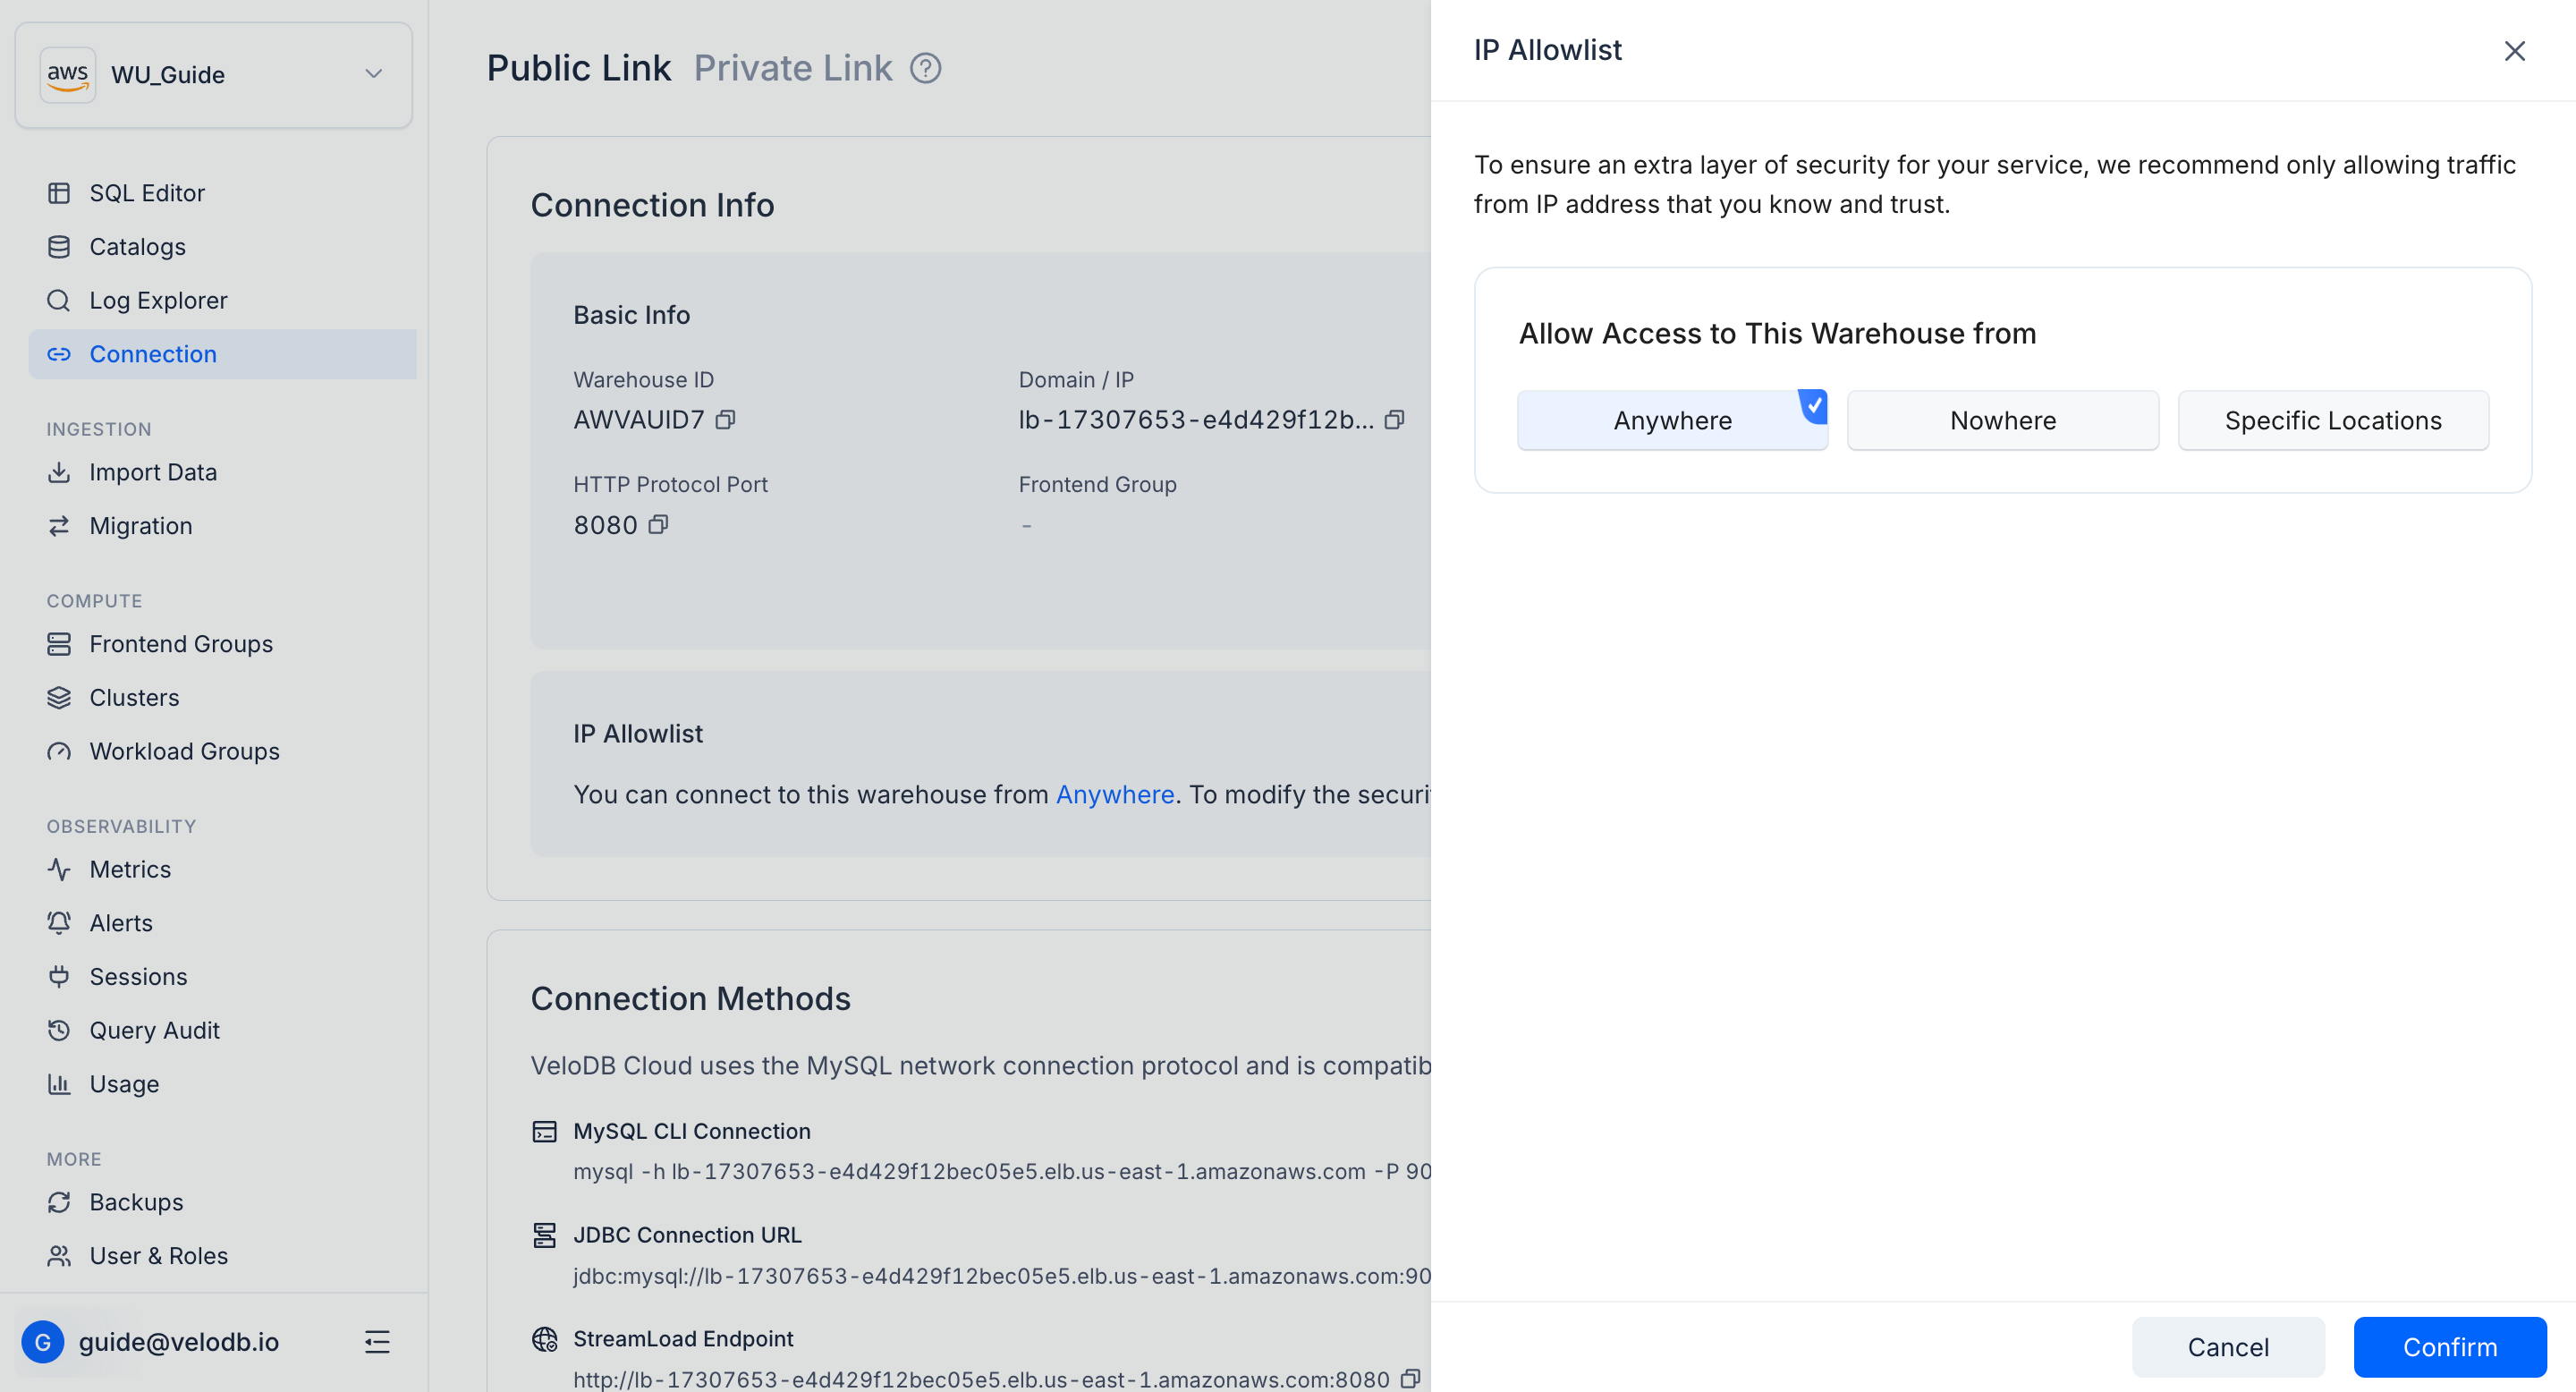
Public Access Allowlist
BYOC warehouses only. Controls which sources can perform data plane operations (query, upsert, fetch) via the console. Control plane operations (create, delete, scale, etc.) are not affected and remain fully accessible regardless of this setting.
Click Edit IP Allowlist to open the settings and choose one of three options:
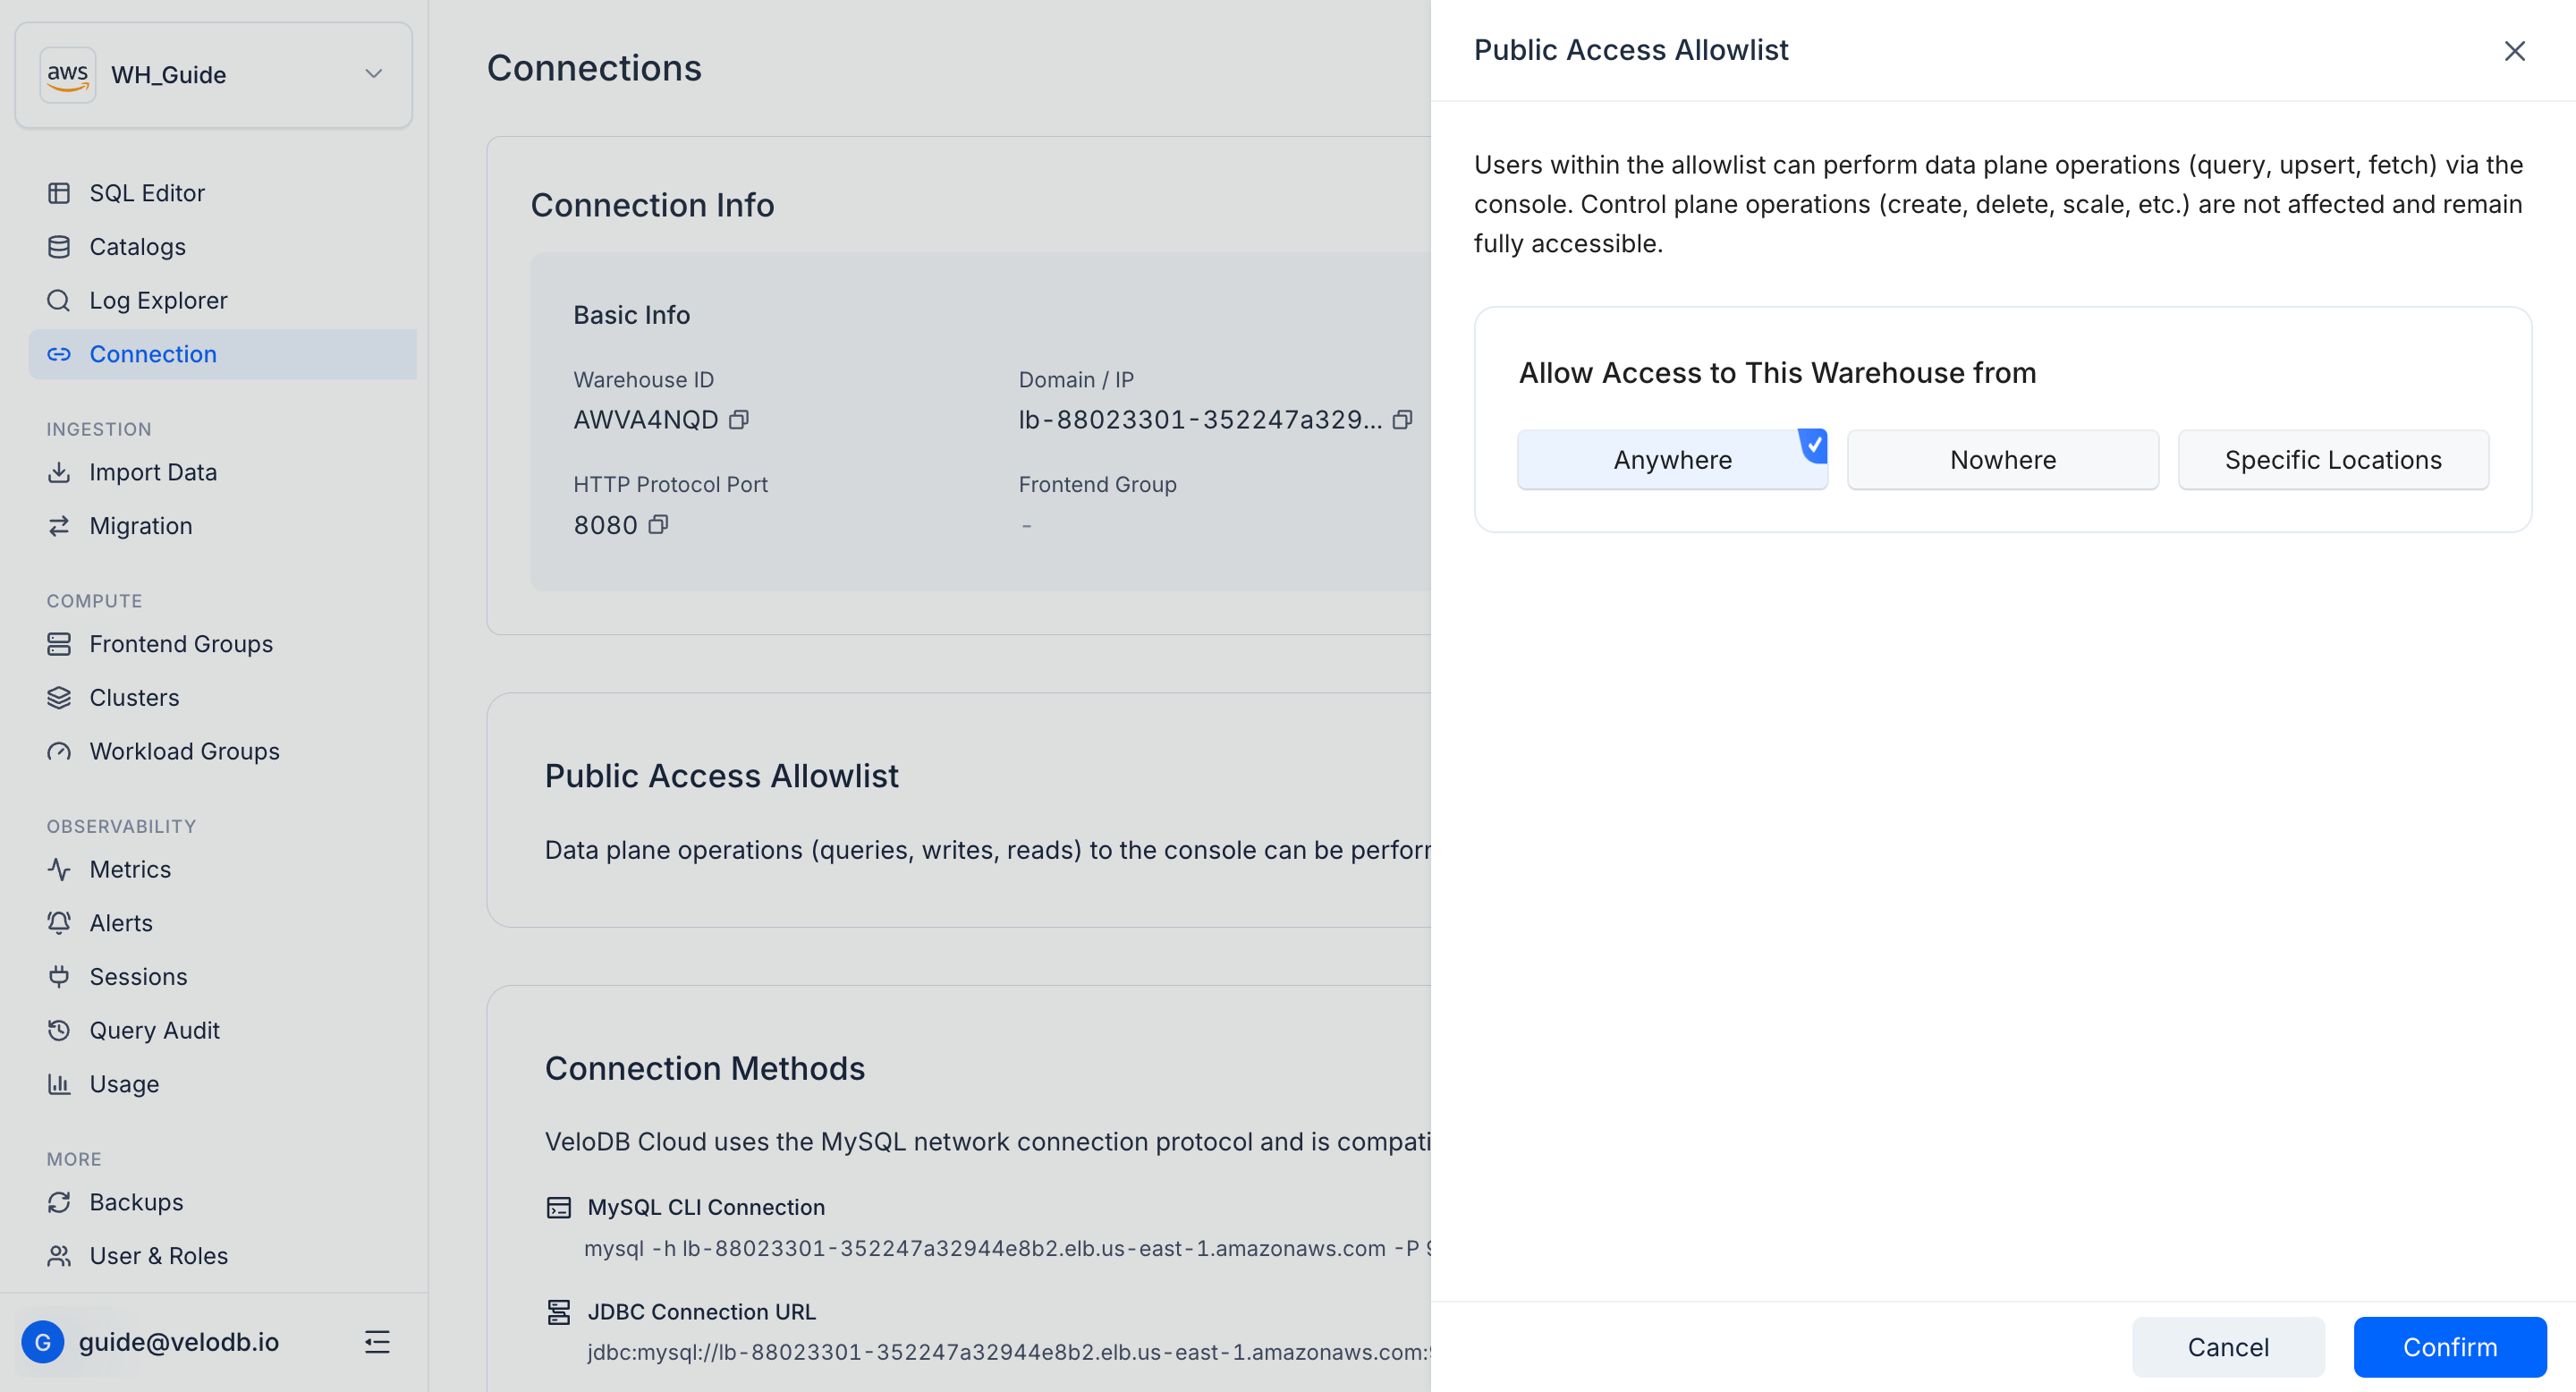
| Option | Behavior |
|---|---|
| Anywhere | All sources can reach the warehouse. |
| Nowhere | No data plane access via the console. |
| Specific Locations | Restrict to listed IP addresses or CIDR blocks. |
Connection strings
VeloDB Cloud uses the MySQL network connection protocol and is compatible with MySQL command line tools, JDBC/ODBC drivers, and visualization tools.
MySQL client:
mysql -h <host> -P <port> -u <username> -p
JDBC:
jdbc:mysql://<host>:<port>/<database>?user=<username>&password=<password>
If the warehouse has multiple clusters, route to a specific cluster by appending @<cluster_name> to the database name:
jdbc:mysql://<host>:<port>/<database>@<cluster>?user=<username>&password=<password>
HTTP (Stream Load):
curl --location-trusted -u <username>:<password> \
  -H "label:<load-label>" \
  -H "column_separator:," \
  -T data.csv \
  http://<host>:<port>/api/<database>/<table>/_stream_load
To target a specific cluster, add the cloud_cluster header:
-H "cloud_cluster:<cluster>"
For the exact host and port, use the Connection Examples popover on the Connection page.