Import
The Import module provides a unified, visual interface for data integration. It allows you to seamlessly ingest data from external sources into your VeloDB Cloud target data warehouse. Supporting both batch data loading and continuous data ingestion with automatic table creation, this module significantly lowers the barrier to building data pipelines.
You can access this feature by navigating to Data -> Import in the left sidebar of VeloDB Studio, and click the Add Import Job button to create a new task.
Supported Data Sources
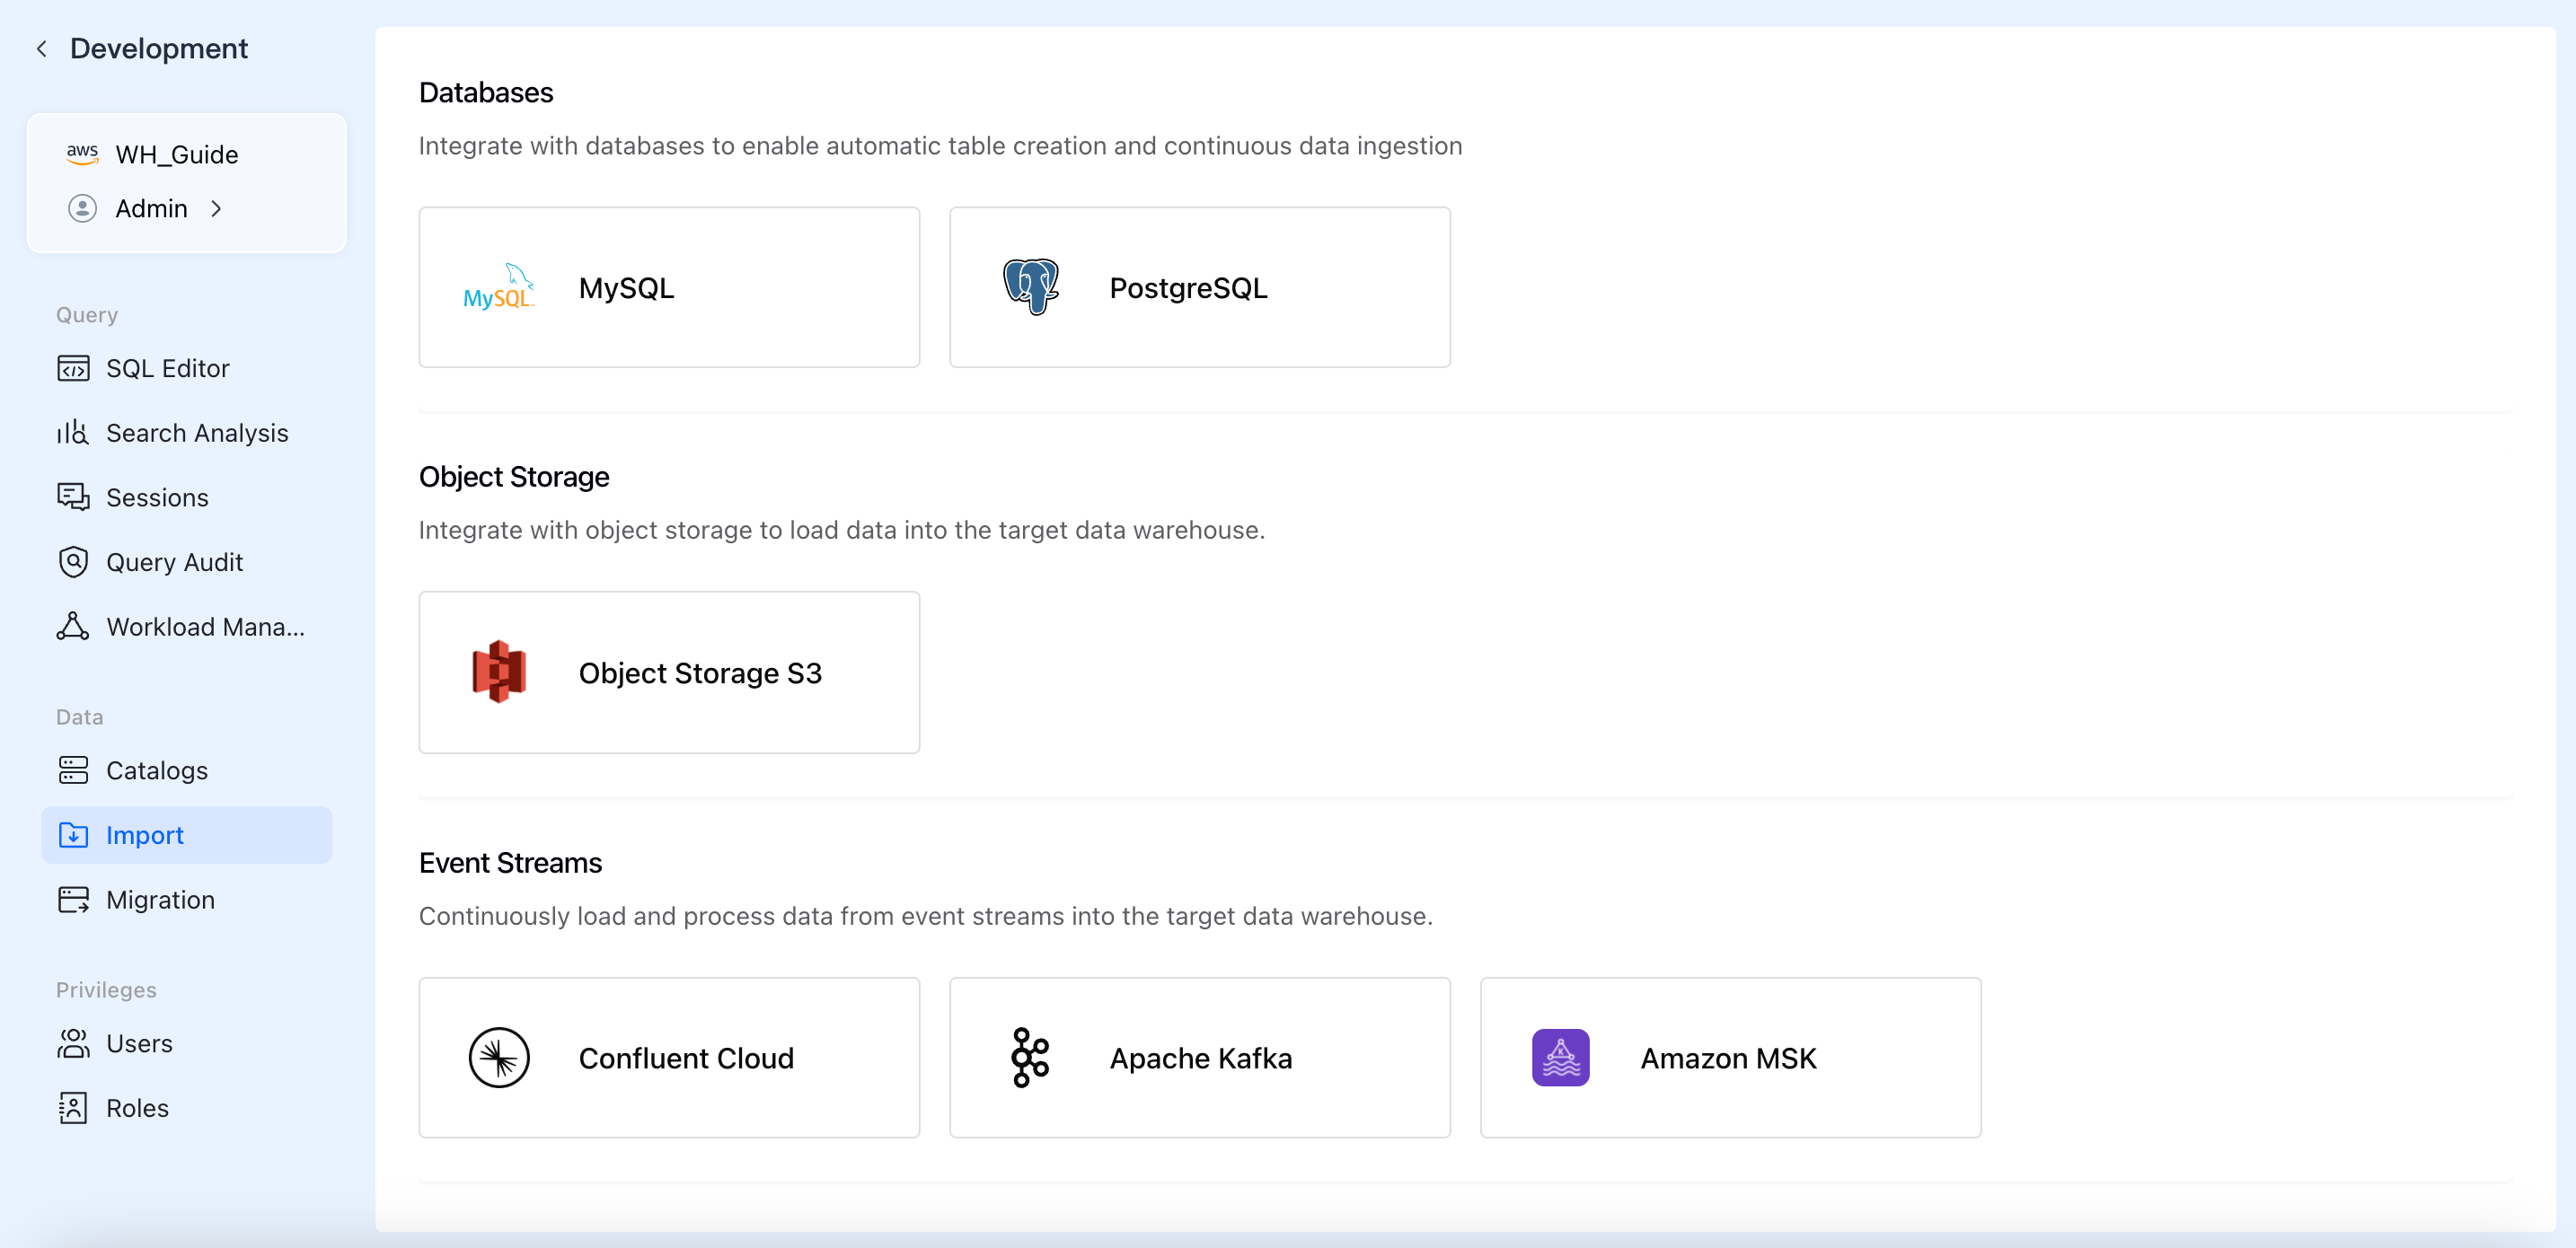
Depending on your business scenarios and data storage types, VeloDB Cloud currently supports importing data from three main categories:
- Databases
- MySQL
- PostgreSQL
- Object Storage
- Object Storage S3
- Event Streams
- Confluent Cloud
- Apache Kafka
- Amazon MSK
Creating an Import Job
Although configuration details vary slightly by data source, VeloDB Cloud provides a consistent, 5-step wizard-driven experience. Here is a general guide using a database import as an example:
1. Select a Data Source
- Log in to the VeloDB Cloud console and click Import in the left navigation pane under the Data section,
- Click the + Add Import Job button on the top right.
- Select your desired data source card (e.g.,
PostgreSQL) from the corresponding category.
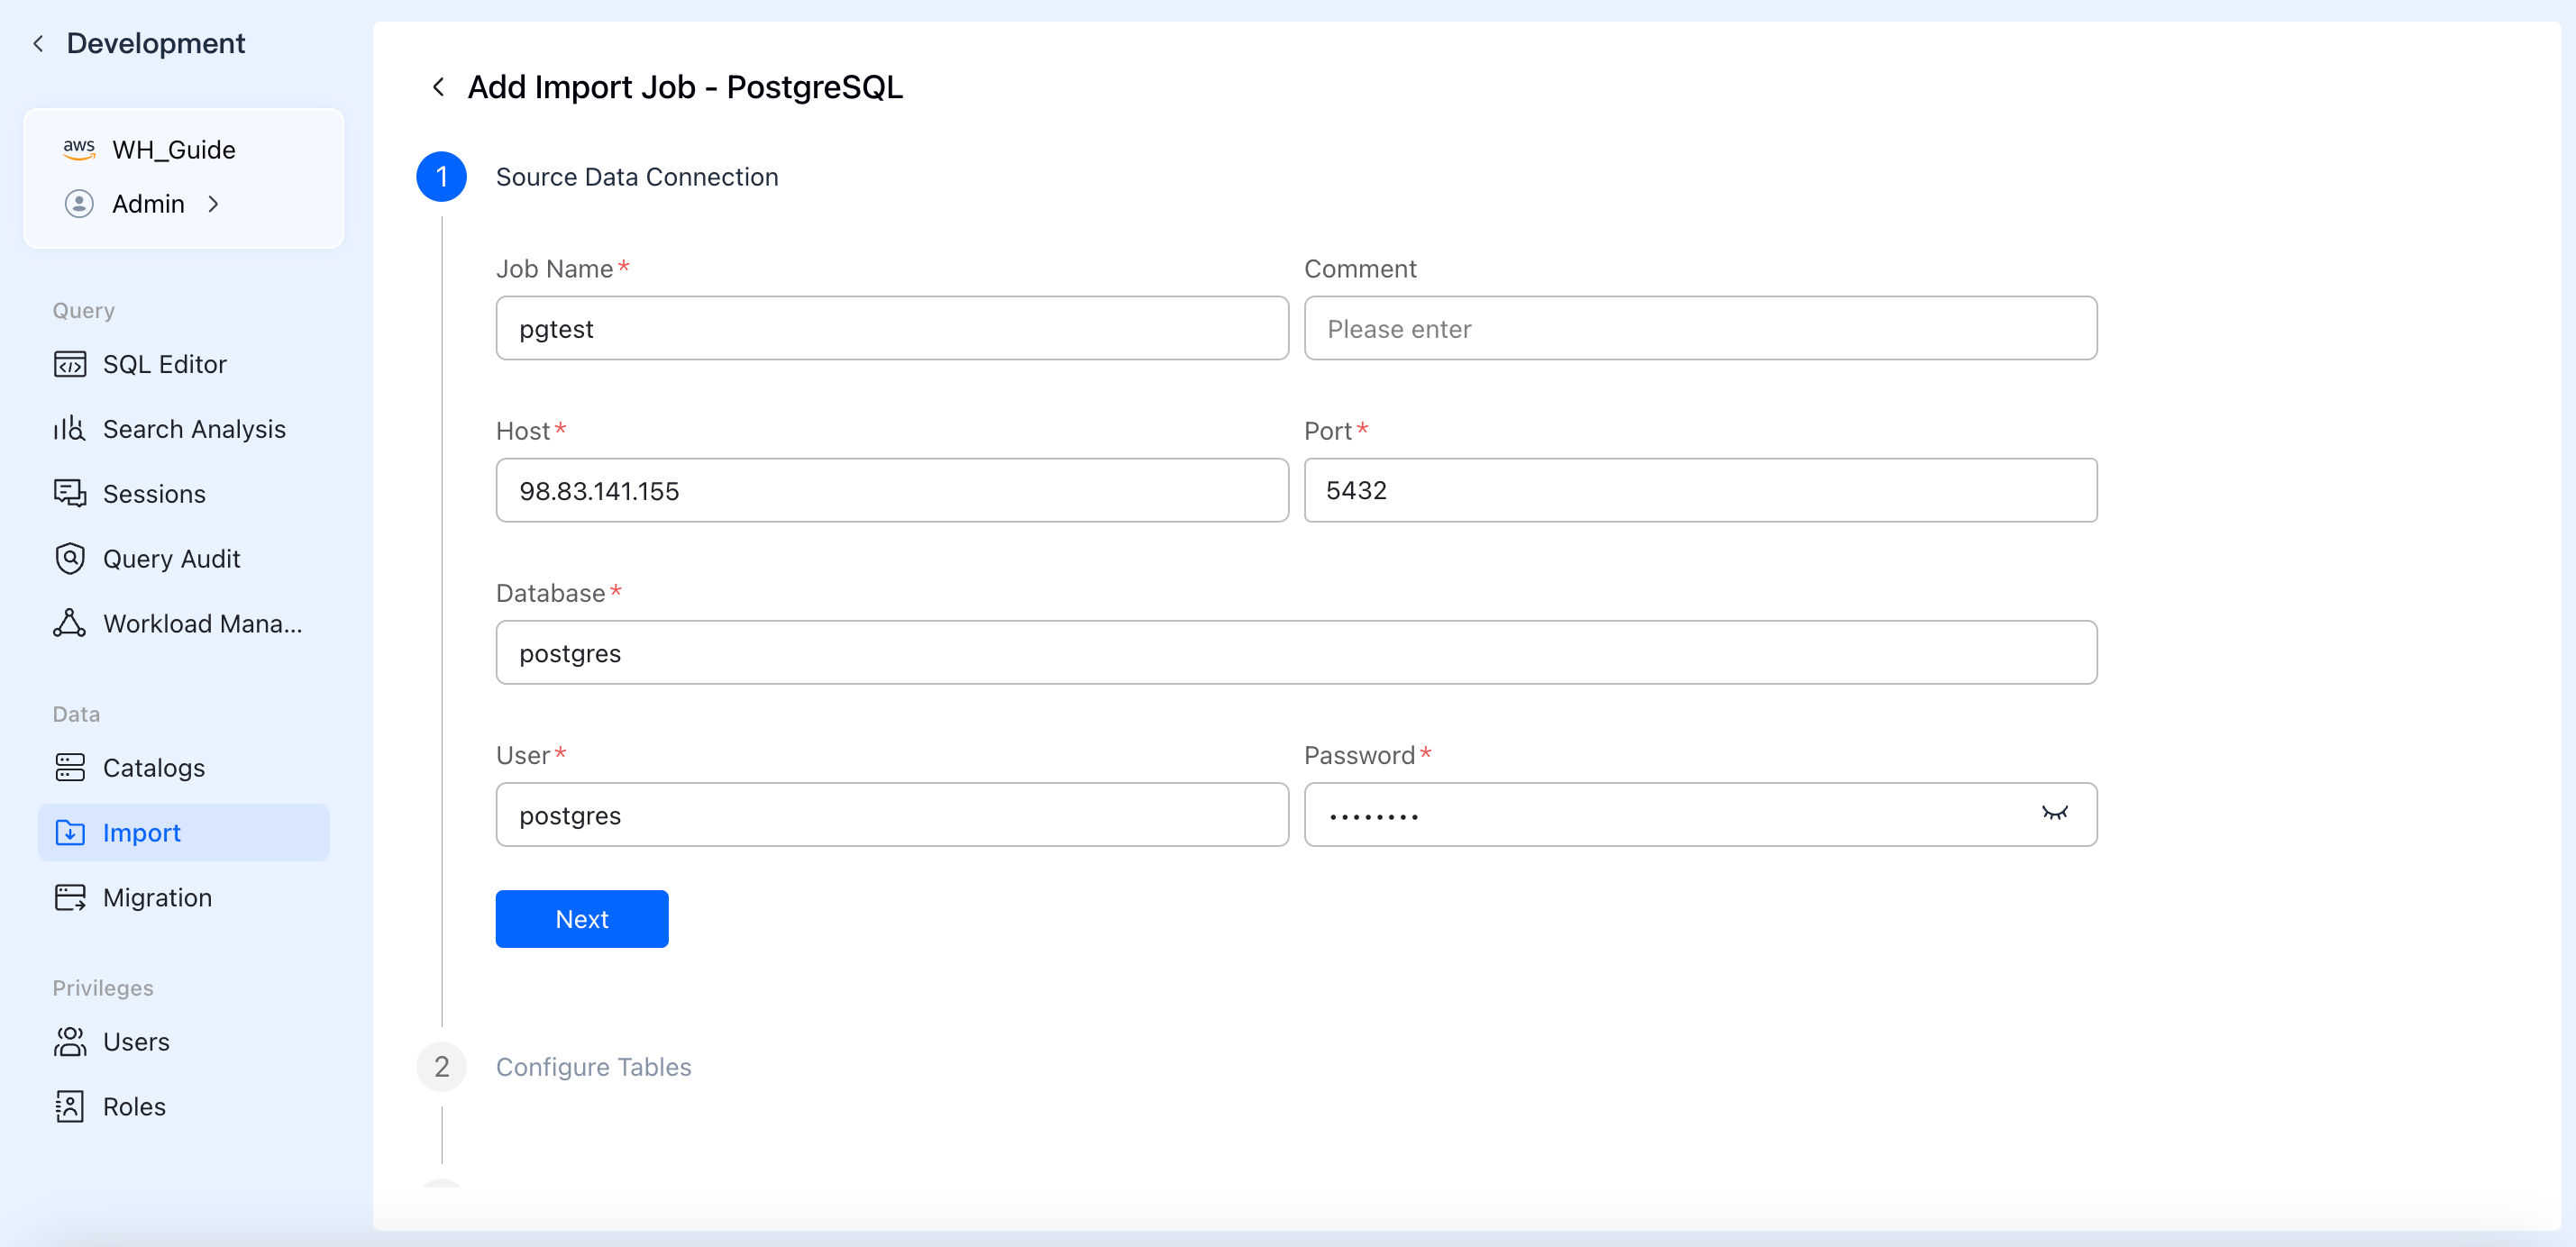
2. Configure Source Data Connection
Fill in the authentication details to establish a secure connection with your data source.
- Job Name: Specify a globally unique name for your import job for easy management and identification.
- Connection Credentials: Depending on the source, enter details such as Host, Port, Database Name, Username, Password, or AK/SK keys.
- Click Next. The system will automatically verify network connectivity and credential validity in the background.
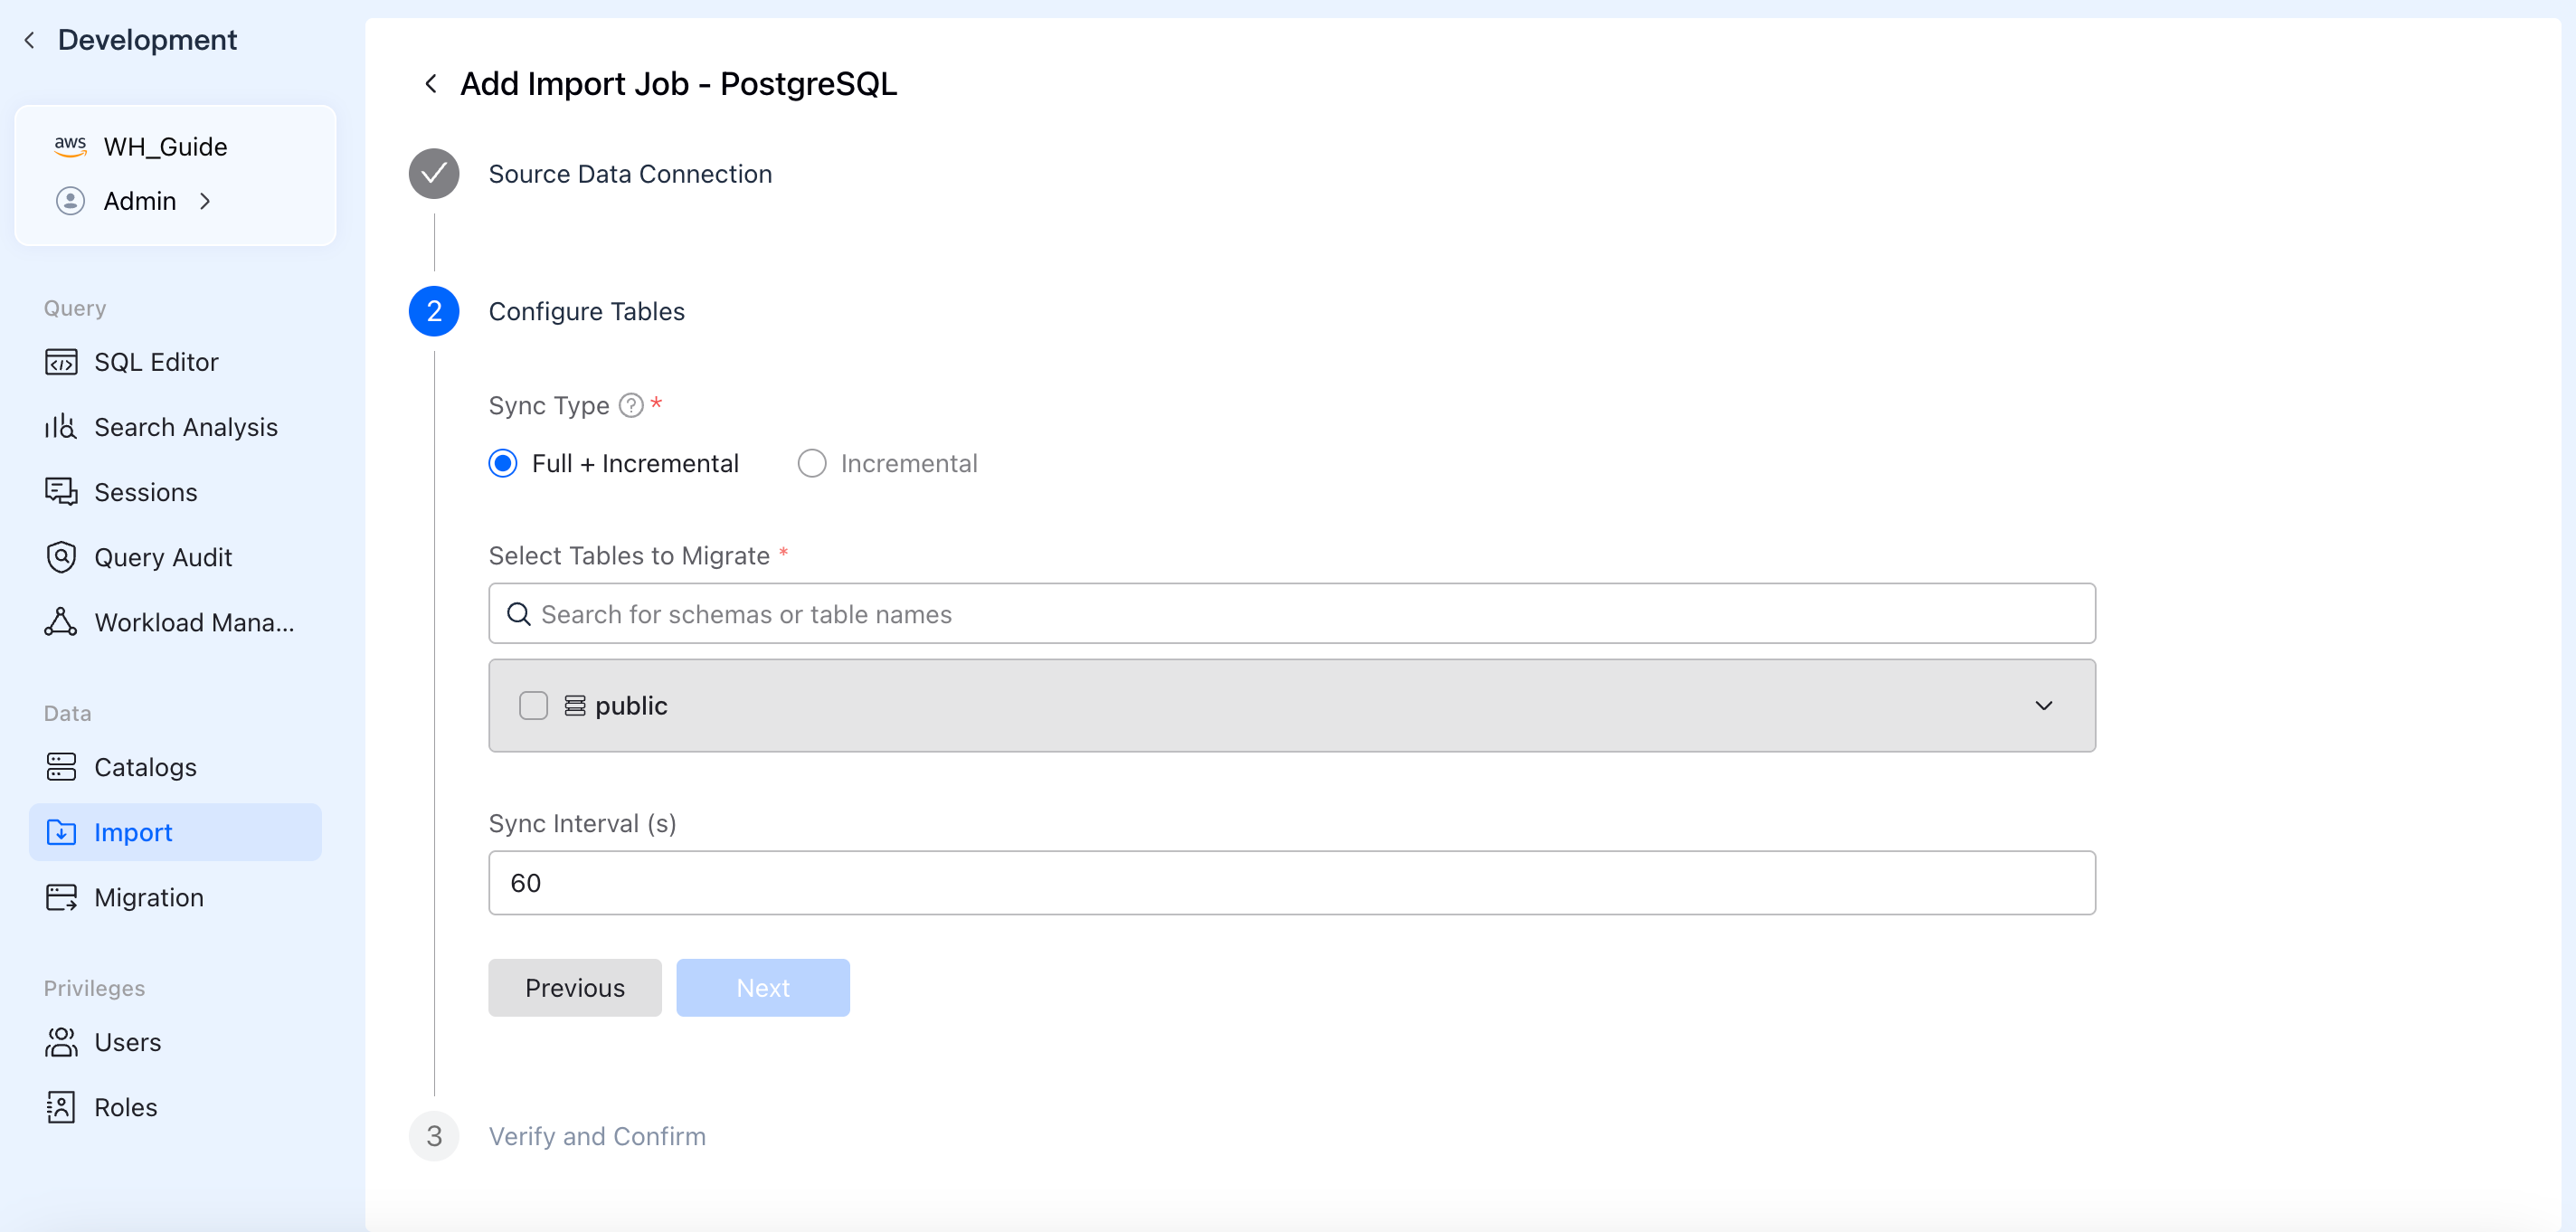
3. Configure Sync Scope (Tables / Topics)
Define what data to pull and how it should be written.
- Sync Type: Choose between Full + Incremental sync or Incremental only.
- Data Scope:
- For Databases: Select the schemas and tables to sync. You can expand tables to apply column-level filtering under
Column Settings. - For Event Streams: Specify the topics to consume and the starting offset.
- For Object Storage: Specify the bucket path and file matching patterns.
- For Databases: Select the schemas and tables to sync. You can expand tables to apply column-level filtering under
- Sync Interval: Set the frequency for data fetching (the default is typically 60 seconds).
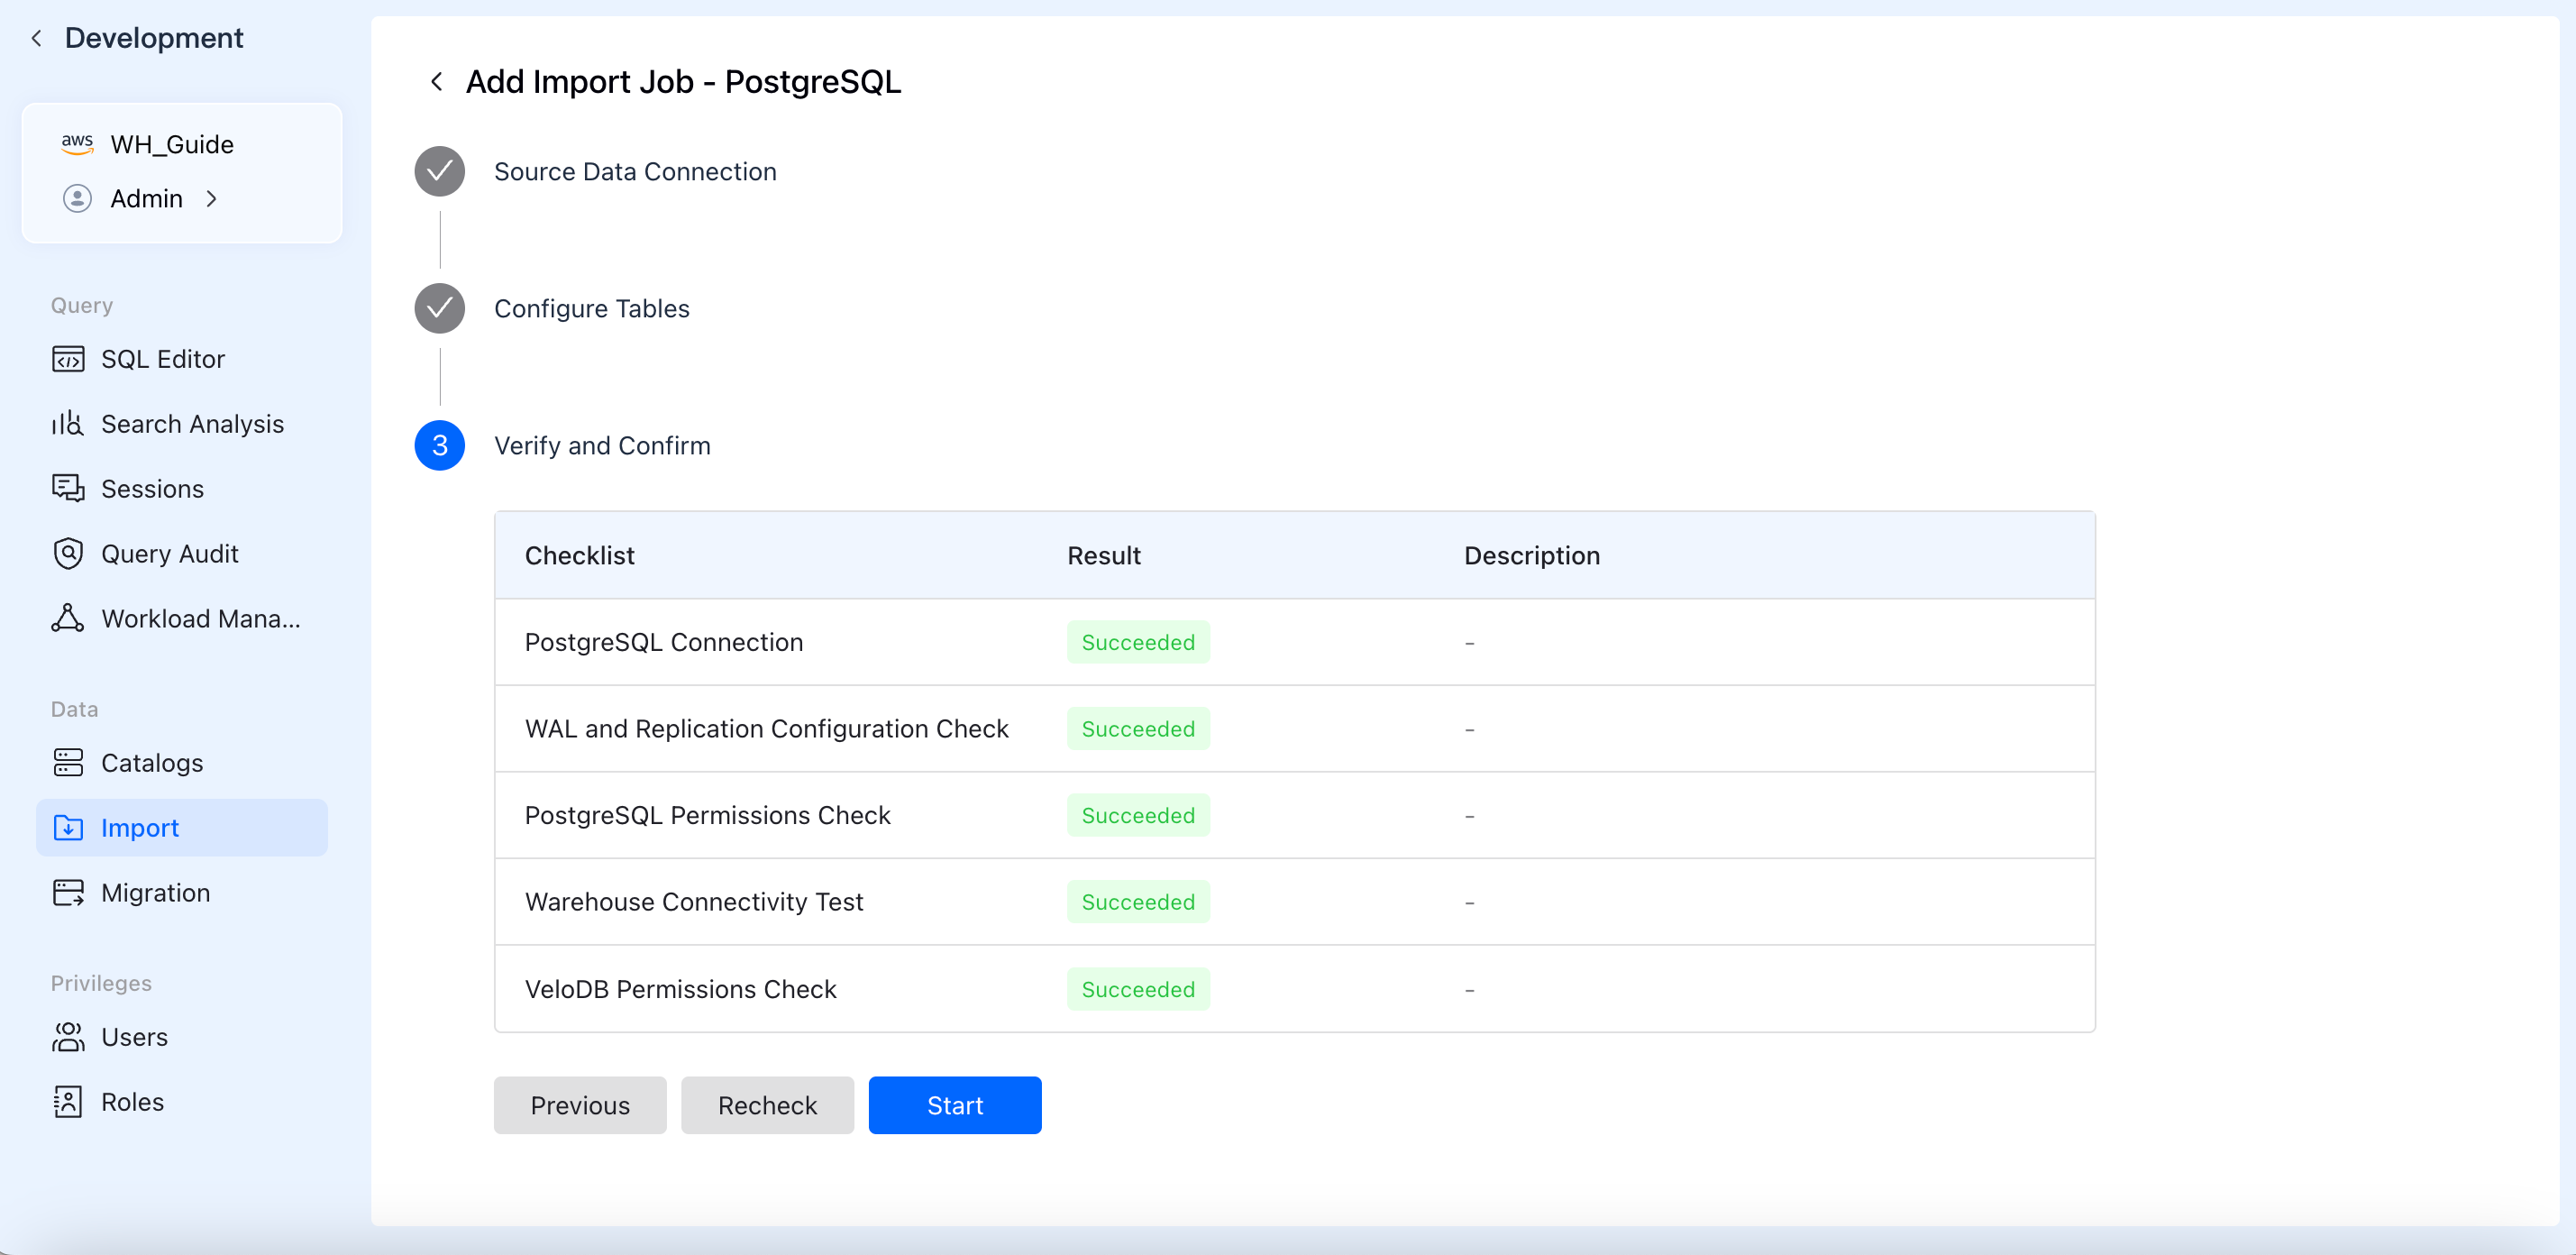
4. Verify and Confirm
To ensure the job runs successfully, the system automatically runs a pre-check Checklist.
- Checks typically include: network connectivity tests, source-side permission validation (e.g., WAL/Binlog permissions required for CDC), and target-side table creation/write permissions.
- Once all checklist items display a green Succeeded, click Start to officially launch the data import job.
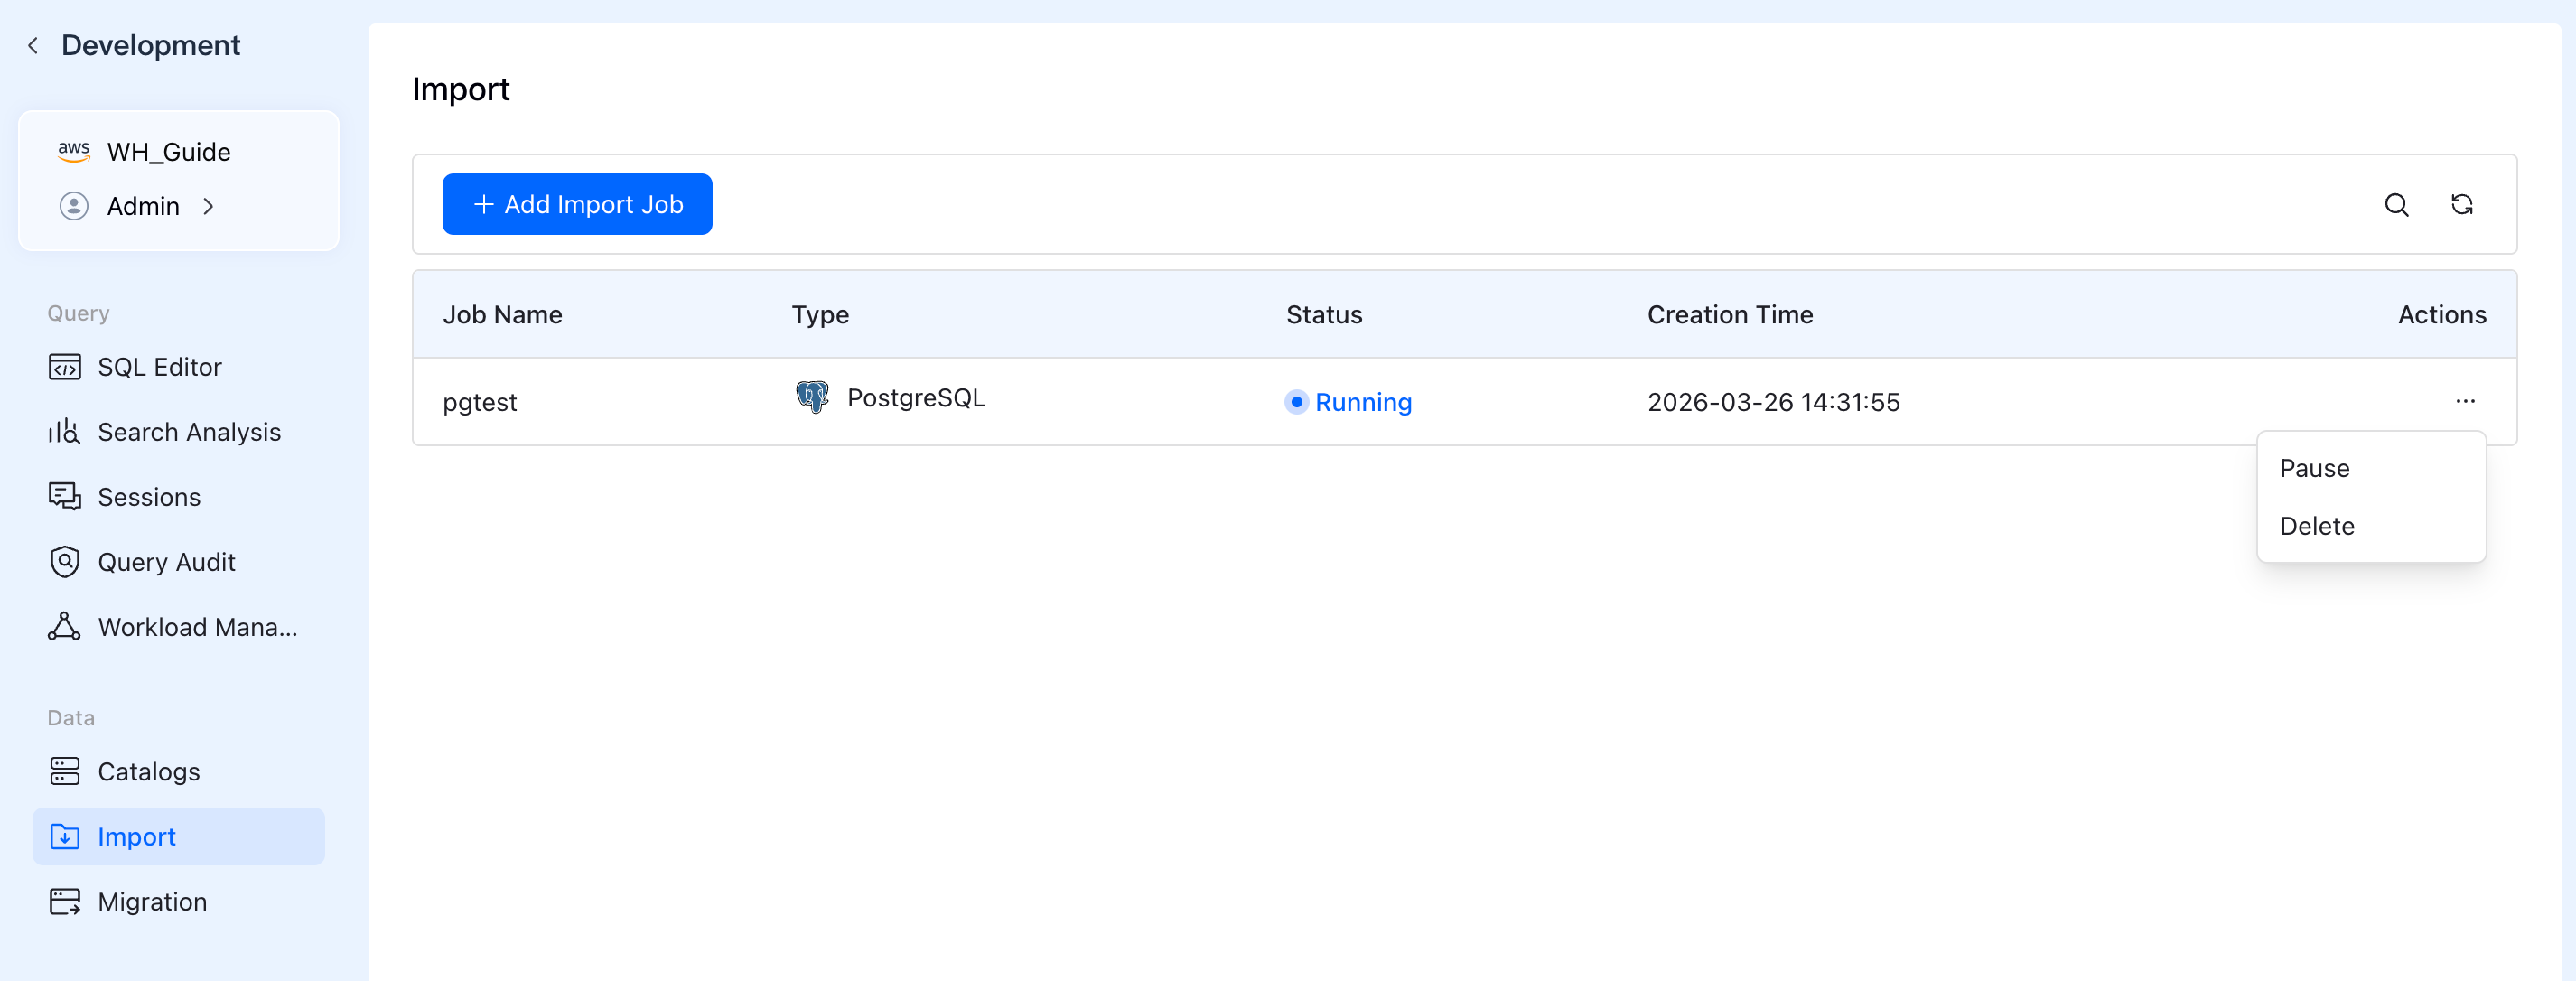
5. Manage and Monitor
After starting the job, you will be redirected back to the Import jobs list.
- View Status: Monitor the real-time
Status(e.g., *Running*, *Paused*, *Failed*) and creation time of your jobs. - Actions: Click the
...(Actions) menu next to a job to Pause, Resume, or Delete the import task as your business needs change.