Connect to AWS Glue Iceberg Catalog
This guide walks you through connecting VeloDB Cloud to an AWS Glue Iceberg catalog using the visual interface.
Prerequisites: Before proceeding, complete the AWS Setup Guide to create your S3 bucket, Glue database, and IAM user with proper permissions.
Step 1: Navigate to Catalogs
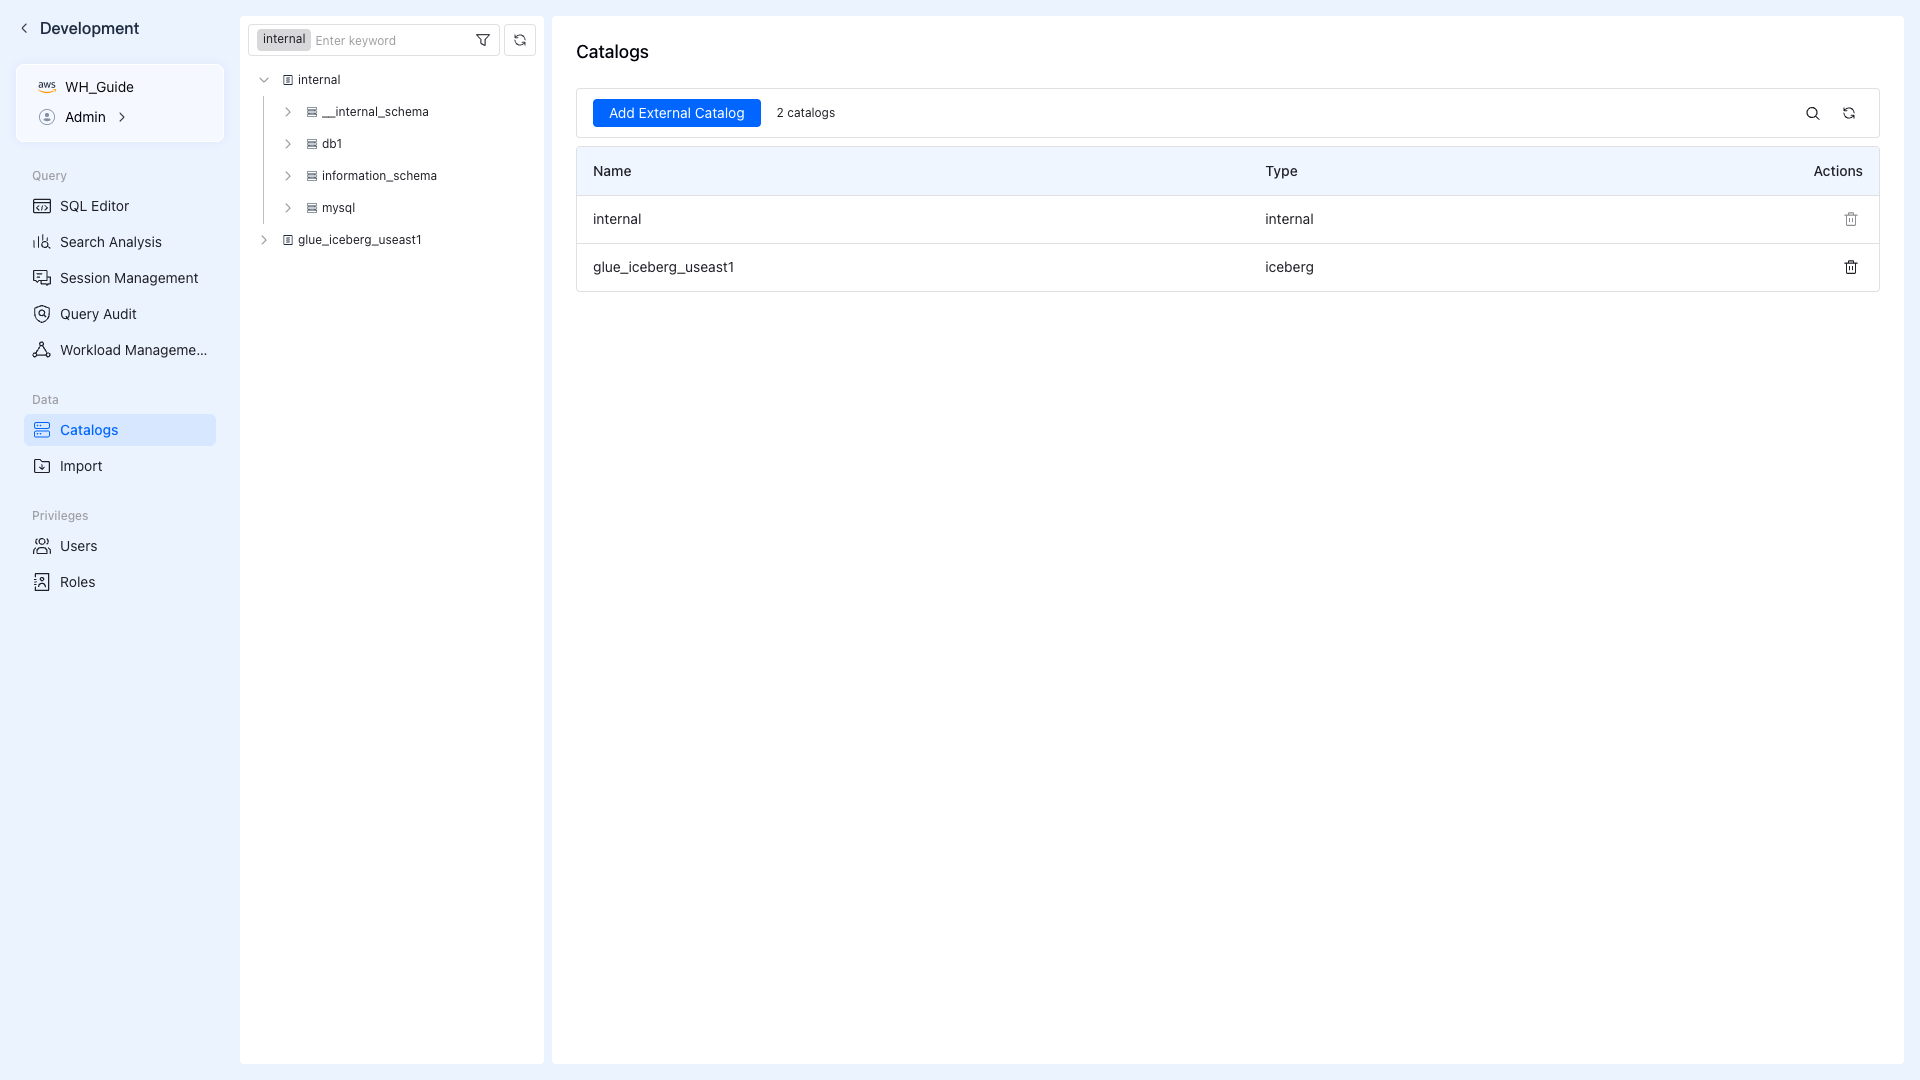
In your VeloDB warehouse, go to the left sidebar and find the Data section under Development, then click Catalogs.
You'll see the Catalogs page with the Add External Catalog button.
Step 2: Add External Catalog
Click Add External Catalog to view available catalog types.
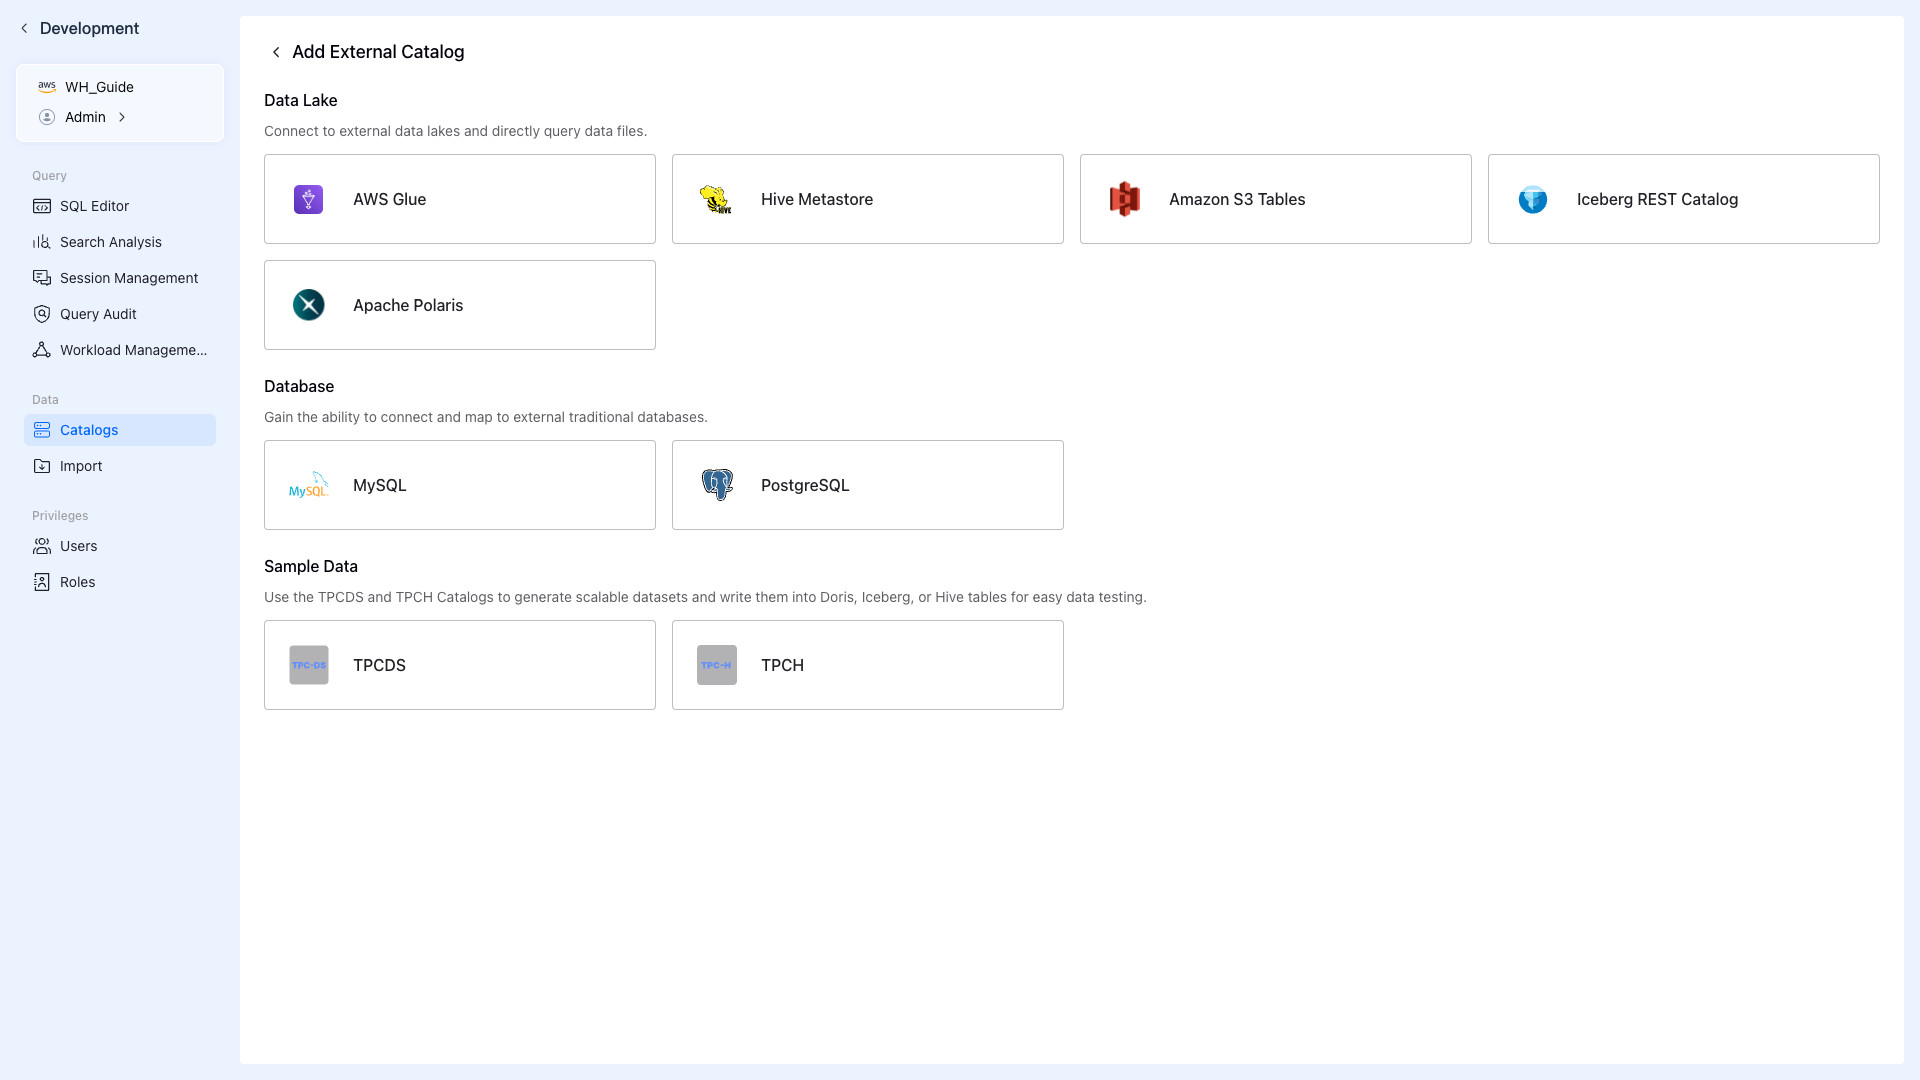
Available catalog types include:
- AWS Glue - For Glue-managed Iceberg/Hive tables
- Hive Metastore - For on-premise Hive
- Amazon S3 Tables - For S3-native tables
- Iceberg REST Catalog - For Polaris, Gravitino, Tabular
- Apache Polaris - For Polaris catalog
Step 3: Select AWS Glue
Click AWS Glue to open the configuration form.
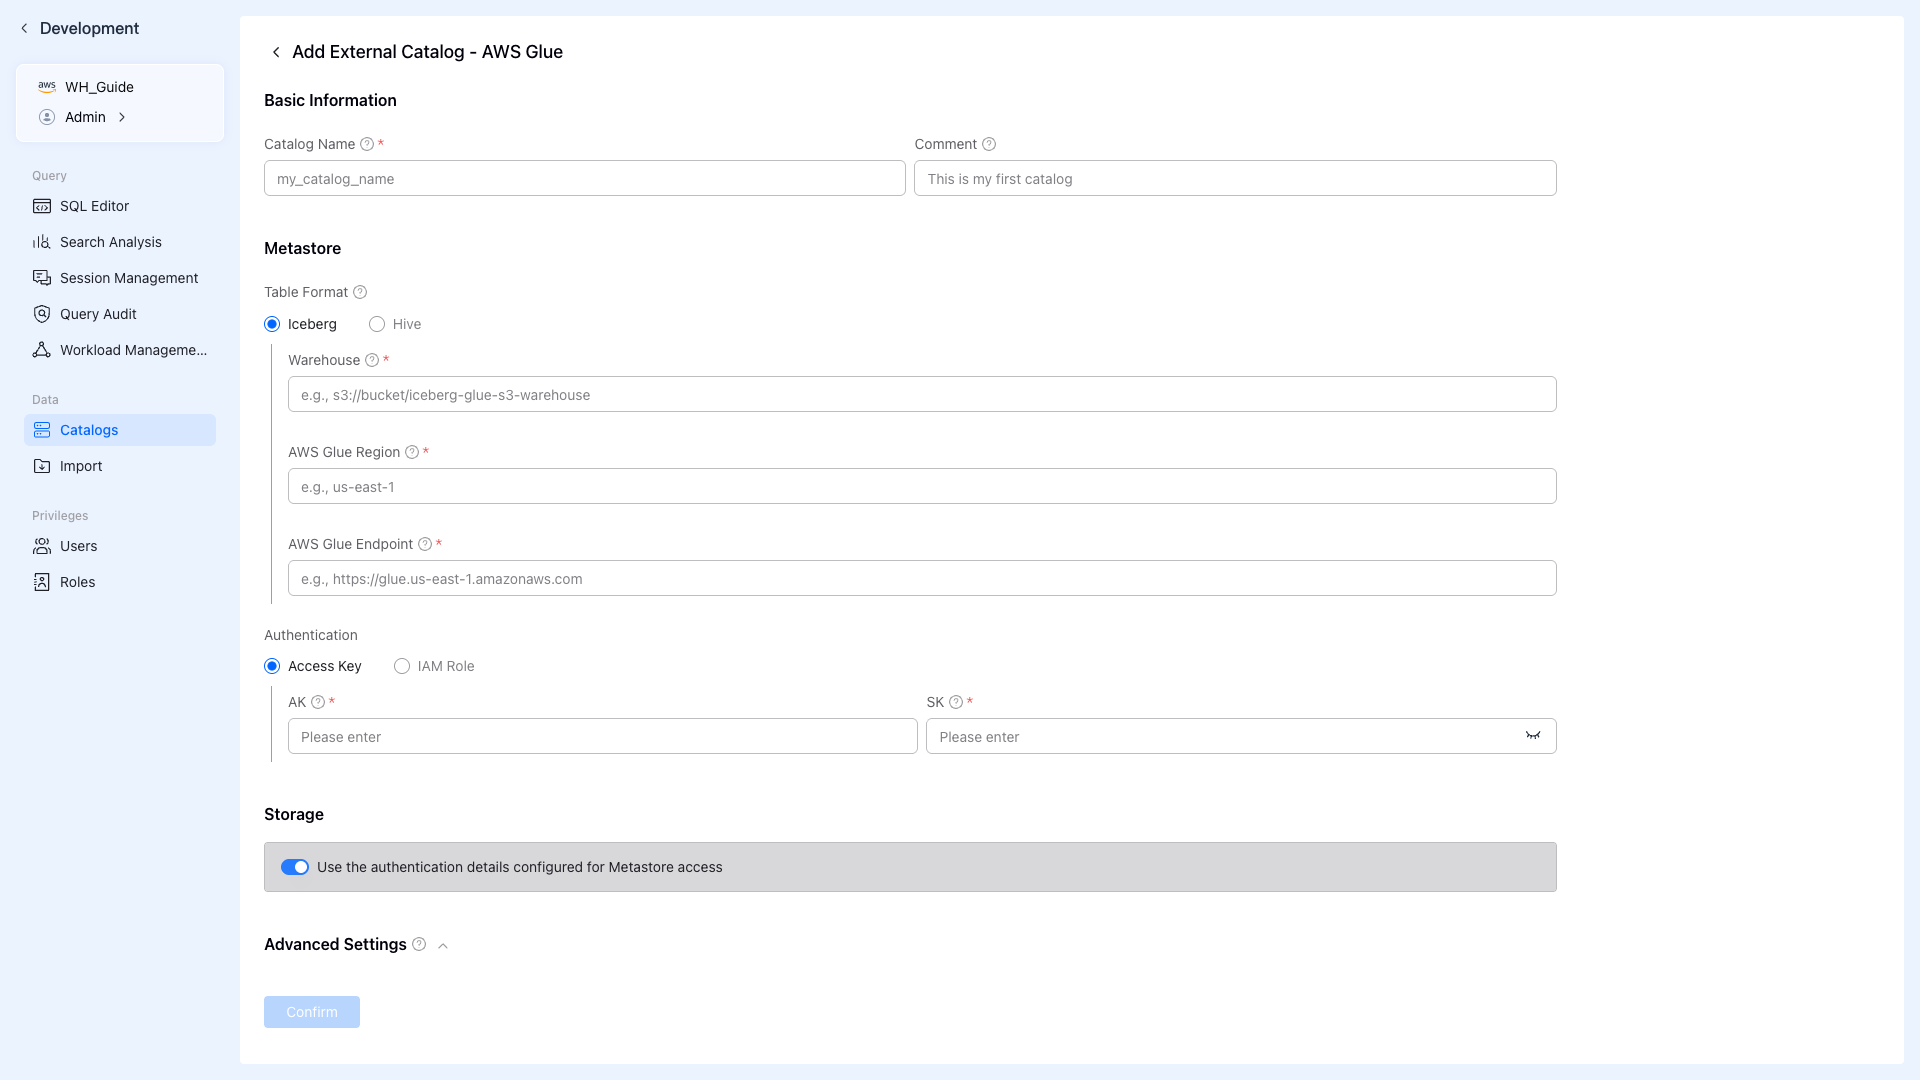
Step 4: Configure Catalog Settings
Fill in the form with values from AWS Setup Guide:
Basic Information
| Field | Description | Example |
|---|---|---|
| Catalog Name | Unique identifier for the catalog | glue_iceberg_useast1 |
| Comment | Optional description | AWS Glue Iceberg catalog |
Metastore Settings
| Field | Description | Example |
|---|---|---|
| Table Format | Select Iceberg or Hive | Iceberg |
| Warehouse | S3 path to Iceberg warehouse | s3://my-bucket/iceberg |
| AWS Glue Region | AWS region of your Glue catalog | us-east-1 |
| AWS Glue Endpoint | Glue API endpoint | https://glue.us-east-1.amazonaws.com |
Authentication
| Field | Description |
|---|---|
| Authentication Type | Access Key or IAM Role |
| AK (Access Key) | Your AWS Access Key ID |
| SK (Secret Key) | Your AWS Secret Access Key |
Storage
Leave "Use the authentication details configured for Metastore access" checked to use the same credentials for S3 access.
Enter your actual AWS credentials from AWS Setup Guide in the AK and SK fields.
Step 5: Create Catalog
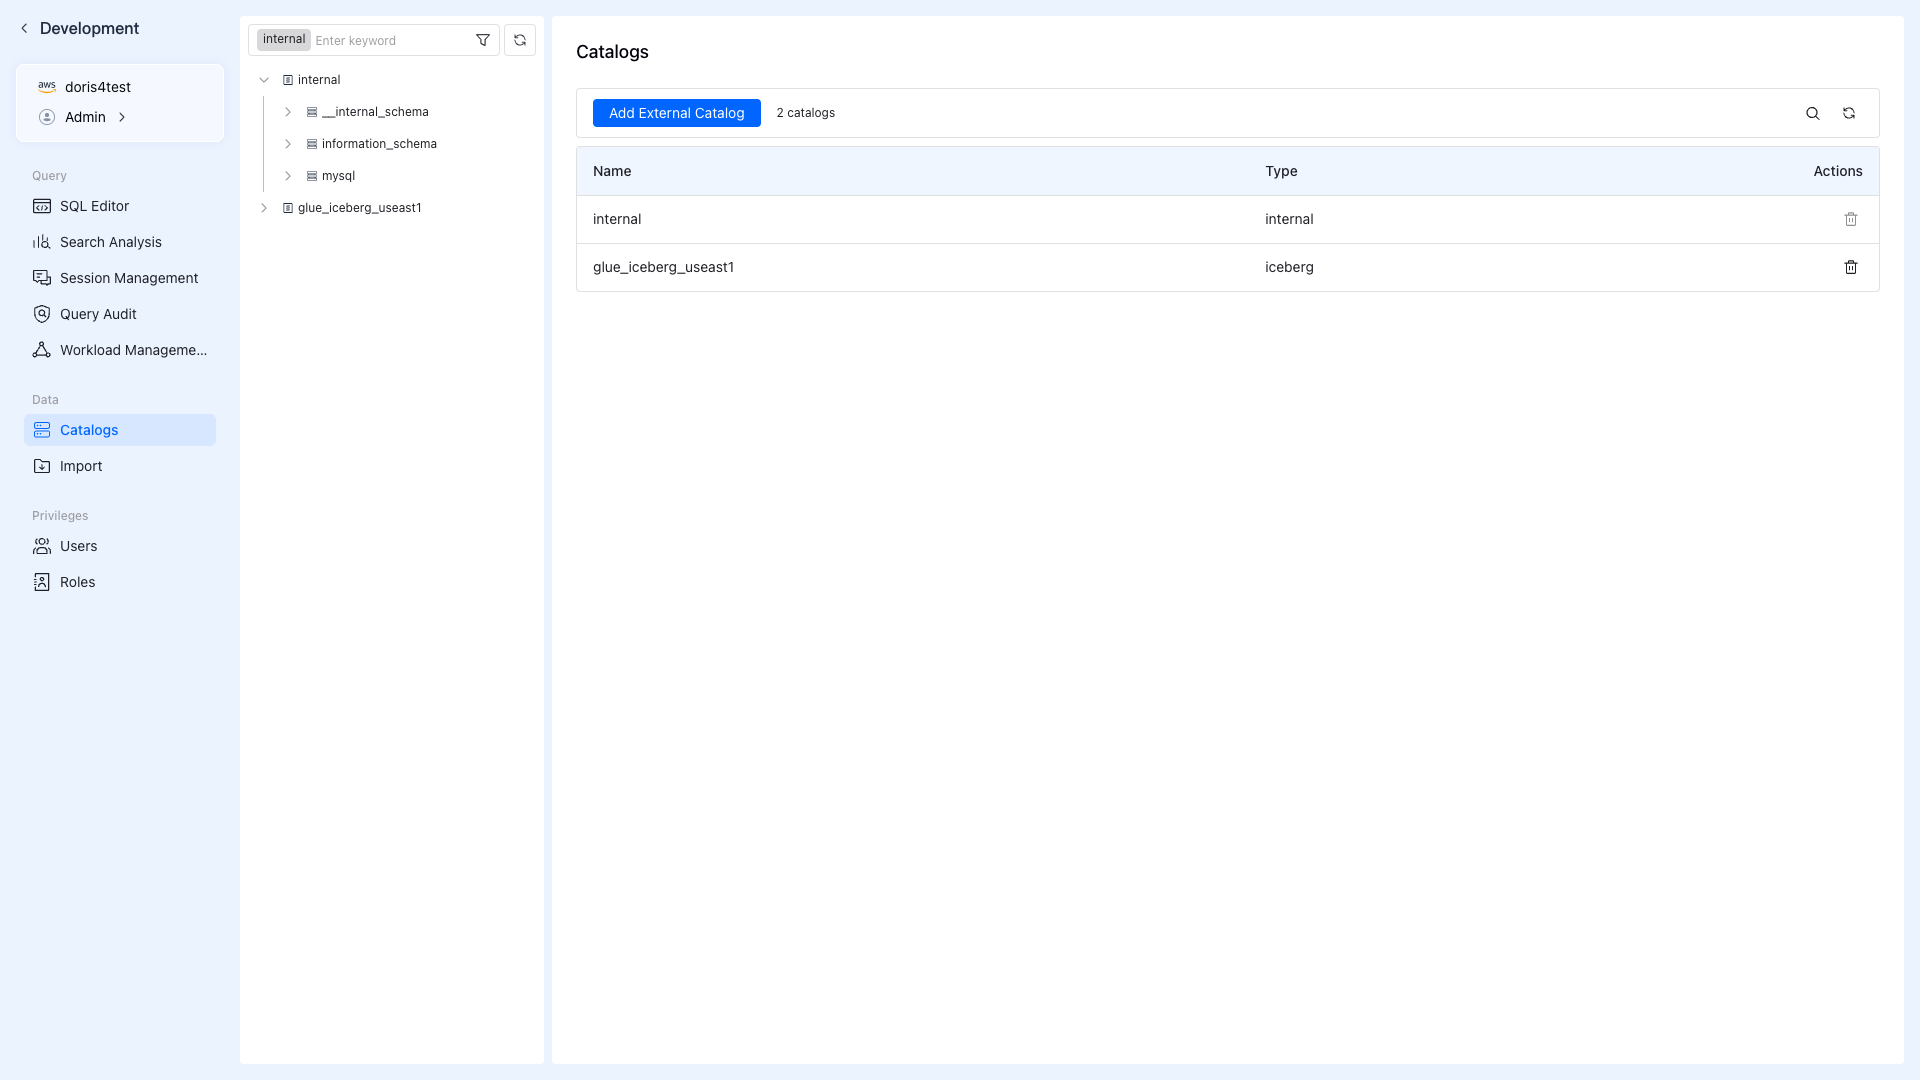
Click Confirm to create the catalog.
VeloDB will validate the connection to AWS Glue. If successful, you'll see a success notification and the catalog will appear in the list.
Step 6: Verify with SQL
Navigate to Query > SQL Editor in the left sidebar to test your catalog connection. Run these queries to verify your setup (replace your_catalog_name and your_database with your actual names):
List All Catalogs
SHOW CATALOGS;
Expected output: You should see your new Glue catalog in the list.
List Databases in Your Catalog
-- Replace 'your_catalog_name' with your catalog name (e.g., glue_iceberg_useast1)
SHOW DATABASES FROM your_catalog_name;
List Tables in a Database
-- Replace with your catalog and database names
SHOW TABLES FROM your_catalog_name.your_database;
Query Data from an Iceberg Table
-- Example: Query the sample table created in Setup Step 5
SELECT * FROM your_catalog_name.your_database.your_table LIMIT 10;
If tables don't appear after data updated externally, run REFRESH CATALOG your_catalog_name; to clear the metadata cache.
Troubleshooting
| Issue | Solution |
|---|---|
| "Cannot convert namespace to Glue database name" | Database name contains hyphens. Use underscores only. |
| "Lake Formation permission denied" | Grant Lake Formation permissions via AWS CLI. See AWS Setup Guide. |
| "Connection timeout" | Ensure VeloDB warehouse and AWS Glue are in the same region. |
| "Table does not exist" after data updated externally | Run REFRESH CATALOG catalog_name; to clear metadata cache. |