Access VeloDB Cloud from Your VPC on AWS
Before you begin, read Access VeloDB Cloud from your VPC for the connection direction, ownership model, and network-control scope. This procedure applies to SaaS warehouses and uses AWS PrivateLink to create an interface endpoint in your virtual private cloud (VPC).
Make sure that you can create VPC endpoints, select subnets and security groups, and configure private DNS in the AWS account that contains the client applications.
-
Log in to the VeloDB Cloud console. In the upper-left corner, select the warehouse that you want to use, then click Connect in the left navigation pane. Select Private Endpoint > Access VeloDB from Your VPC, and then click Set up Connection.
-
Click Set up one or more endpoints to open the AWS VPC console and create an endpoint.
-
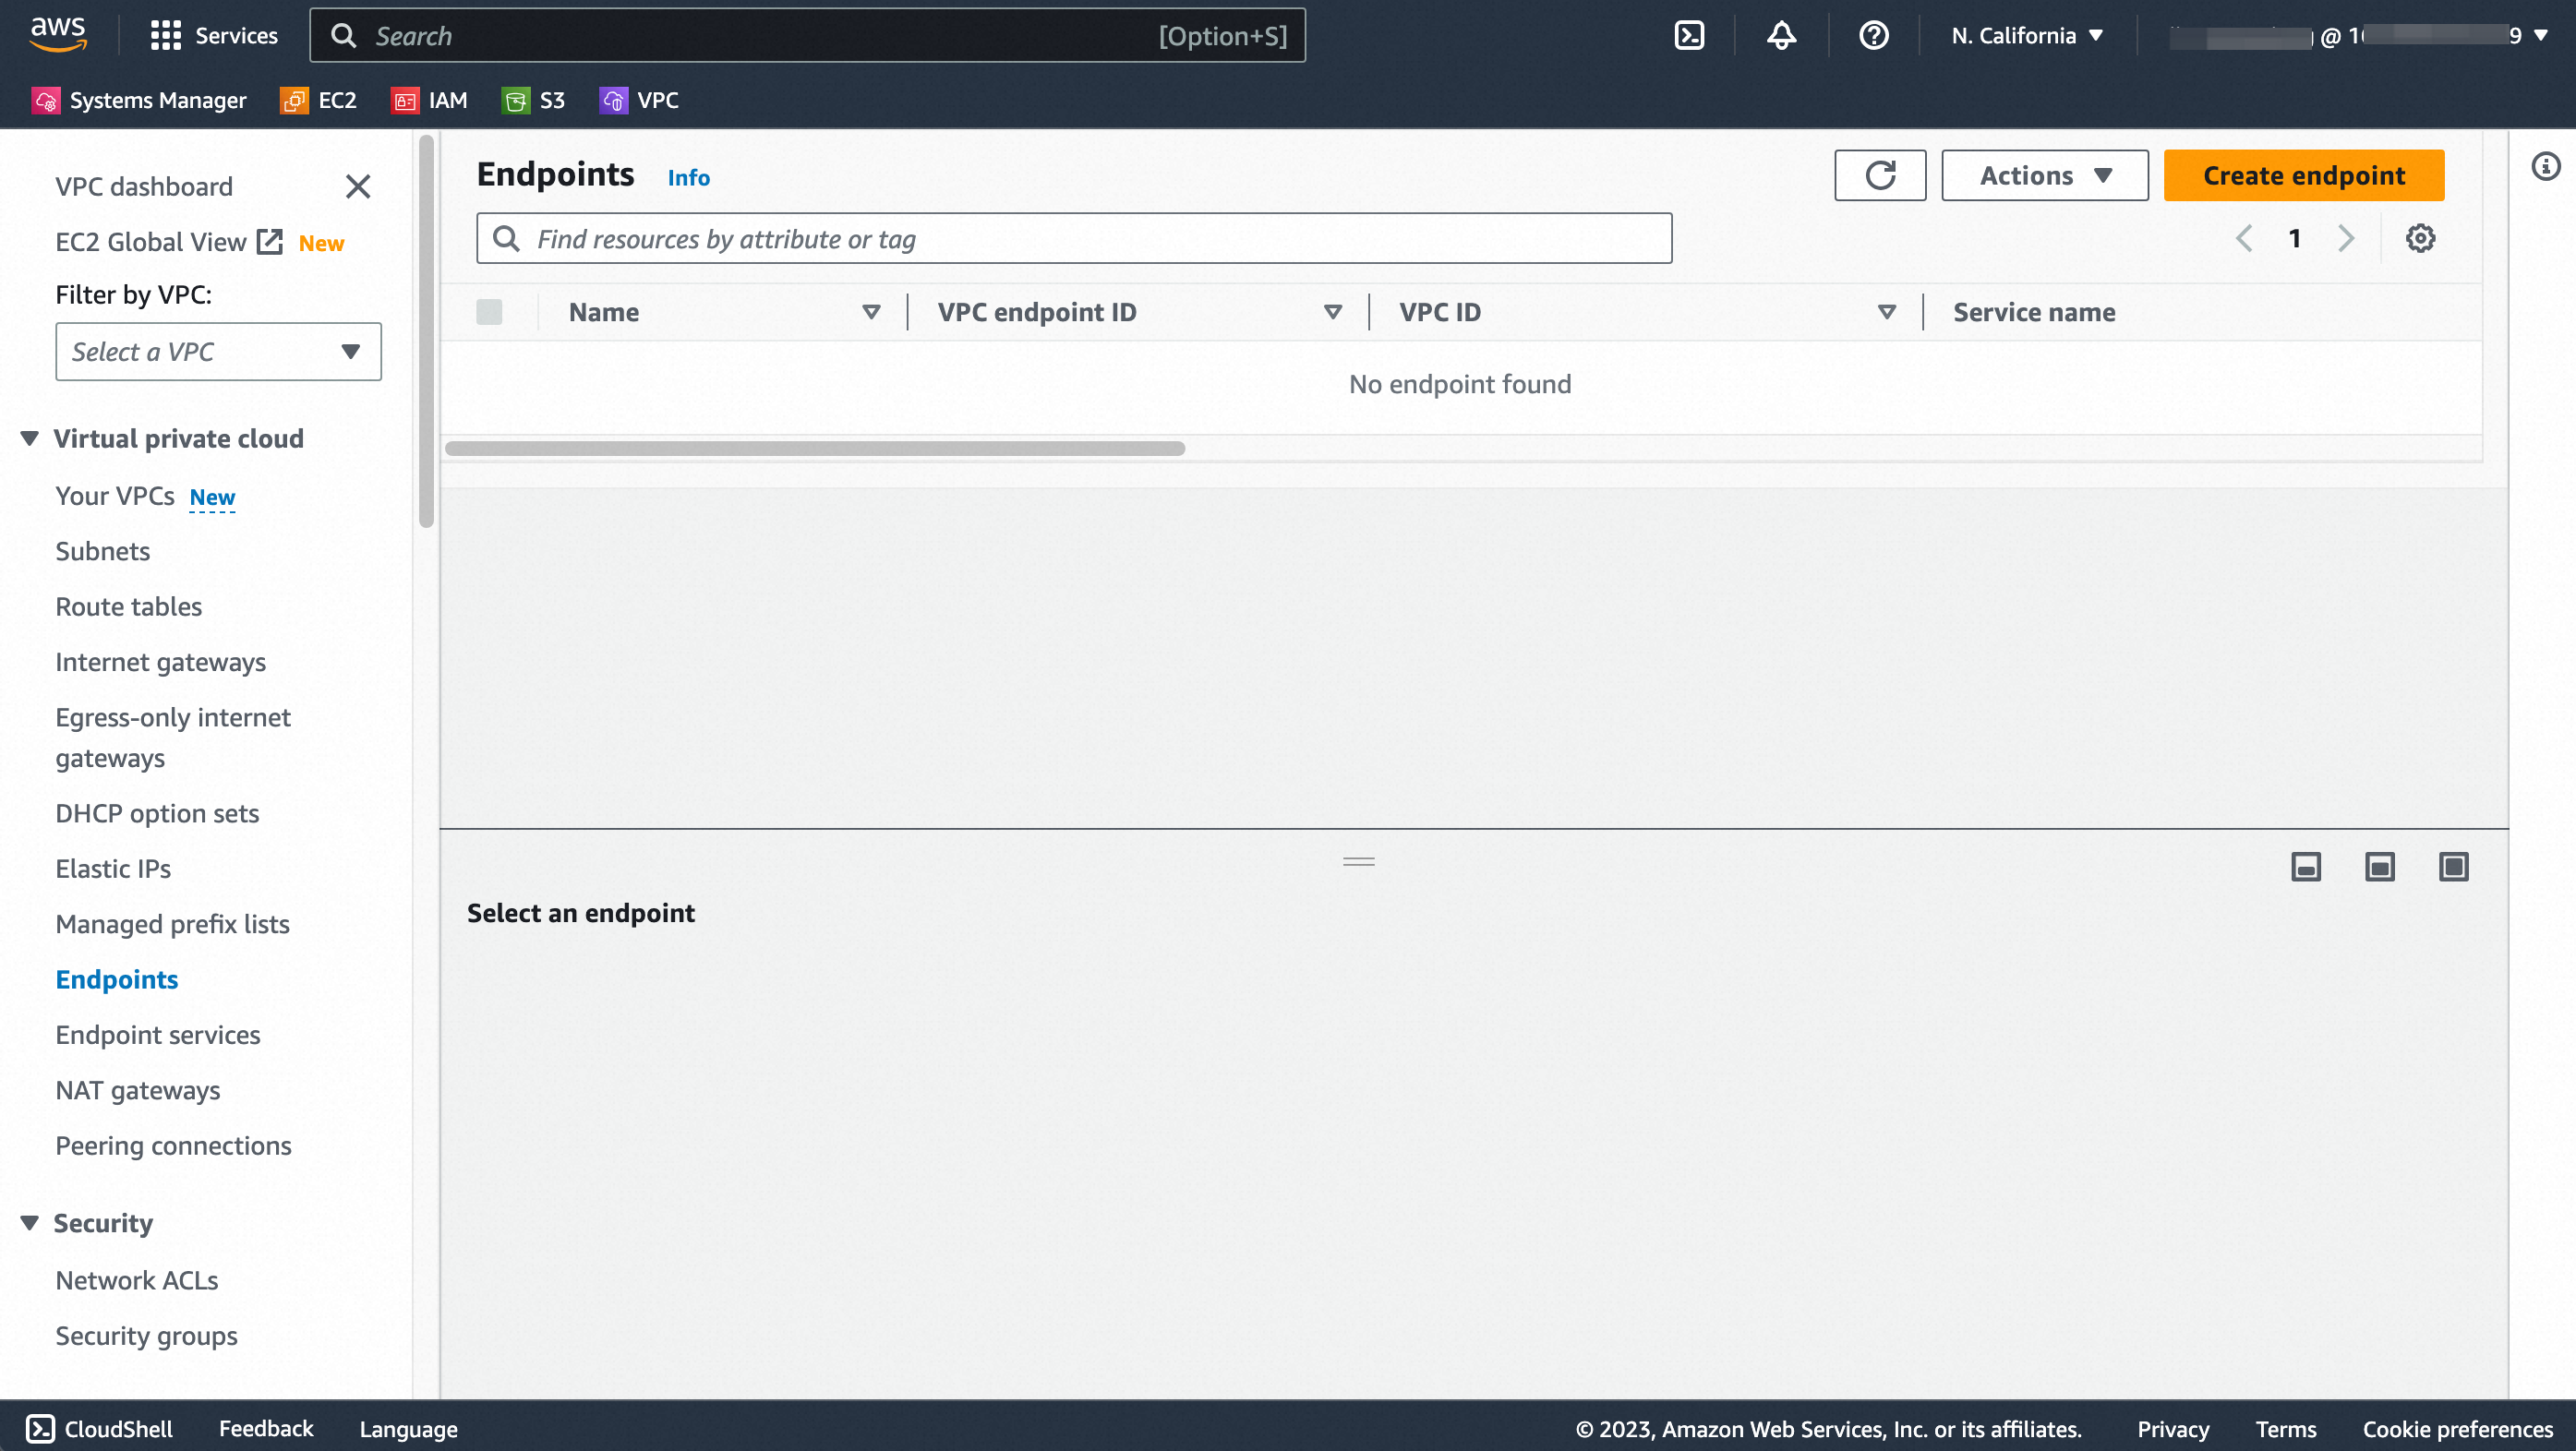
In the AWS VPC console, switch to the AWS Region that matches the warehouse region. AWS PrivateLink is region-scoped. On Endpoints, click Create endpoint to open the form.
Note:
Log in to AWS with a principal that is allowed to access the VeloDB Cloud endpoint service. Otherwise, service-name verification fails.
-
Fill in the endpoint form:
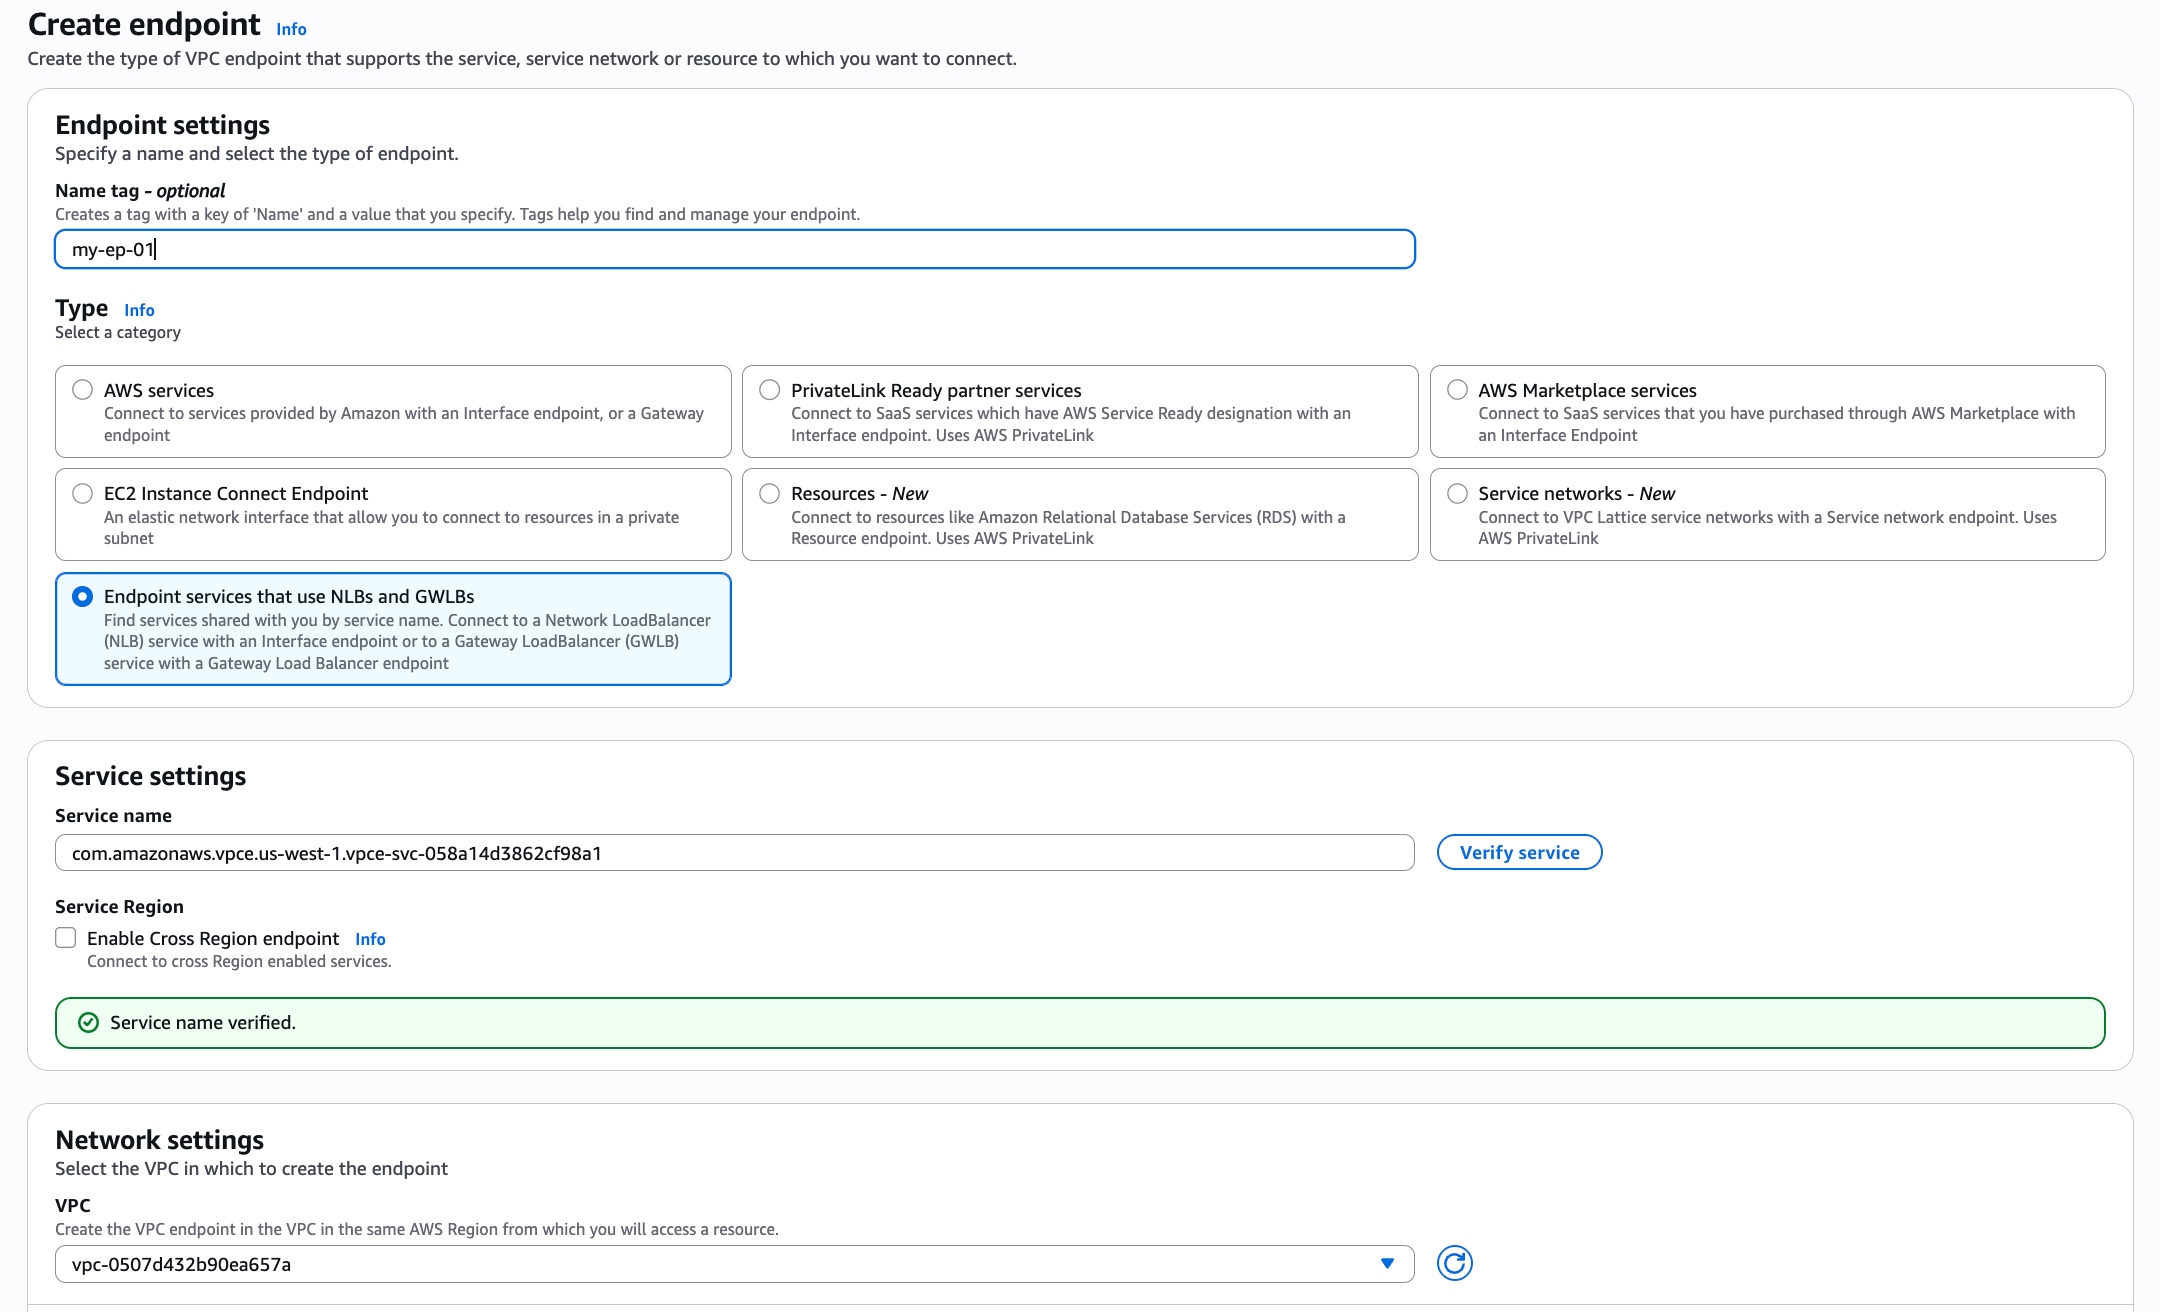
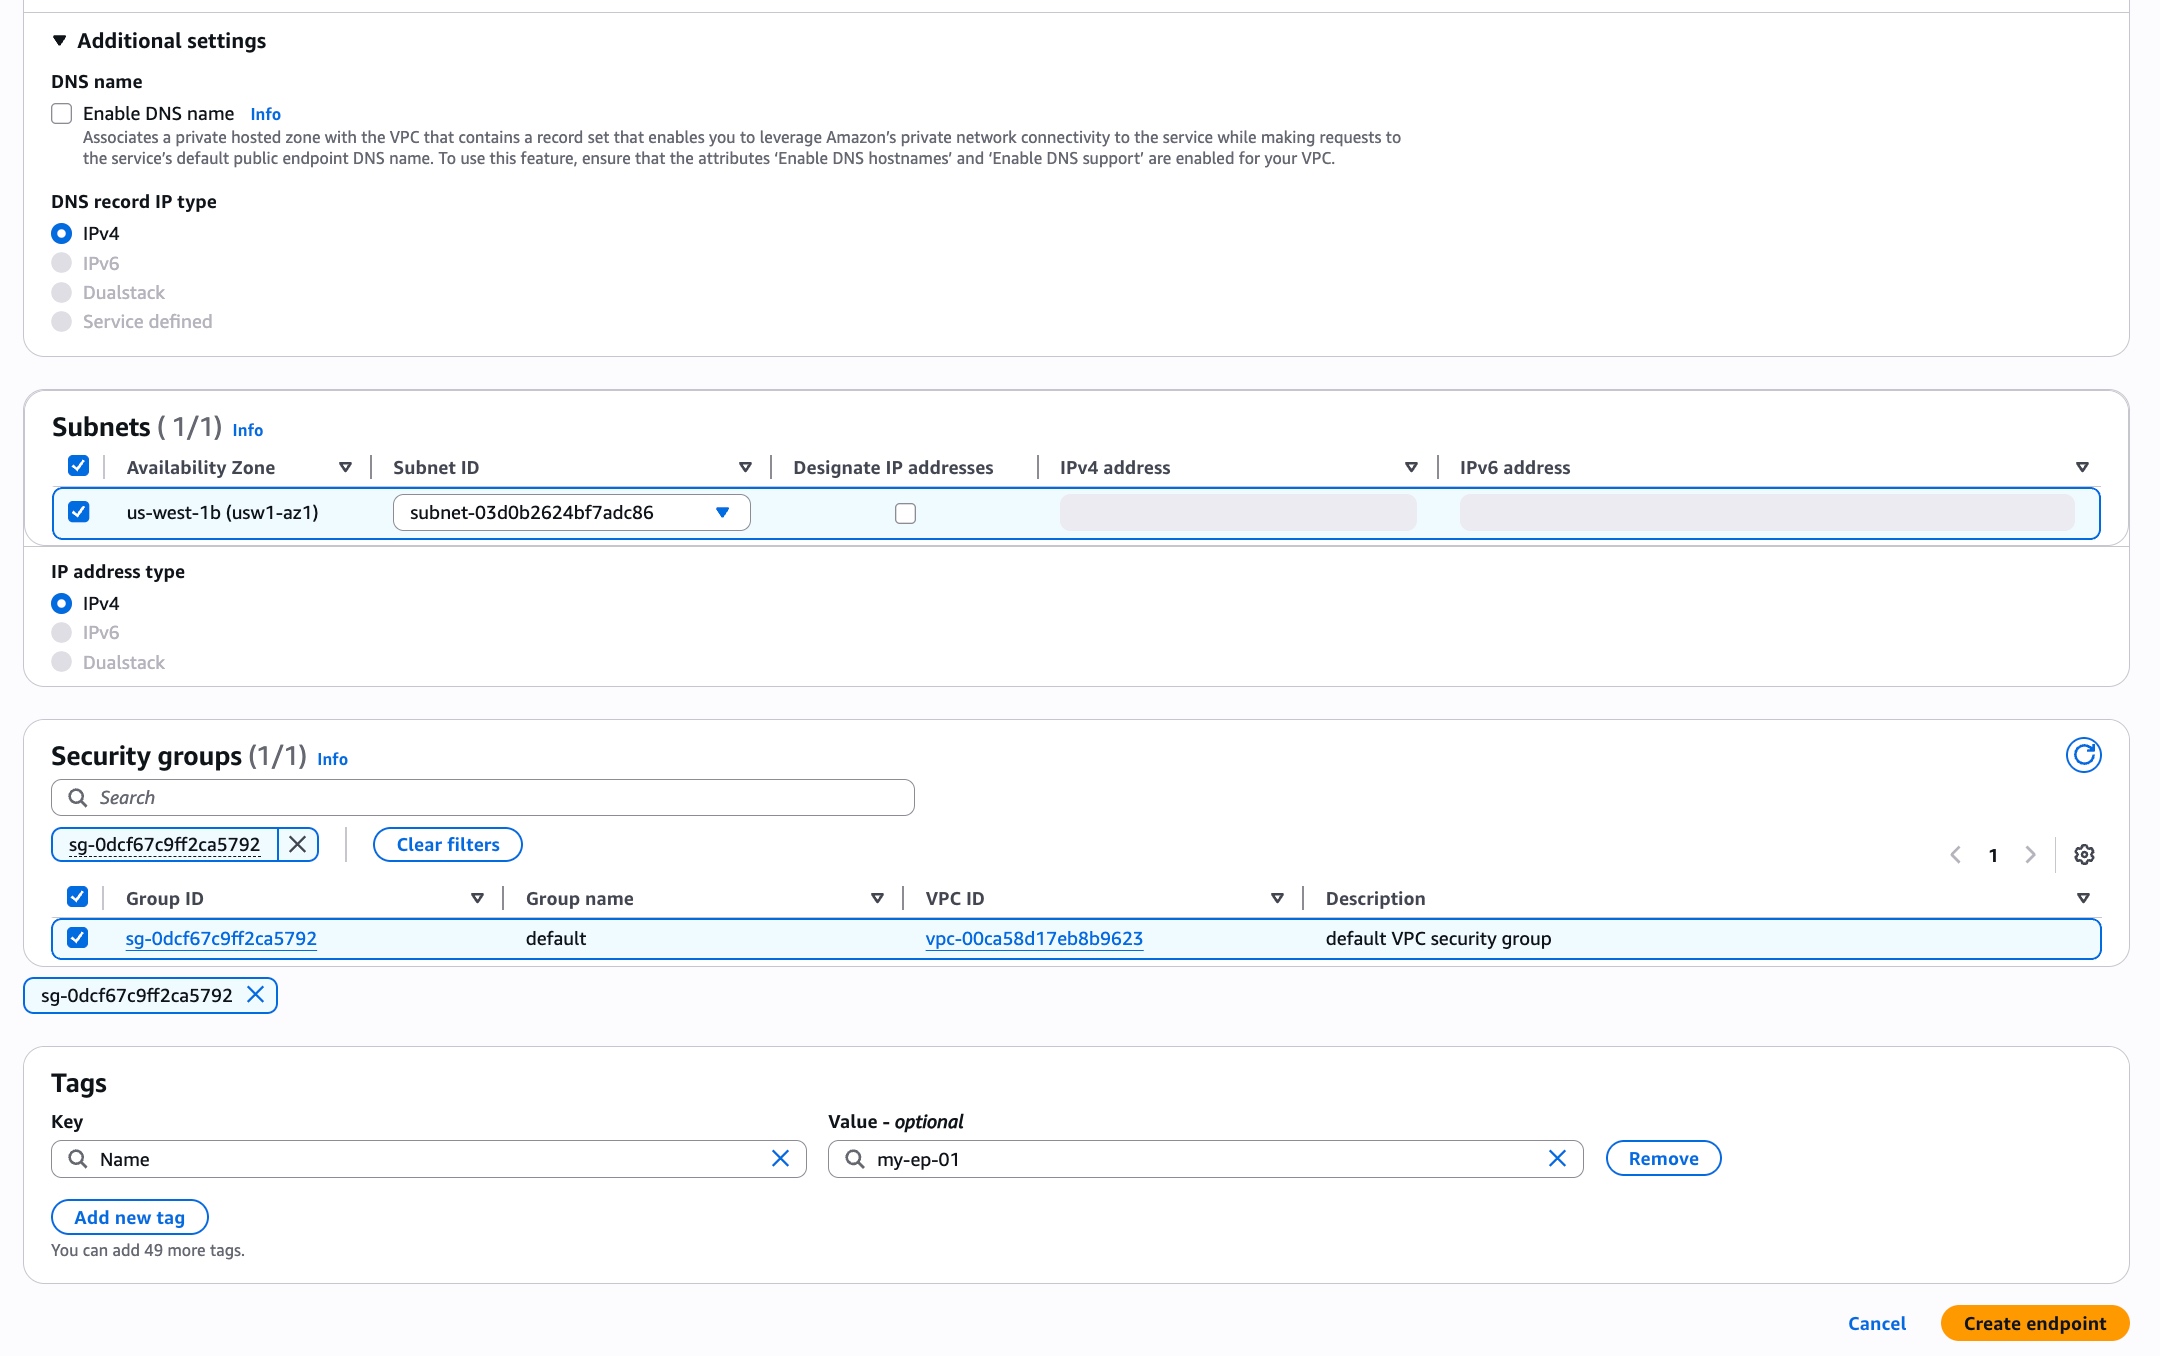
Parameter Description Name tag Optional. Tag with key Nameand a value of your choice.Service category Required. Select Endpoint services that use NLBs and GWLBs. Service name Required. Copy the Endpoint Service Name from the Supporting Information section of the VeloDB Cloud console, paste it here, and click Verify service. VPC Required. The VPC to create the endpoint in. Subnets Required. Select one or more suitable subnets in Availability Zones supported by the VeloDB Cloud endpoint service. Security groups Required. The rules must allow the protocol and port used by the warehouse and the source IP of your application. Tags Optional. After completing the form, click Create endpoint to submit it.
-
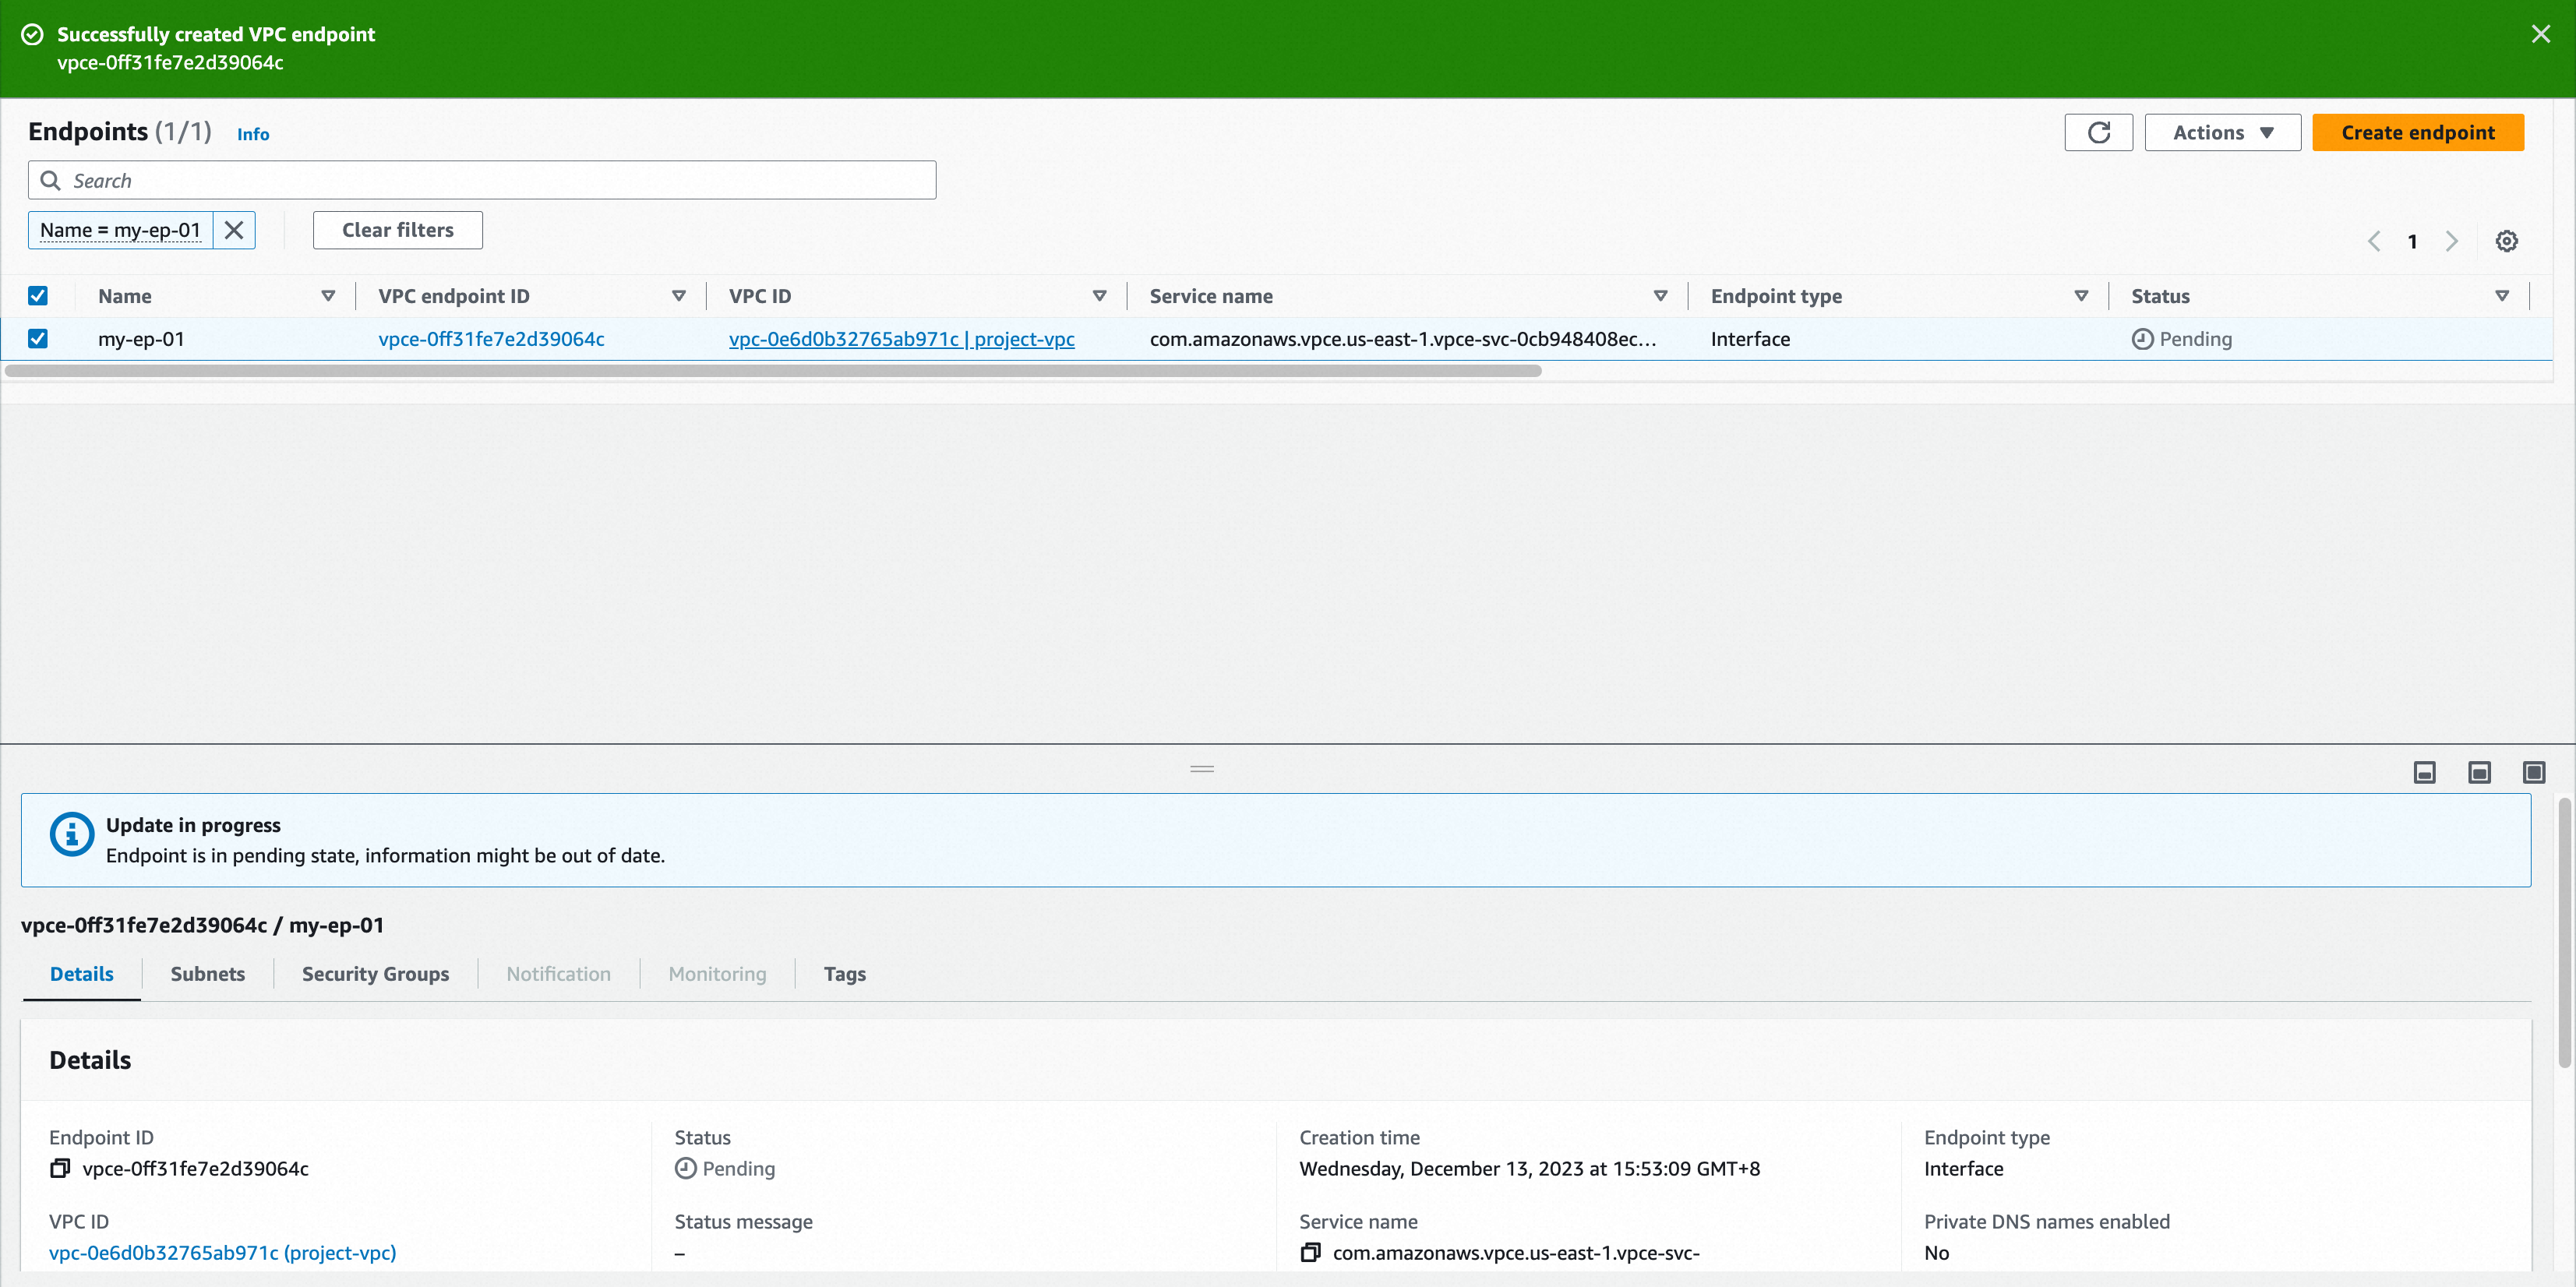
Wait for the endpoint status to change from Pending to Available. If the endpoint service requires approval, it remains pending until VeloDB Cloud accepts the connection. The connection is ready only after the status is Available.
-
Return to VeloDB Cloud. If the Set up Connection dialog is closed, open Connect > Private Endpoint > Access VeloDB from Your VPC, and then click Set up Connection. Under Endpoint Information, enter the Endpoint ID. Optionally enter a Description, and then click Save.
-
Refresh the page, then open Connect > Private Endpoint > Access VeloDB from Your VPC. Locate the row by its Endpoint ID, and verify the Endpoint DNS Name.
-
In the endpoint row, select the connection option for your client, and then copy the connection details from the dialog.
- Configure your client with the copied connection details.
After the endpoint is ready, use Connection Methods to connect an application.