Grant VeloDB Cloud Access to Your VPC on Azure
Use this guide when a software as a service (SaaS) warehouse needs to access a private data source in your Azure virtual network (VNet), such as a database used for an import or integration job.
Before you begin, read Grant VeloDB Cloud access to your VPC for the connection direction, ownership model, and network-control scope.
The Azure resources in this procedure have the following roles:
- You create and own the Private Link Service, which is backed by a load balancer and forwards traffic to your private data source.
- VeloDB Cloud creates and manages the private endpoint that connects to your Private Link Service.
Prerequisites
- The private data source is reachable from the VNet and subnet used by the load balancer.
- You have permission to create or manage the load balancer, frontend IP address, Private Link Service, network security rules, and routes in Azure.
- The Azure region of the Private Link Service matches the VeloDB Cloud warehouse region.
- You know the data-source port and have the VeloDB Cloud subscription ID from the Supporting Information section.
-
Log in to the VeloDB Cloud console. In the upper-left corner, select the warehouse that you want to use, then click Connect in the left navigation pane. Select Private Endpoint > Grant VeloDB Access to Your VPC, and then click Set up Connection.
-
Under Supporting Information, copy the Subscription ID of VeloDB Cloud and verify the Region. Click Set up endpoint services to open the Azure Create a Private Link Service workflow.
-
On the Basics tab, verify that the Azure region matches the warehouse region, complete the form, and click Next: Outbound settings.
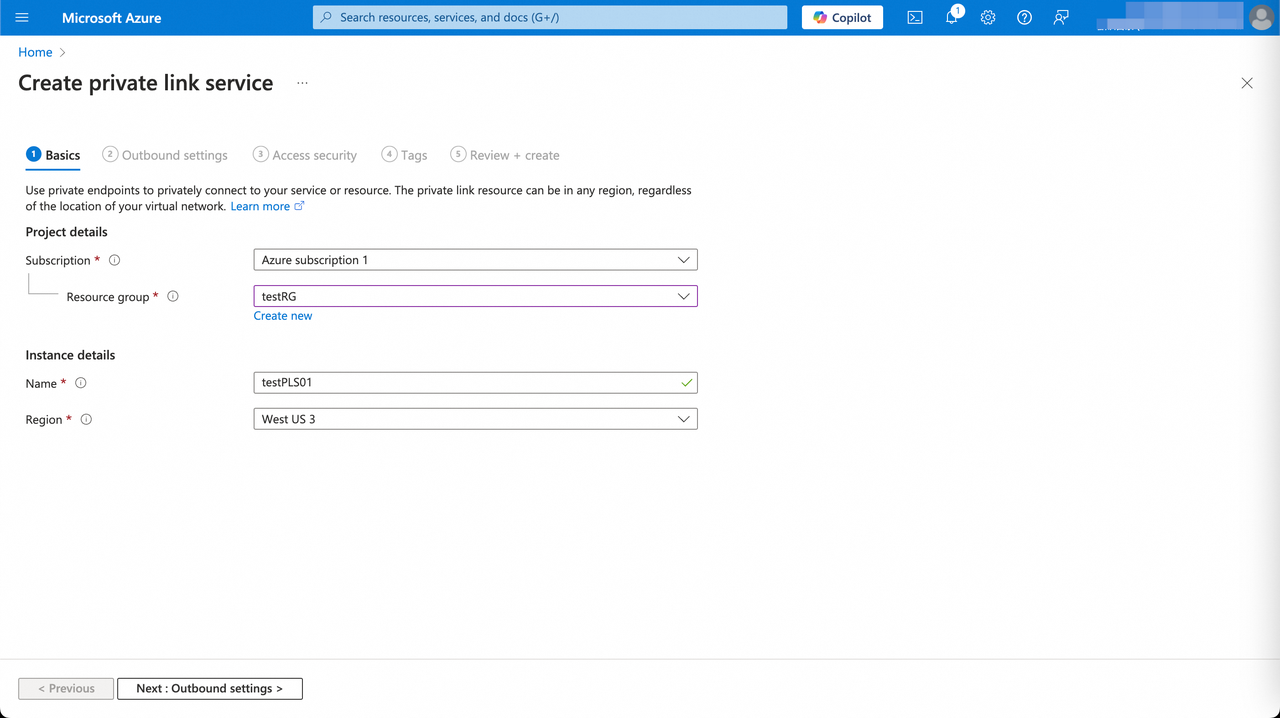
Parameter Category Description Subscription Project details Azure subscription for the Private Link Service. Resource group Project details Resource group to put the Private Link Service in. Name Instance details Private Link Service instance name. Region Instance details Must match the VeloDB Cloud warehouse region. -
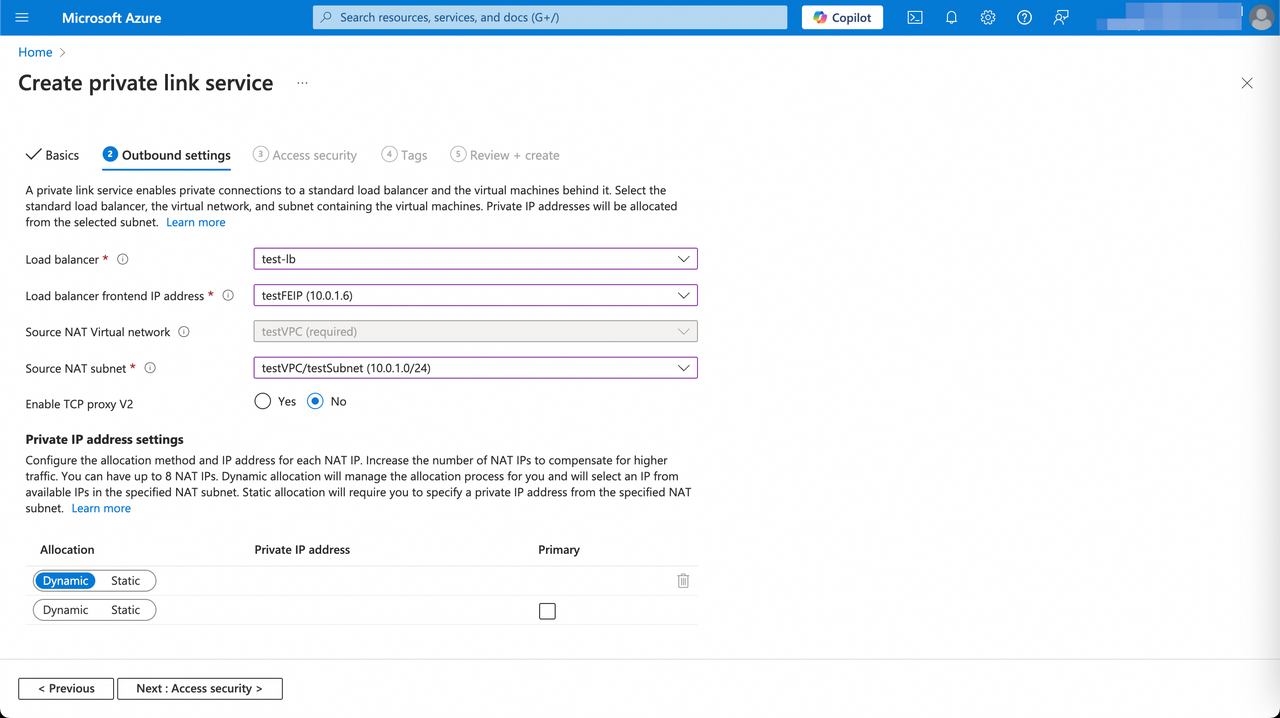
On Outbound settings, select the load balancer, frontend IP address, and source NAT (source network address translation) network and subnet. Then click Next: Access Security.
-
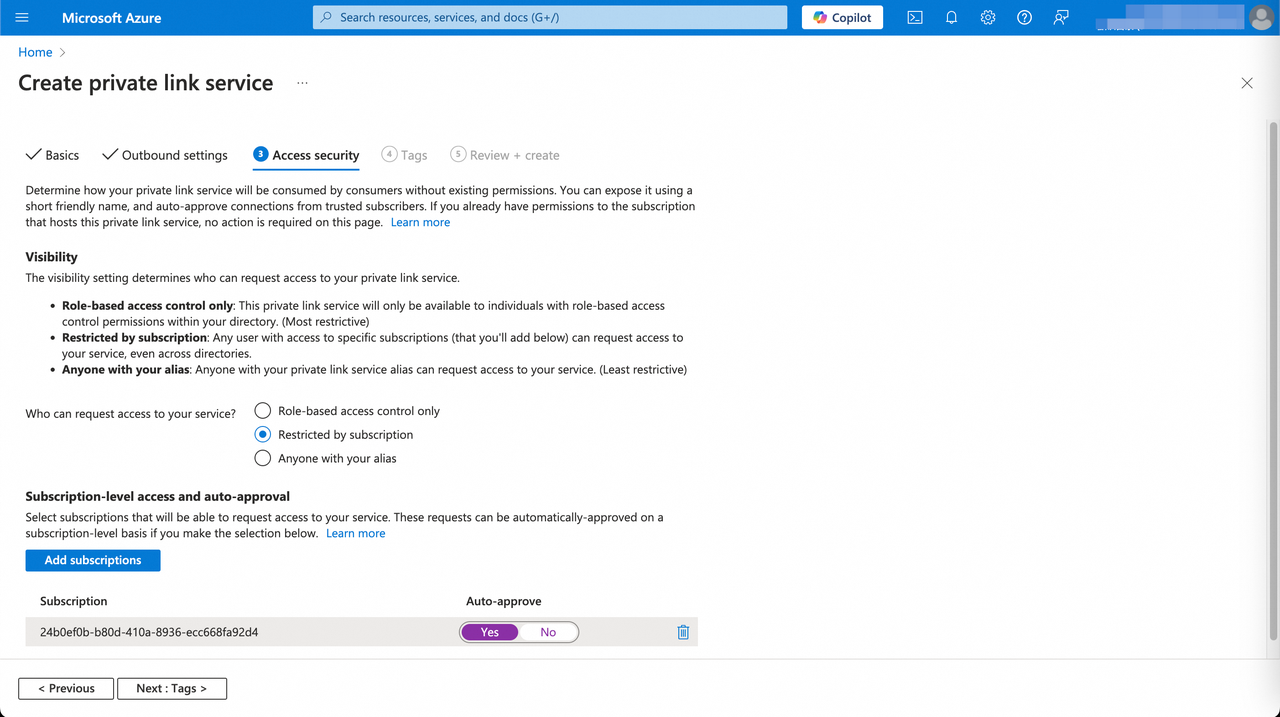
On Access Security, set Restricted by subscription, add the Subscription ID of VeloDB Cloud to the allowlist, and set auto-approve to Yes if you want connection requests to be approved automatically. Then click Next: Tags.
-
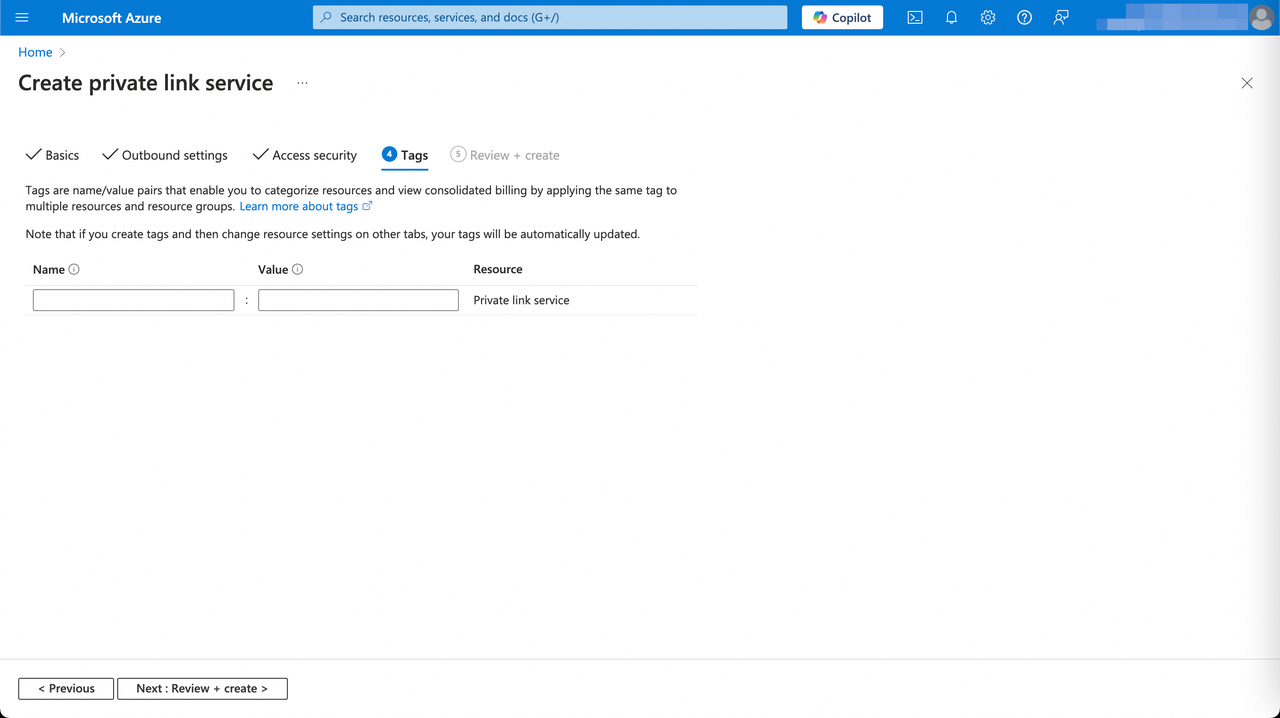
On Tags, add tags as needed. Review the configuration and click Create.
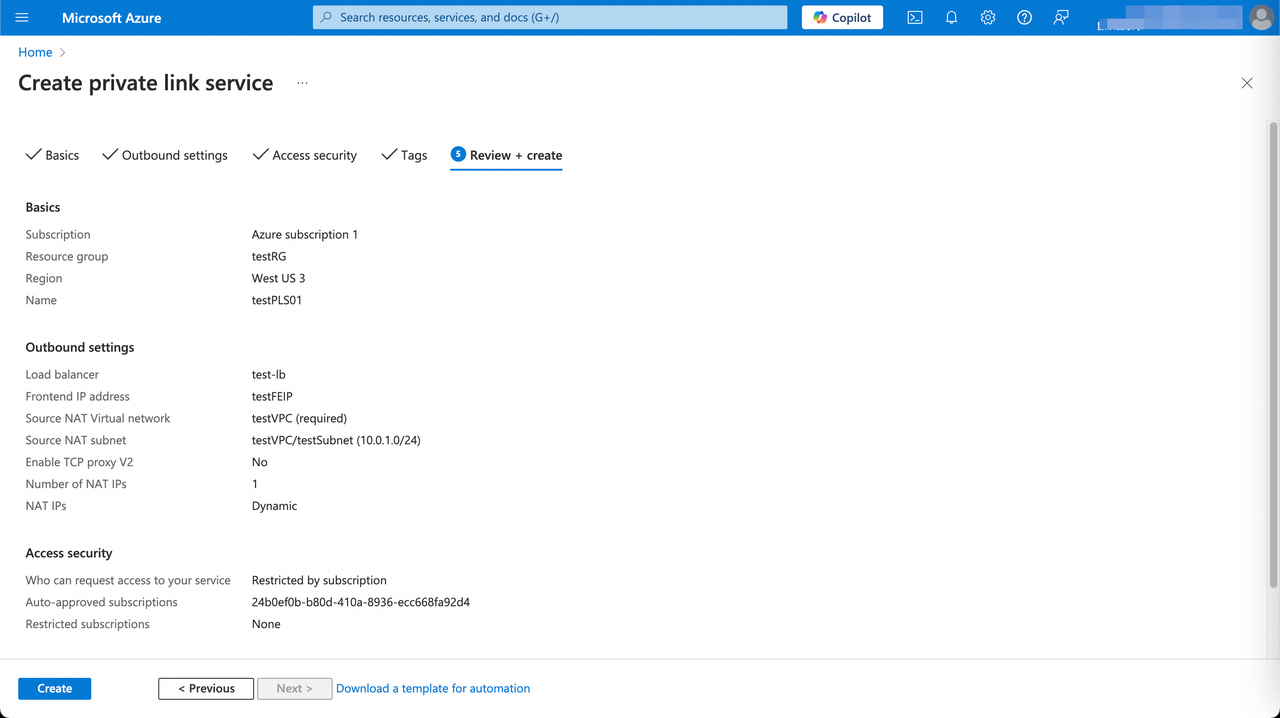
-
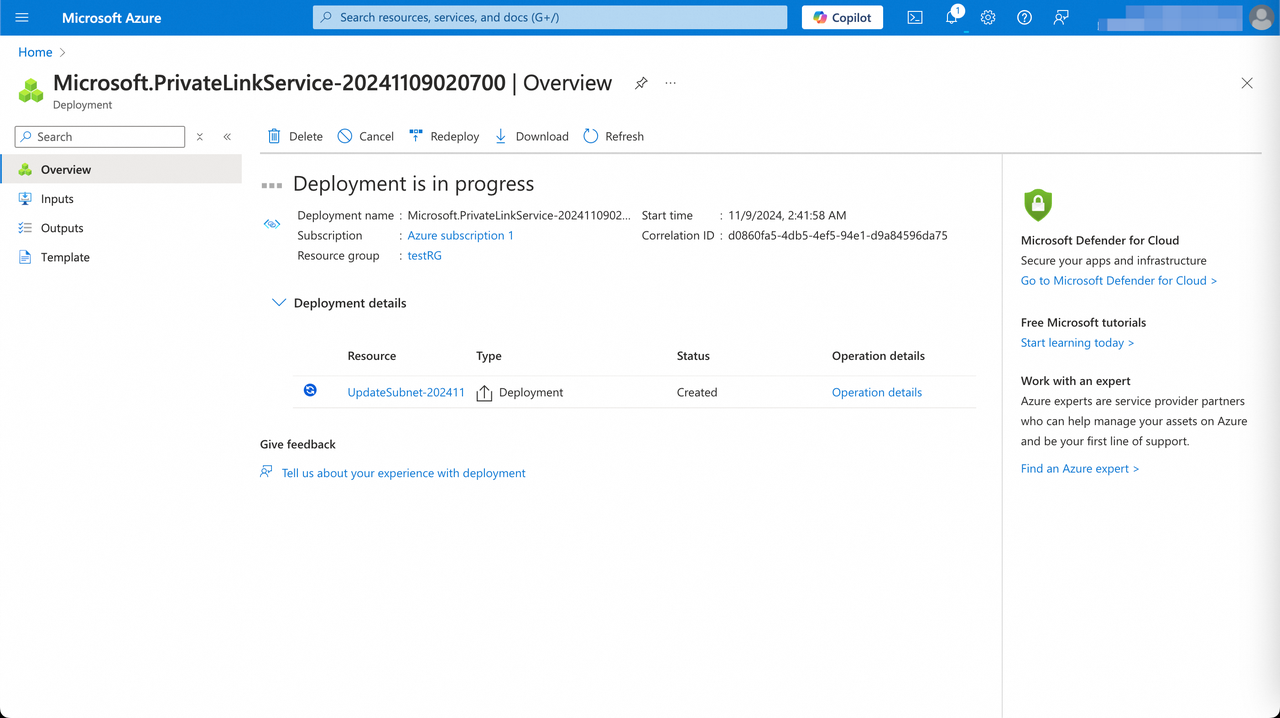
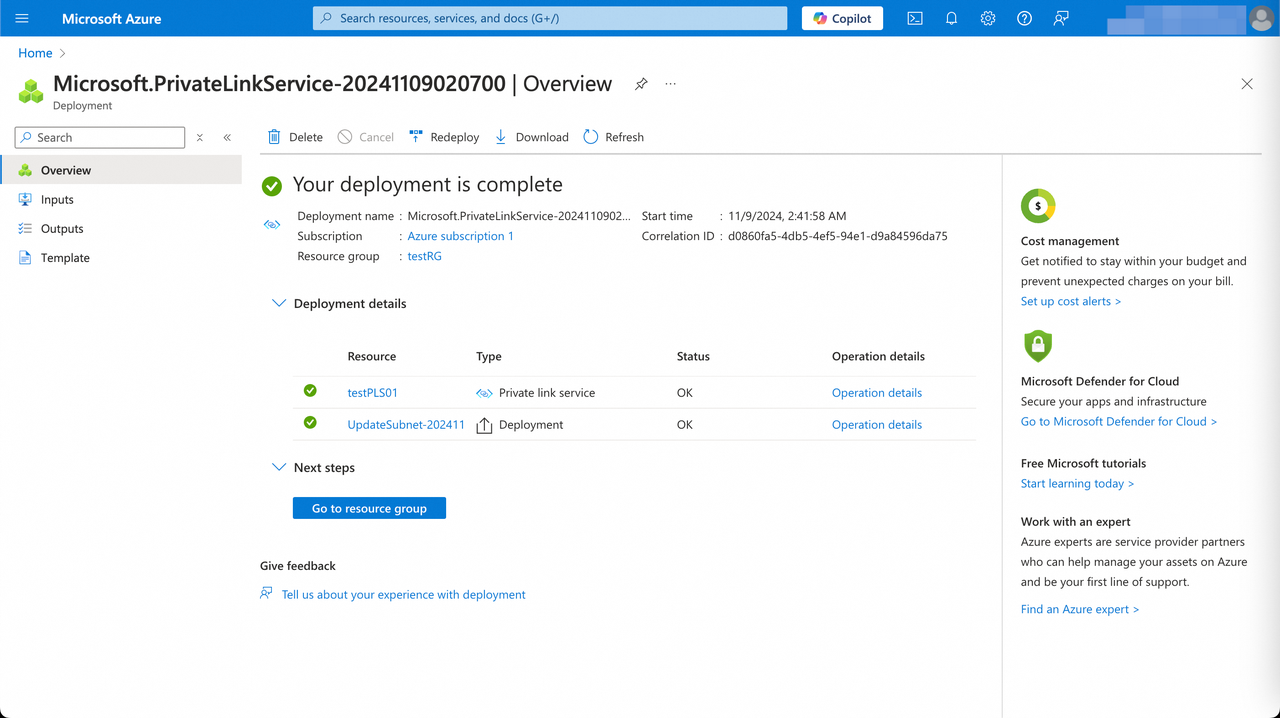
Wait for the Private Link Service status to change from Created to OK. The service is ready only after it reaches OK.
-
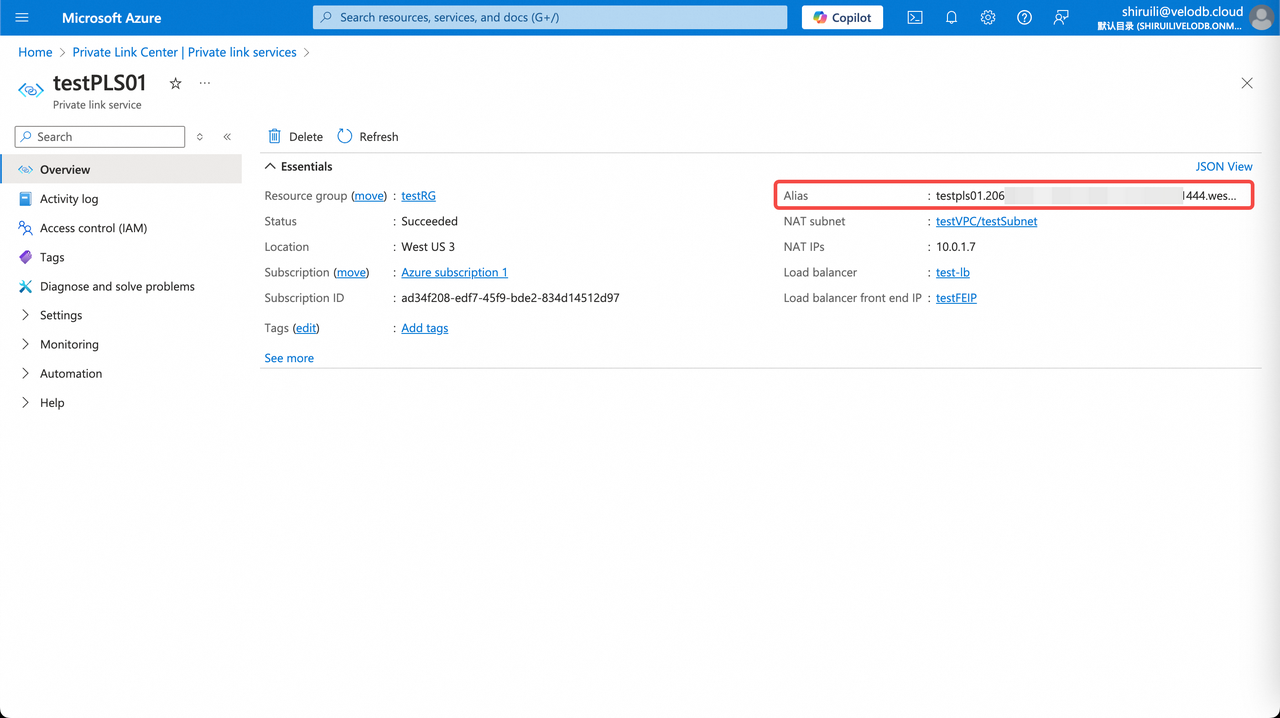
Copy the Resource ID and Alias from the Private Link Service details page. Return to the VeloDB Cloud Set up Connection dialog. Under Endpoint Service Information, enter the Resource ID and Service Alias.
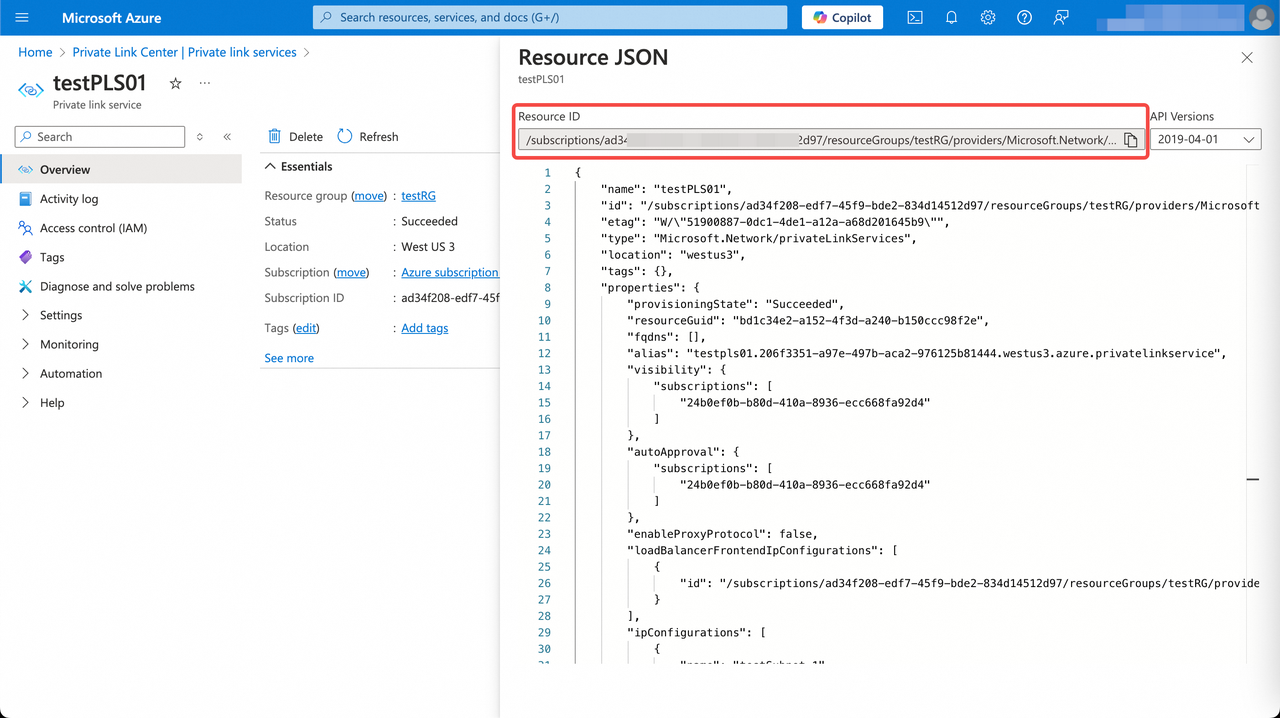
-
Enter a Description, and then click Grant.
-
Return to Connect > Private Endpoint > Grant VeloDB Access to Your VPC, and then refresh the page. With auto-approval enabled, the status changes to Connected when setup finishes. If auto-approval is disabled, the connection initially shows Pending Approval and changes to Connected after approval. A declined request can show Rejected.
Troubleshooting
If the connection does not become Connected, verify the following:
- The Private Link Service and warehouse are in the same Azure region.
- The Subscription ID of VeloDB Cloud is allowed under Access Security.
- The load balancer frontend IP, source NAT subnet, and data-source port are correct.
- Network security rules and routes allow traffic from the load balancer to the data source.
- The connection request is approved when auto-approval is disabled.