Create a BYOC Warehouse on Azure
On Azure, VeloDB Cloud deploys the warehouse with a VeloDB-provided template that you deploy as a Deployment Stack in your own Azure account. When you start creating the warehouse, you choose the network option:
- BYOC (New VPC): the template creates a new VNet and subnet along with the other resources the warehouse needs. You do not need an existing VNet.
- BYOC (Existing VPC): the template deploys into a VNet and subnet you already have, such as one from an earlier BYOC warehouse.
If you are new to Azure networking or VeloDB Cloud, we recommend New VPC, which needs no existing network setup. For Existing VPC, see Azure Preparation to create a VNet and subnet first.
The Custom Infrastructure option is available only on AWS.
Note:
The VeloDB Cloud console labels the network option VPC on every cloud platform. On Azure, this VPC option corresponds to an Azure Virtual Network (VNet). A BYOC warehouse on Azure currently runs in a single availability zone, so Existing VPC uses one subnet rather than three.
Prerequisites
- Log in to the VeloDB Cloud console.
- In the upper-left corner, click the organization name to open the Organization Overview page.
- Click Create New Warehouse. Alternatively, you can click All Warehouses in the upper-left corner and then click Create New Warehouse.
- Select BYOC, select Azure, then complete the warehouse configuration.
Because you run the template yourself in your own Azure account, complete this preparation before you begin:
- An Azure subscription with sufficient permissions to deploy the template as a Deployment Stack and create its resources. If you lack these permissions, you can copy the deployment URL and send it to your Azure administrator.
- For Existing VPC, a VNet and subnet in the target region. See Azure Preparation for how to create them and for a reference of the resources the template provisions.
For the Azure regions where a BYOC warehouse can be deployed, see Supported Regions.
Steps
The steps are the same for both options. Your choice of New VPC or Existing VPC only changes two things: the prerequisites above, and whether you select a VNet and subnet in step 9.
-
Log in to the VeloDB Cloud console.
-
In the upper-left corner, click All Warehouses, then click Create New Warehouse. Alternatively, open the Organization Overview page and click Create New Warehouse.
-
Select BYOC (New VPC) or BYOC (Existing VPC), then click Continue.
-
On the Warehouse Configuration and Initial Cluster cards, set the fields below.
Field Description Warehouse Name Required. Up to 32 characters: letters, numbers, underscores (_), and hyphens (-). The name must be unique within the organization. Warehouse Mode Select BYOC. Cloud Platform Select Azure. Region Select the region where the warehouse runs. To reduce latency, choose the same region as your application or client. If your region is not listed, get help to request it. Core Version Select the VeloDB Core version. Version 2.0 and later separate storage and compute, and storage is billed by actual usage with nothing to pre-provision. Admin Password Required. The password for the default admin user. Use at least 8 characters, including at least three of: uppercase letters, lowercase letters, numbers, and special characters. You can reset it later from the warehouse settings page. Advanced Settings
Field Description Custom Tags Optional. Add custom tags to the cloud resources VeloDB Cloud creates for the warehouse. Table Name Case Sensitivity Choose whether table names are case-sensitive. This setting cannot be changed after the warehouse is created. Initial Cluster
Field Description Compute The compute size of the warehouse's first cluster. The default range is 4 to 1024 vCPU per cluster at a fixed 1:8 vCPU-to-memory ratio. To raise this quota, get help. Cache The cache-space limit scales with the compute size. -
Click Create. In the Create BYOC Warehouse dialog, review the notes, then click Start.
-
The Azure portal opens the Deploy template as Deployment Stack page in a new tab, with the template and settings pre-filled. If the tab does not open, click Open Azure Portal on the deployment page.
-
For Create in, select Resource Group (recommended) or Subscription. Enter a Stack name, then click Next.
-
Select the Subscription and Resource Group to create the stack in. The resource group's region must match the warehouse region you selected in VeloDB Cloud, otherwise the deployment fails and the creation flow stalls.
-
On the VeloDB Cloud deployment page, copy the Token and paste it into the Token field. For New VPC, this is the only parameter you set, because the template creates the VNet and subnet. For Existing VPC, after the Token, also fill in the Virtual Network and Subnet you prepared. Then click Next.
-
Review the settings, then click Create to deploy the Deployment Stack. If your permissions are insufficient, the deployment reports an error. Use administrator privileges, or ask your administrator to create the Deployment Stack for you.
-
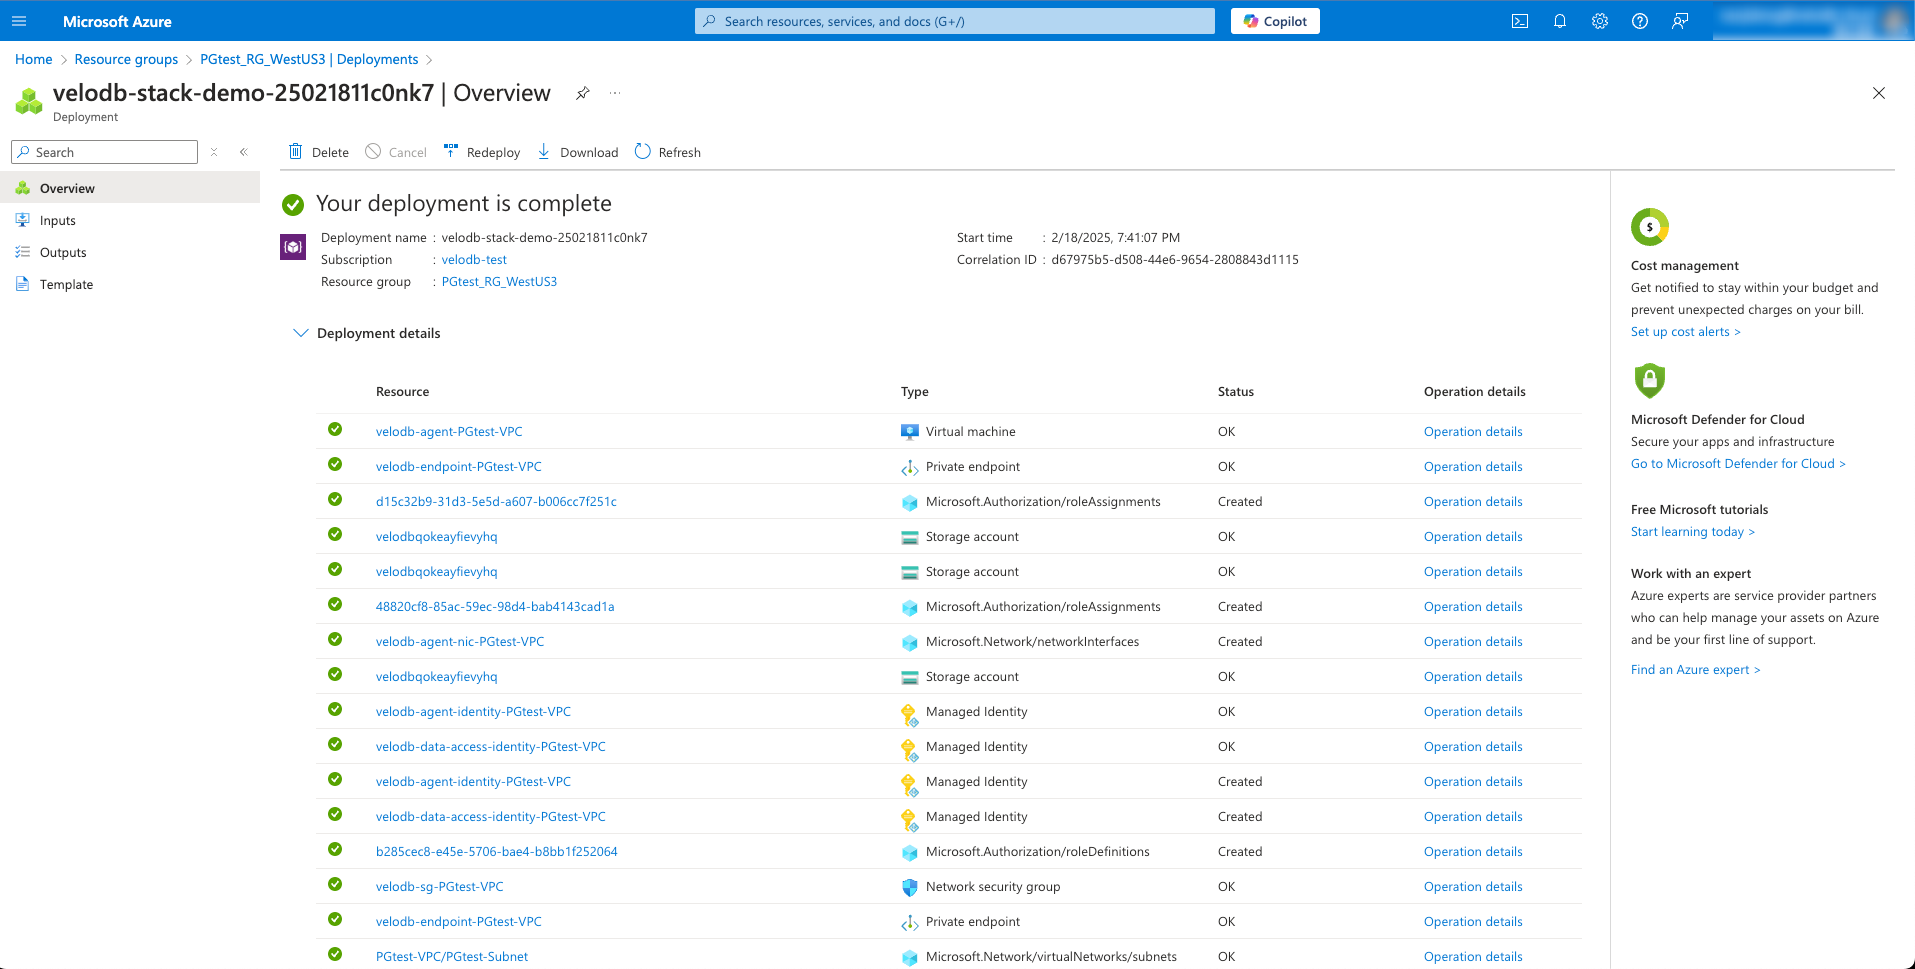
Wait for the Deployment Stack to succeed. You can check its status in the resource group, under Settings > Deployment stacks. The underlying deployment operations appear under Settings > Deployments.
noteIf the deployment failed because the resource group region does not match the warehouse region, delete the failed stack under Settings > Deployment stacks to remove the resources it created, then start over with a matching region.
-
Return to the VeloDB Cloud console. The deployment page waits at Cloud Resource Configuration until the Deployment Stack succeeds, then advances through Agent Deployment and Warehouse Initialization. This usually takes 5 to 10 minutes. If it takes more than 30 minutes, or you hit a situation you cannot resolve, get help.
-
When the deployment finishes, the warehouse is ready to use, including its initial cluster.
See also
- Azure Preparation: prepare a VNet and subnet, and learn about the resource orchestration template and the resources it creates.
- Warehouse Settings: manage or delete the warehouse after creation.