メインコンテンツまでスキップ

AWSでVeloDBにVPCへのアクセスを許可

開始する前に、接続方向、所有モデル、ネットワーク制御の範囲についてVeloDBにVPCへのアクセスを許可を確認してください。

  1. 対象ウェアハウスでConnection → Private Linkを開き、Grant VeloDB Access to Your VPCの下のNew Connectionをクリックします。

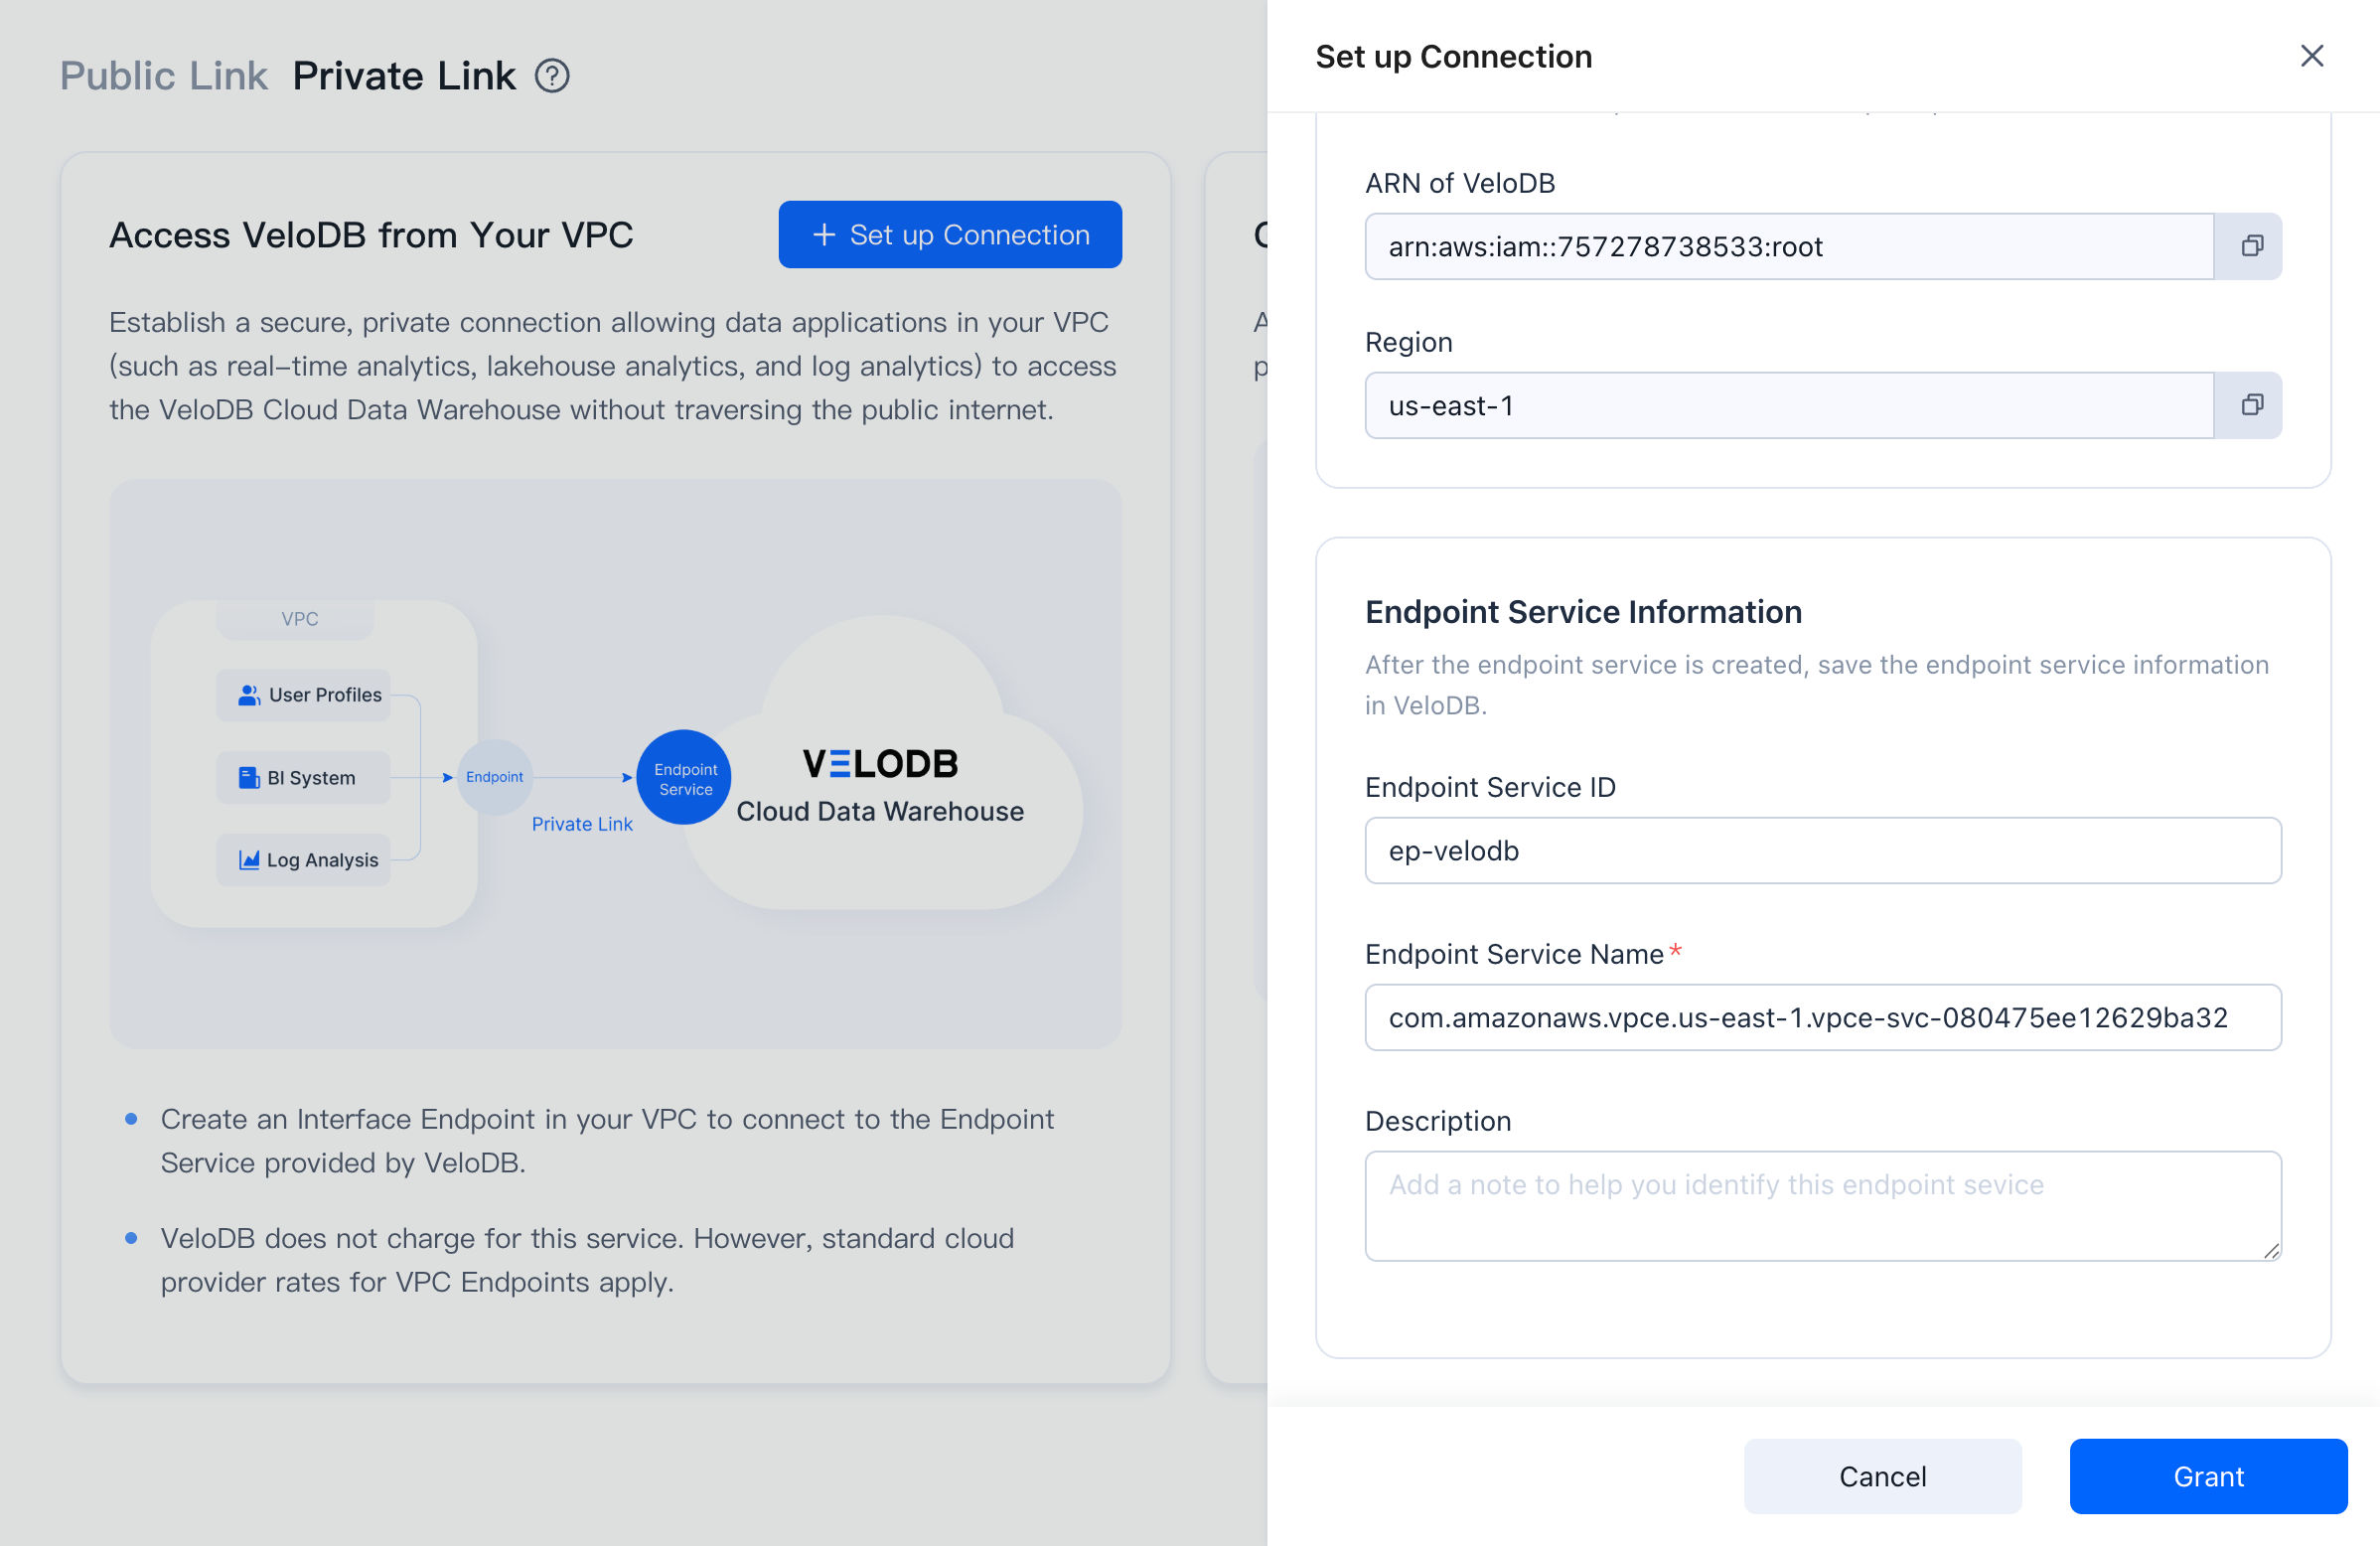
  2. ページにウェアハウスのCurrent RegionARN of VeloDBが表示されます。Set up endpoint servicesをクリックしてAWS PrivateLinkコンソールを開きます。
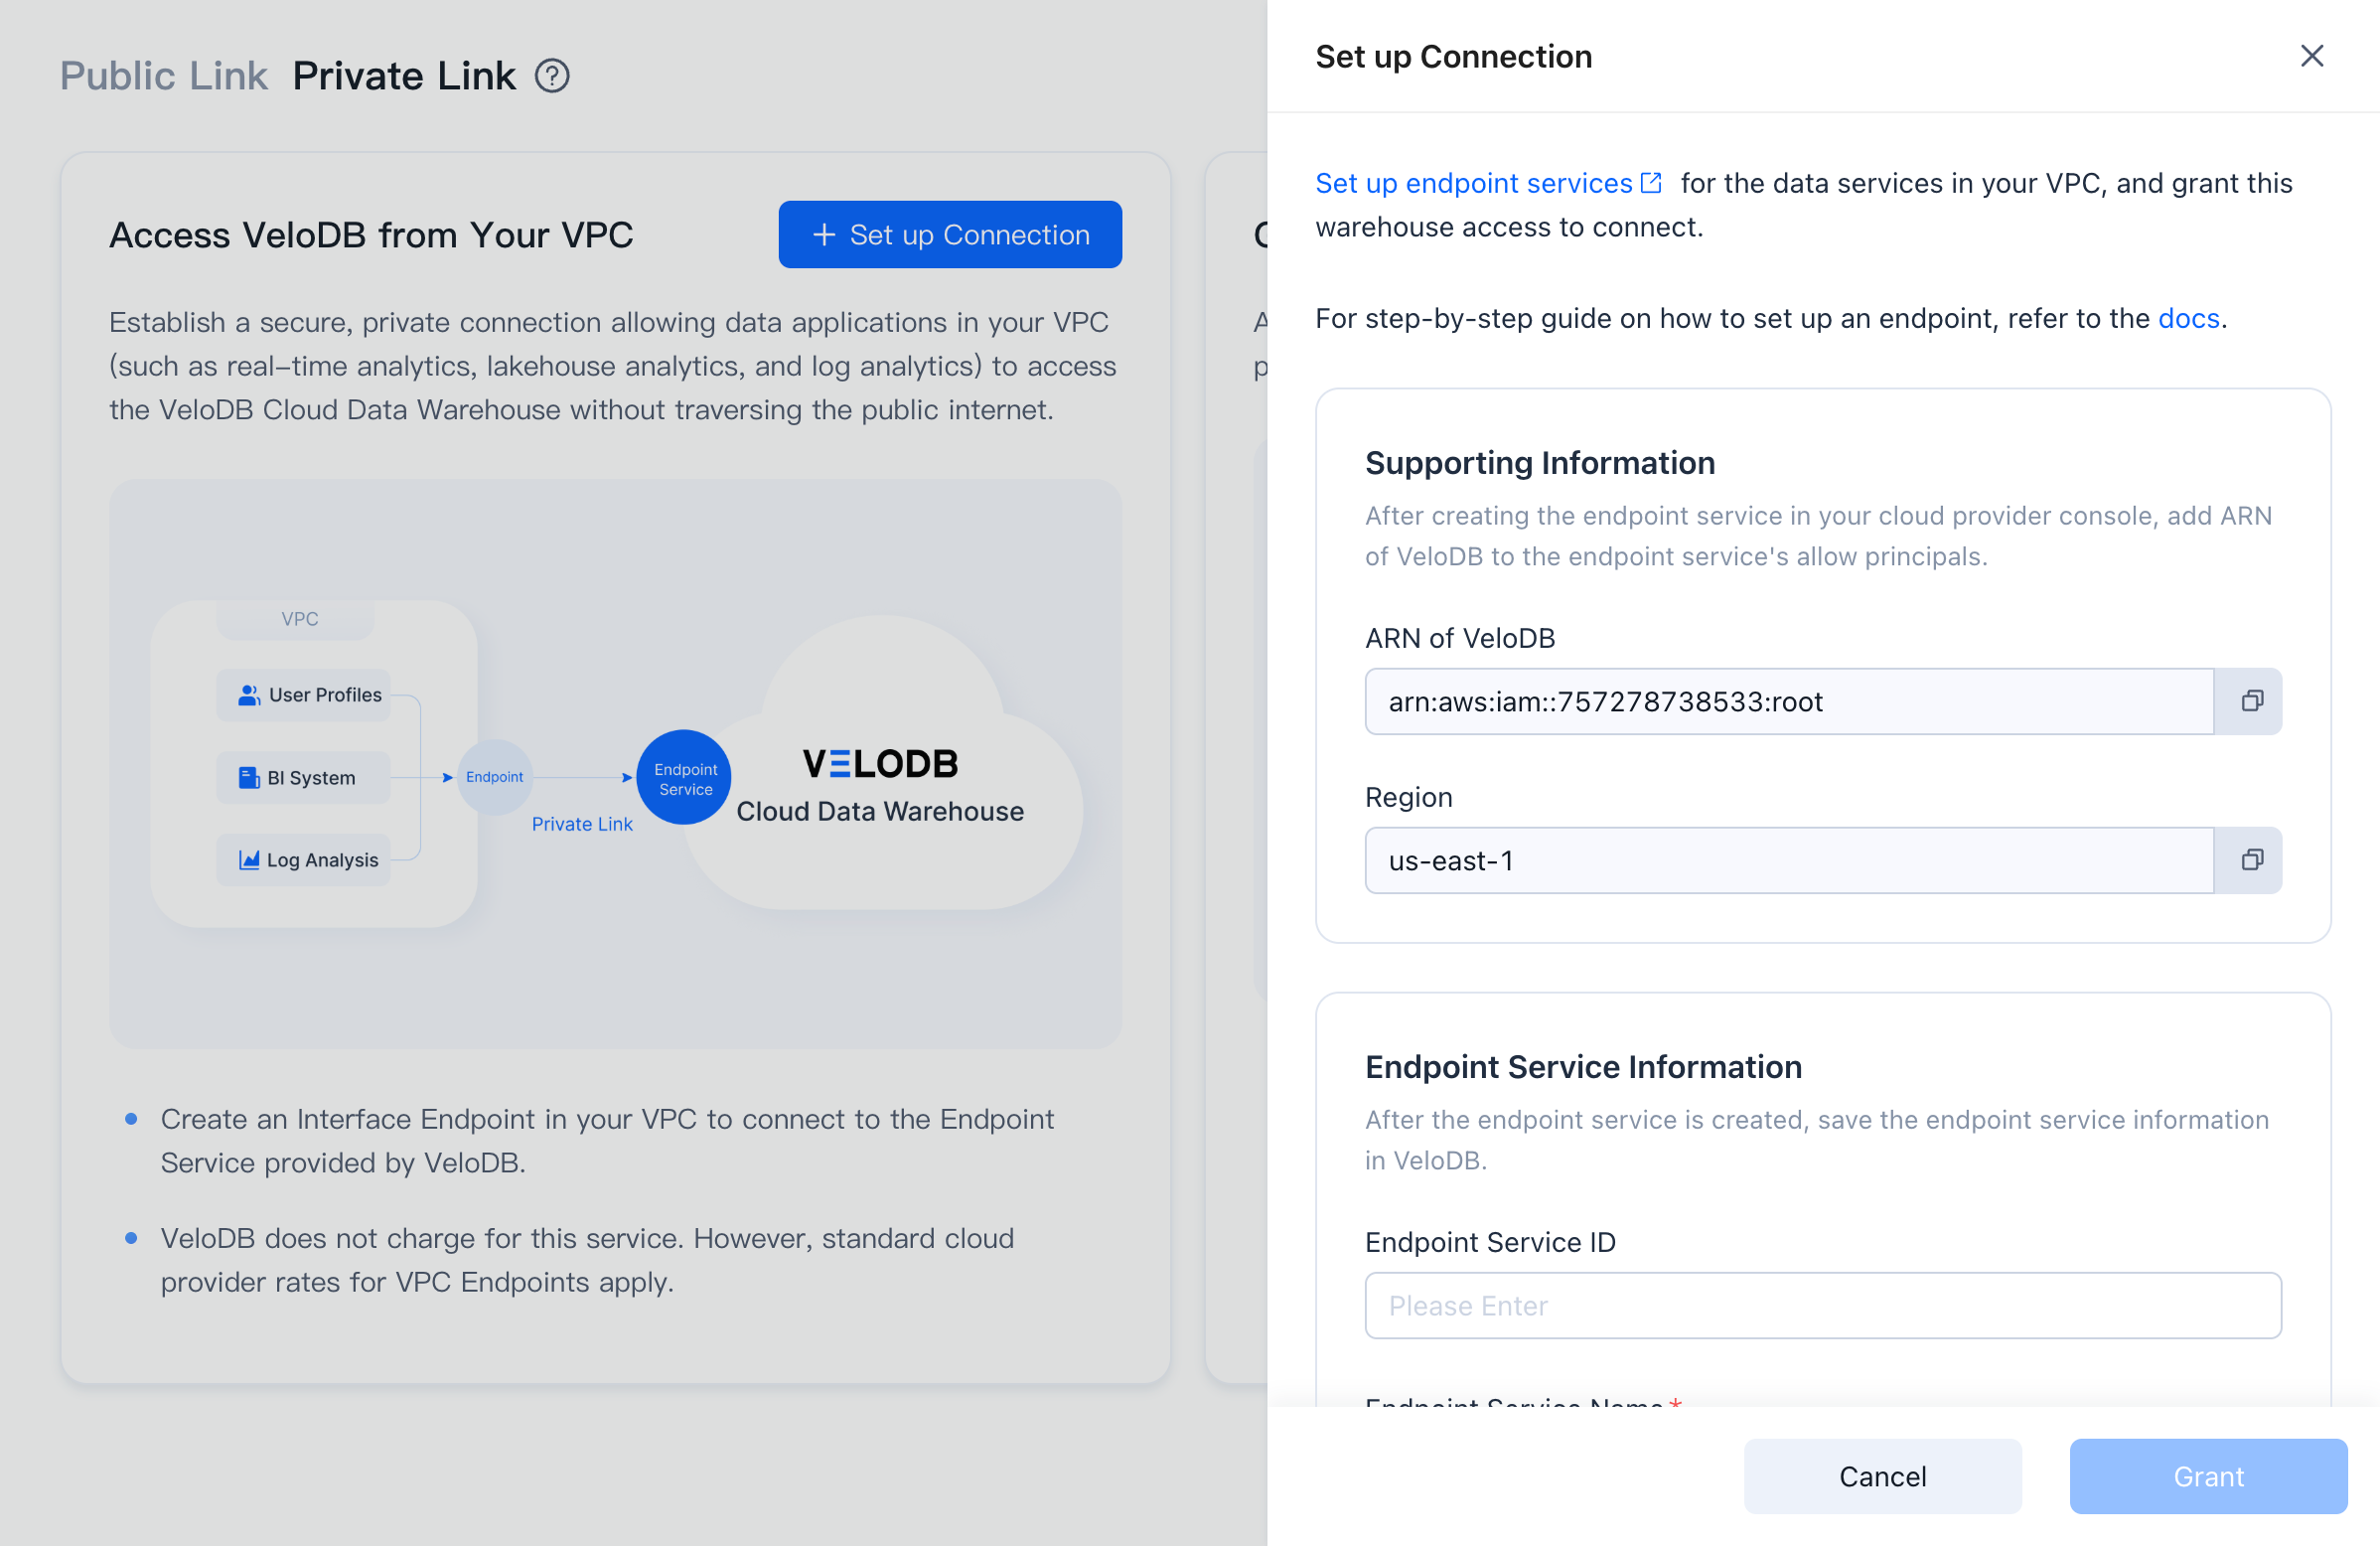
    private link create connection choose endpoint service register

  3. AWSコンソールでVPC → Endpoint servicesを開き、ウェアハウスと同じリージョンに切り替えてCreate endpoint serviceをクリックします。
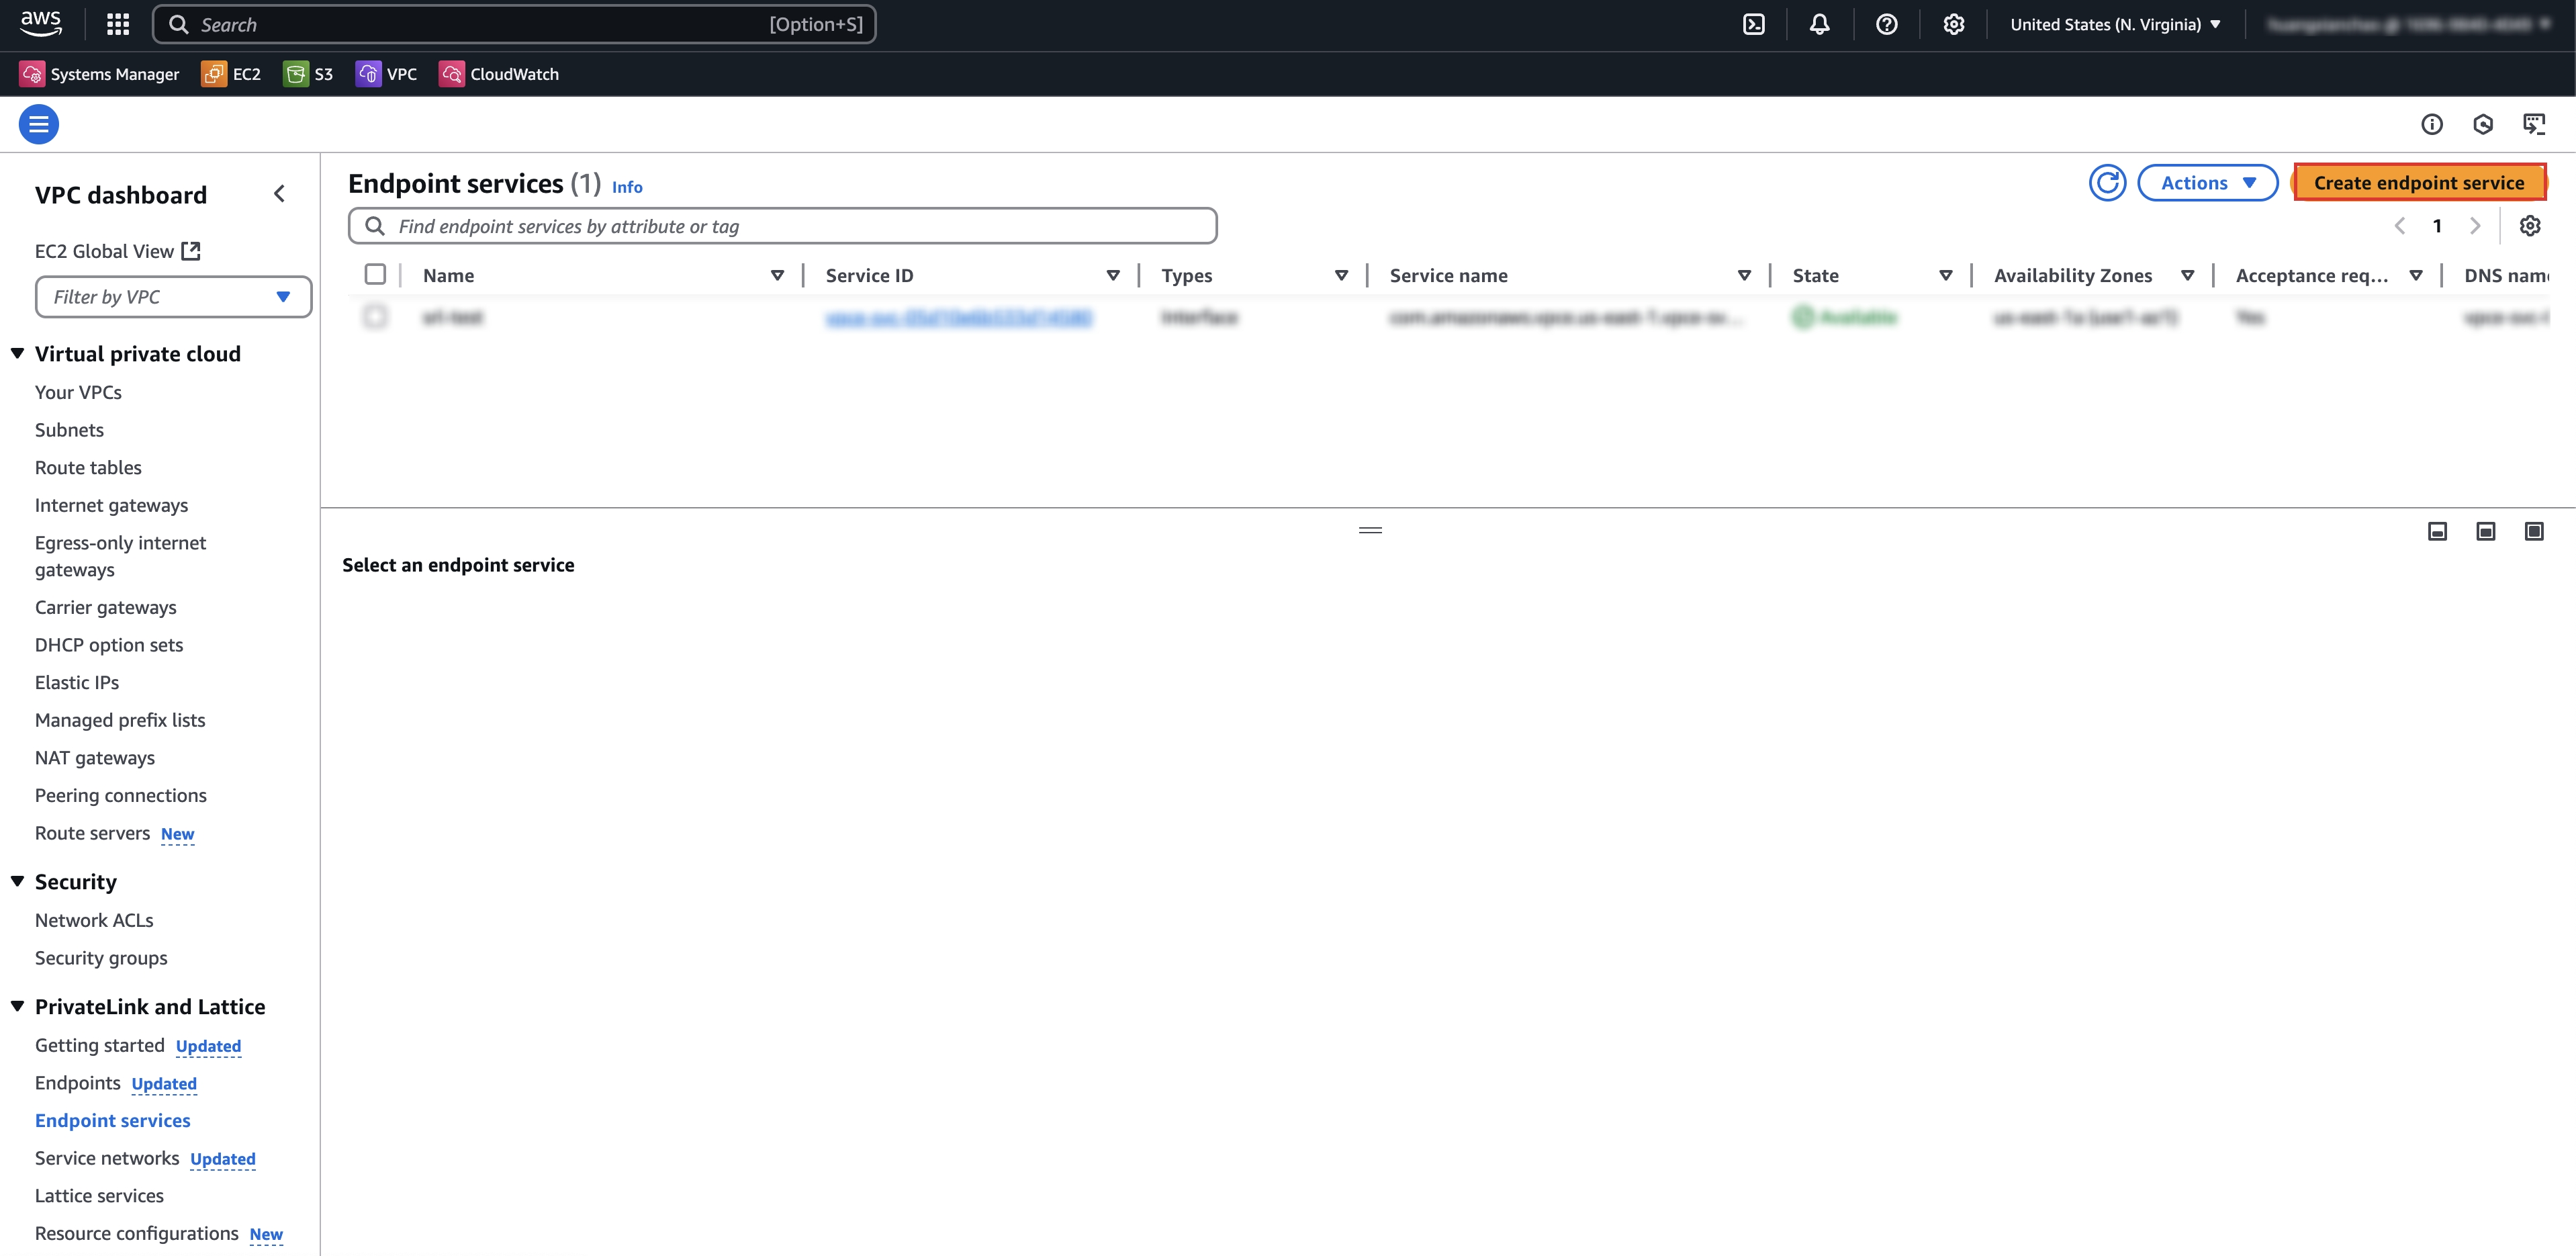
    private link create endpoint service on aws

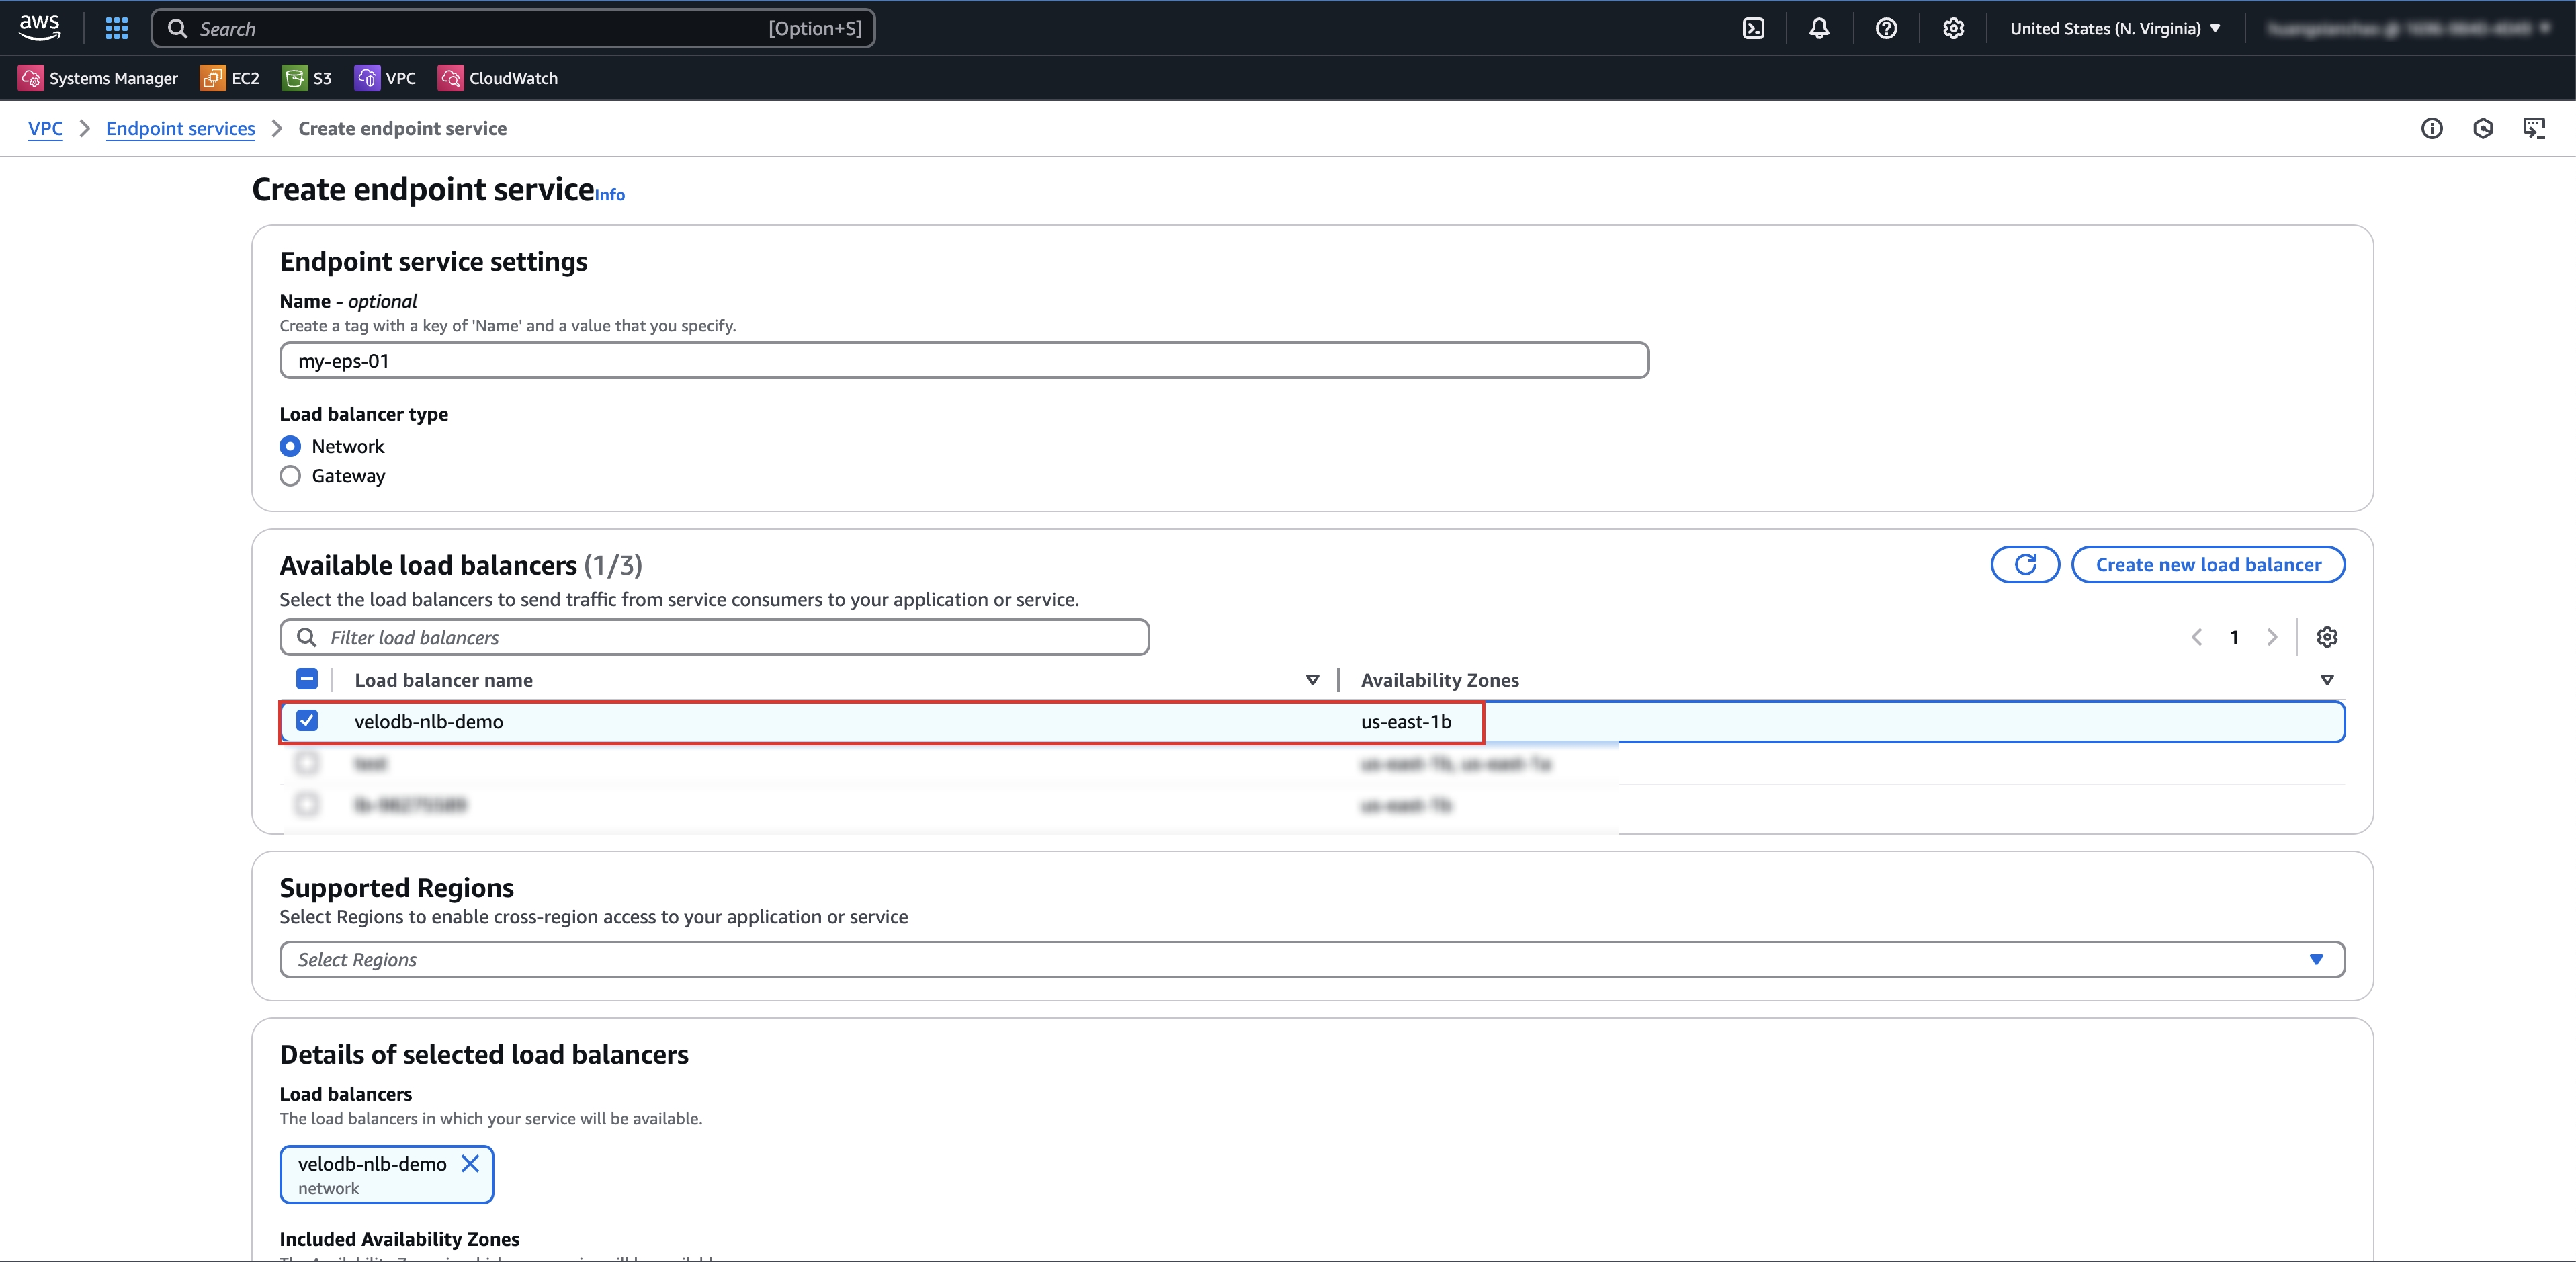
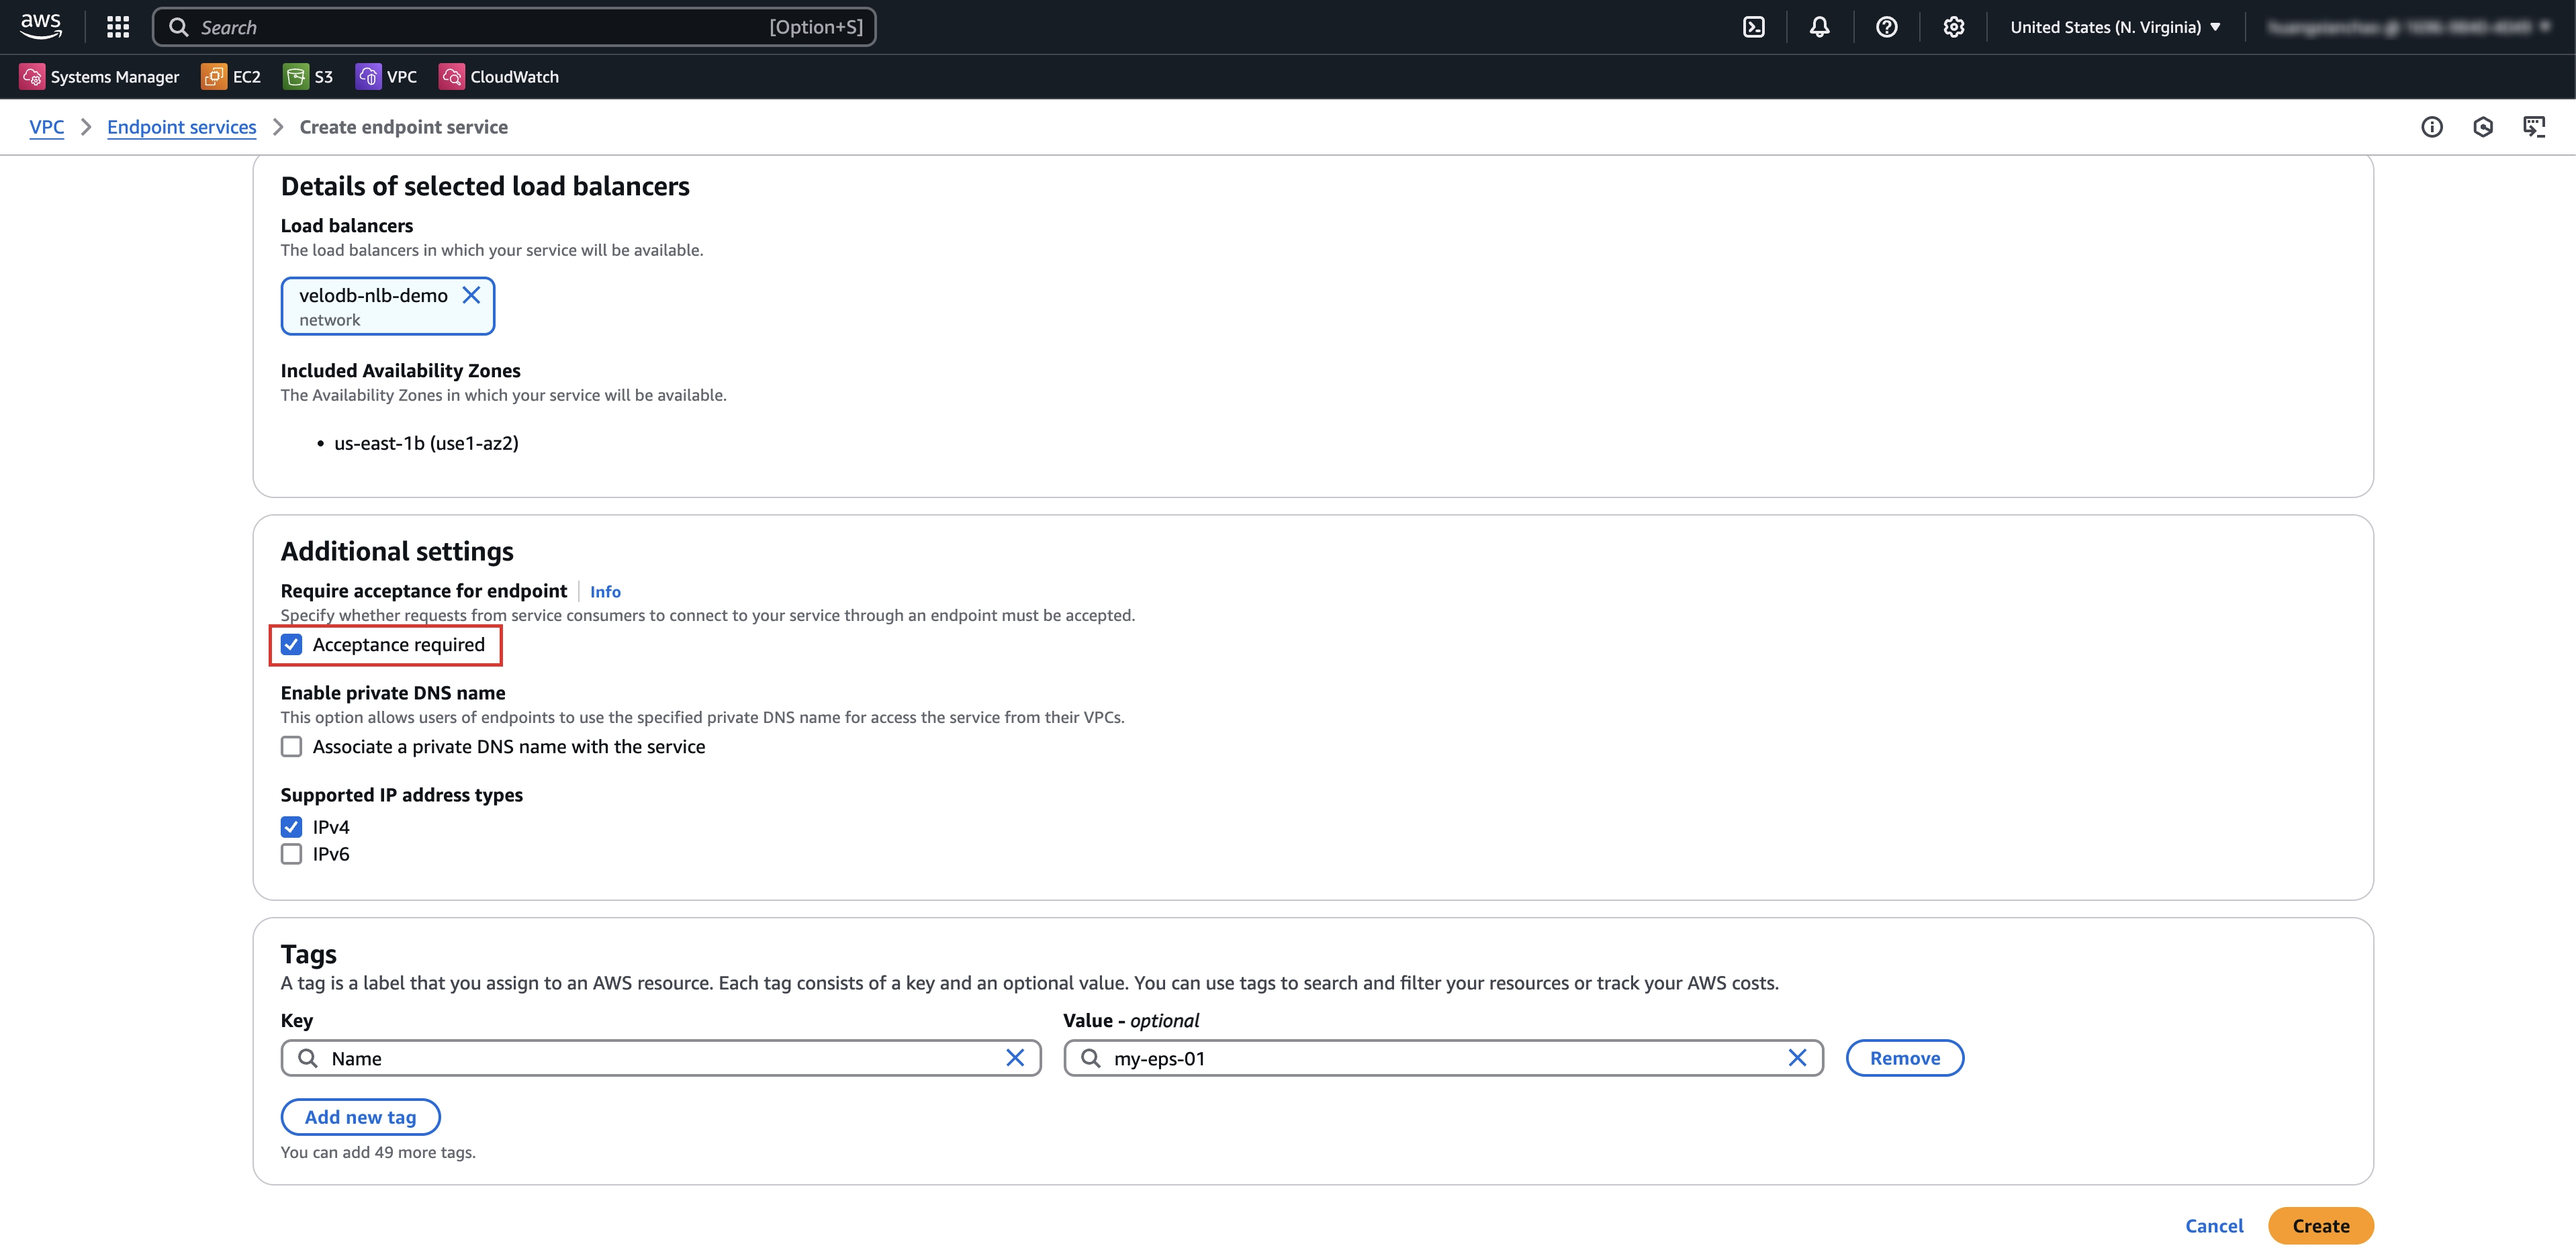
  4. Endpoint Serviceを設定してCreateをクリックします。

    private link create connection choose endpoint service create

    private link create connection choose endpoint service create 1

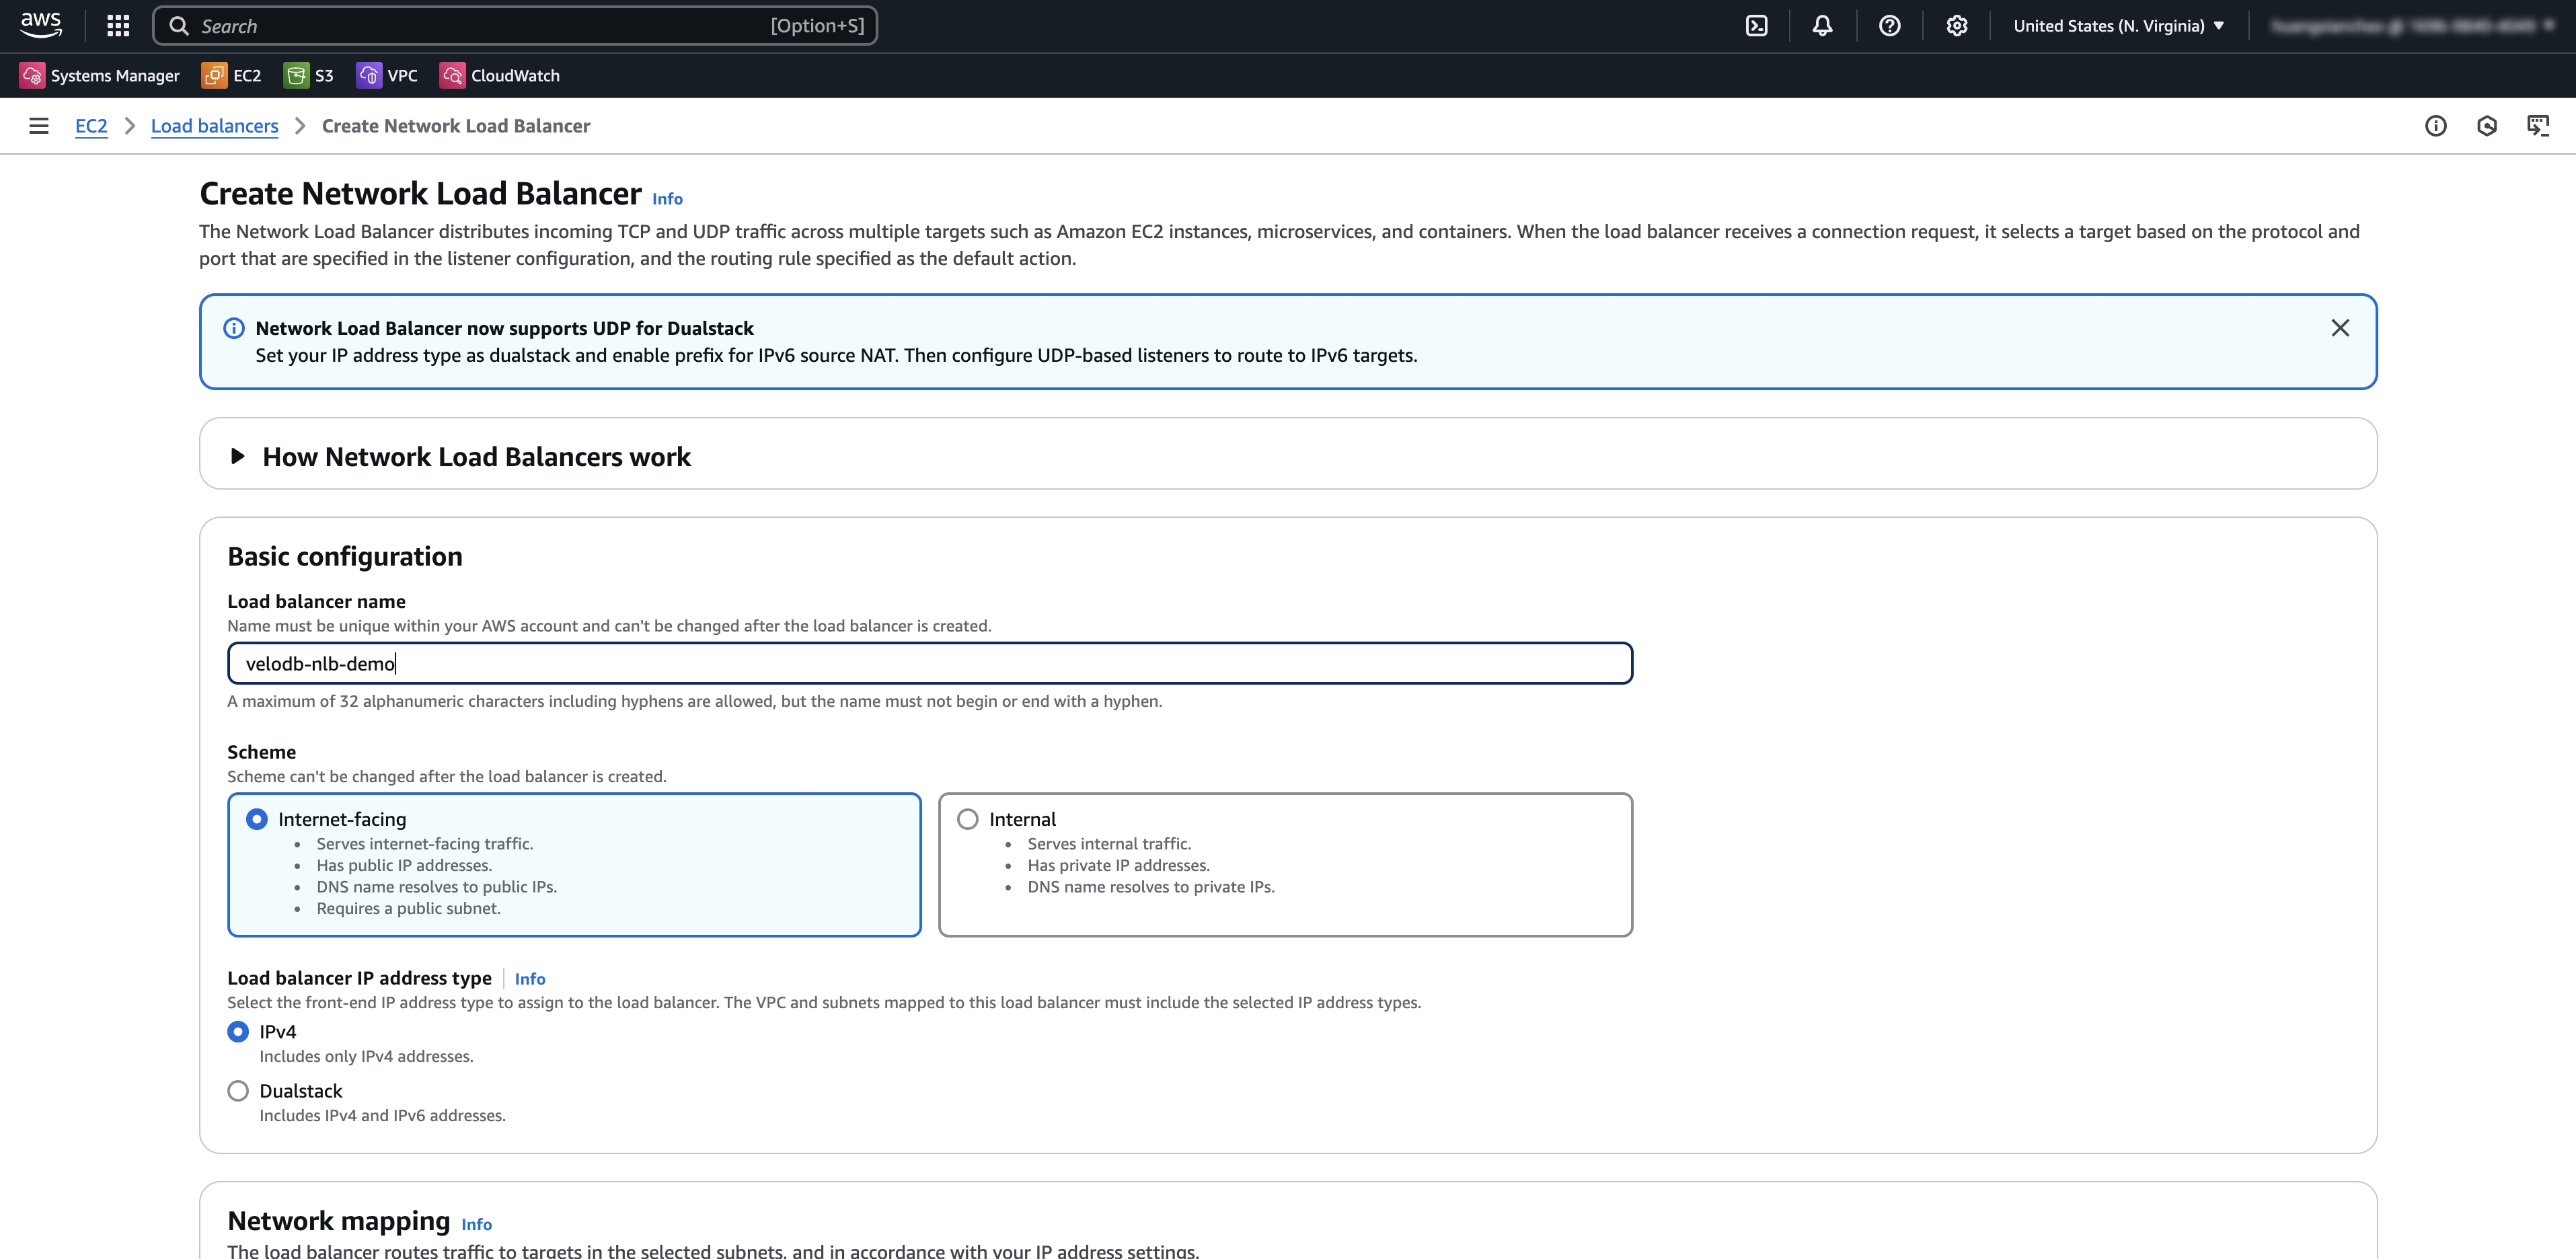
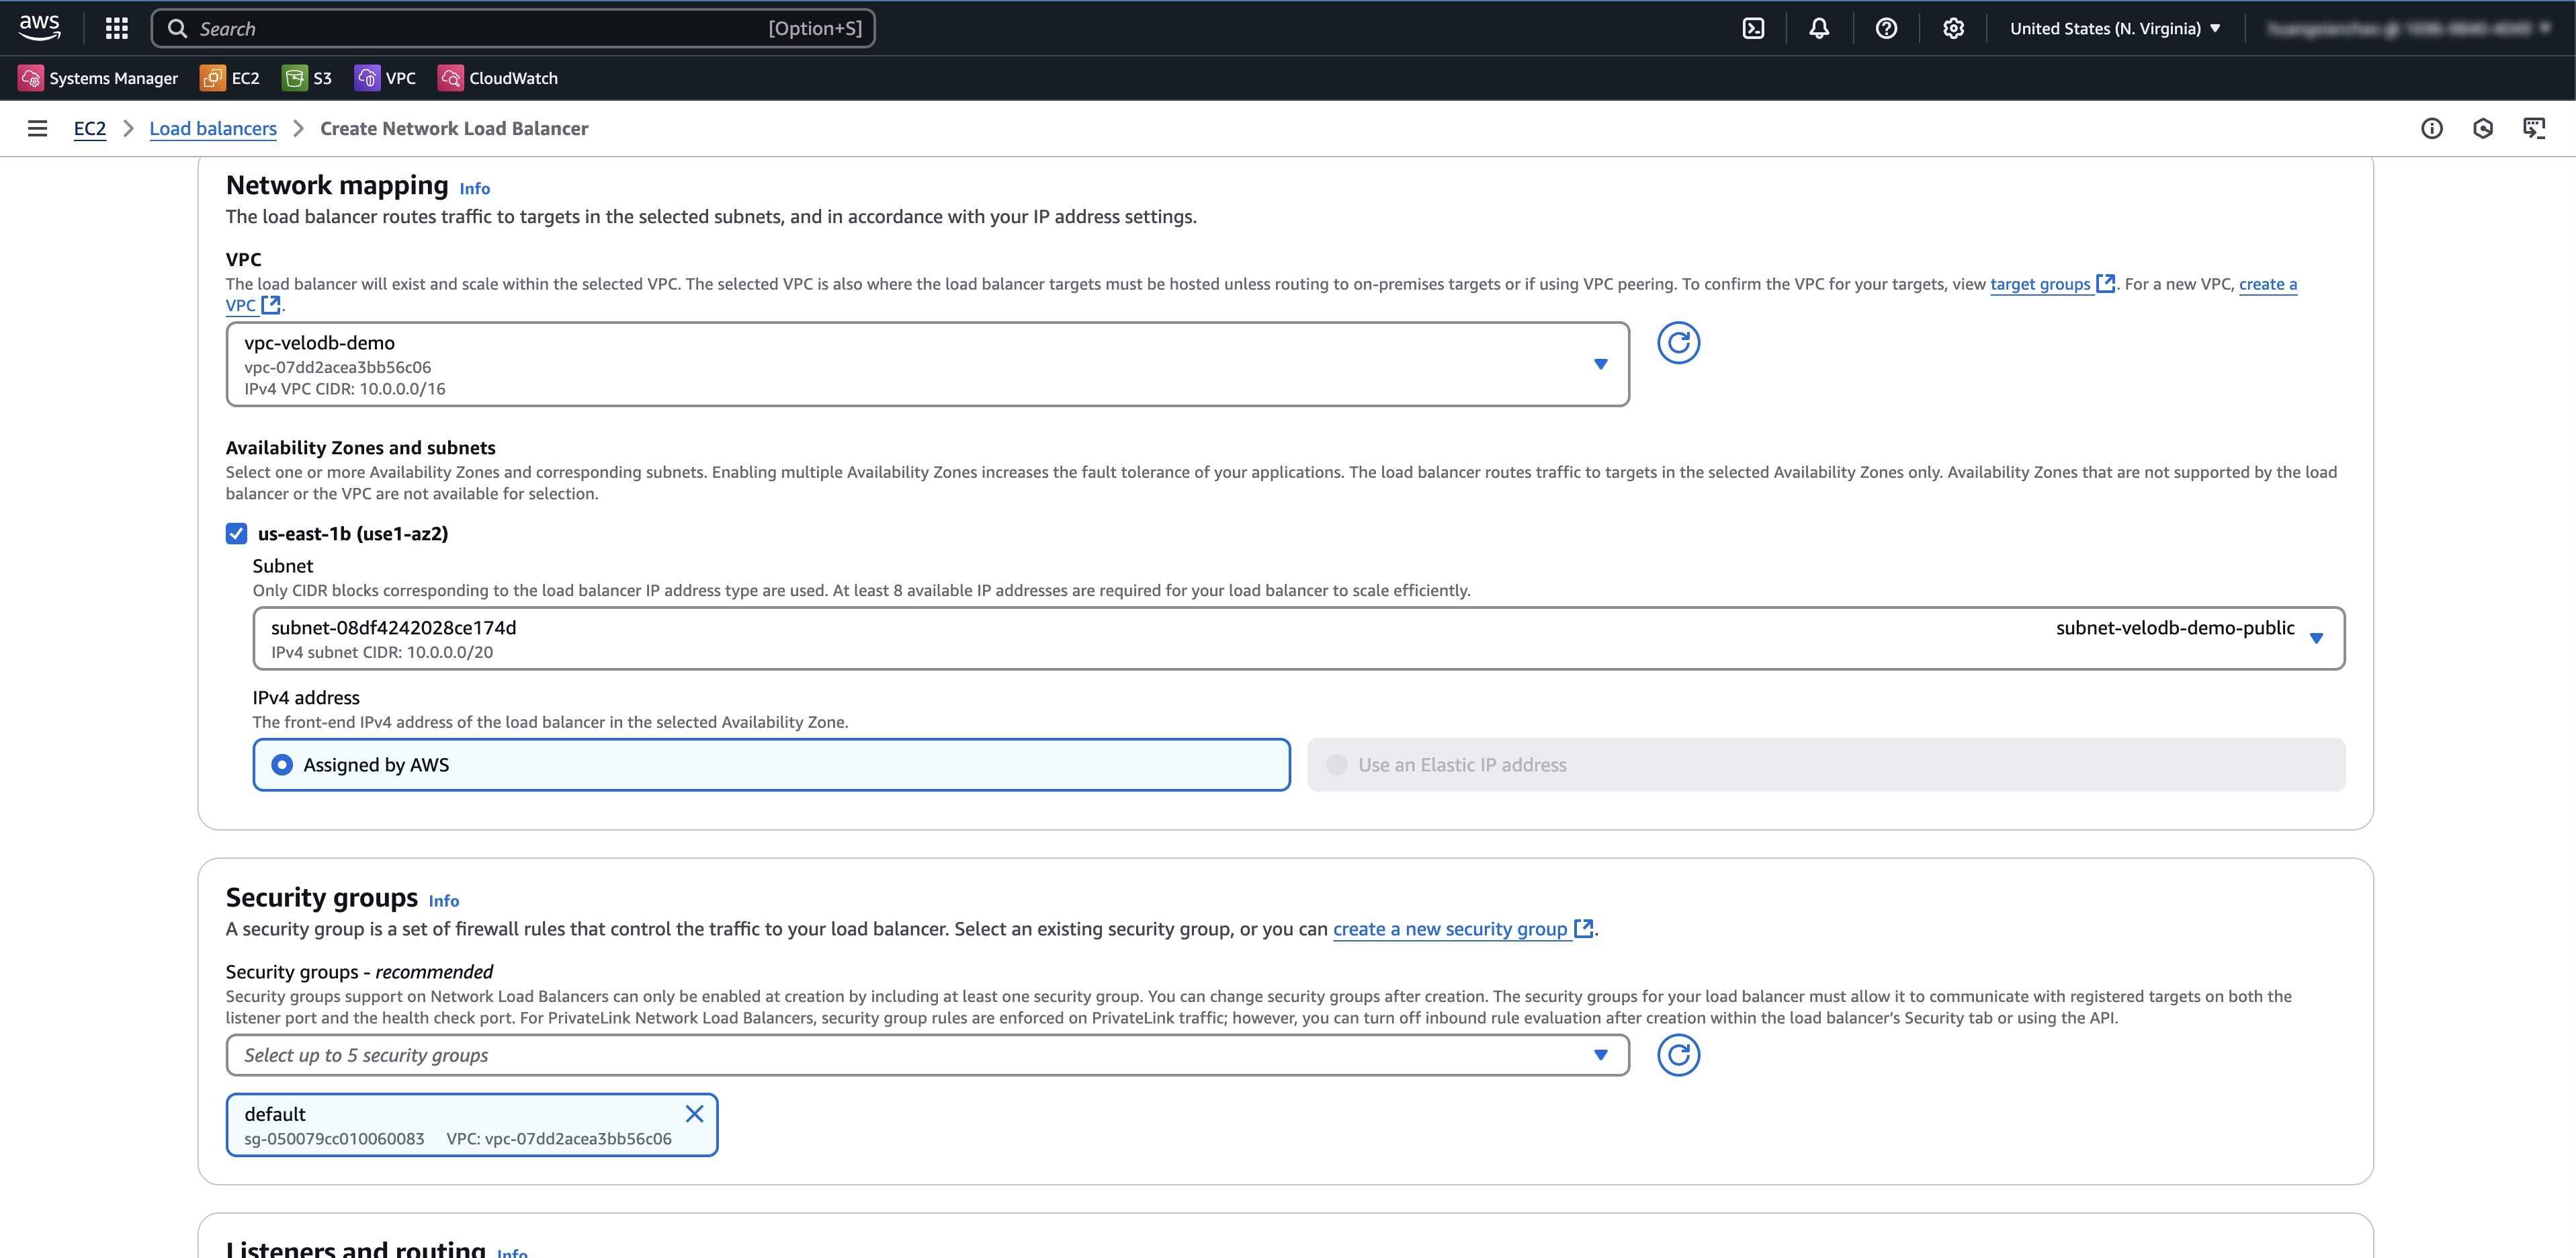
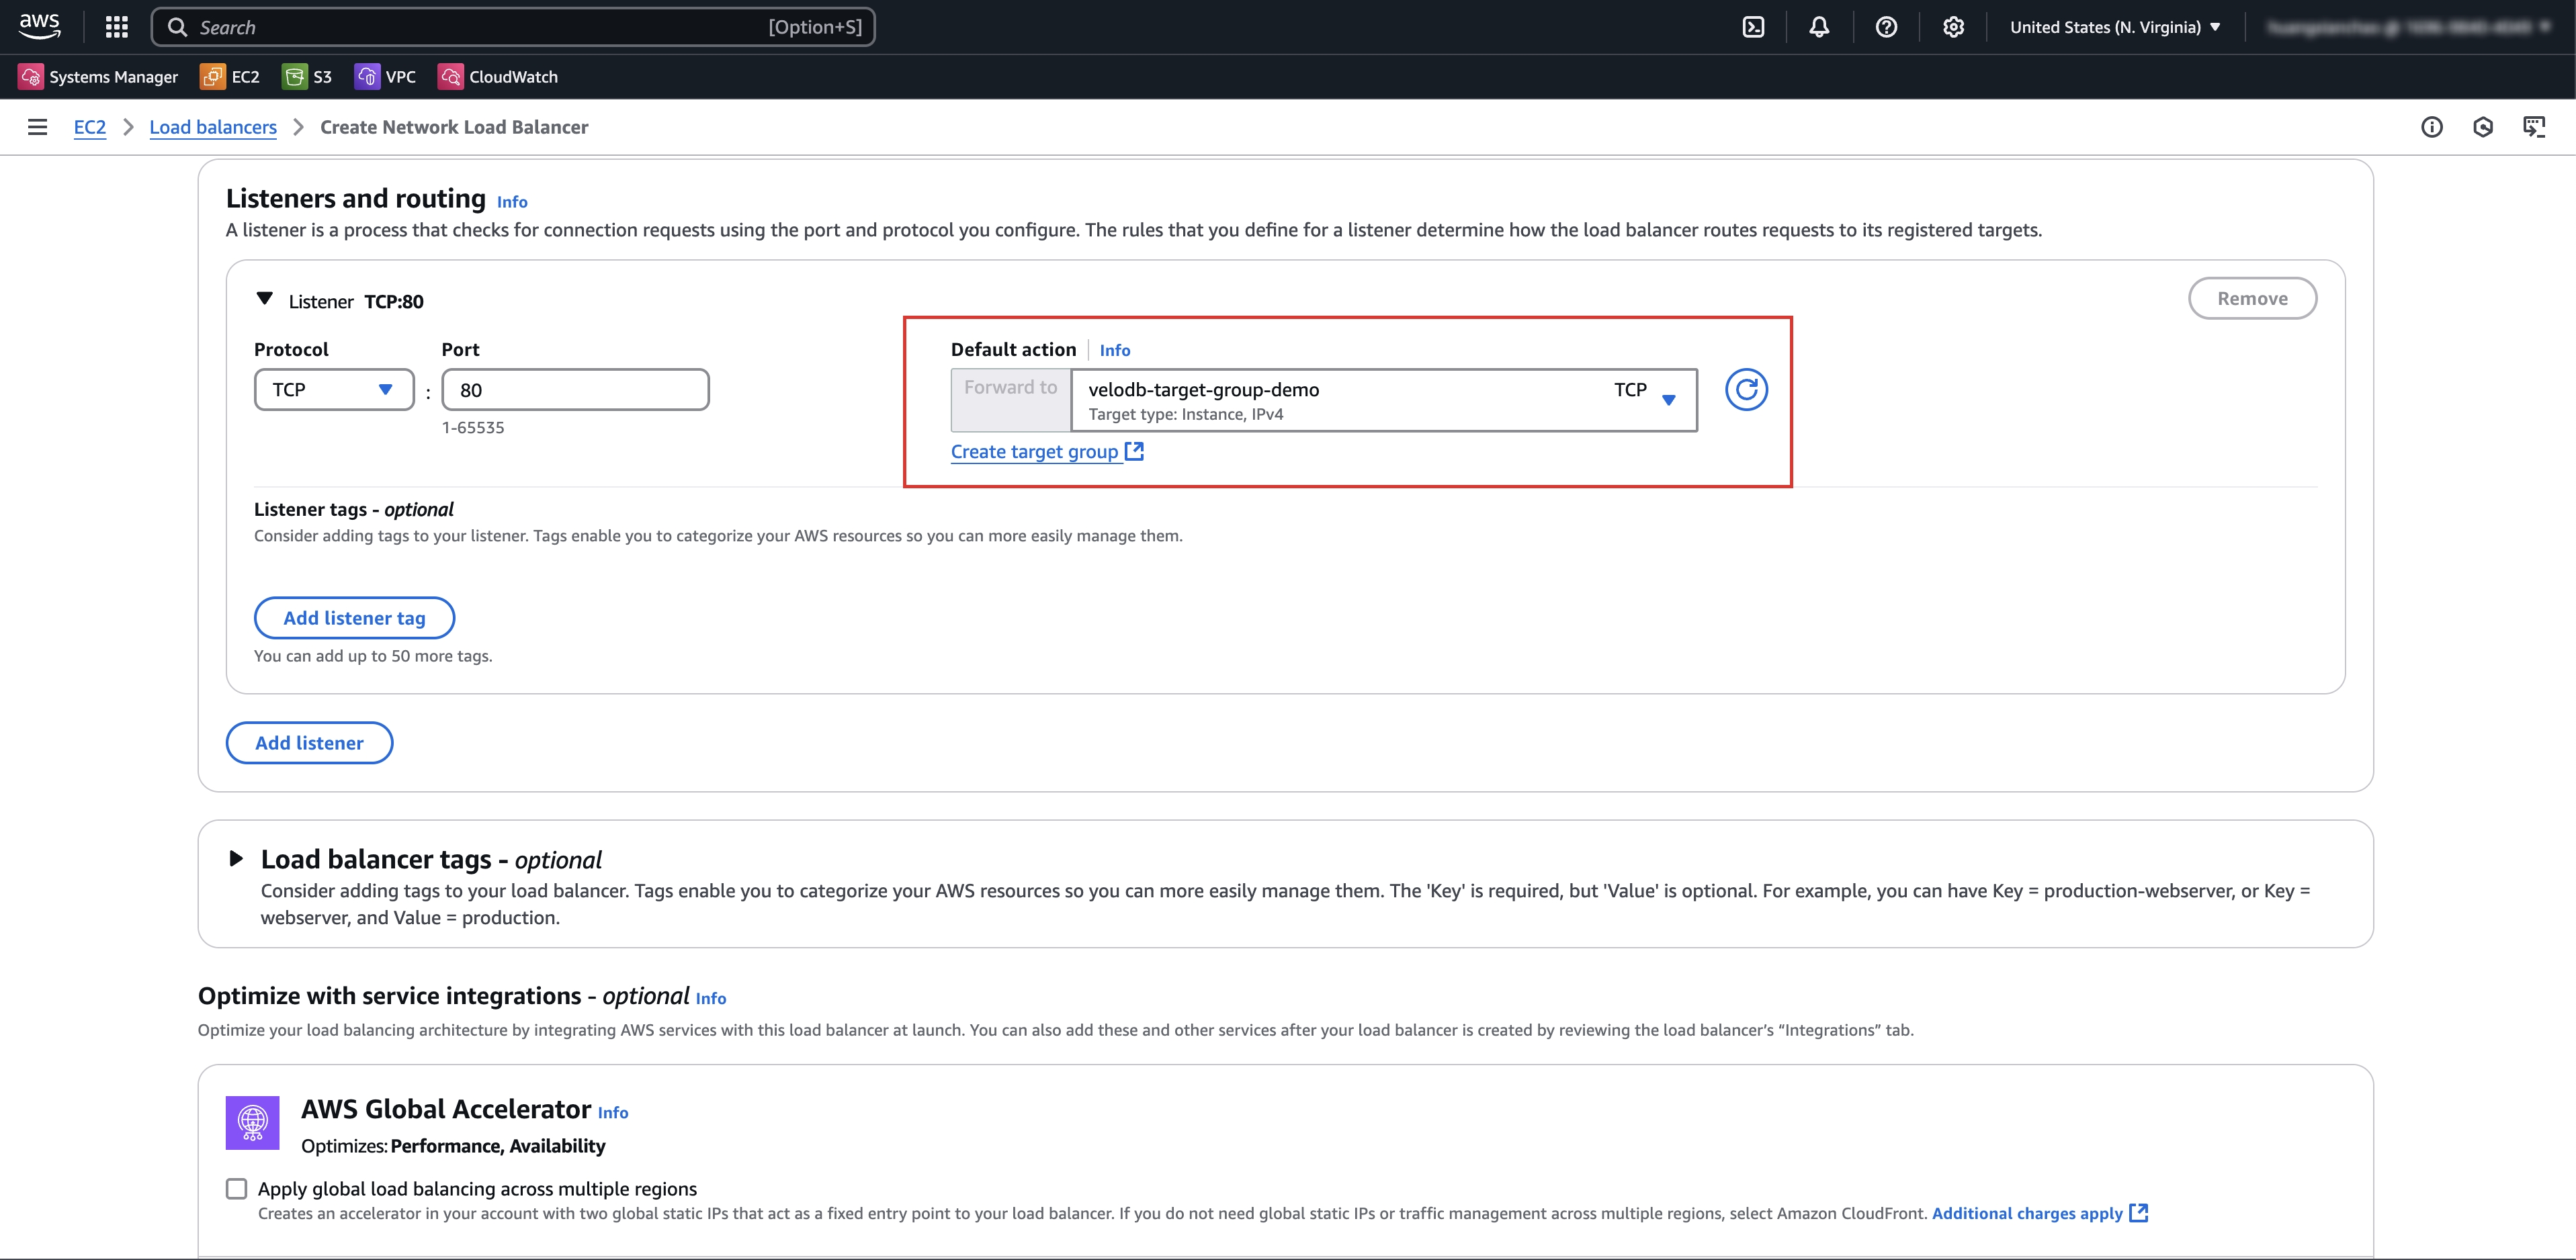
    適切なNetwork Load Balancerがない場合は、先にCreate Network Load Balancerをクリックし、作成後に絞り込んで選択します。
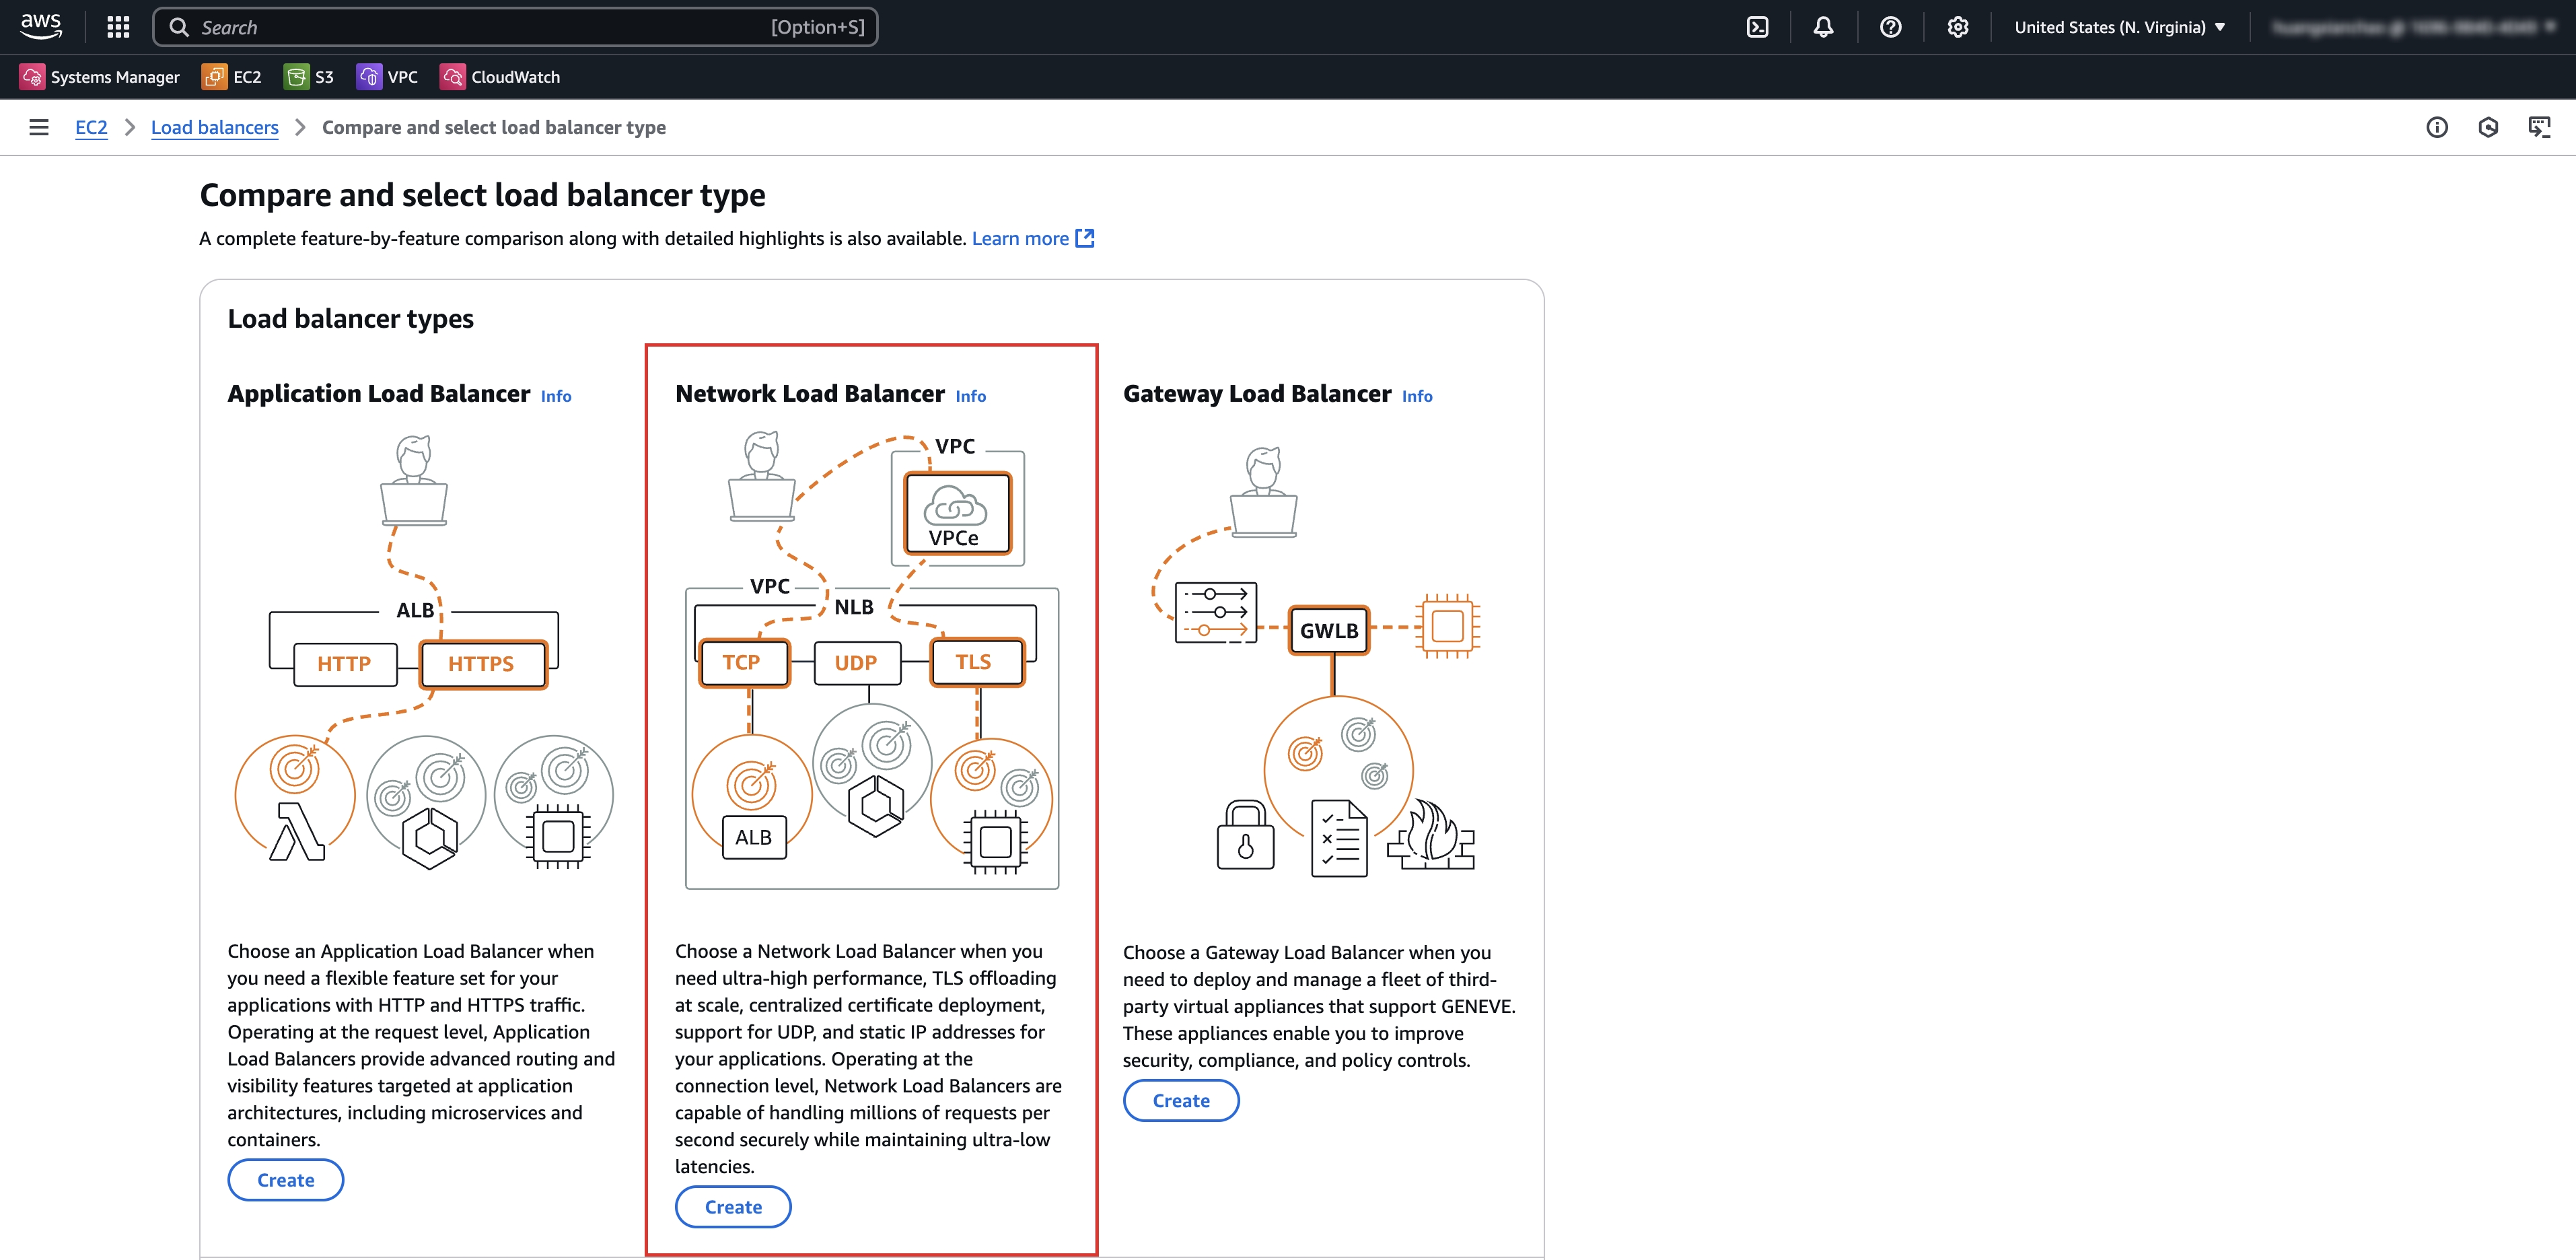
    private link create connection create nlb 0

    private link create connection create nlb 1

    private link create connection create nlb 2

    private link create connection create nlb 3

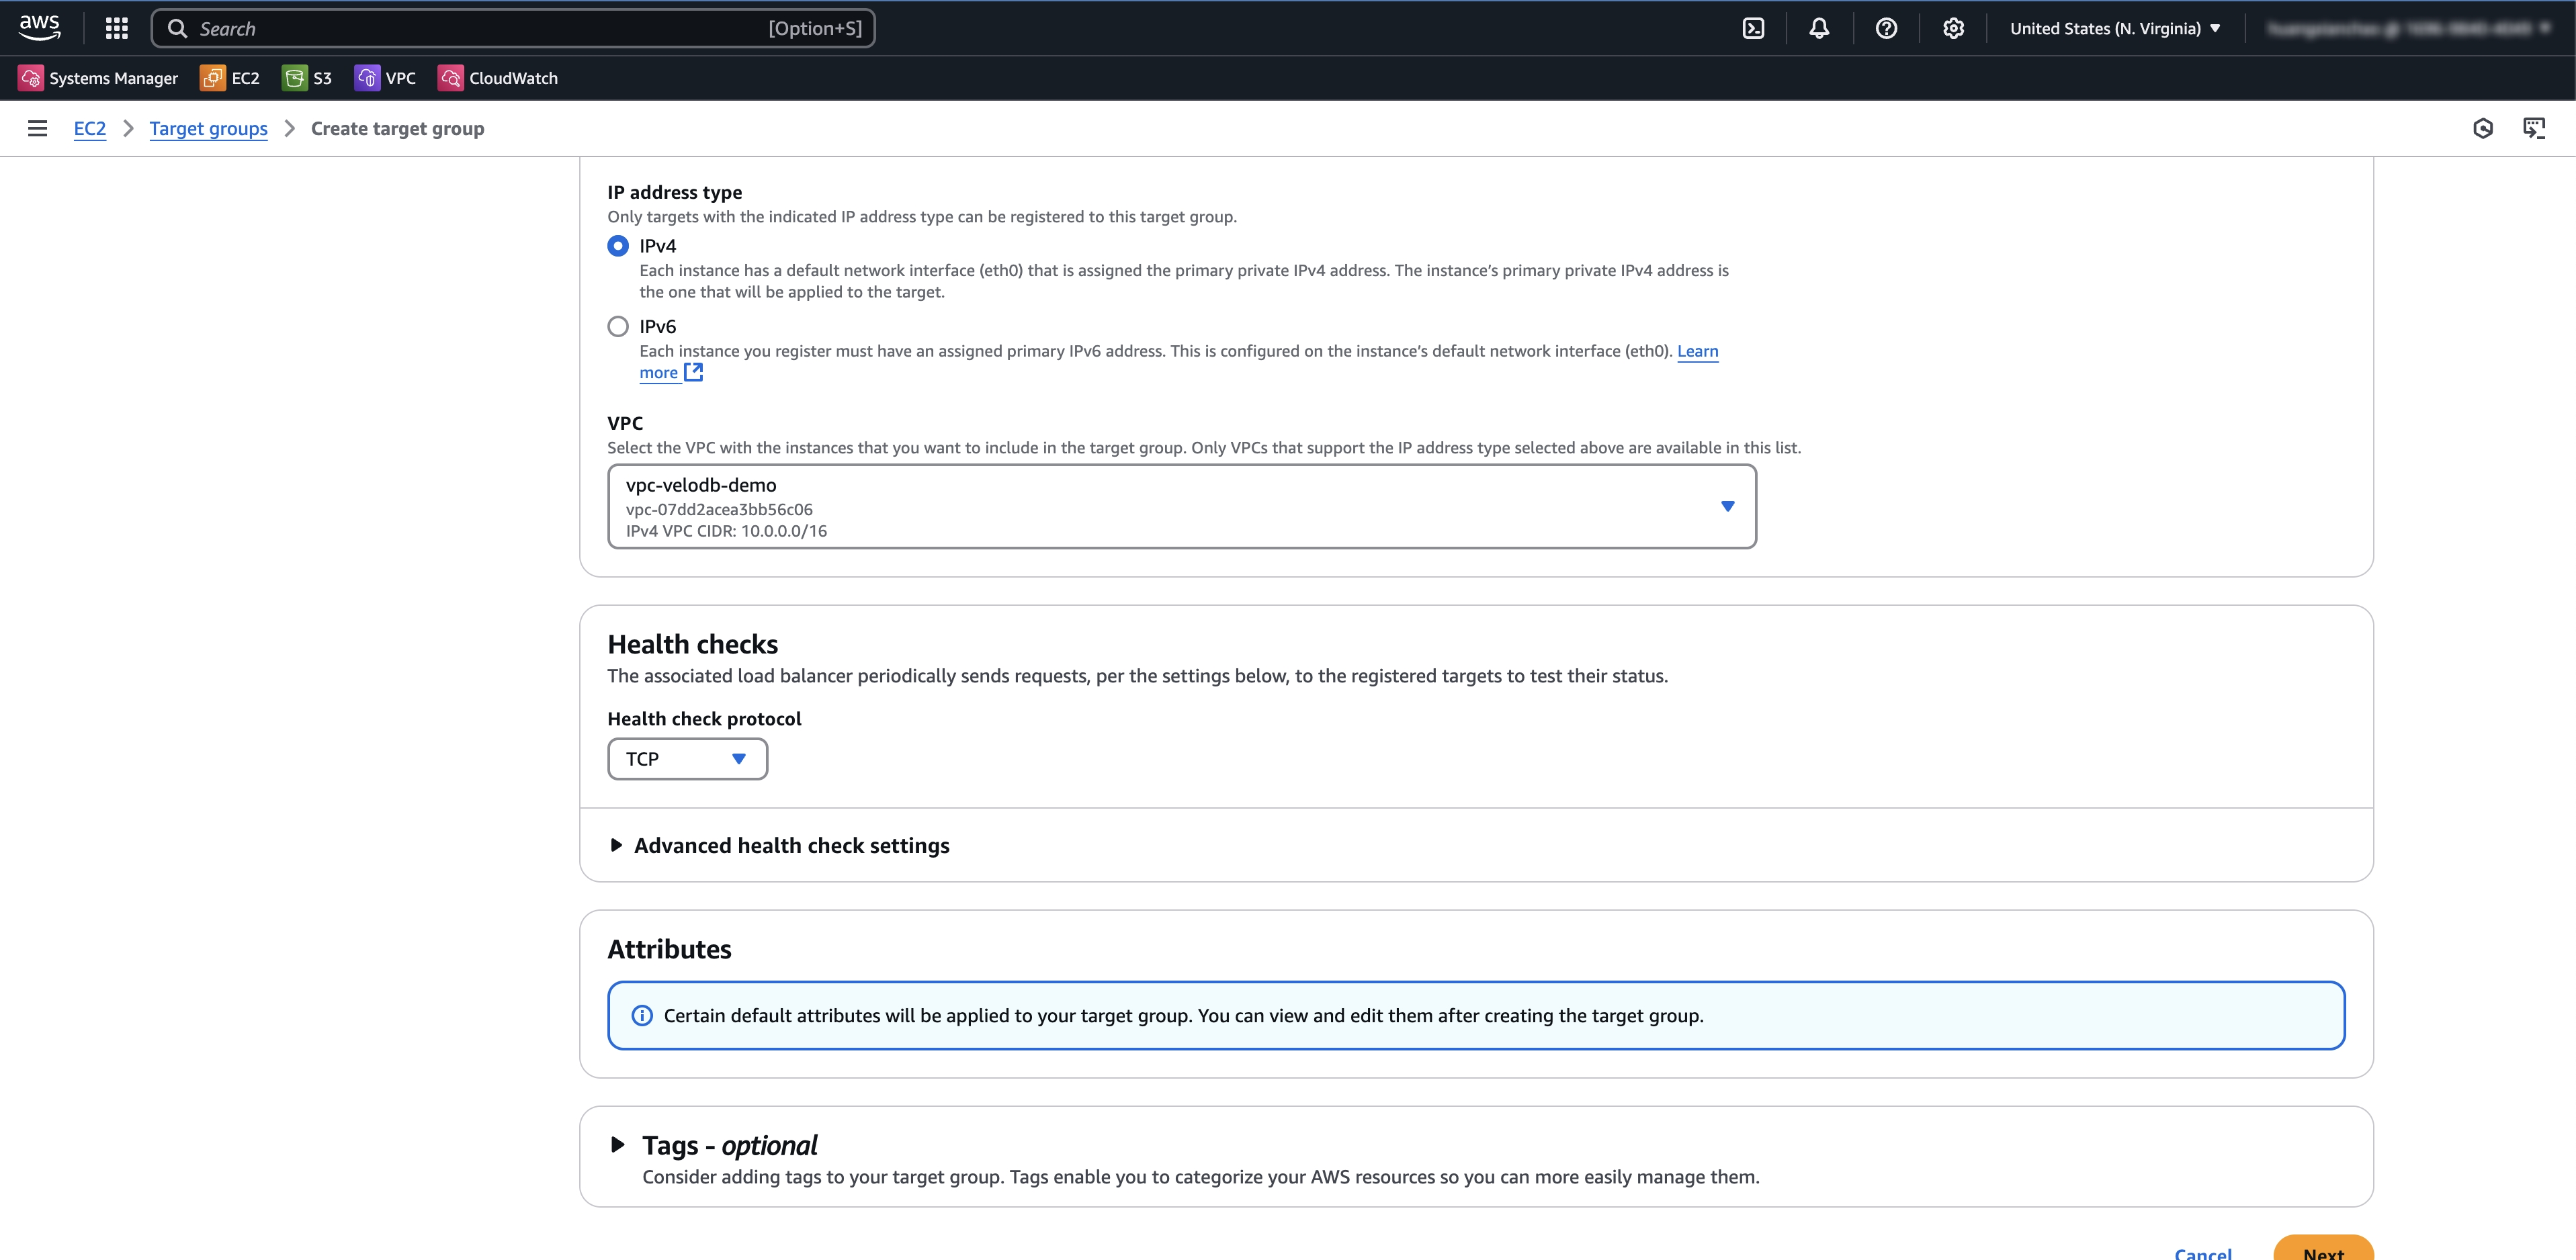
    適切なターゲットグループがない場合は、先にCreate Target Groupをクリックし、更新後に選択します。
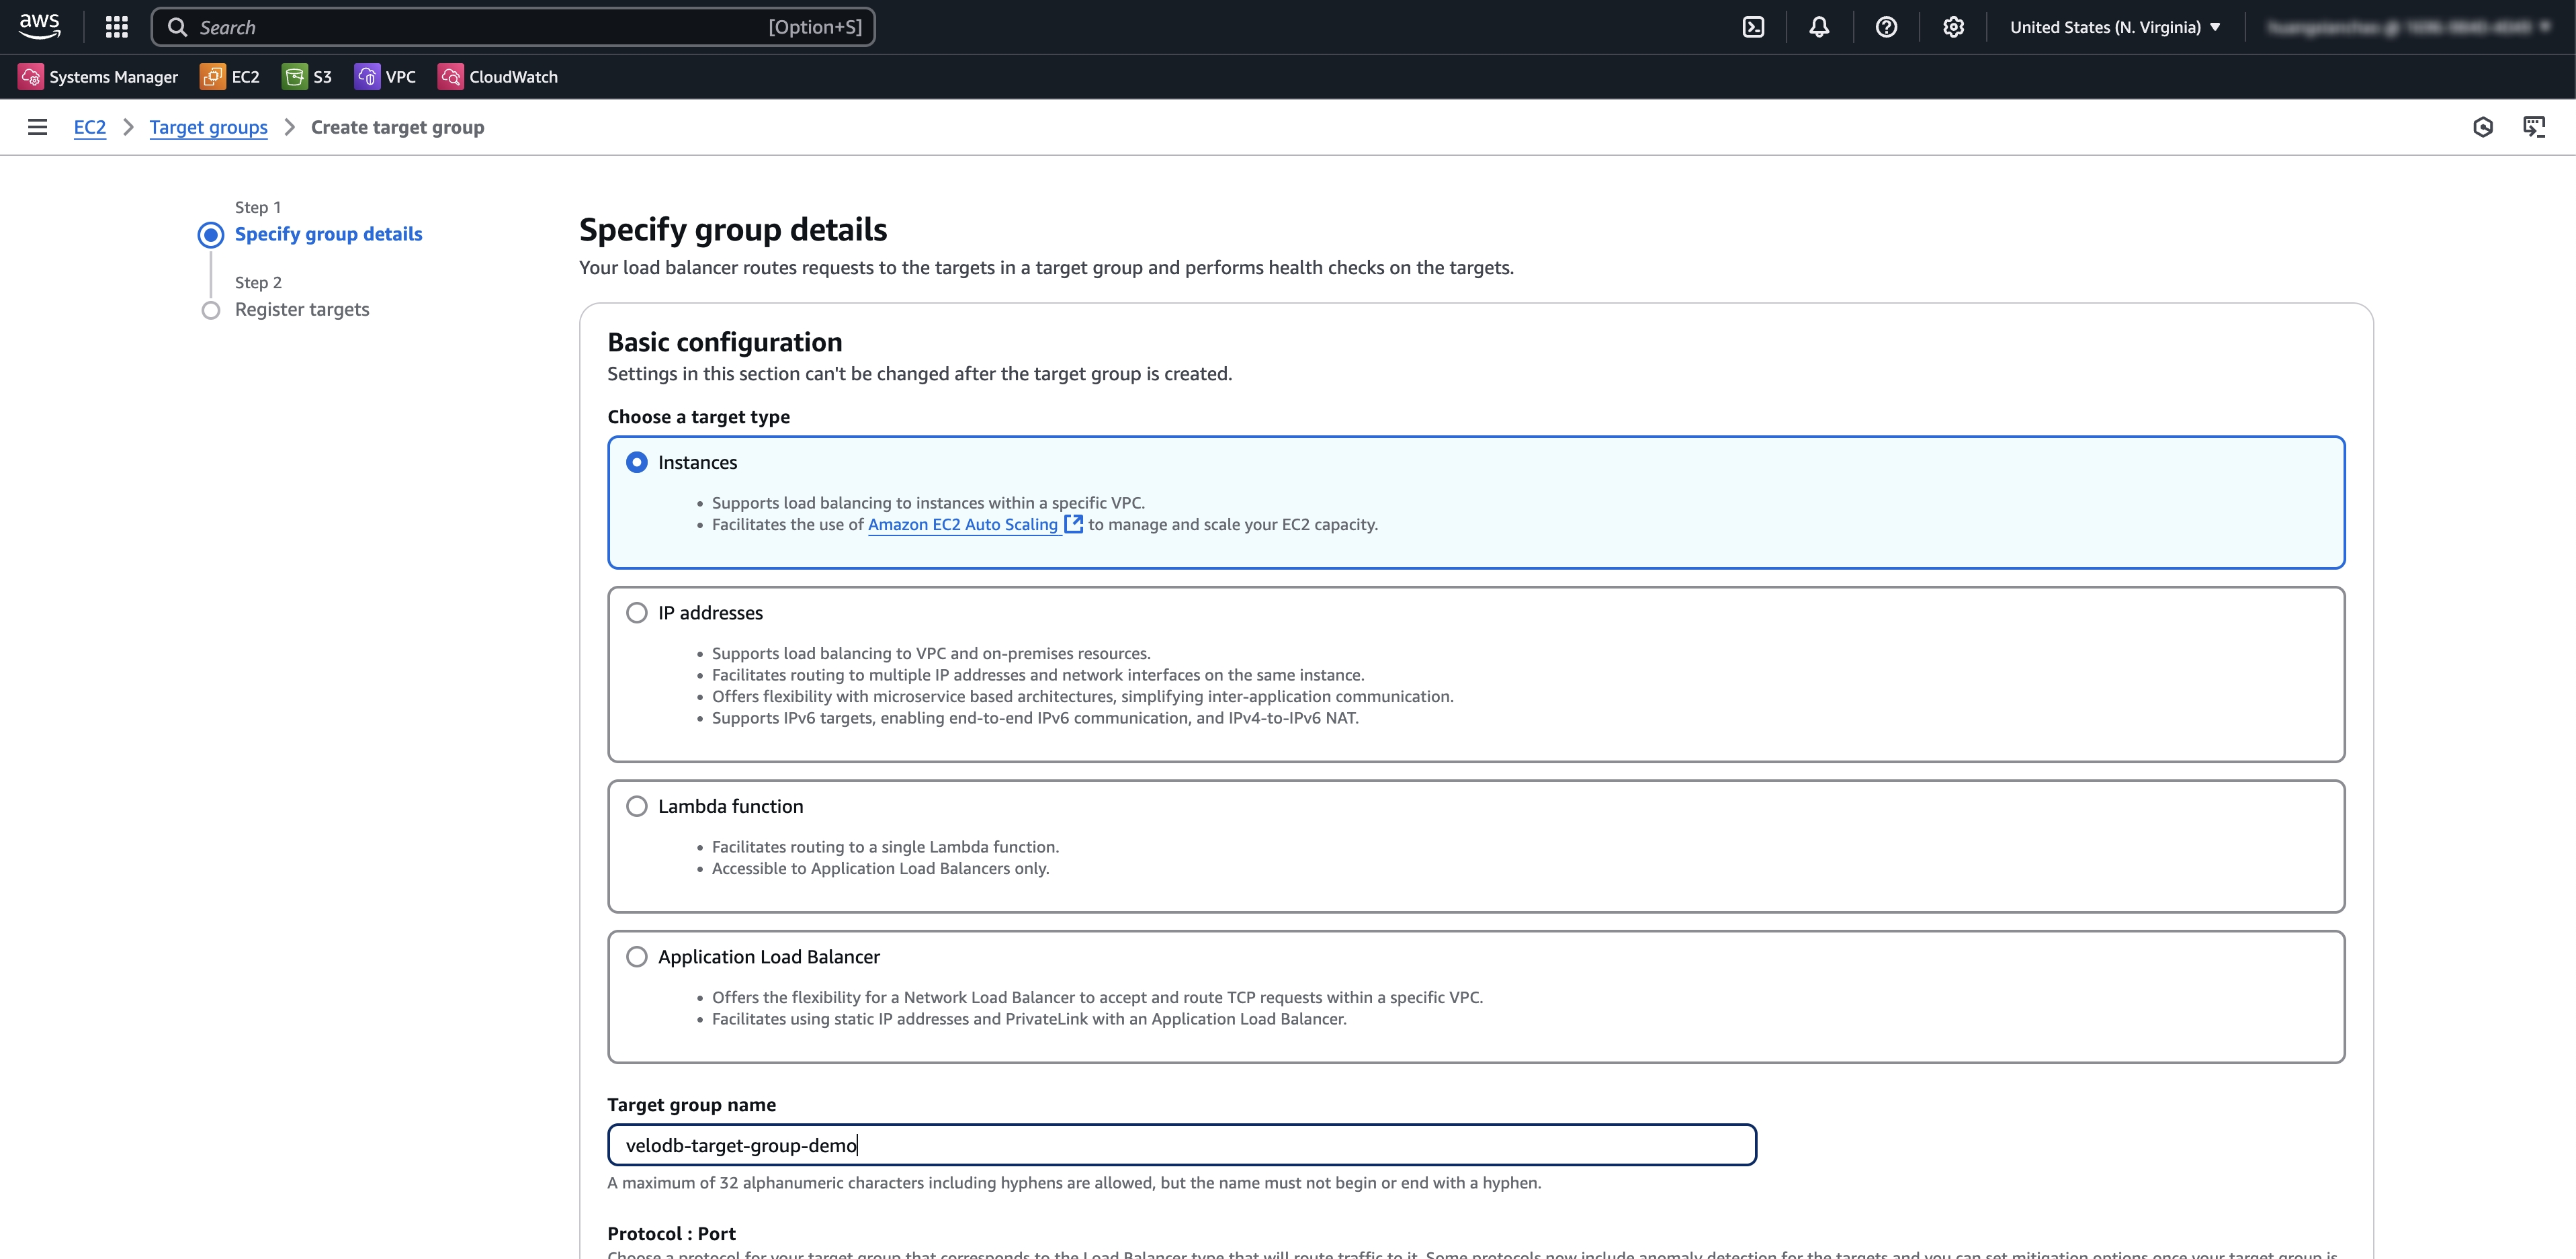
    private link create connection create tg 0

    private link create connection create tg 1

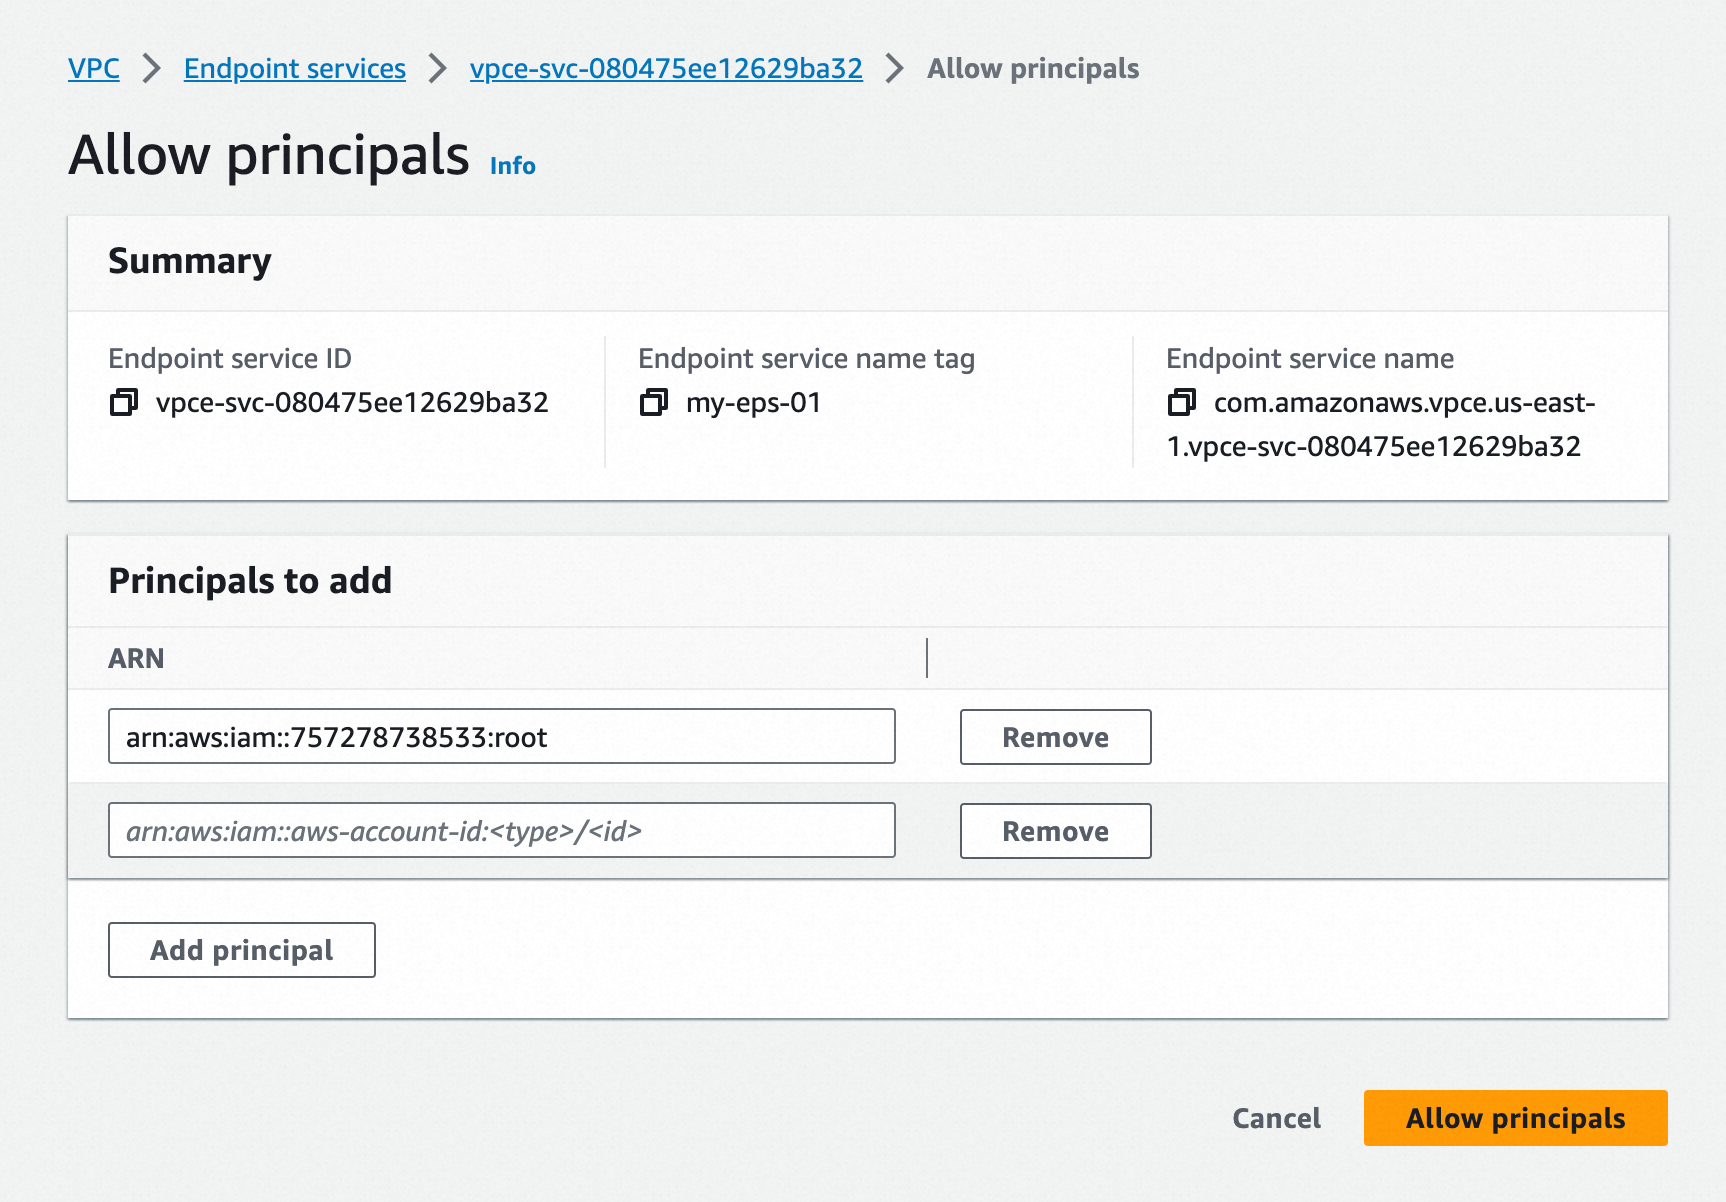
  5. Endpoint ServiceのAllow principalsタブでARN of VeloDBを追加します。
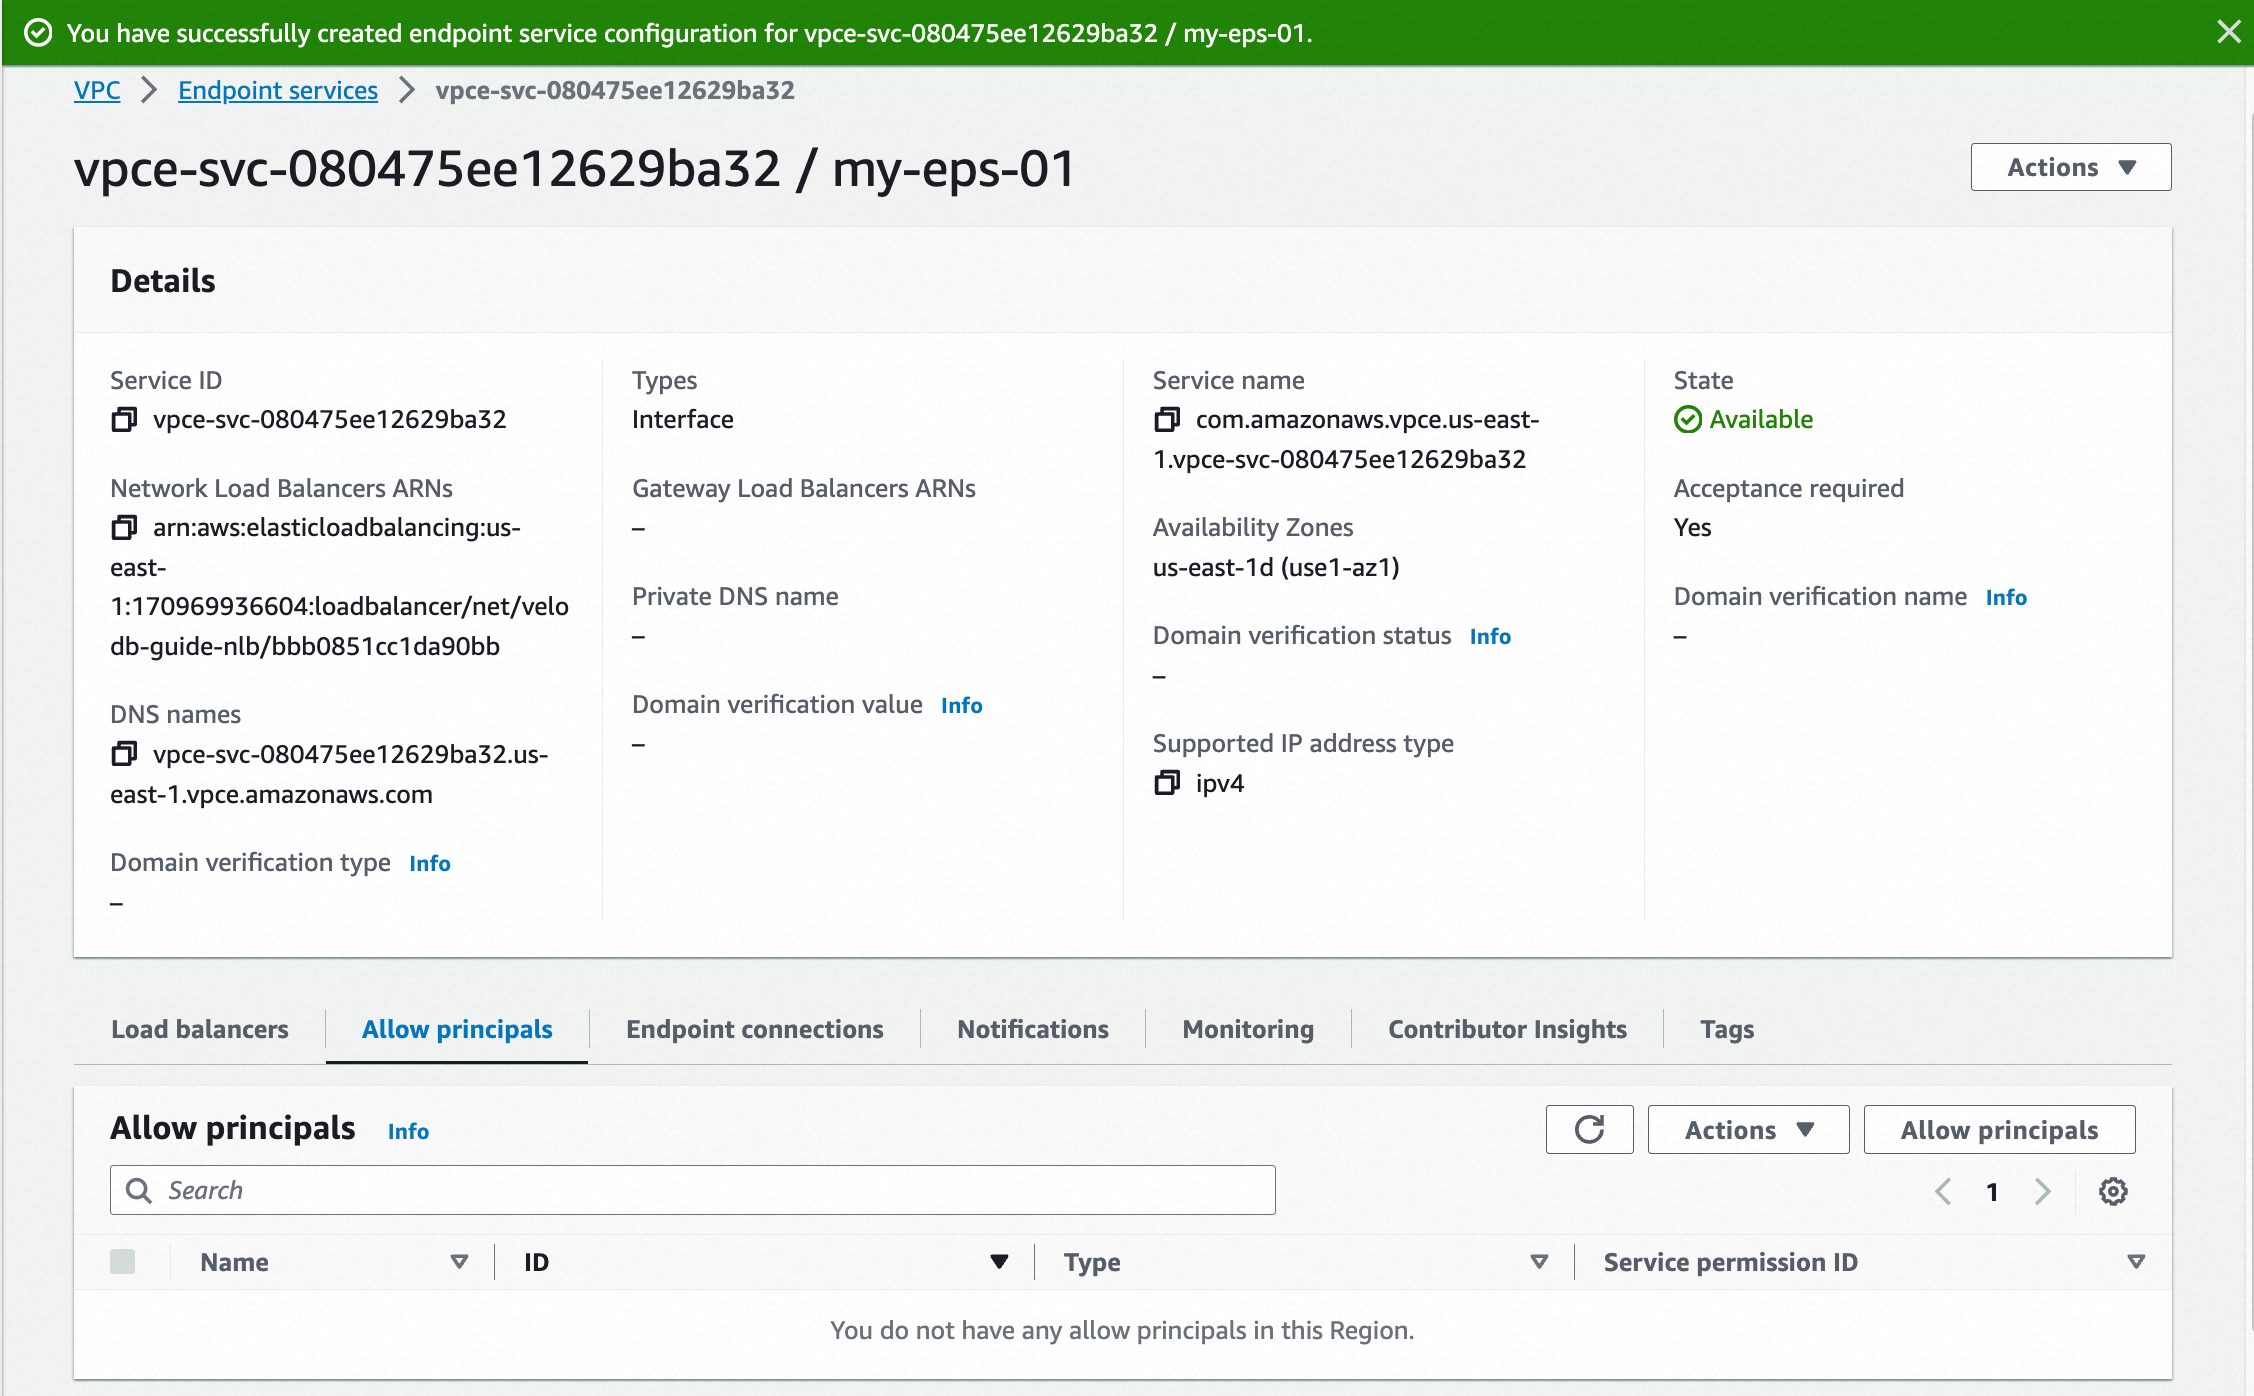
    private link create connection choose endpoint service details

    private link create connection choose endpoint service allow principals

  6. Endpoint Serviceの詳細ページからService IDService Nameをコピーし、VeloDB CloudのEndpoint Service登録ページに貼り付けます。
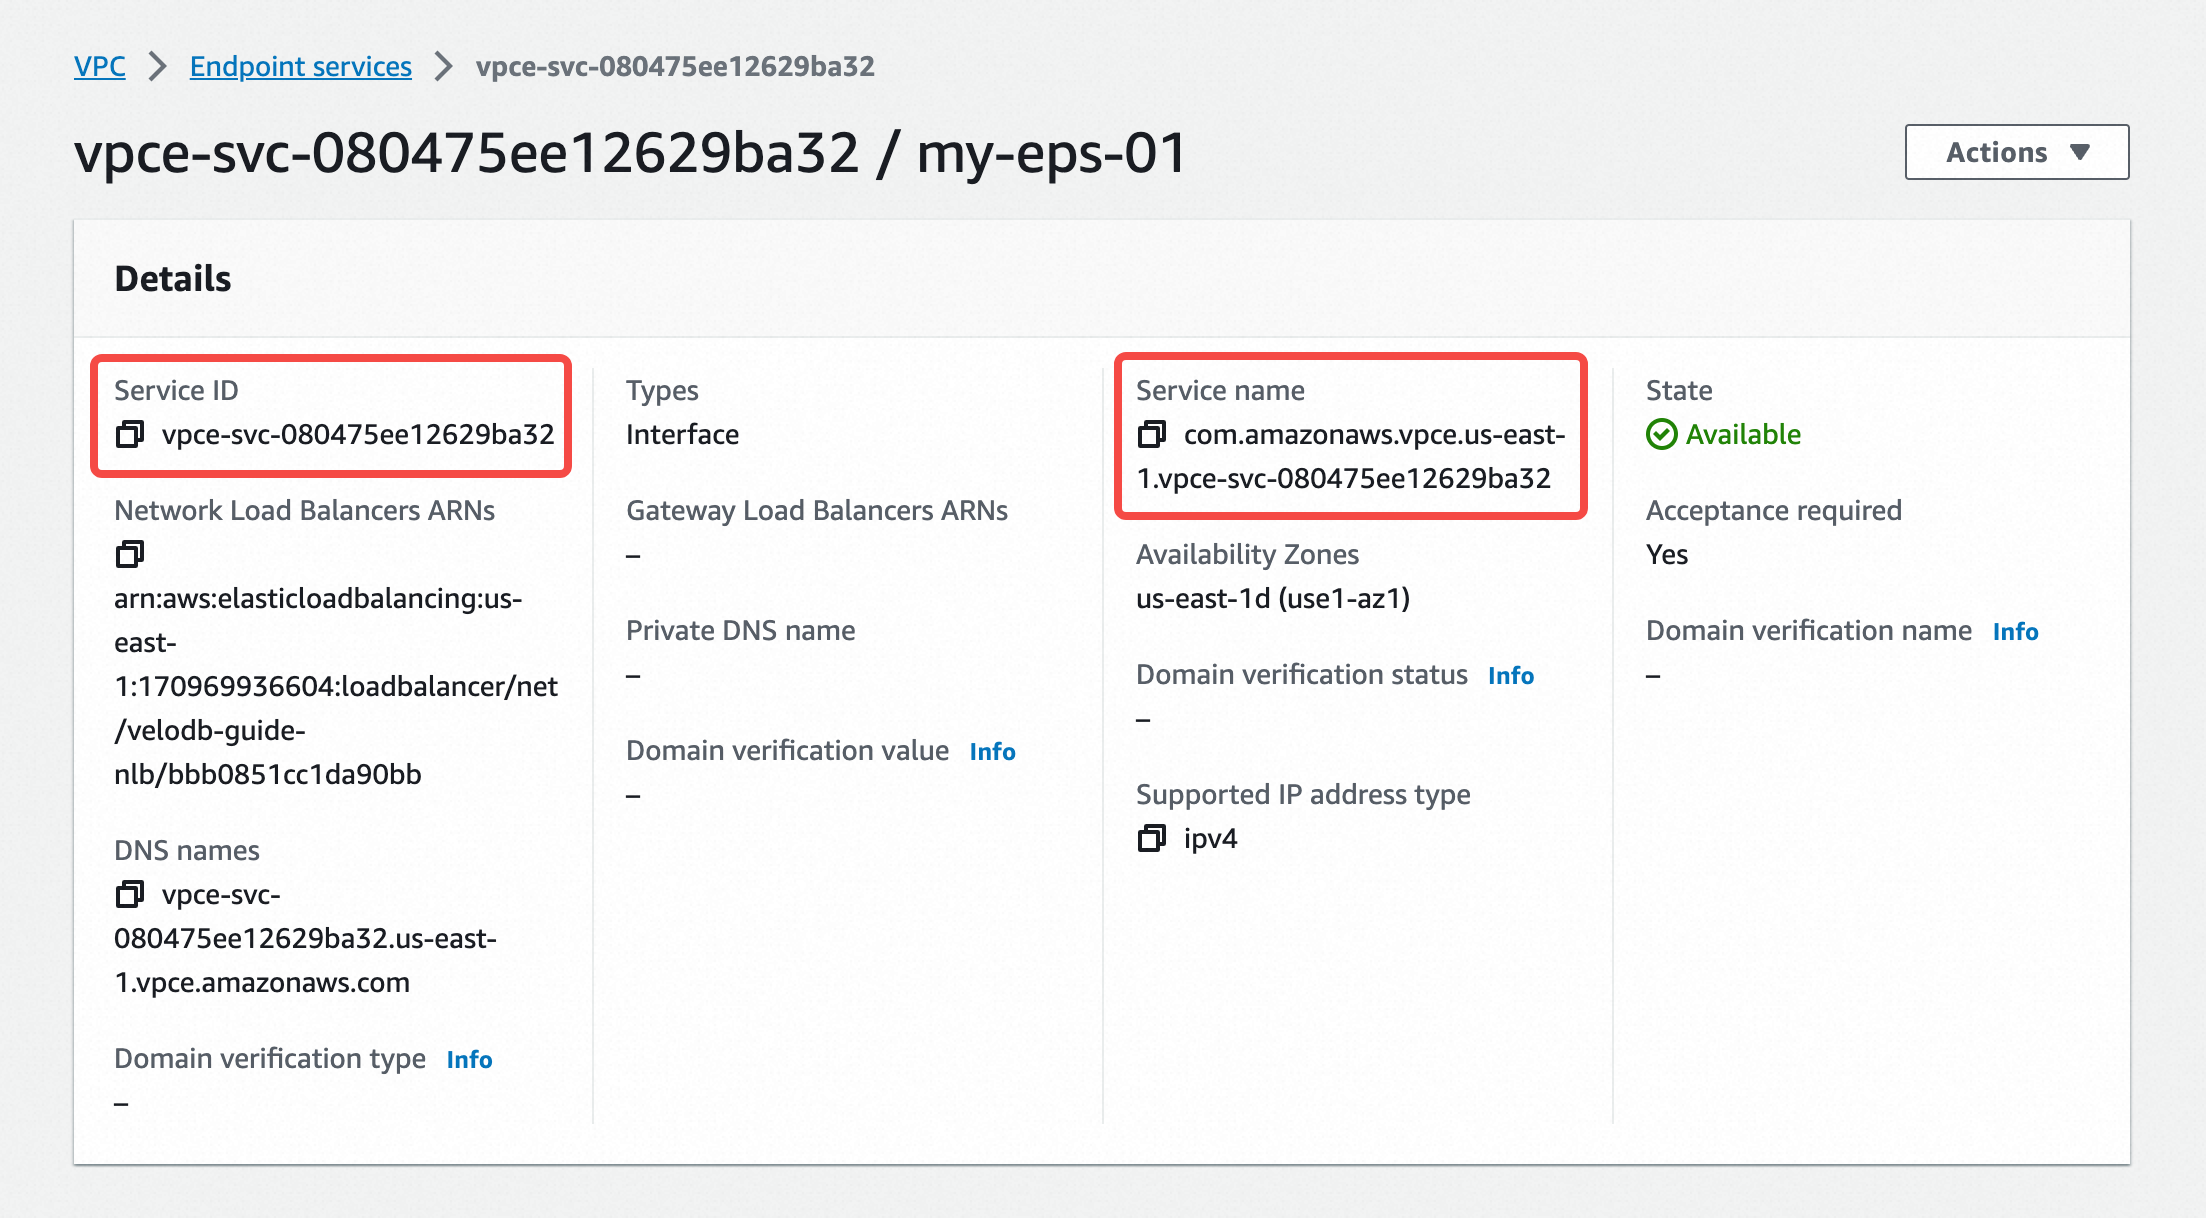
    private link create connection choose endpoint service details02

  7. 登録後、エンドポイントに名前を付けてCreate Nowをクリックします。

    private link create connection choose endpoint service chosen

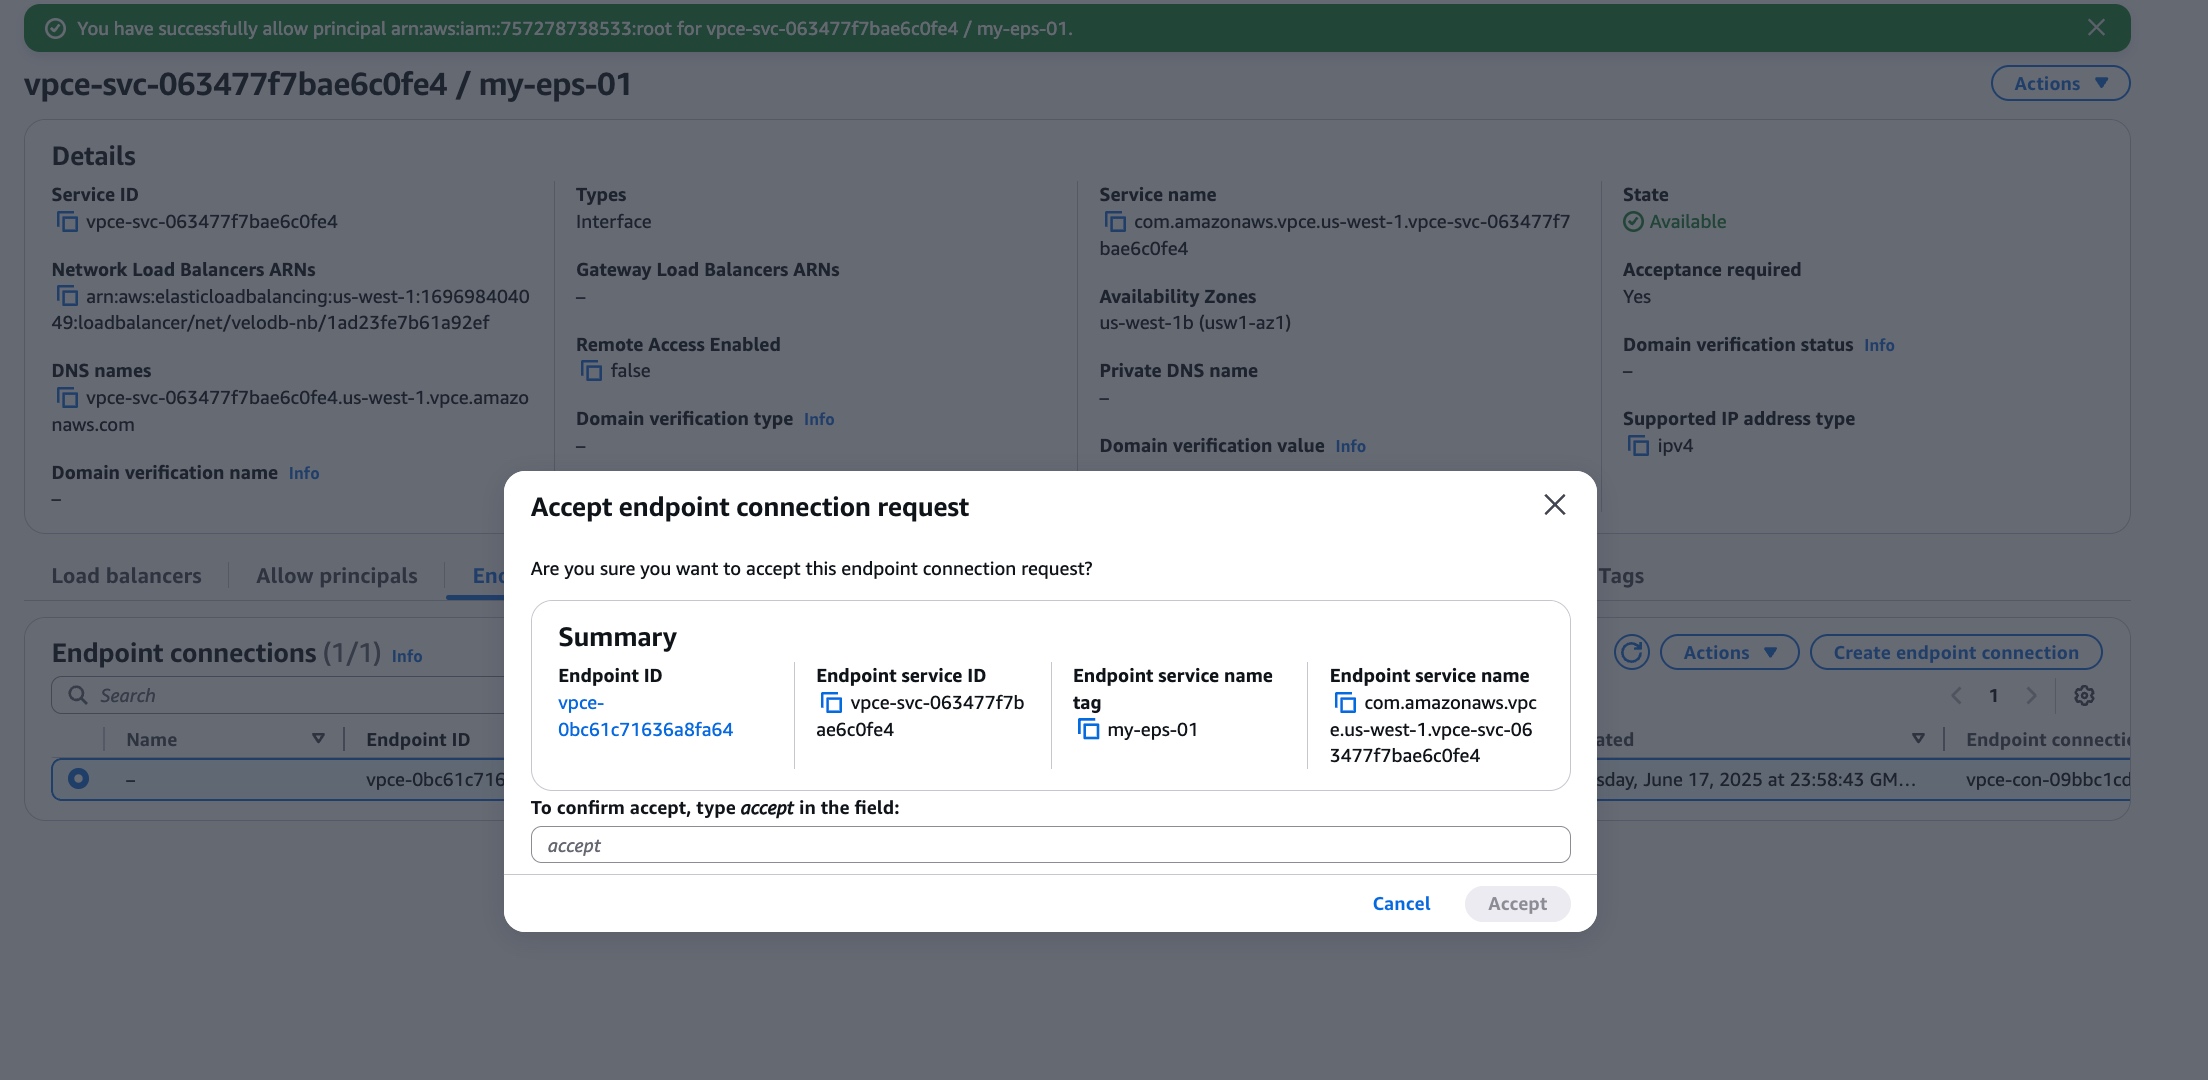
  8. Endpoint ServiceのEndpoint connectionsタブで、エンドポイント接続リクエストを承認します。
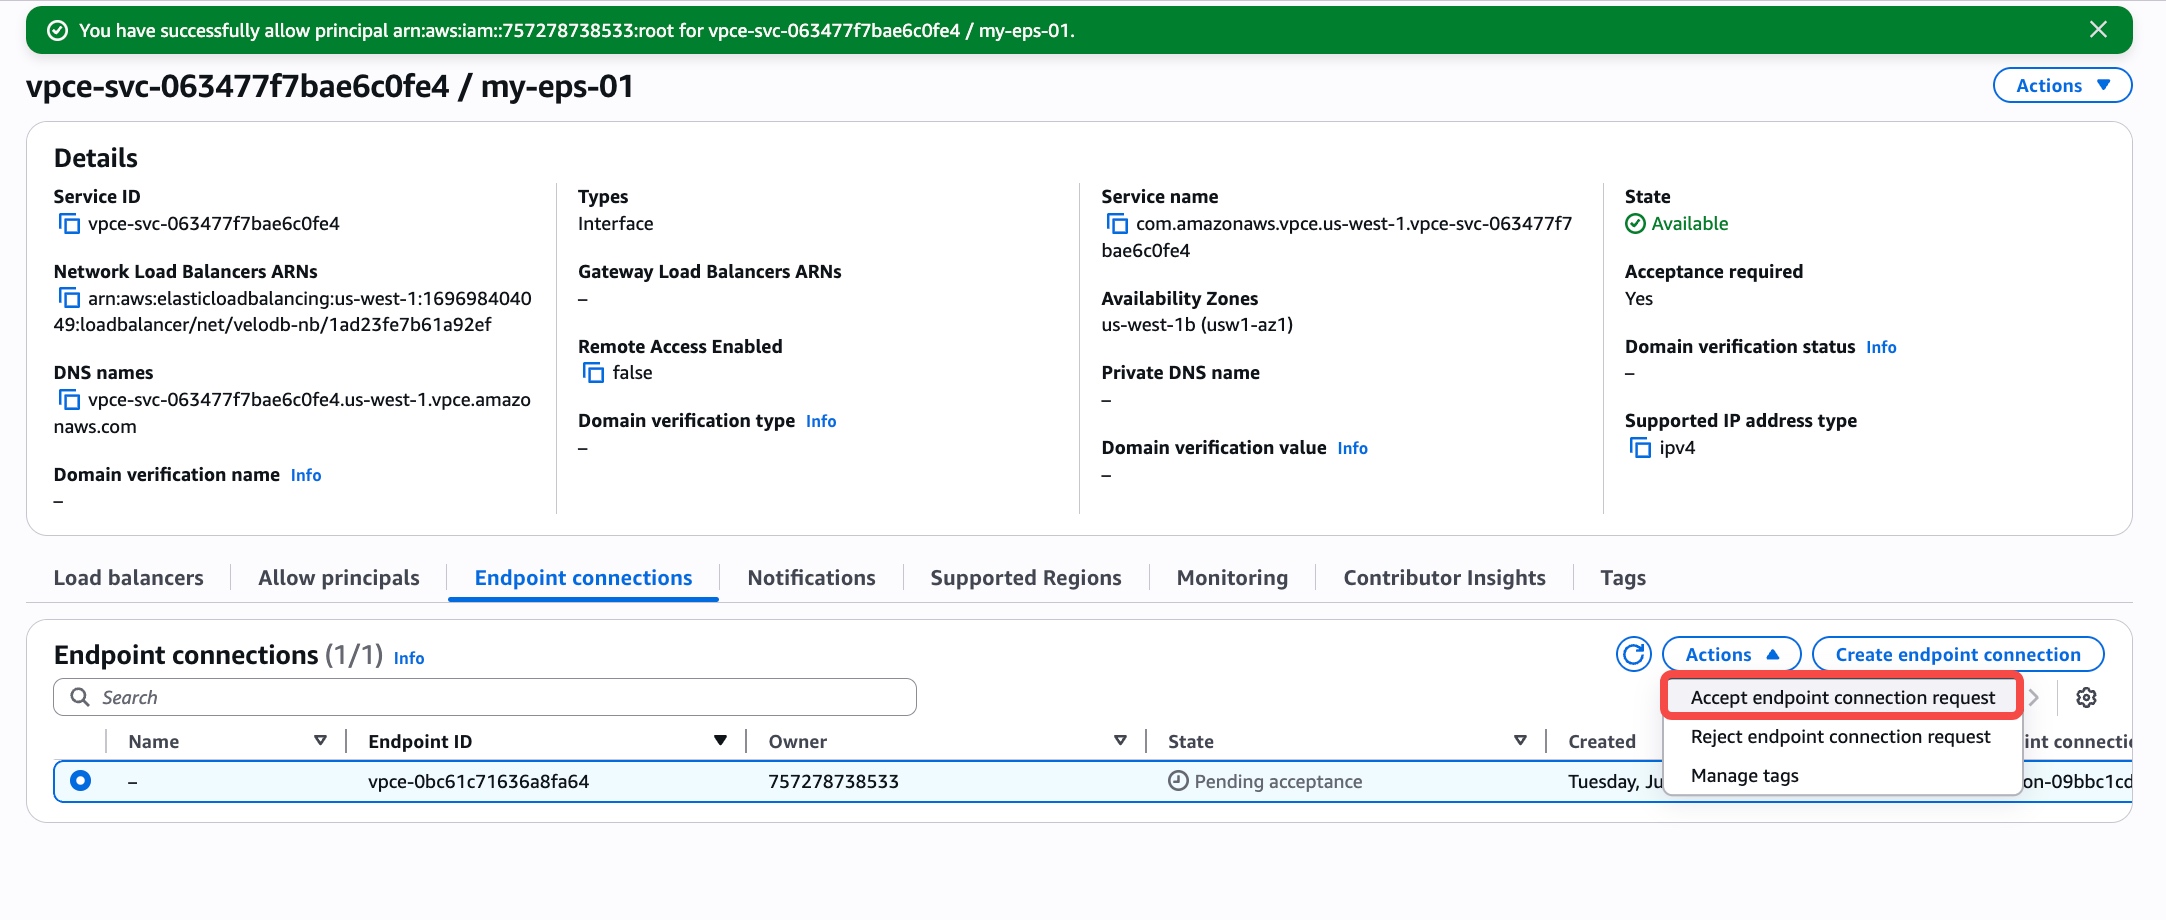
    private link velodb acdess user vpc endpoint accept

    private link velodb acdess user vpc endpoint accept ok

  9. VeloDB CloudのConnectionページを更新し、エンドポイントステータスがpendingAcceptanceからavailableに変わるまで待ちます。
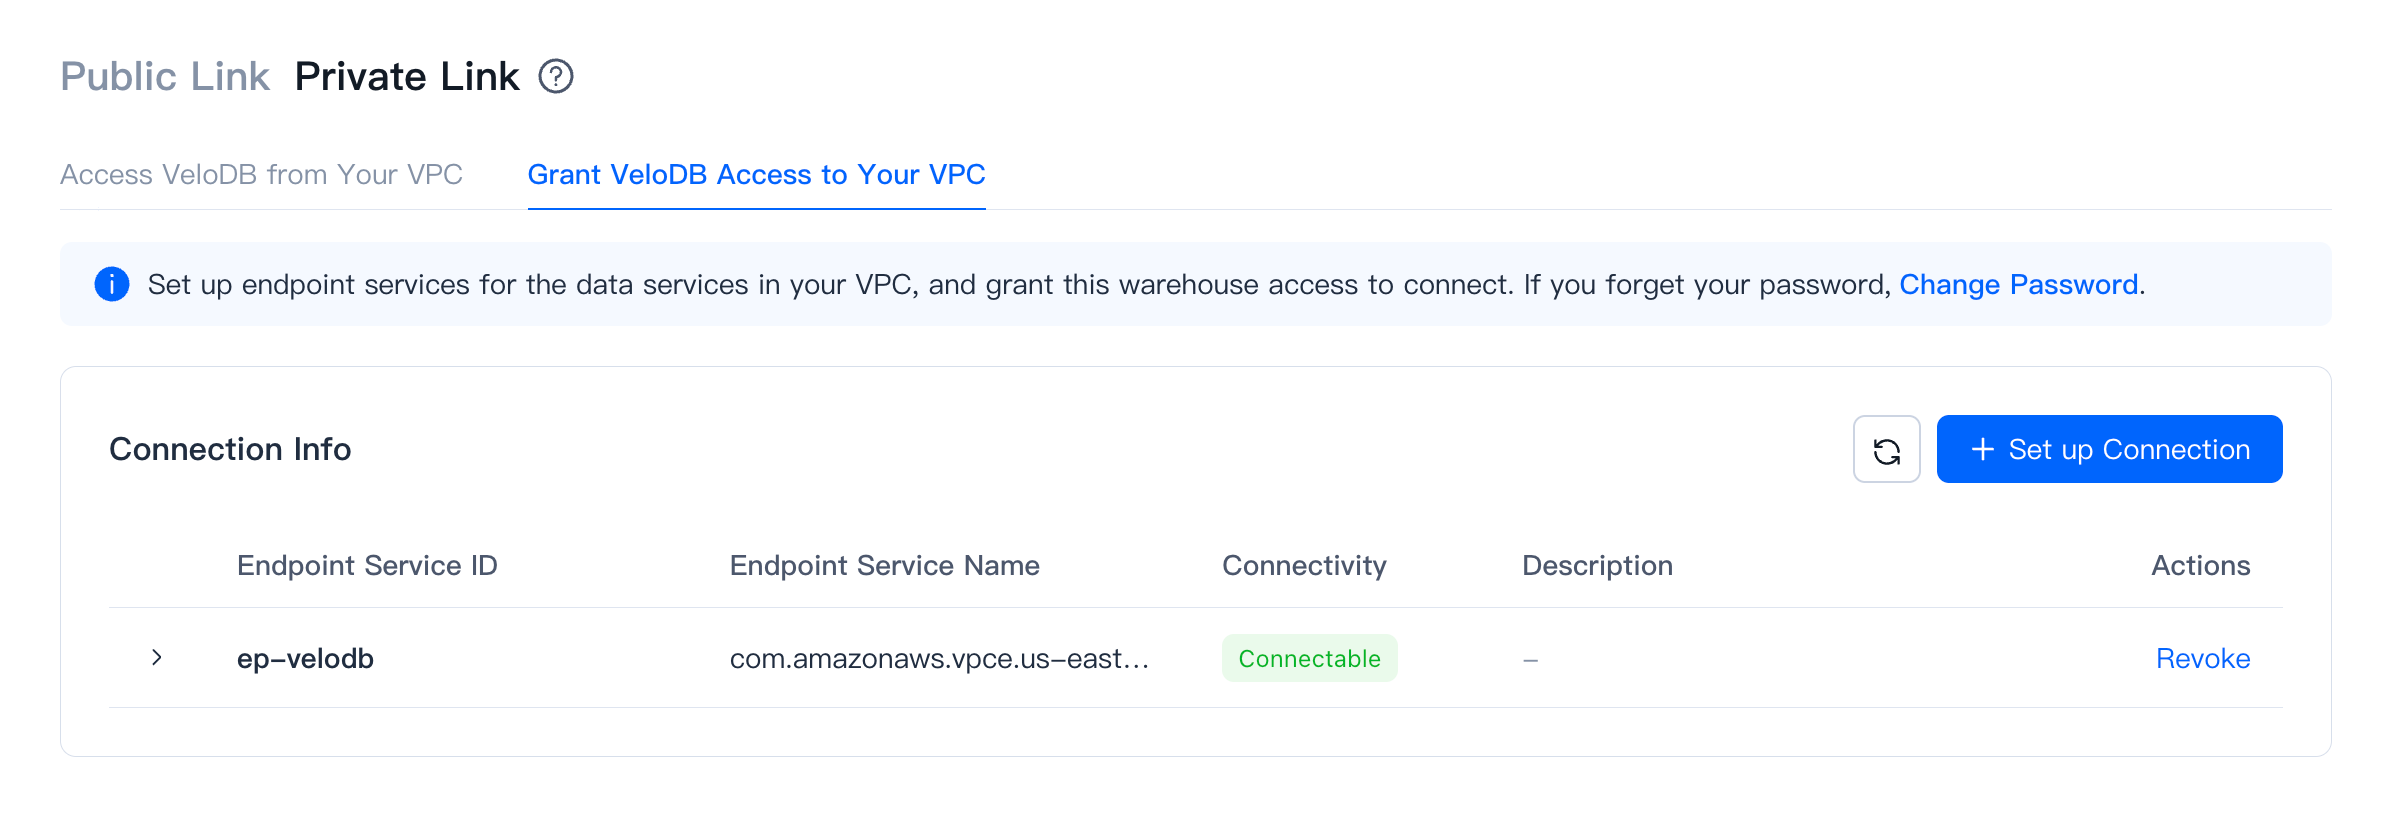
    private link velodb acdess user vpc endpoint pendingacceptance