Use Warehouse
Check Warehouse Details
In the warehouse selector, you can see all the warehouses you are permitted to check.
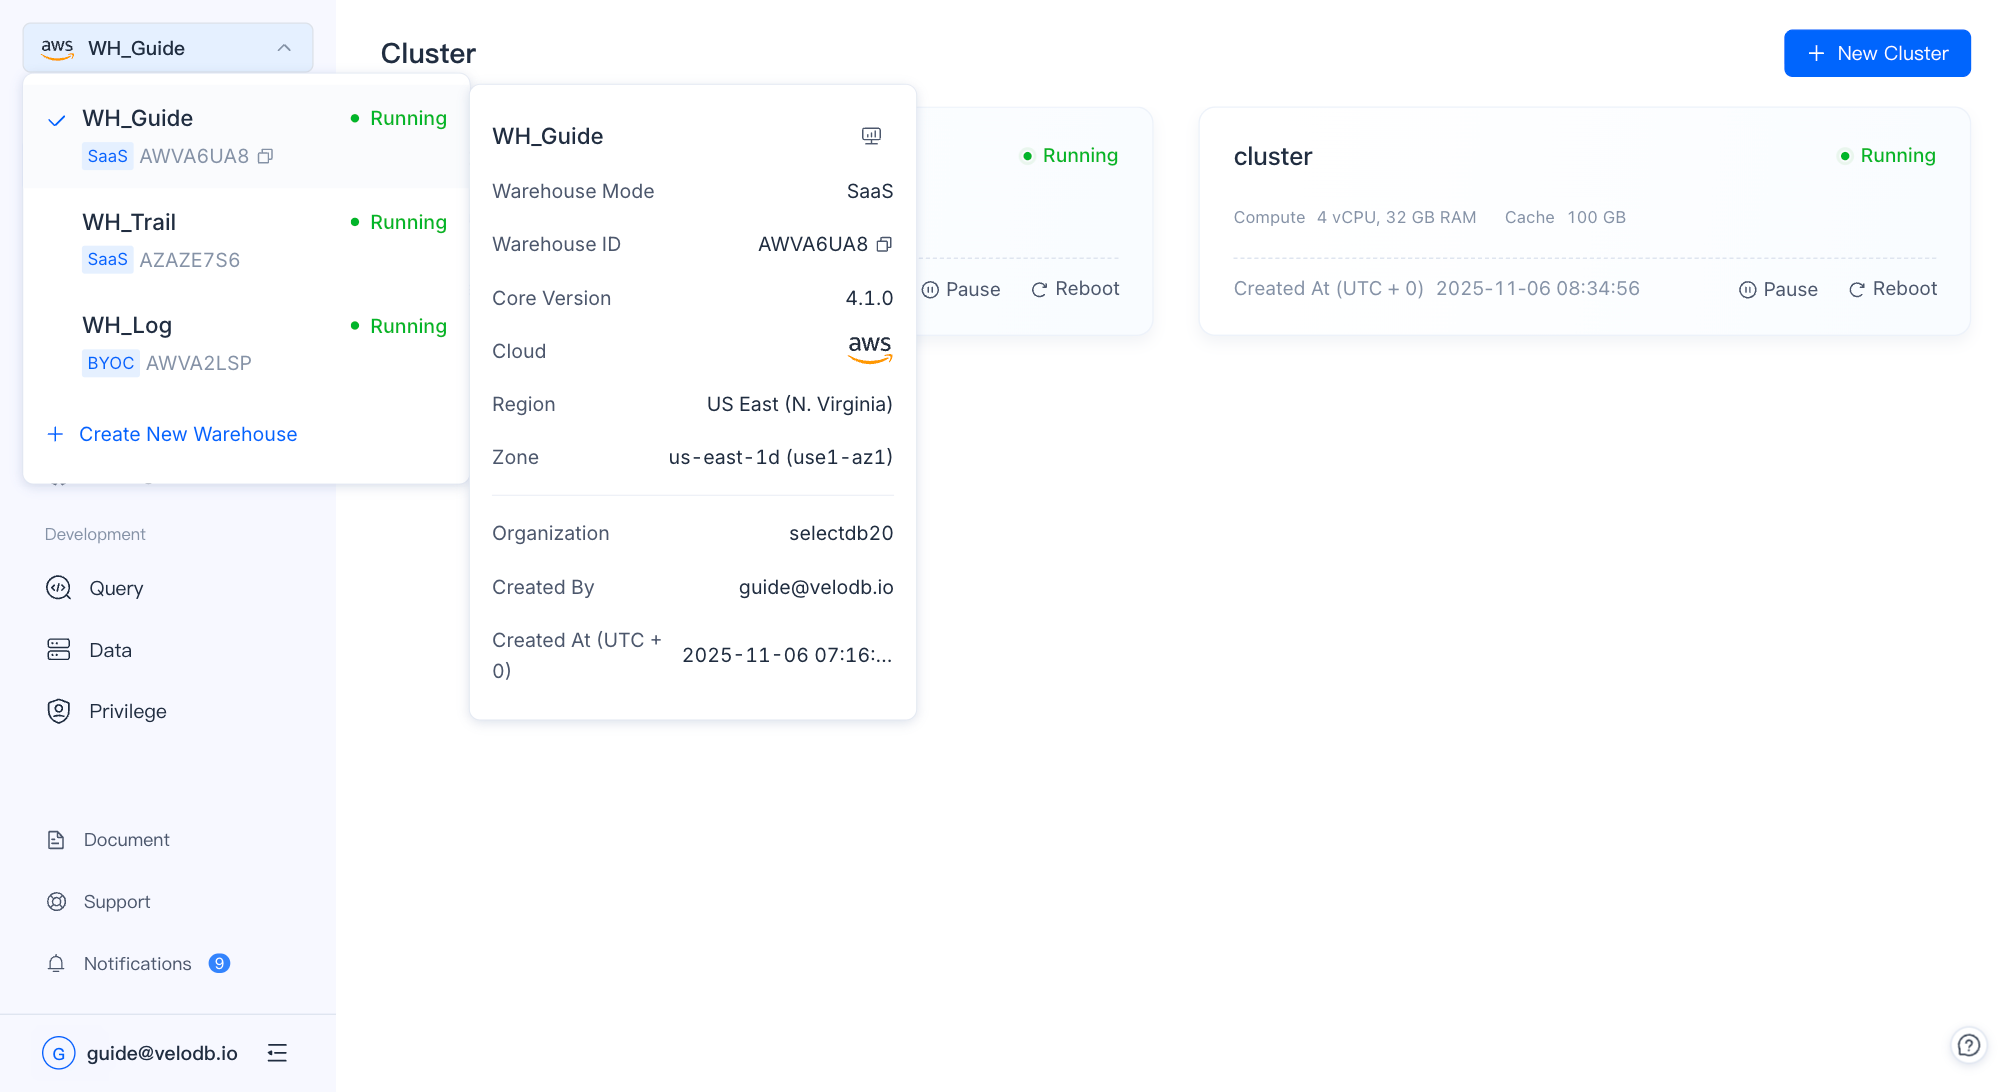
The warehouse selector will display each warehouse's name, cloud platform, region, and status. The ticked one is your current warehouse.
Hover the cursor over a warehouse, and you will see a pop-up card, which displays the name, ID, core version, cloud platform, region, zone and organization of the warehouse.
Note
- Warehouse ID coding rules: have 8 characters, consisting of uppercase letters and numbers. The first 4 letters represent the cloud platform & region (e.g. US East (N. Virginia) of AWS, AWVA), and the last 4 letters represent the warehouse by a random combination of letters and numbers (such as X7NG).
Switch Current Warehouse
In the warehouse selector, you can scroll and find your target warehouse and switch to it by a simple click.
Change Warehouse Name
You can change the warehouse name on the Settings page. Please enter a new warehouse name (self-explanatory names are recommended) and press Enter to confirm the modification.
Warning The warehouse name must be unique within the current organization, with a maximum of 32 characters. It only supports Chinese, letters, numbers, _ and -
Change Warehouse Password
The username and password are required when connecting to a warehouse. You can initialize or reset the password on the Settings page.
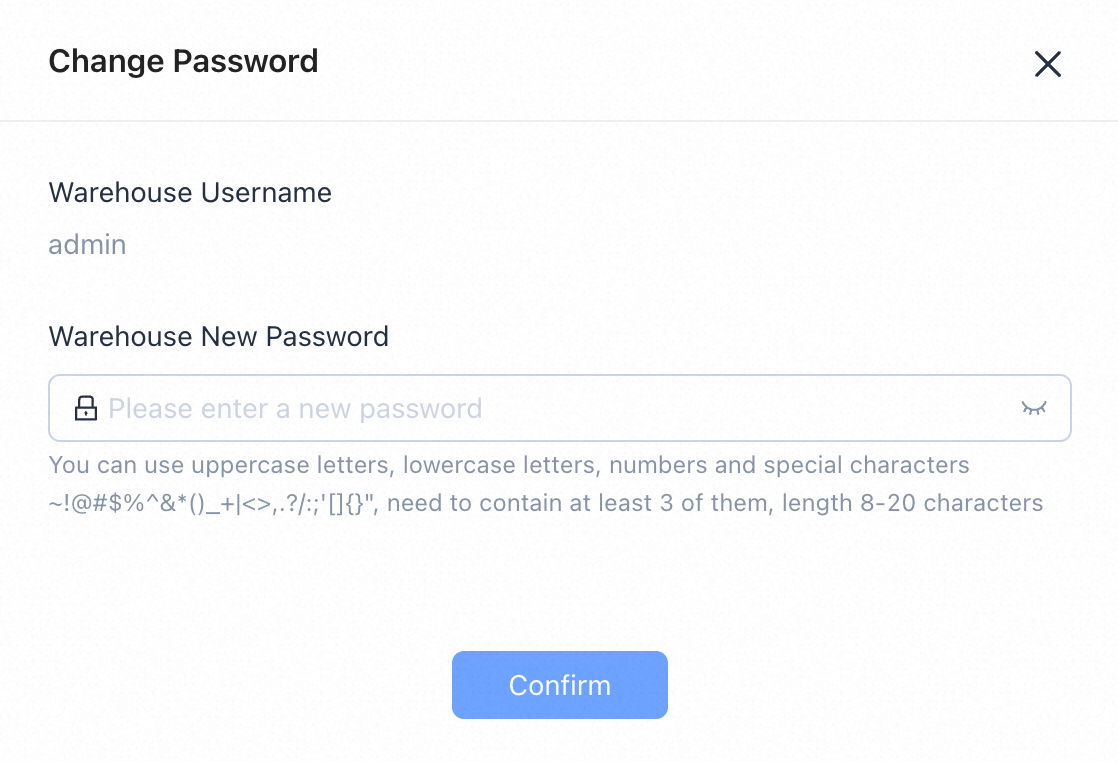
Warning The password only supports uppercase letters, lowercase letters, numbers and special characters ~!@#$%^&*()_+|<>,.?/:;'[]", need to contain at least 3 of them, length 8-20 characters.
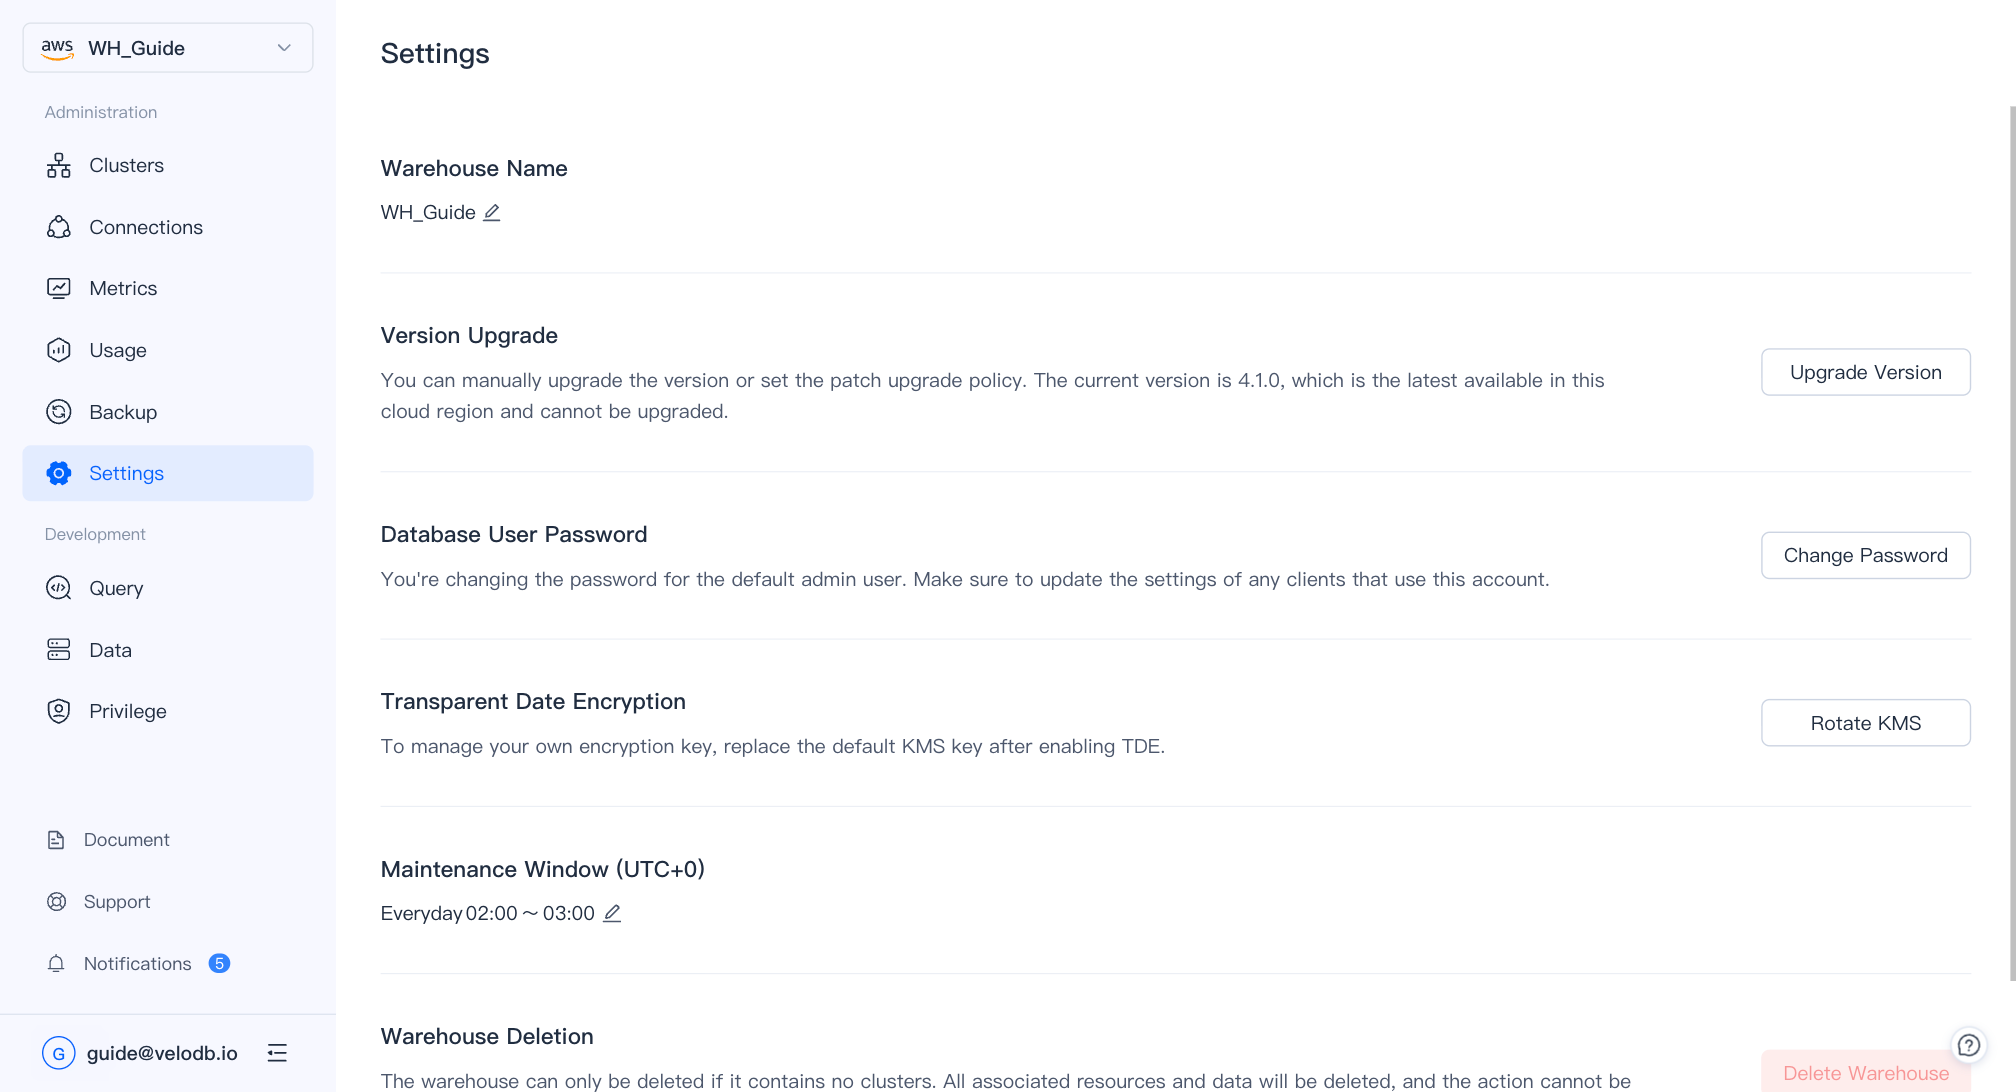
Transparent Date Encryption
To enhance security, you can enable Transparent Data Encryption (TDE) during warehouse creation, providing an additional layer of protection for your service data.
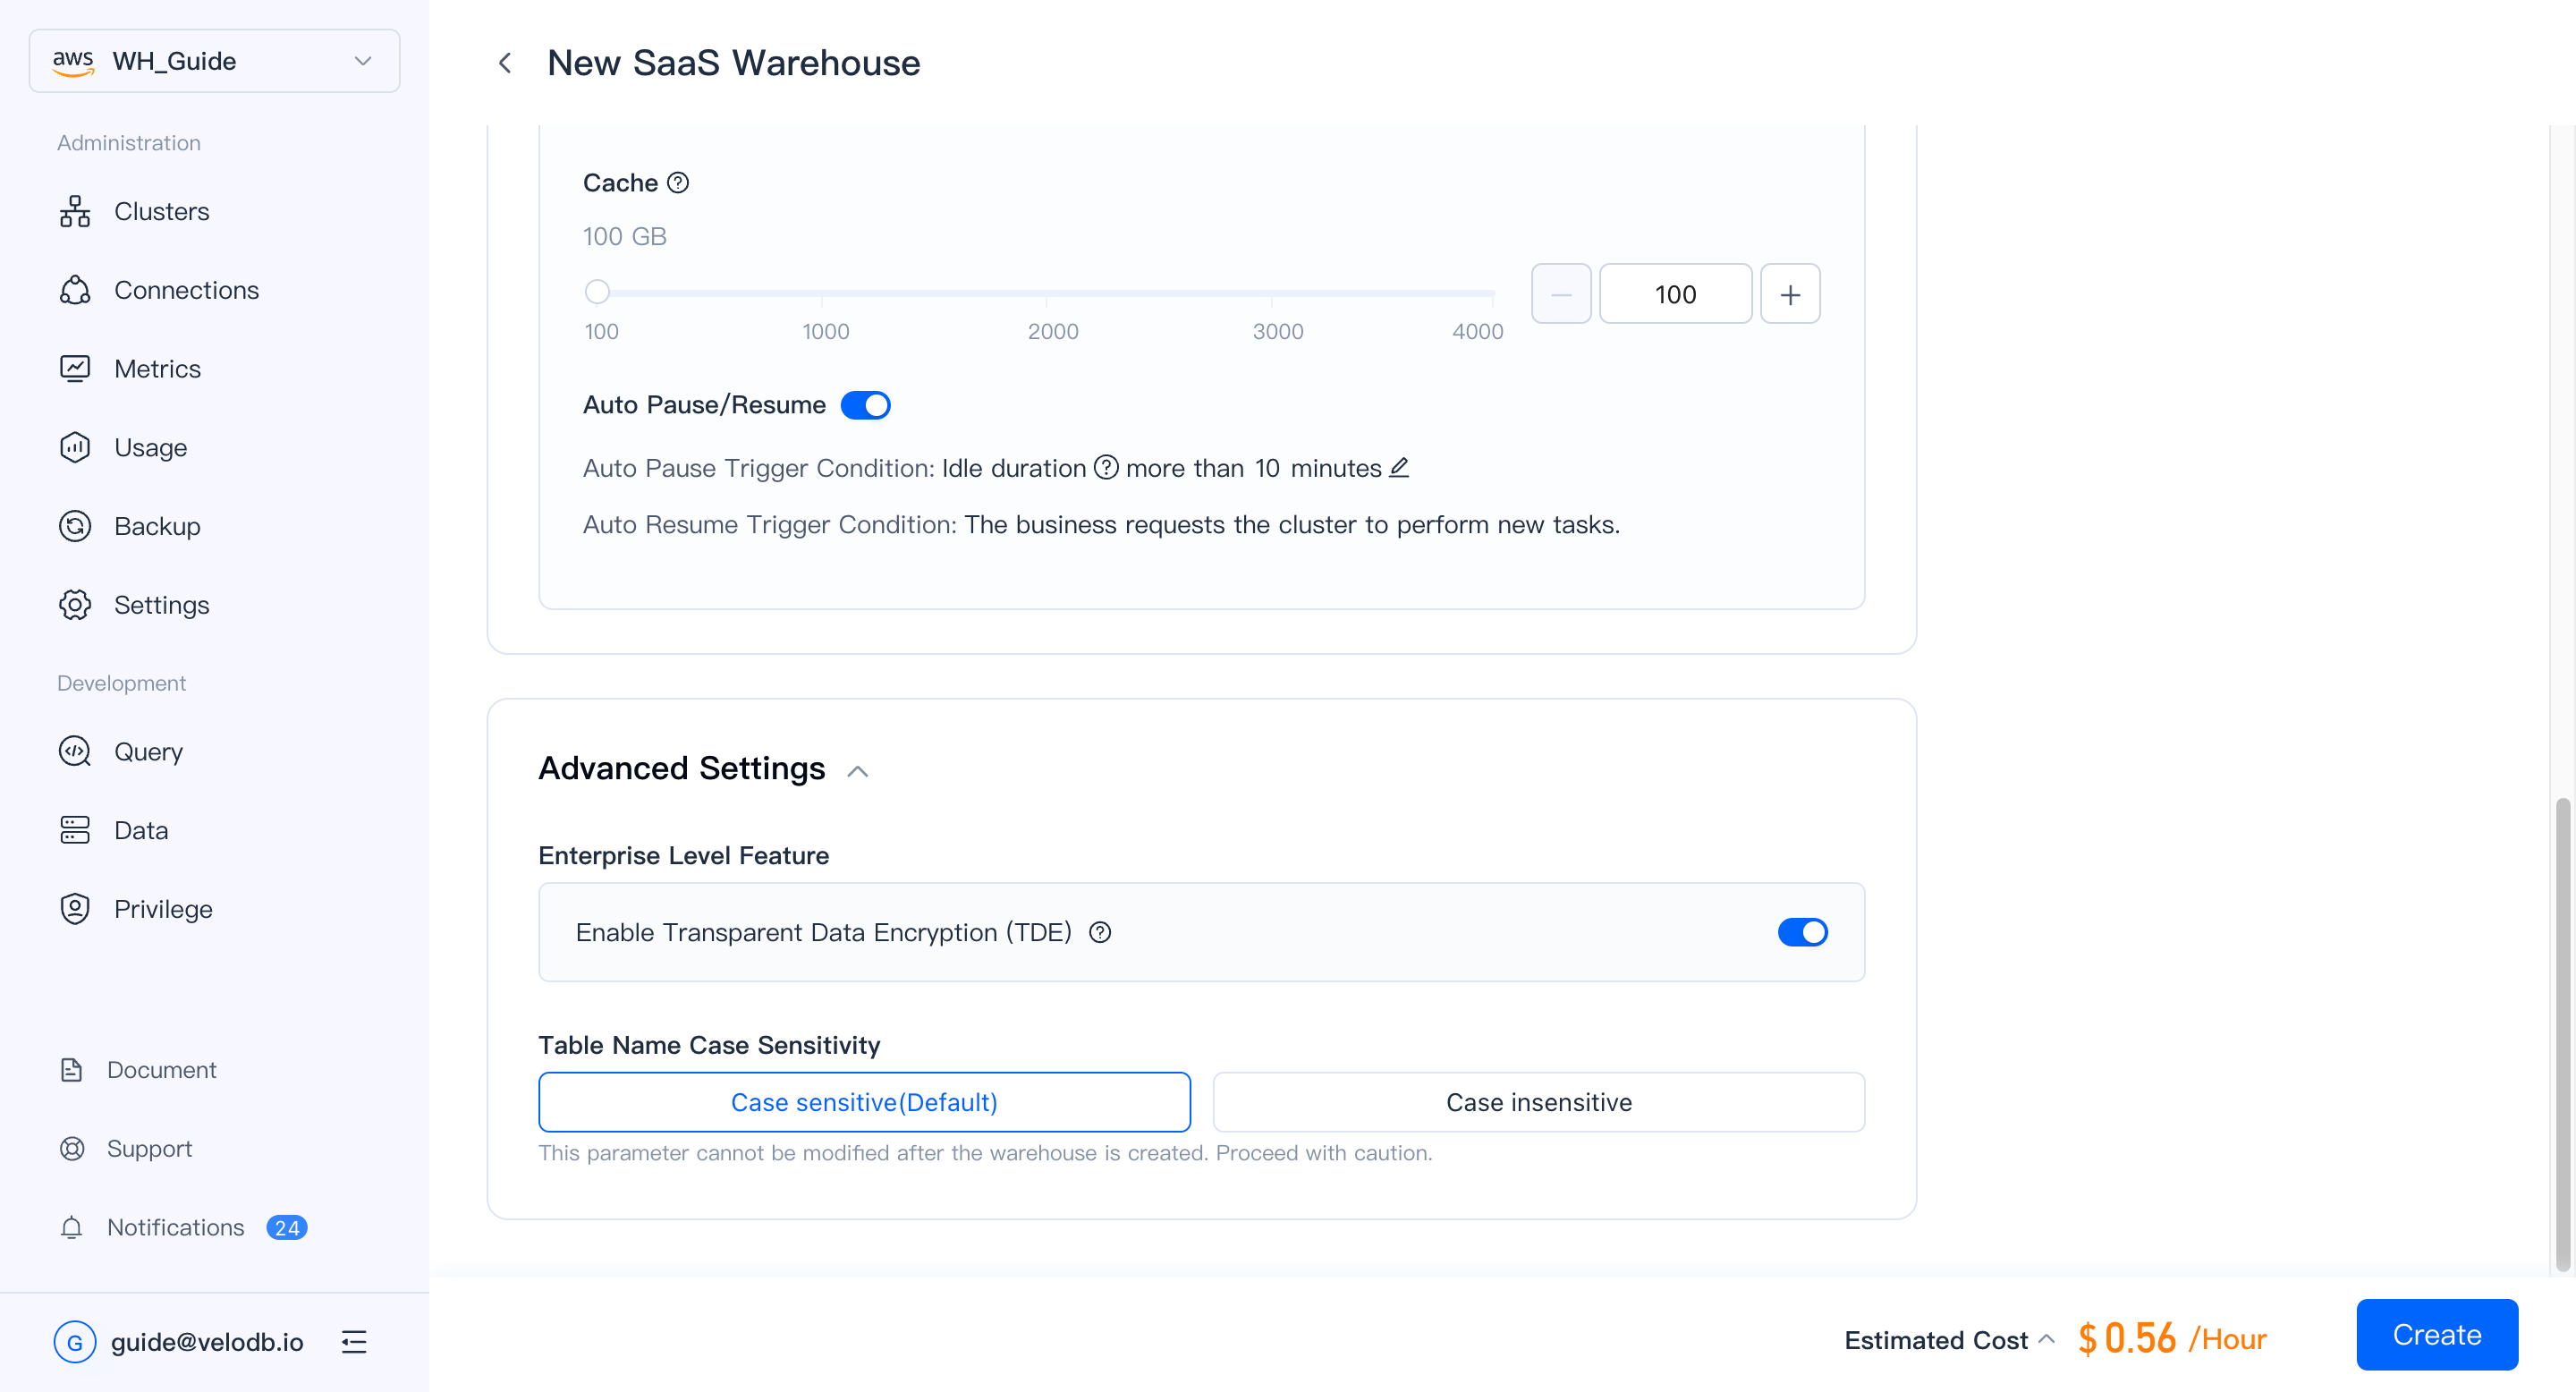
Enhanced encryption is currently available in AWS warehouses.
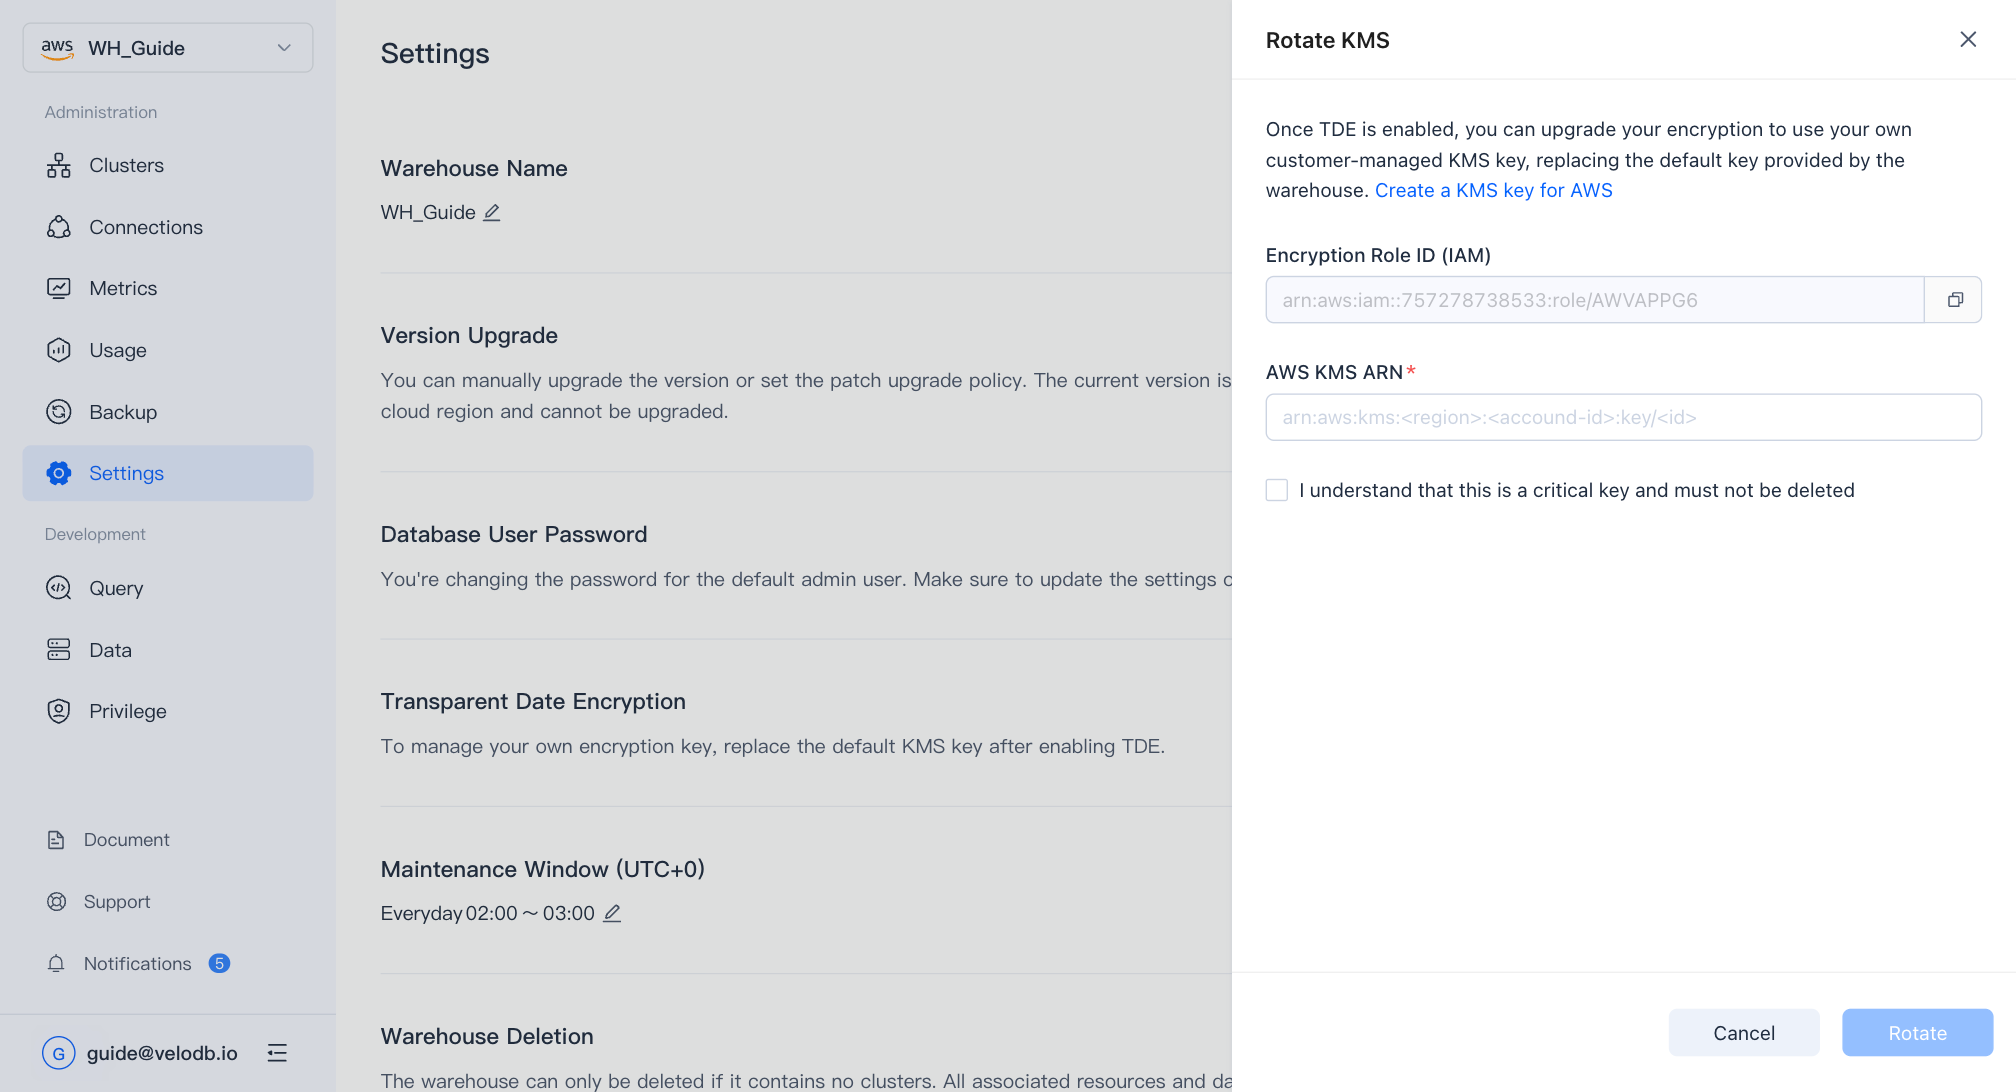
Once TDE is enabled, you can upgrade your encryption to use your own customer-managed KMS key, replacing the default key provided by the warehouse.
-
Create a KMS Key: In the AWS KMS console, create a new symmetric encryption key.
-
Copy the Encryption Role ID: In your management console, Click Rotate KMS on the Settings page and copy the Encryption Role ID.
- Update the Key Policy: Add the following policy statement to the key policy of the KMS key you just created to authorize the above role to use the key. Replace YOUR_ENCRYPTION_ROLE_ID with the role ID copied in the previous step.
{
    "Sid": "Allow VeloDB Access",
    "Effect": "Allow",
    "Principal": {
        "AWS": [ "Encryption role ID " ]
    },
    "Action": [
        "kms:Encrypt",
        "kms:Decrypt",
        "kms:ReEncrypt*",
        "kms:DescribeKey"
    ],
    "Resource": "*"
}
- Return to VeloDB Cloud and paste the Key ARN in the Transparent Data Encryption section of the warehouse settings, then click Rotate.
Note: Protect your KMS key from deletion, as warehouse operation depends entirely on its availability.
Operation and Maintenance Time Window
Operation and Maintenance Time Window refers to the time window during which system maintenance or user scheduled tasks (operation requests) can be performed. For example, if you set the core to automatically upgrade the patch version, the system will automatically upgrade the core version to the latest stable patch version during the maintenance time window.
The default maintenance time window is 02:00 ~ 03:00 every day, and the default time zone is UTC+0. You can modify it on the Settings page according to business conditions, usually during the business trough.

Each warehouse can set a separate maintenance time window. The start time and end time are only accurate to the hour, and the end time must be greater than the start time.
Set Tags
Tags consist of a key-value pair and are used to mark resources for easy search filtering, cost tracking, access control, etc.
The custom tags will be automatically synchronized to the cloud platform resource tags. In particular, when the cluster is set up for time-based scaling or manual scaling, the cloud platform resources can still retain the tags.
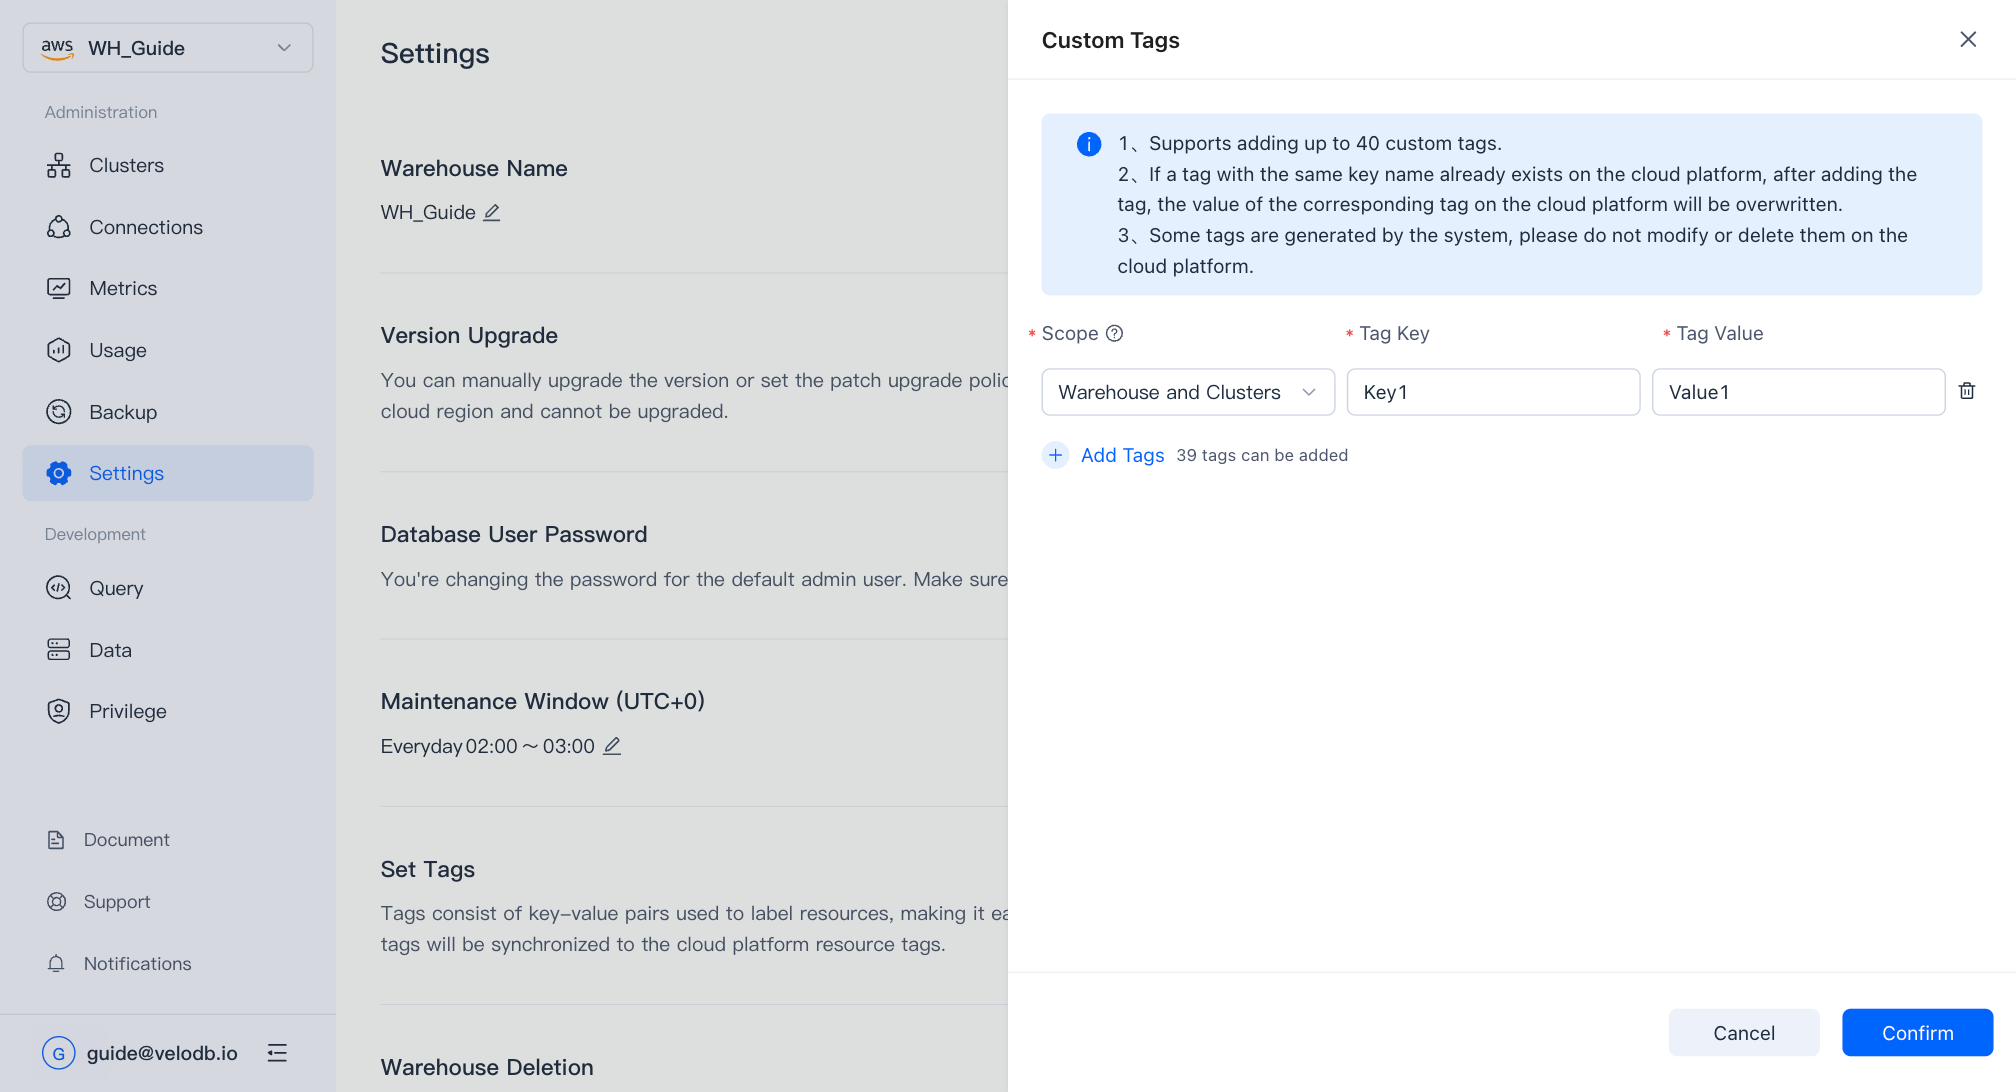
Click Custom Tags to enter the custom tag settings.

Select Warehouse and Clusters or Cluster for the tag range, fill in the tag key and tag value, click OK to complete the tag setting.
-
Warehouse and Clusters: Add custom tags to the current warehouse and cluster virtual machine resources. Resources shared by warehouses will not be added. If necessary, please go to the cloud platform to add them.
-
Cluster: Add custom tags to the virtual machine resources of the specified cluster.
Note:
- The upper limit of the number of tags supported by different cloud platforms varies. Please follow the instructions on the page
- If a tag with the same key name already exists on the cloud platform, after adding the tag, the value of the corresponding tag on the cloud platform will be overwritten
- Some tags are generated by the system, please do not modify or delete them on the cloud platform
Upgrade Core Version
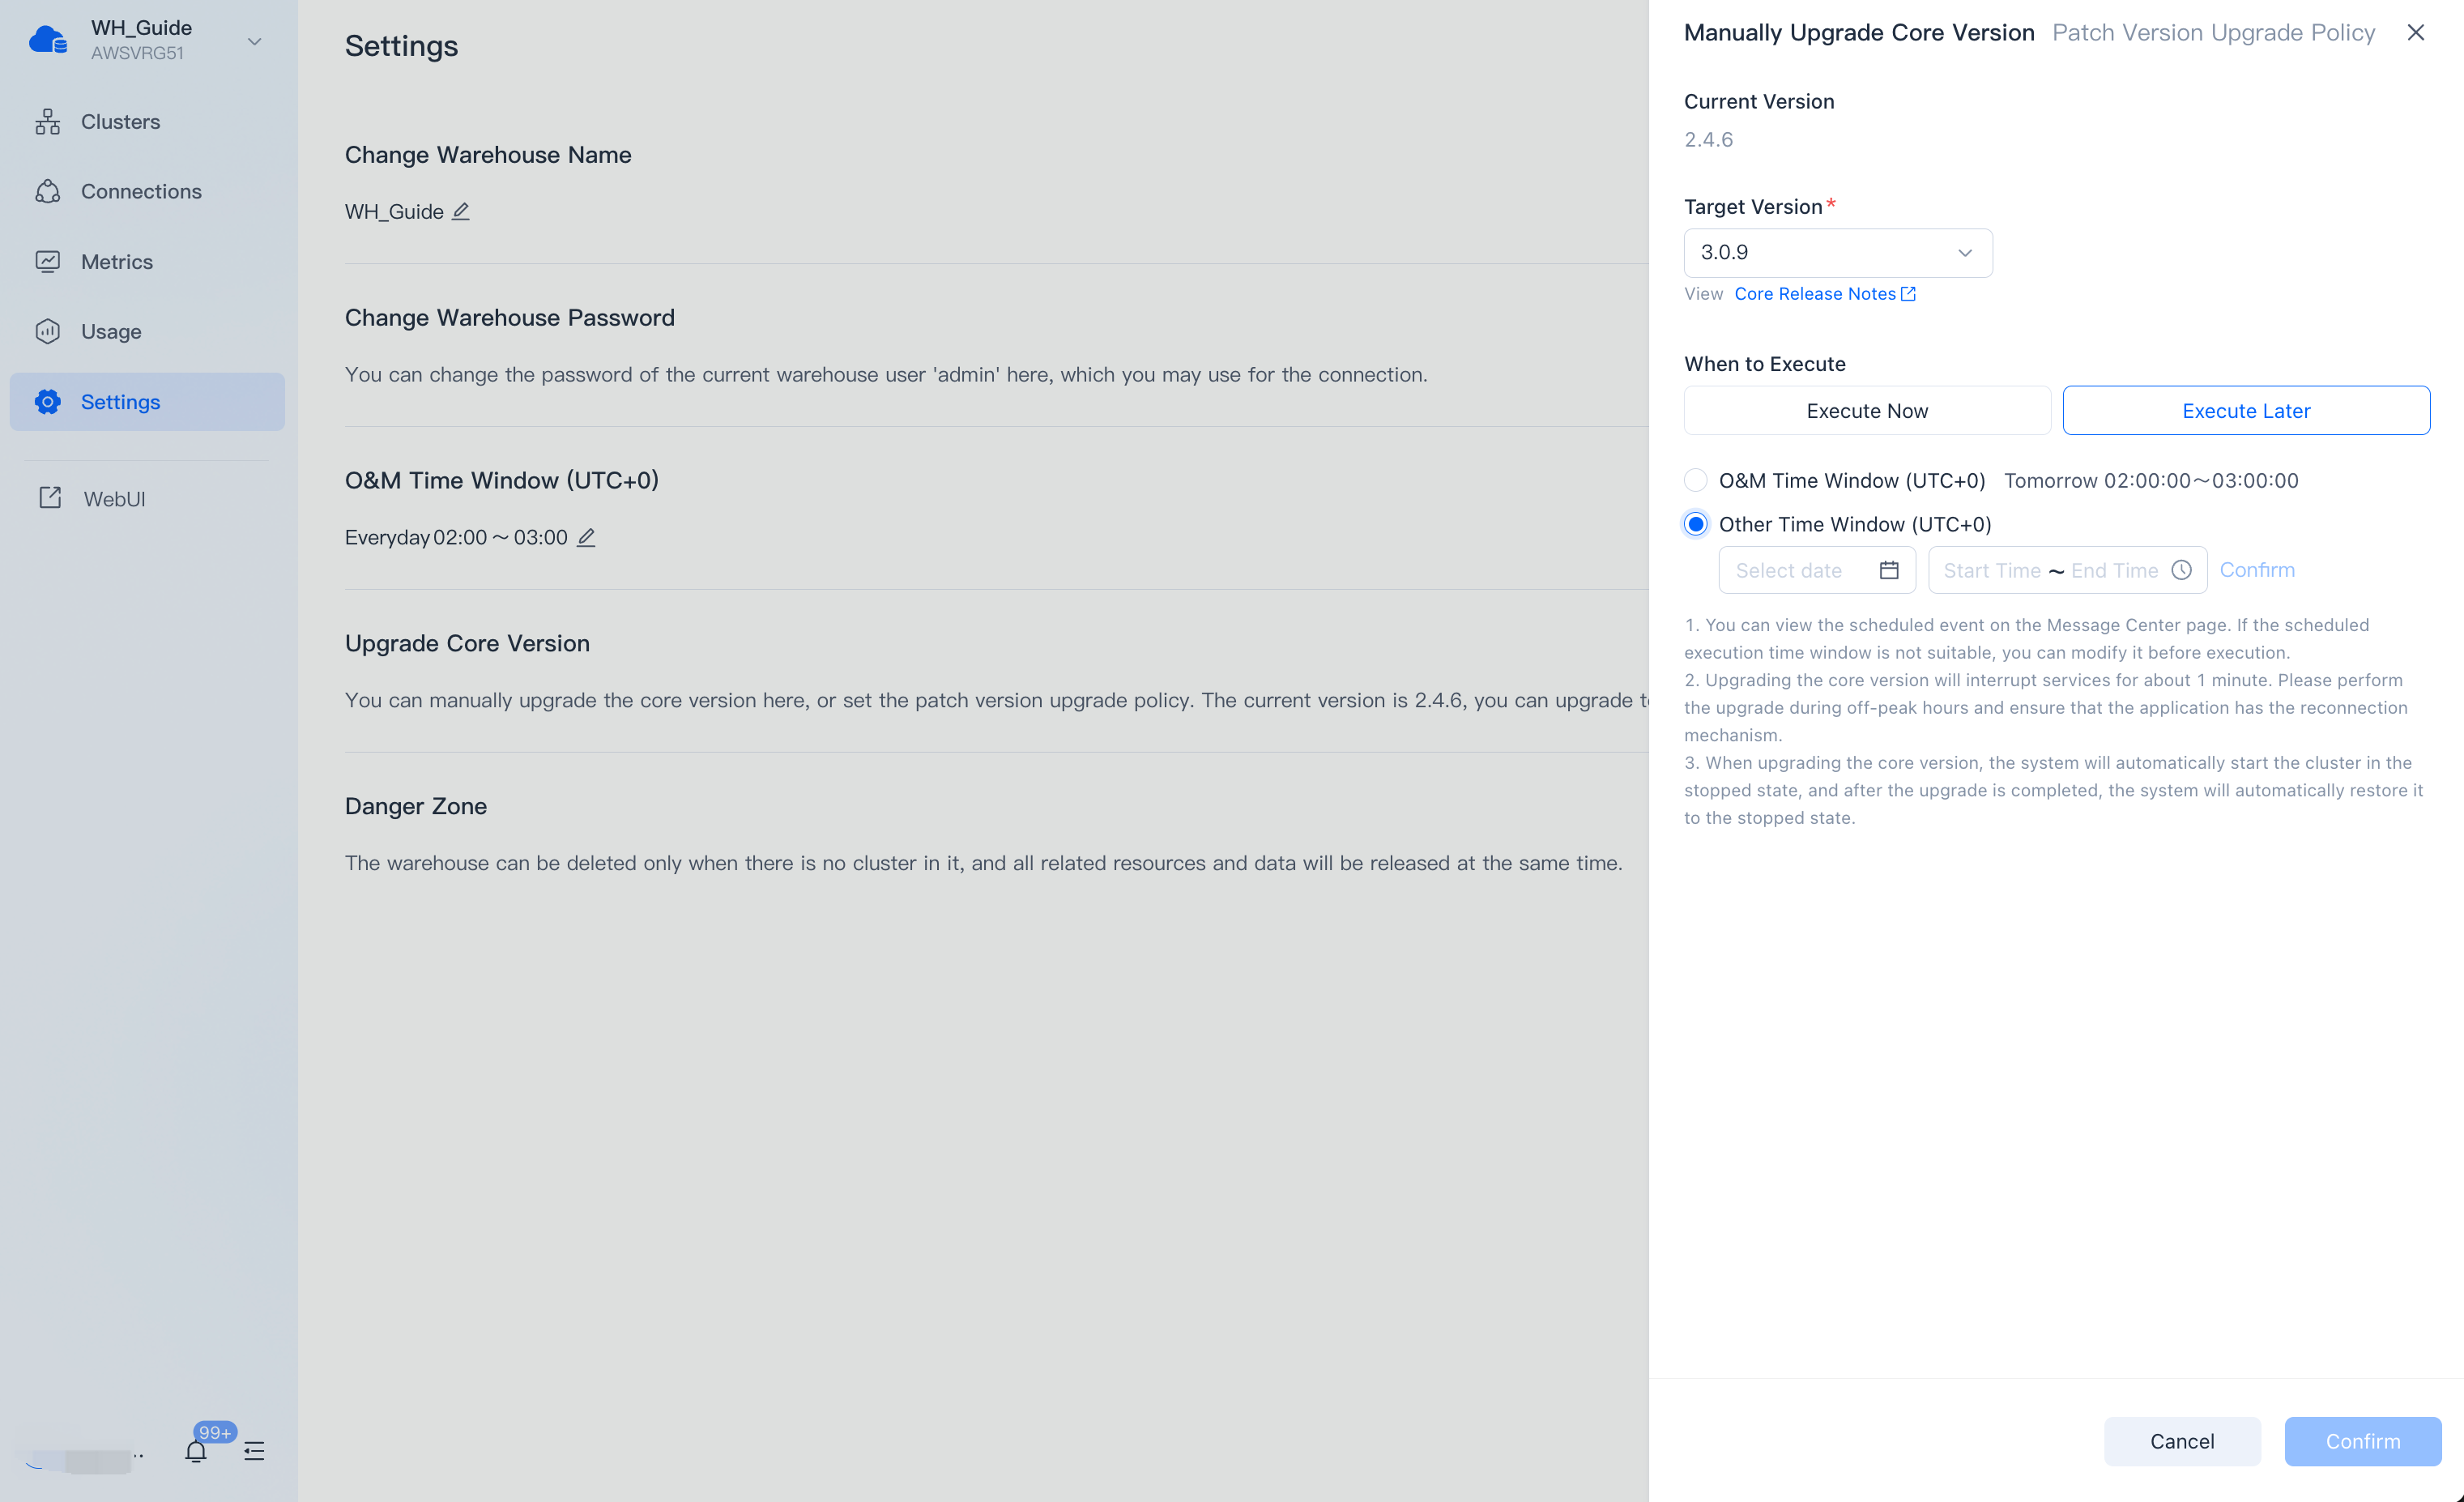
Manually Upgrade Core Version
If the core version of the current warehouse is too old to meet the business requirements, or you want to experience new features, you can upgrade the core version on the Settings page.
Switch to Manually Upgrade Core Version, select the target version, select Execute Now or Execute Later, and confirm.
If you select Execute Now, the system will immediately execute the core version upgrade task

If you select Execute Later, you can choose "O&M Time Window" or "Other Time Window", and the system will perform the core version upgrade task at the specified time.
You can view the scheduled event on the Message Center page. If the scheduled execution time window is not suitable, you can modify it before execution.
After the upgrade starts, the "Running" warehouse status changes to "Upgrading", and the background will automatically complete the version upgrade process, which takes about 1 minute to complete. After the version upgrade is completed, the warehouse status will change from "Upgrading" back to "Running".
Notice:
- If the warehouse has a cluster other than "Running" and "Stopped", manual upgrade will fail if you choose to execute now. Please confirm that the cluster status meets the requirements before operating.
- If the warehouse has an unfinished core version upgrade task, the system will not be able to perform manual upgrade operations. Please confirm that the version upgrade event has been completed or canceled and try again.
- Upgrading the core version will interrupt services for about 1 minute. Please perform the upgrade during off-peak hours and ensure that the application has the reconnection mechanism.
- When upgrading the core version, the system will automatically start the cluster in the stopped state, and after the upgrade is completed, the system will automatically restore it to the stopped state.
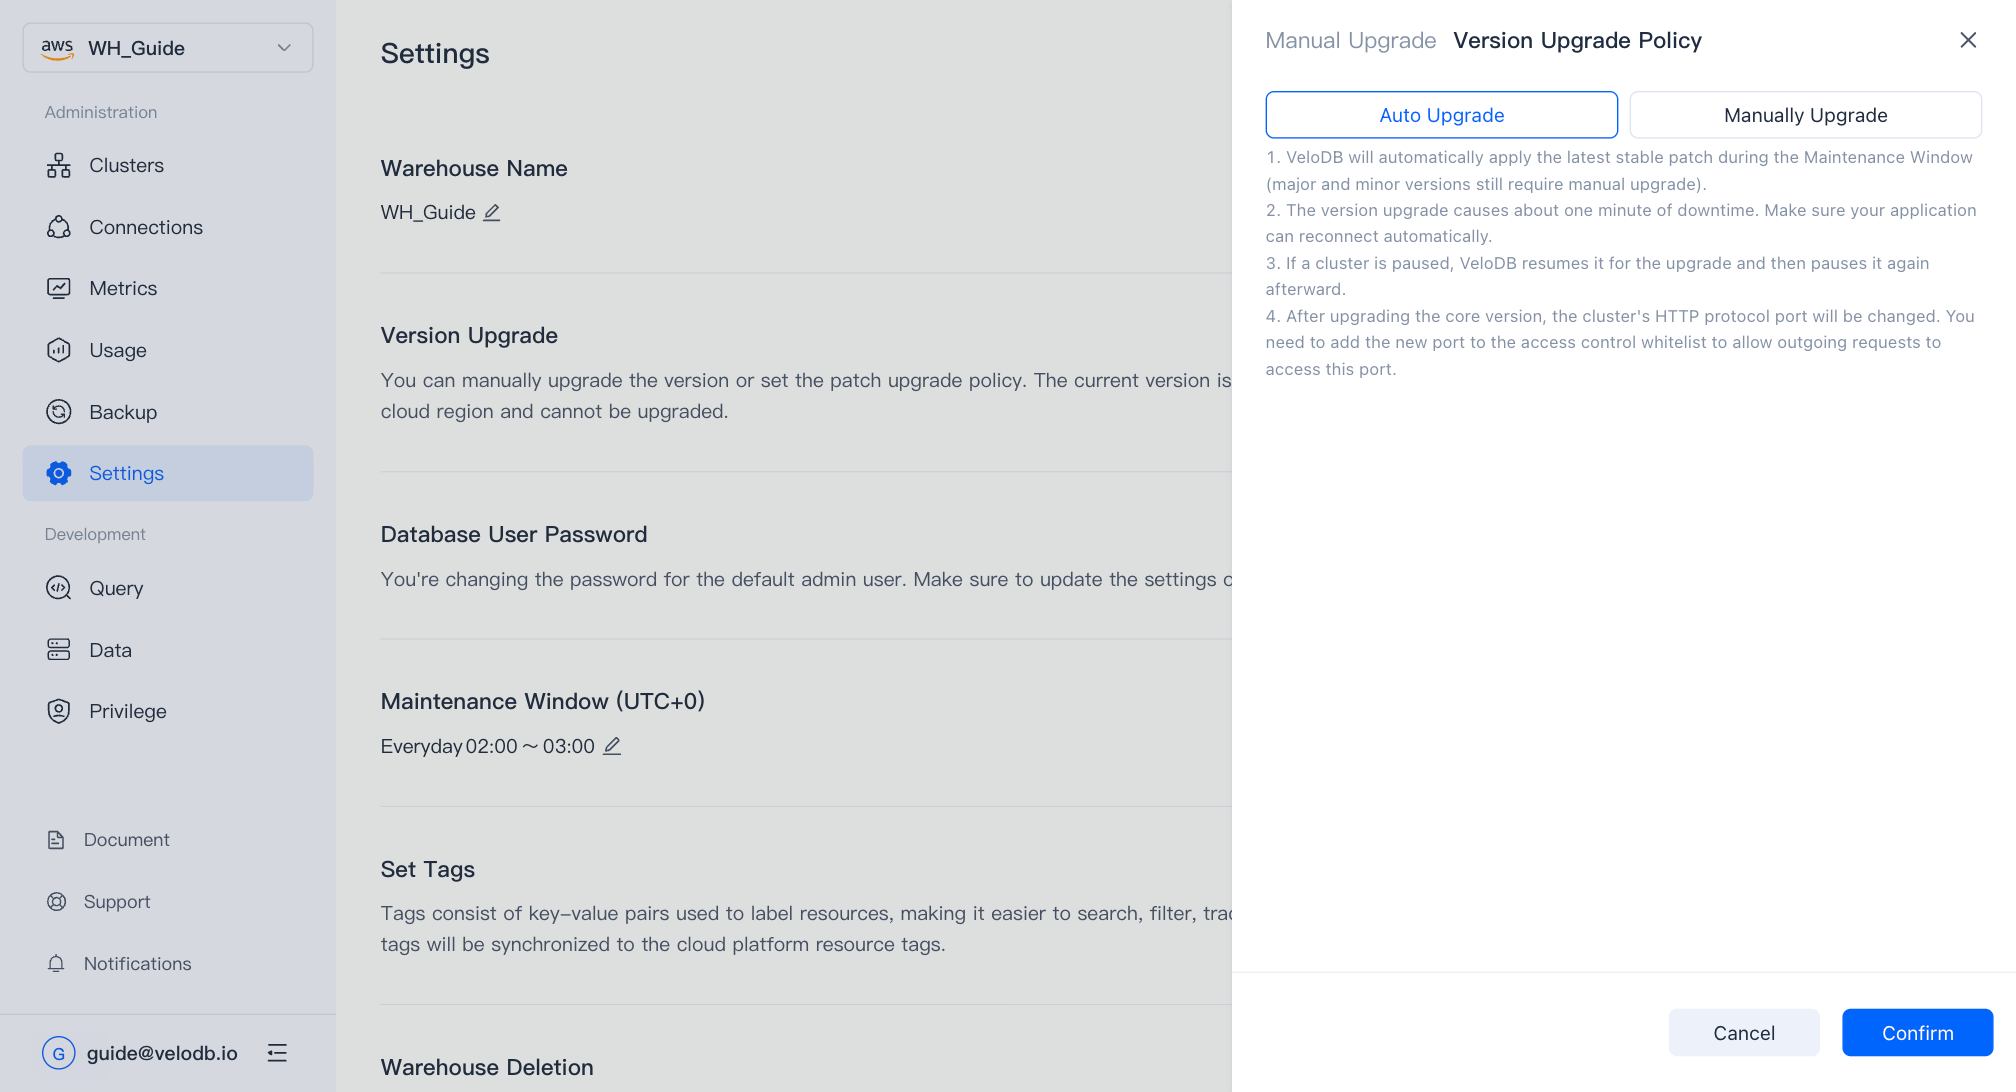
Set Patch Version Upgrade Policy
When creating a warehouse, or after the warehouse is created, in Settings > Upgrade Core Version > Patch Version Upgrade Policy, you can set two strategies for minor versions: Auto Upgrade or Manually Upgrade.
- If you select "Auto Upgrade", the system will automatically upgrade the core version to the latest stable patch version during the O&M Time Window (major and minor versions still require manual upgrade). You can view the scheduled event on the Message Center page. If the scheduled execution time window is not suitable, you can modify it before execution.
- If you select "Manually Upgrade", you can also choose to execute immediately or in a specified time window (upgrade to the selected target version). If you choose to execute in a specified time window, you can view the scheduled event on the Message Center page. If the scheduled execution time window is not suitable, you can modify it before execution.
Delete Current Warehouse
Since deleting a warehouse is a high-risk operation, we need to make sure that you understand the impact of the deletion and confirm it through email verification code.
You can delete the current warehouse on the Settings page.
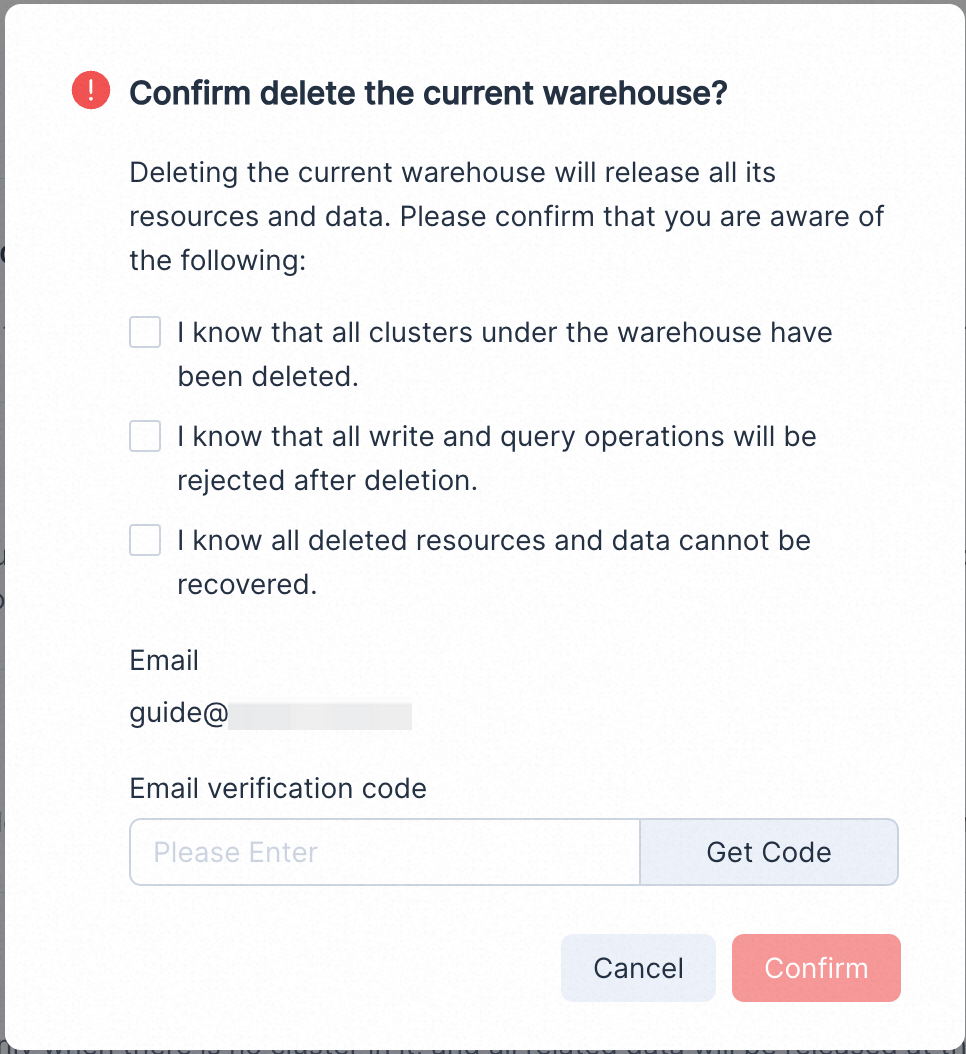
Warning Deleting a warehouse involves the deletion of all its resources and data, which cannot be recovered.
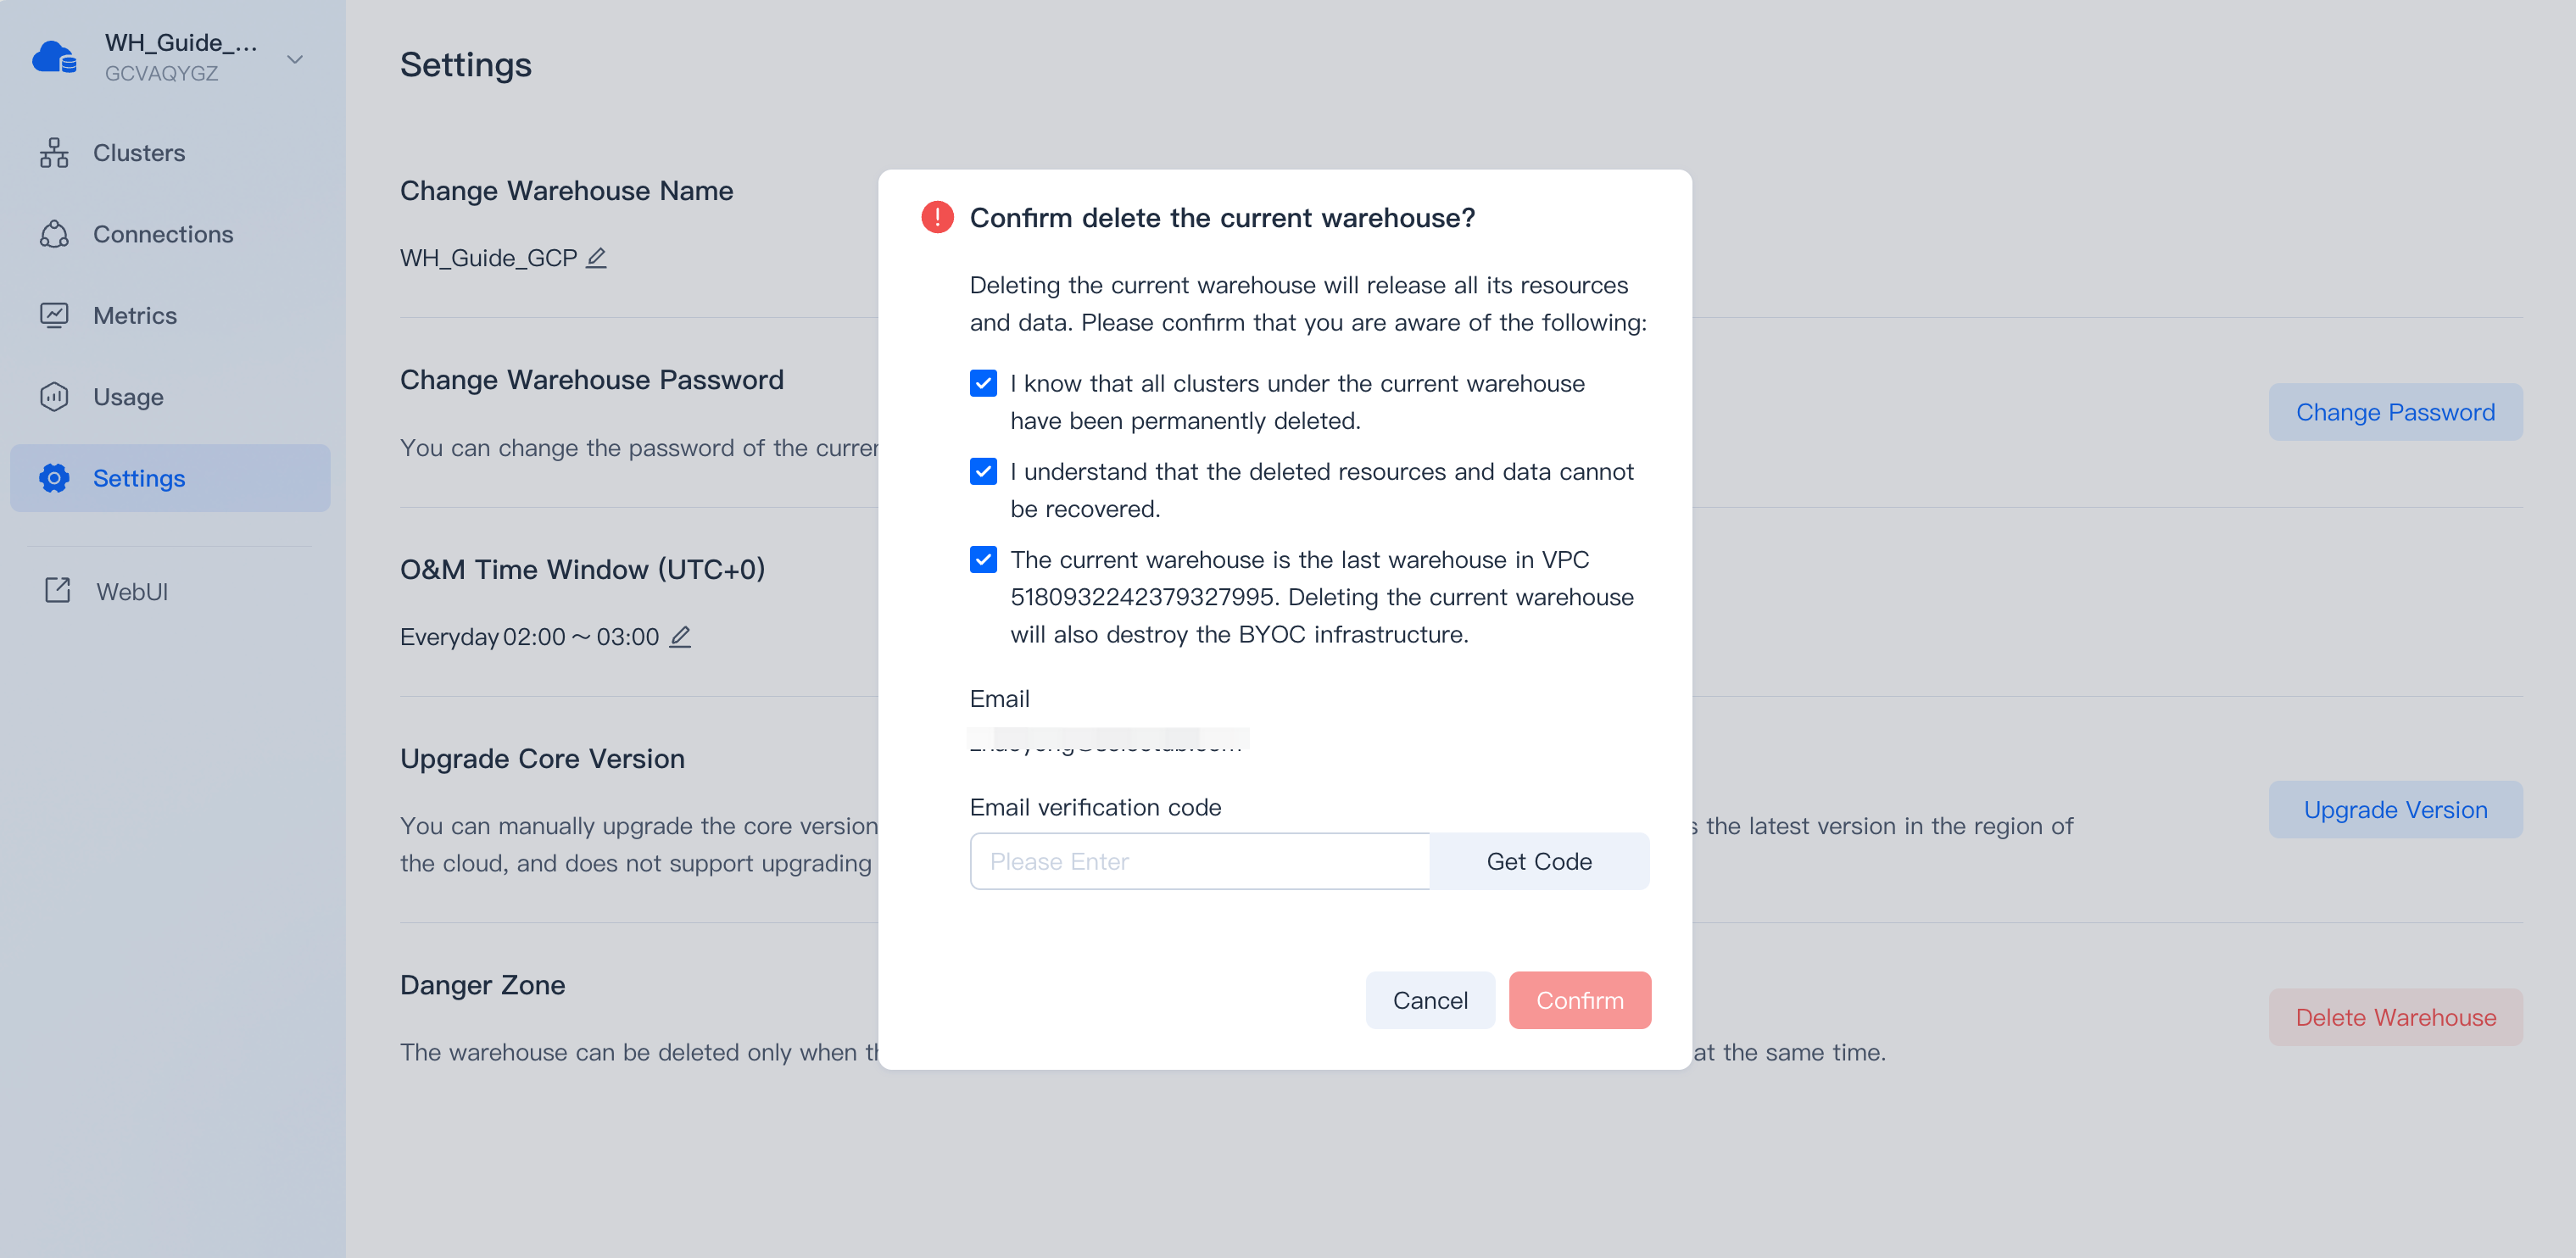
Delete current BYOC warehouse and Destroy the BYOC infrastructure
If the current BYOC warehouse is the last warehouse in the VPC, deleting the current warehouse will also destroy the BYOC infrastructure.
Please refer to the following steps for deletion operations on each cloud platform:
AWS
After clicking Delete, it is expected to take 5 minutes, please wait patiently.
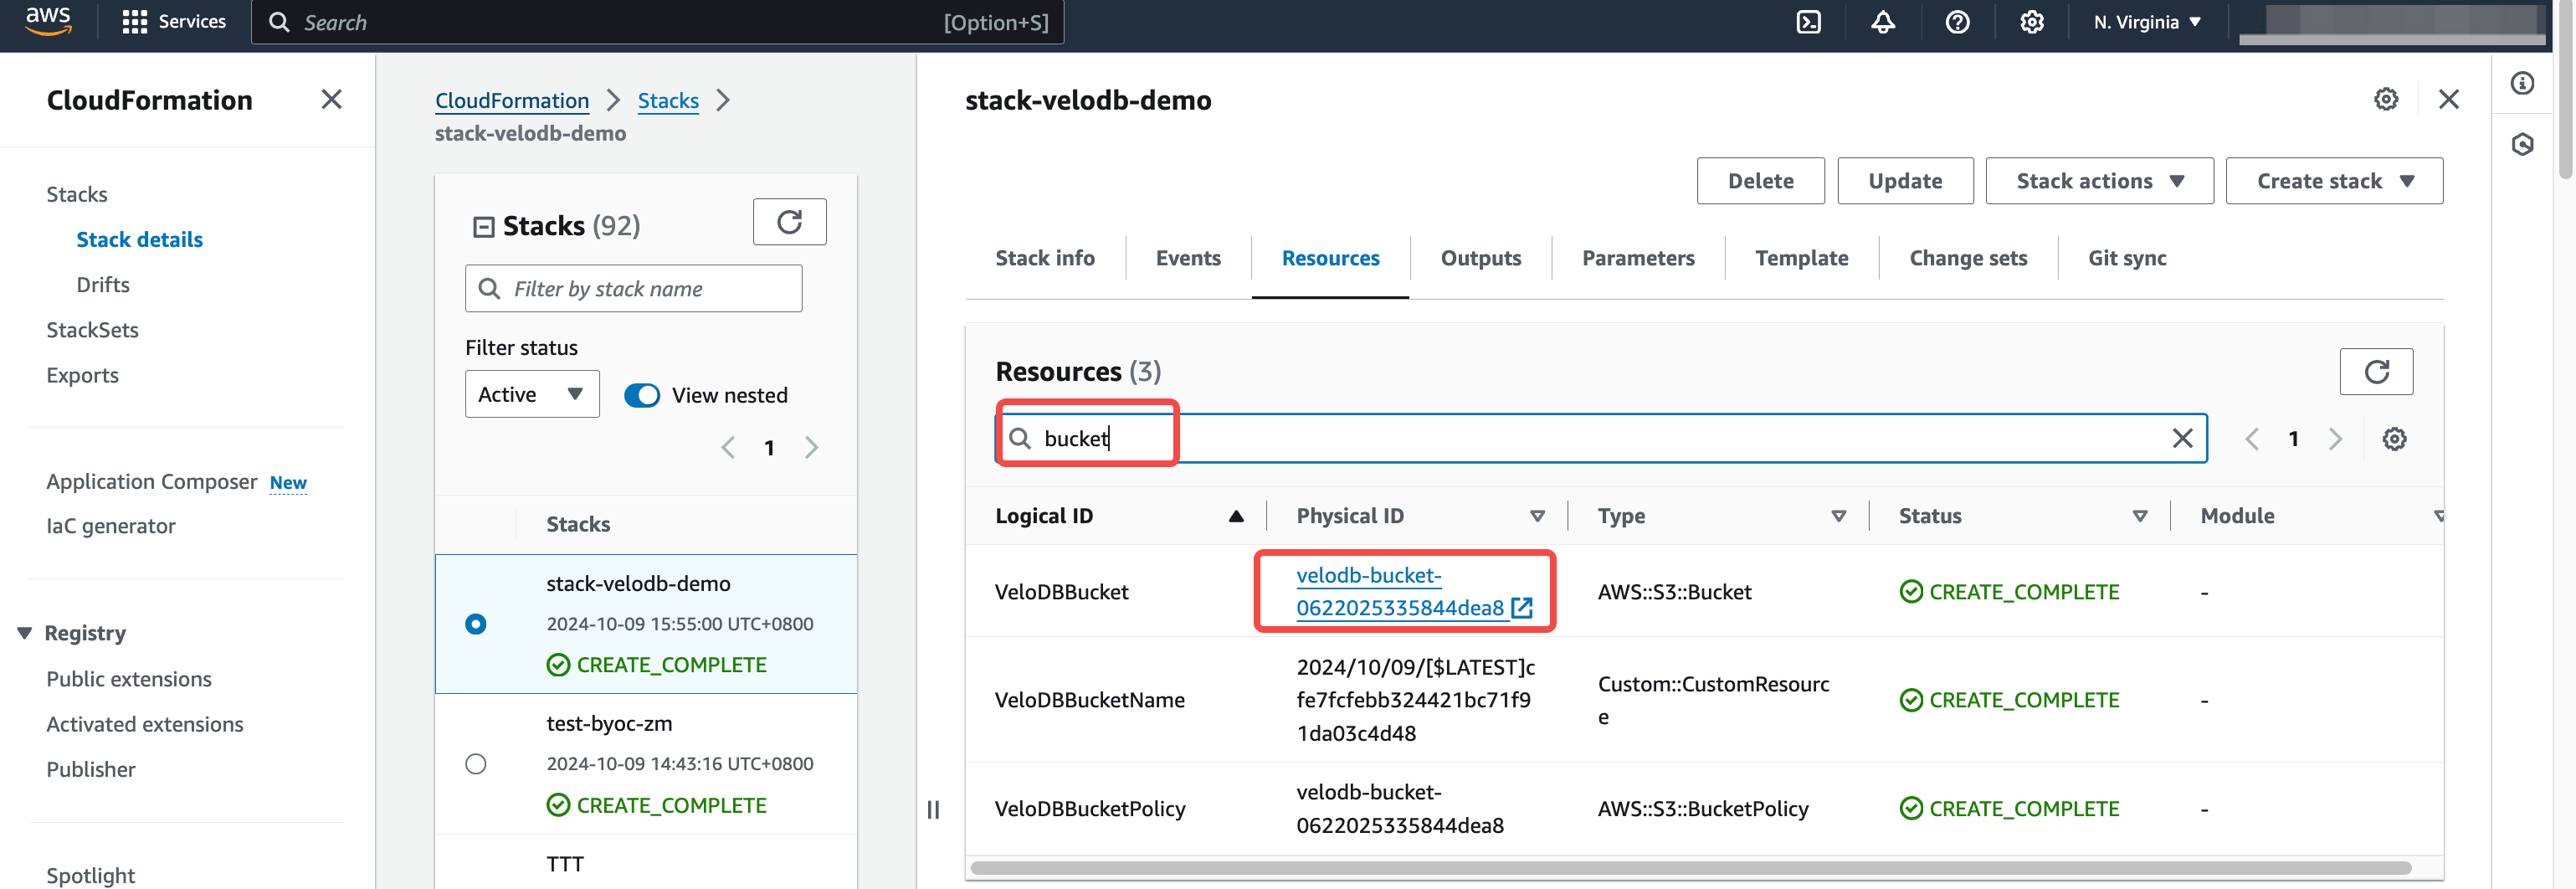
After the warehouse is deleted, click Cloud Platform, enter AWS CloudFormation, and continue to delete the resource stack to destroy the BYOC basic environment.
1. Clear the bucket
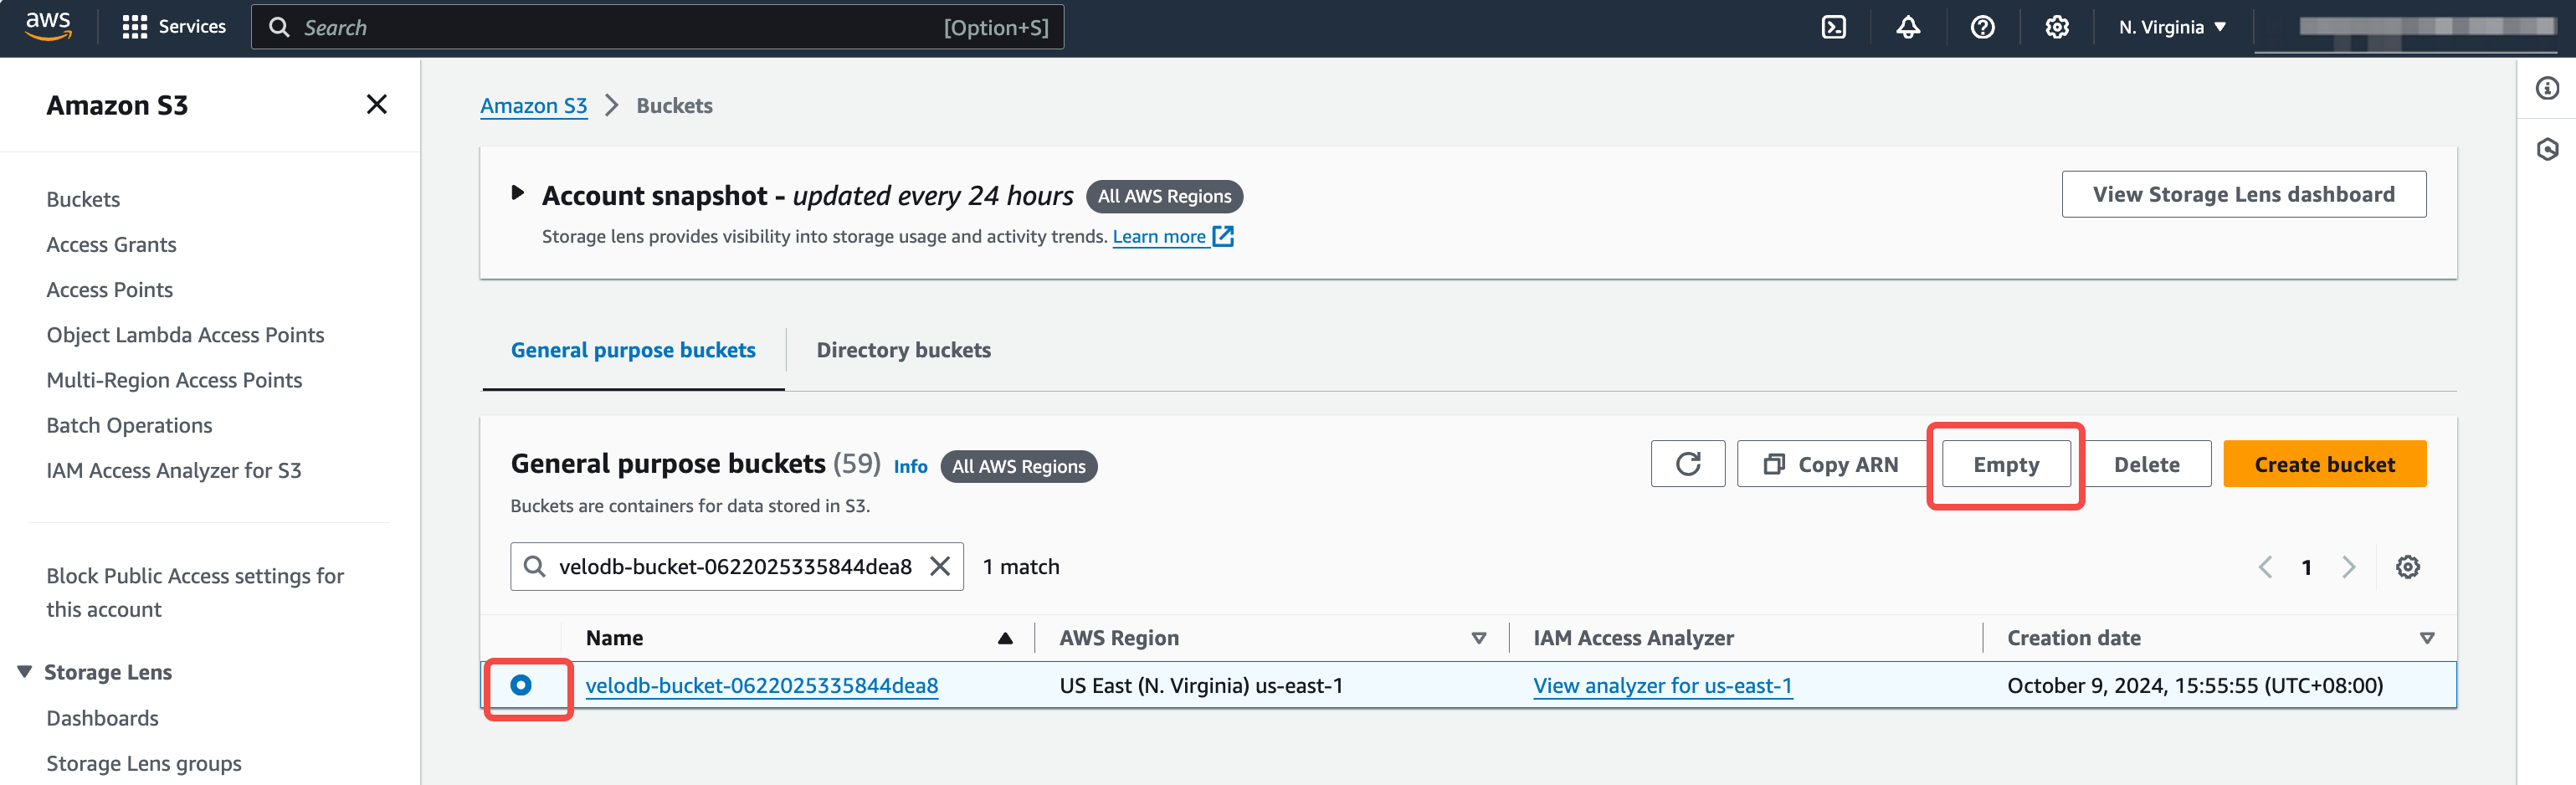
Enter the resource stack to be deleted, switch to the Resources tab, search Bucket, click to enter the bucket, and remember the name.
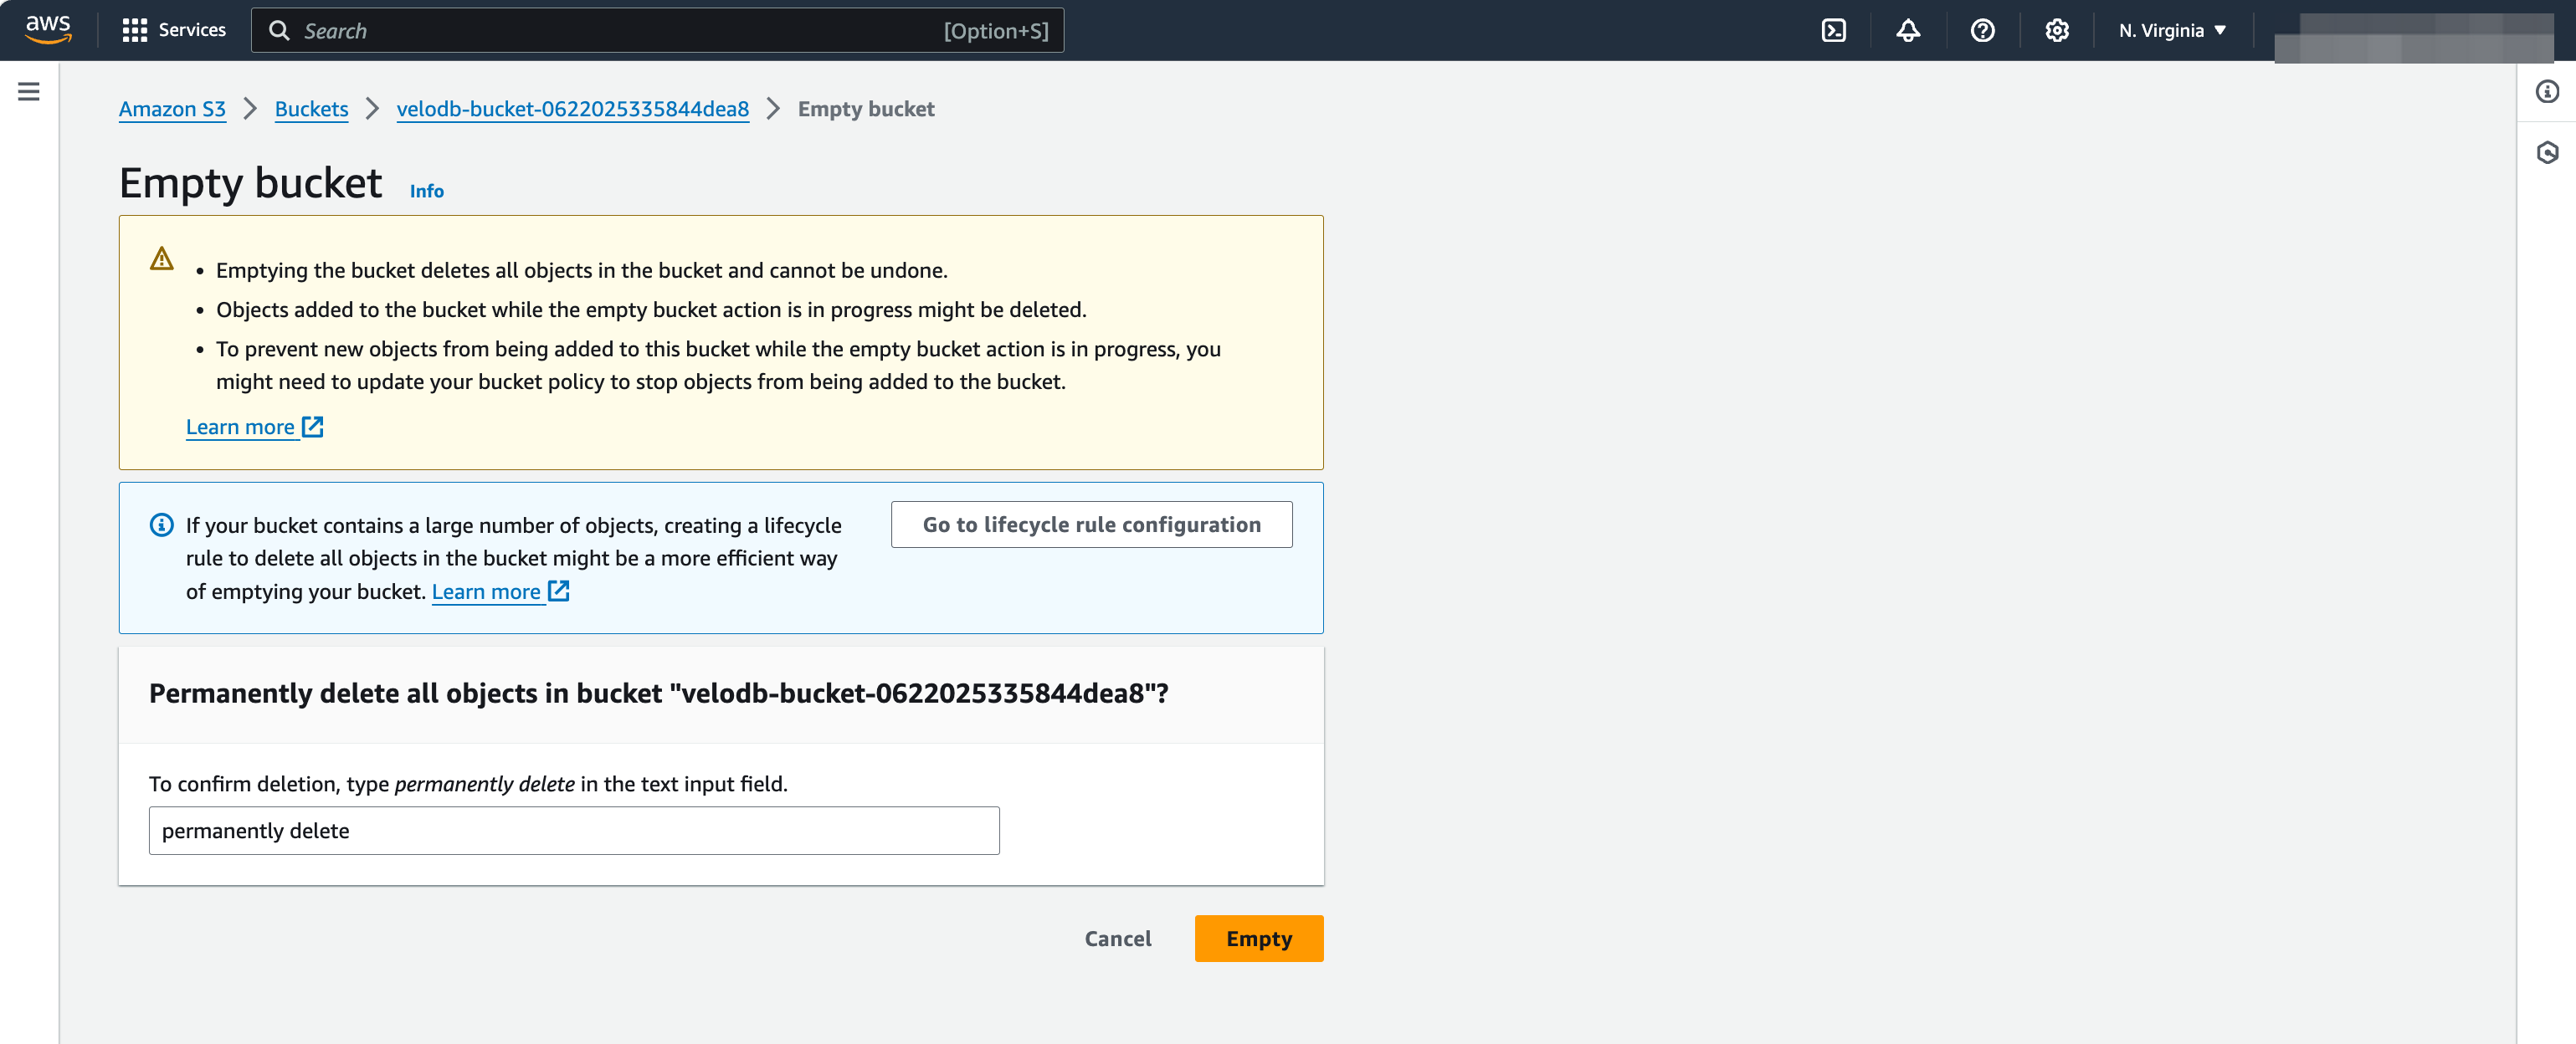
Return to the bucket list, select the bucket. Click Empty. Input permanently delete. Click Empty.
Note: The empty bucket operation cannot be restored. Confirm that there are no files to be retained before the operation.
2. Delete the resource stack
Return to the resource stack, click Delete, and wait for the deletion to complete.
GCP
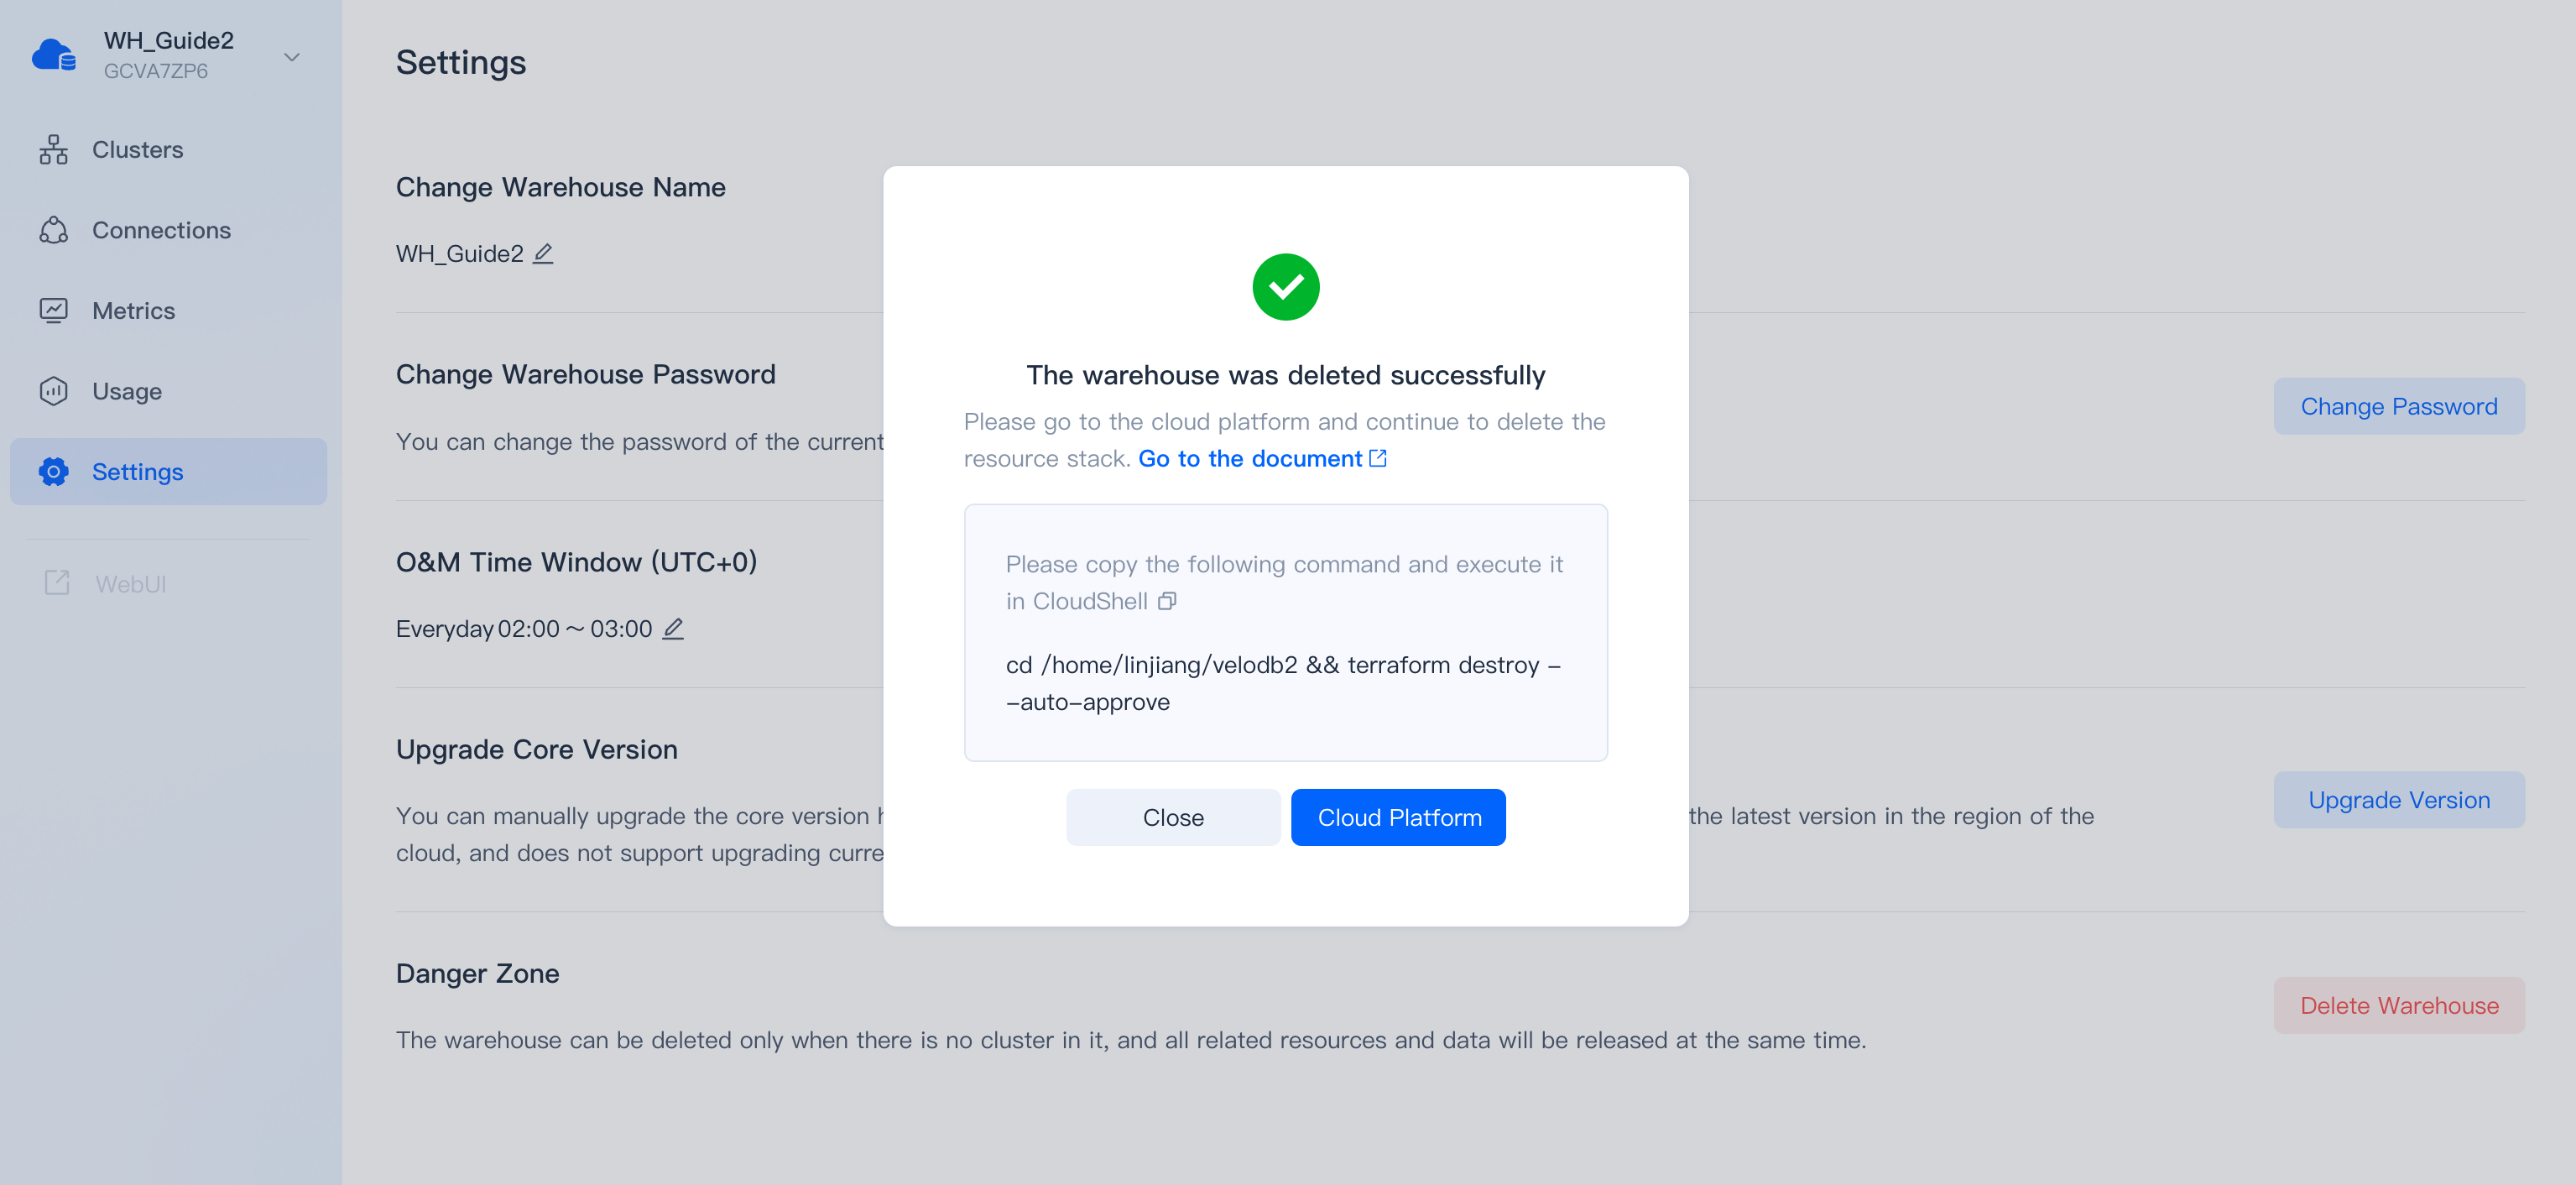
After clicking Delete, it is expected to take 5 minutes, please wait patiently.
After the warehouse is deleted, copy the command, click Cloud platform, enter GCP CloudShell, and continue to delete the resource stack to destroy the BYOC basic environment.
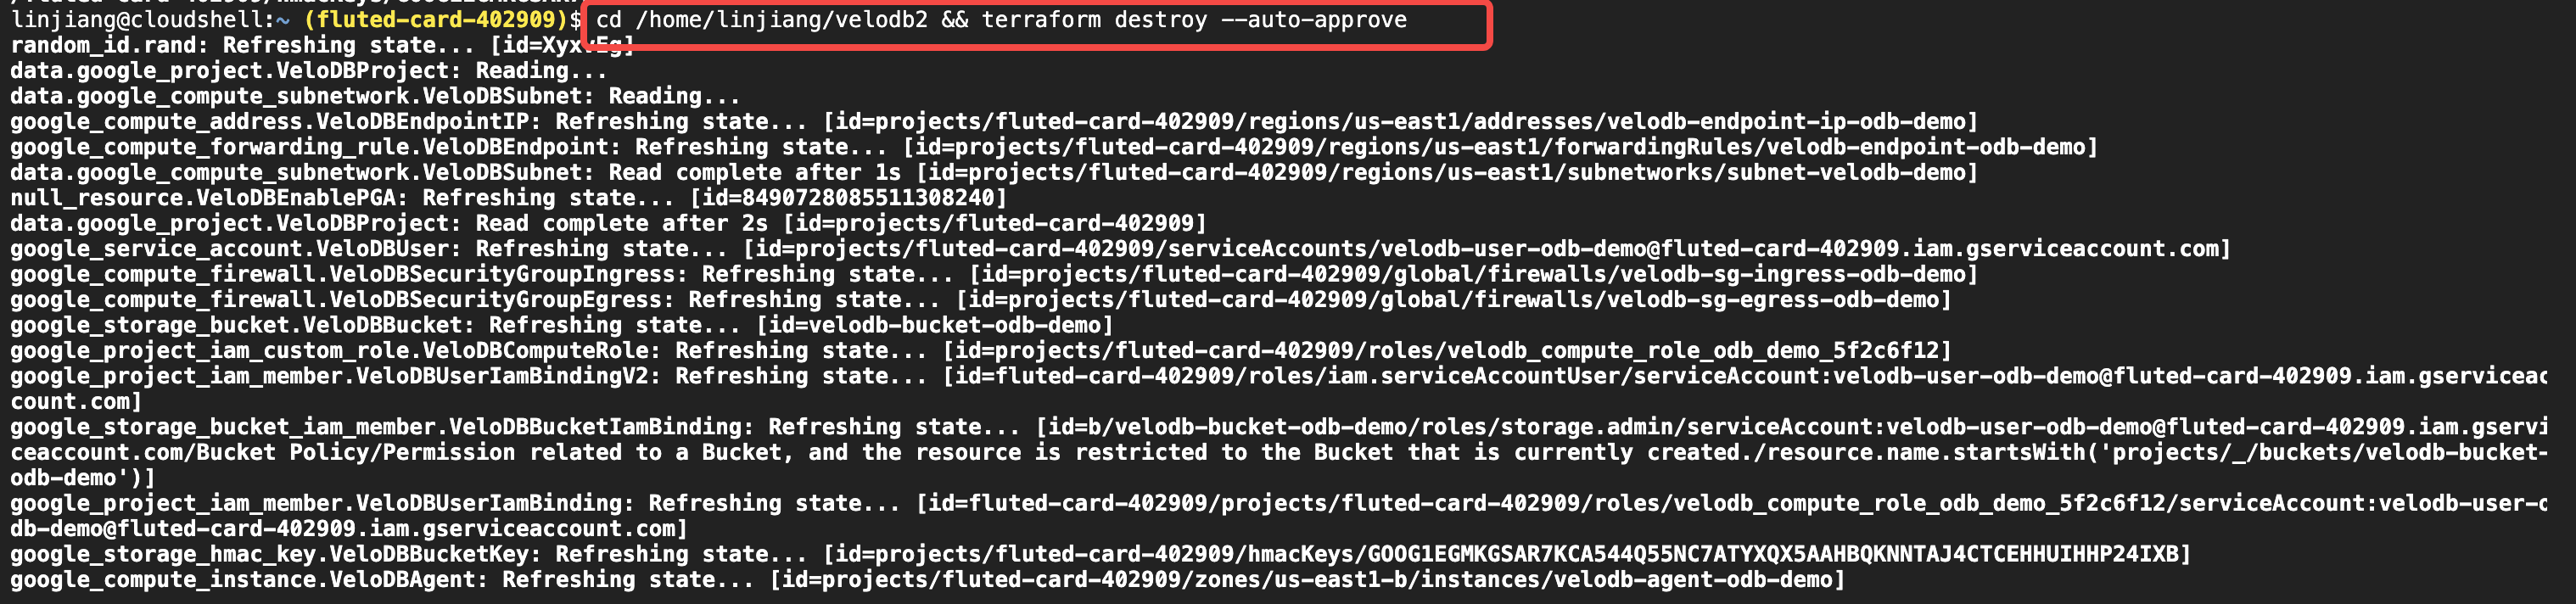
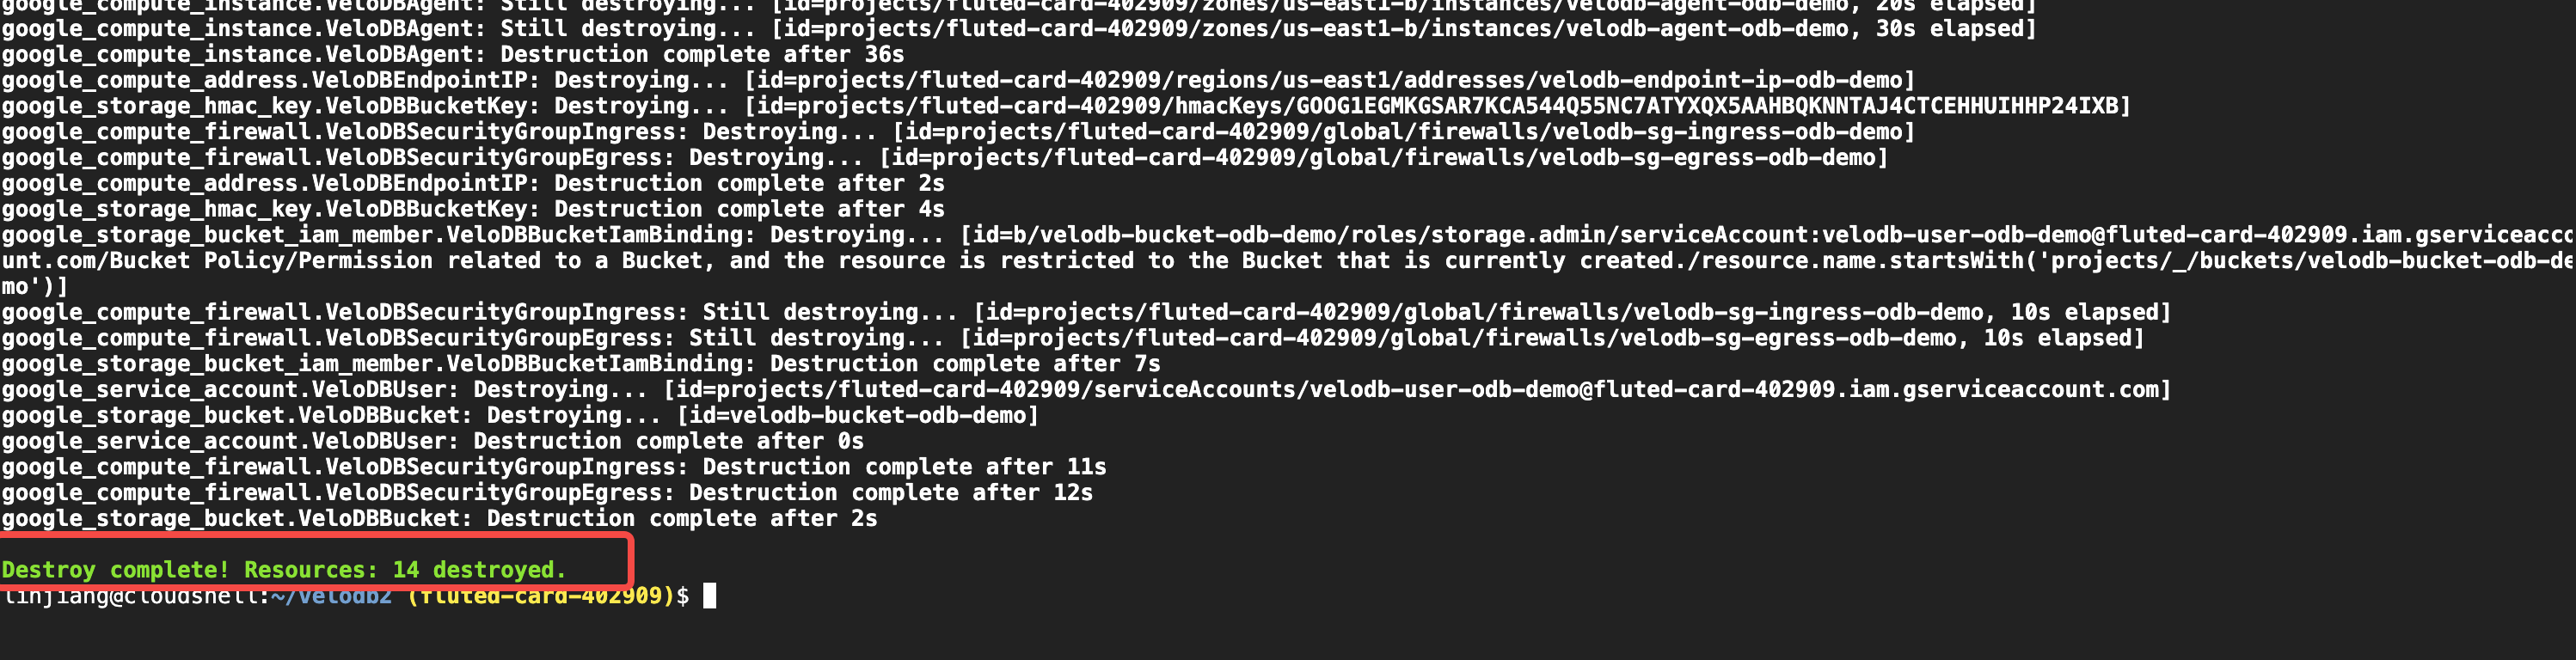
If you see Resources: xx destoryed in the execution result and xx is not 0, it means that the resources are destroyed successfully. Otherwise, Get Help.
Azure
After clicking Delete, it is expected to take 5 minutes, please wait patiently.
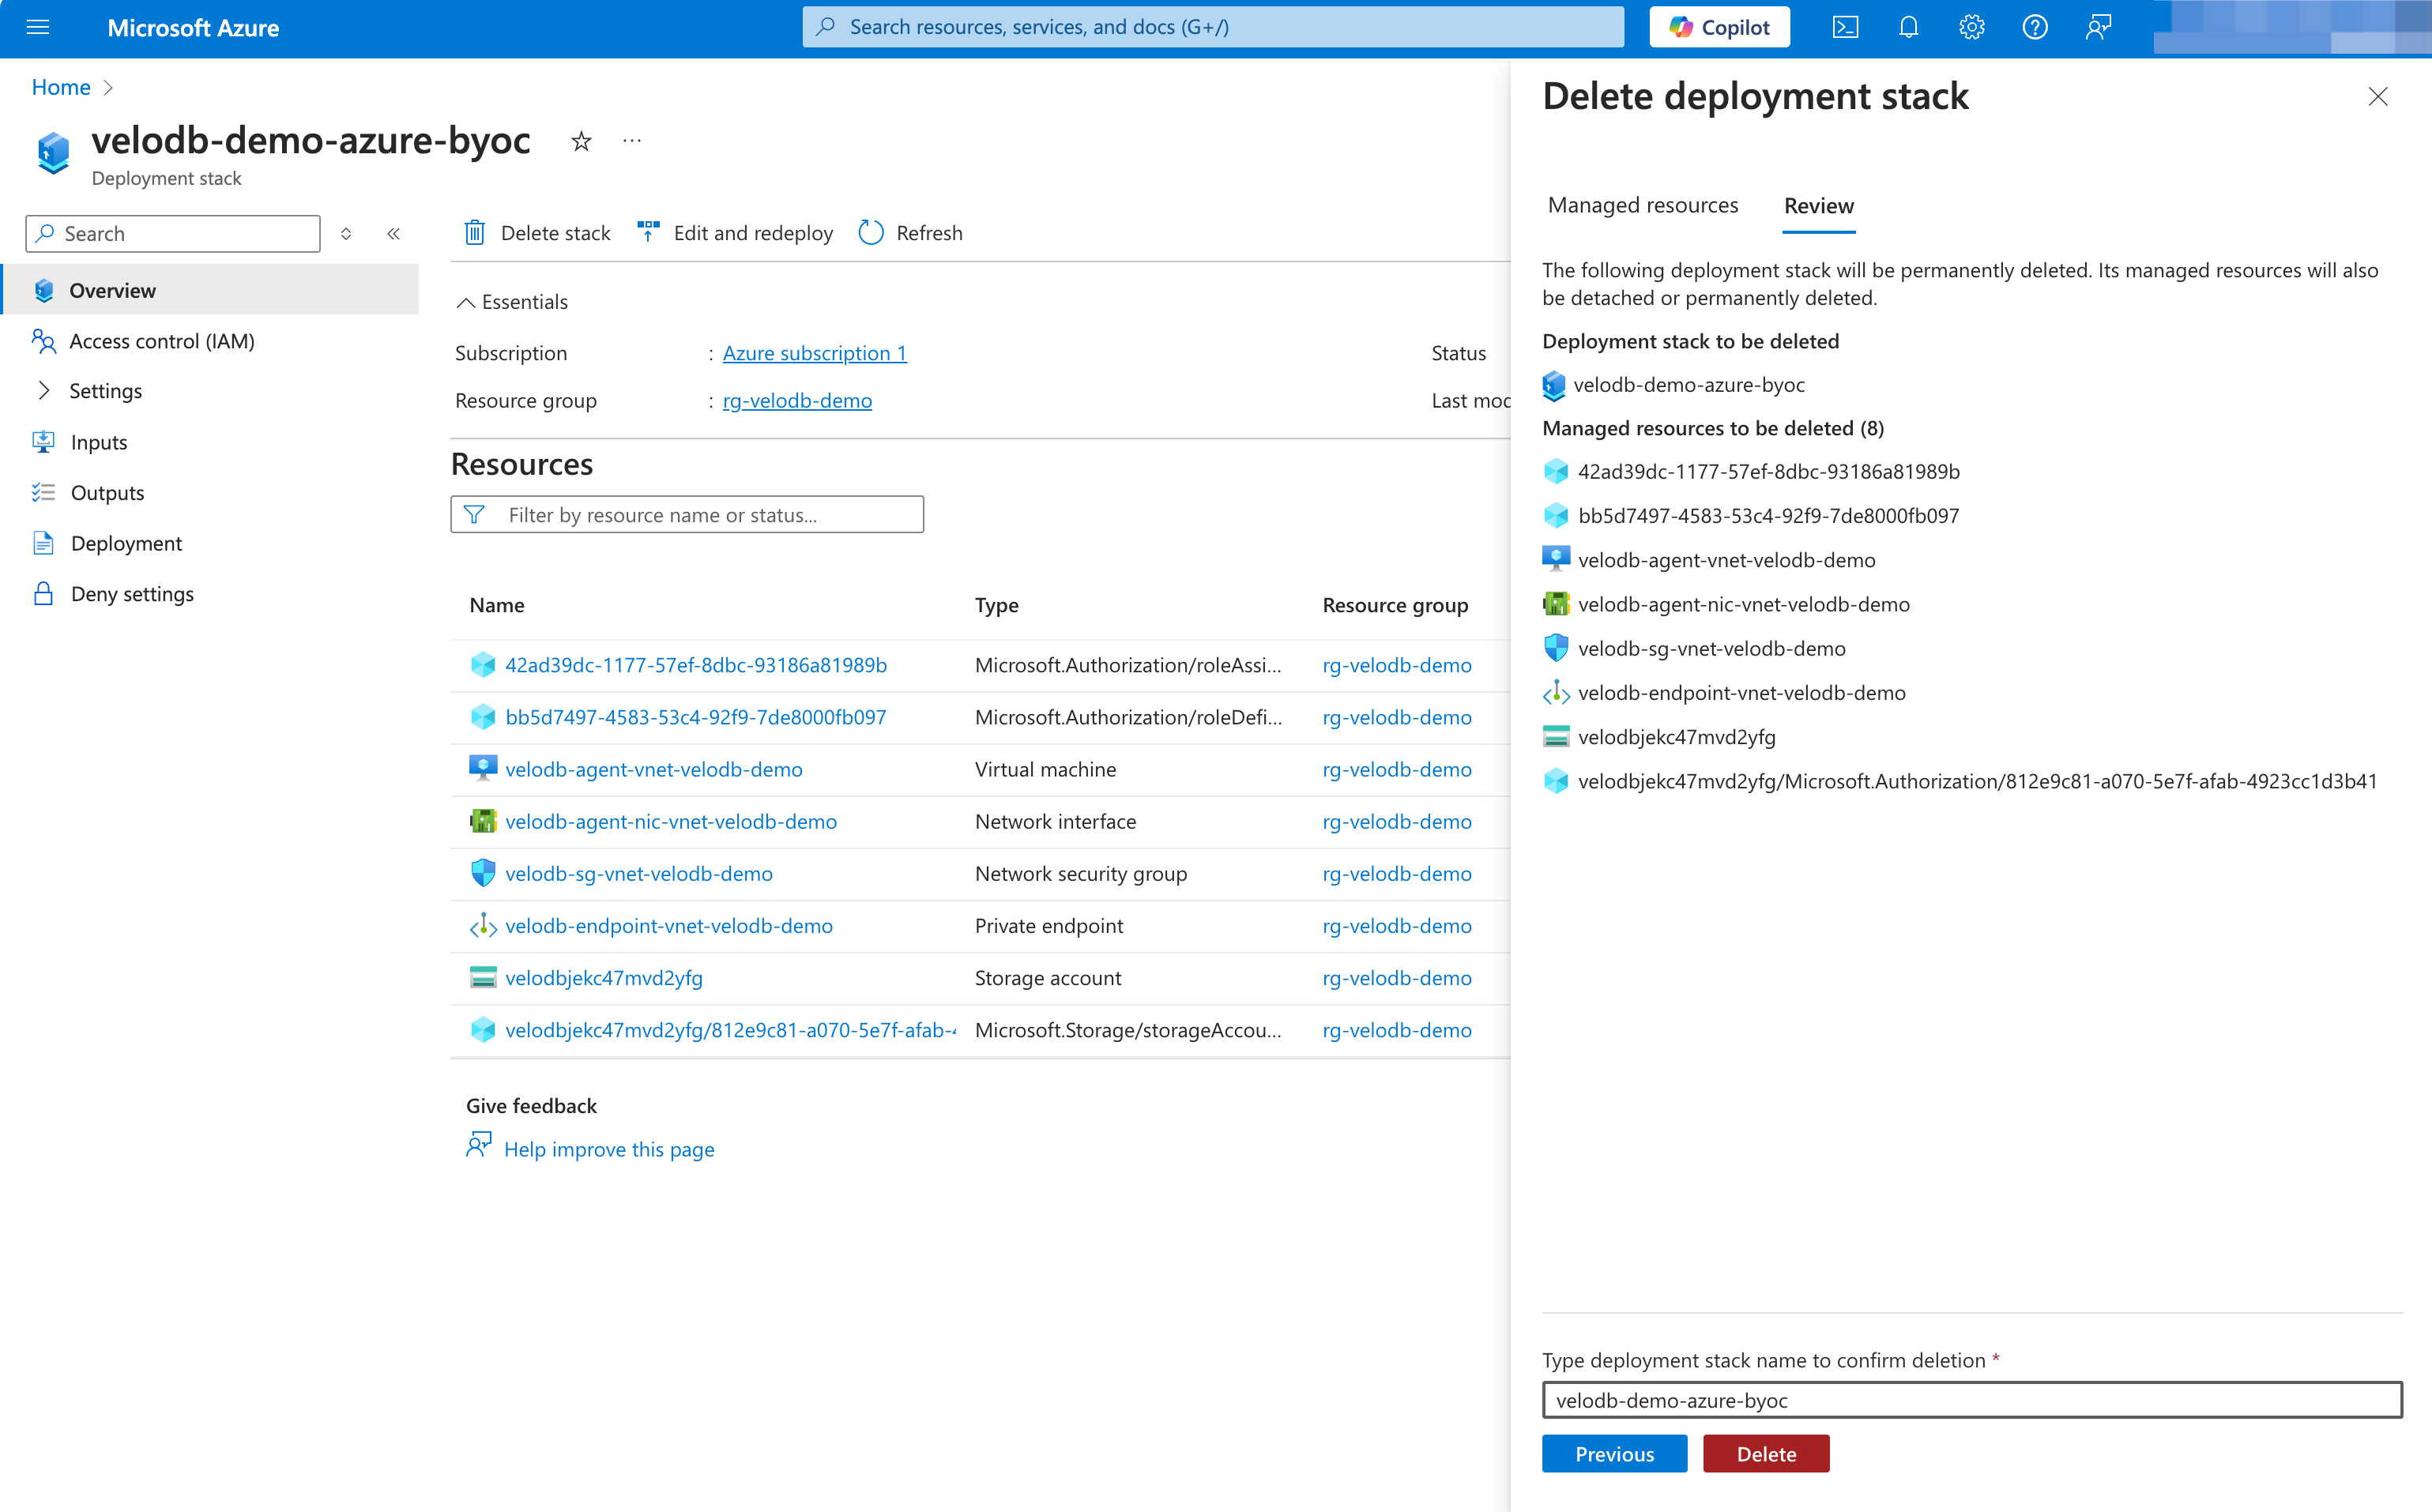
After the warehouse is deleted, click Cloud Platform, enter Azure Deployment Stacks, and continue to delete the resource stack to destroy the BYOC basic environment.
Click Delete stack. Select Delete all resources, detach resource groups and management groups for Update behaviour. Click Next.
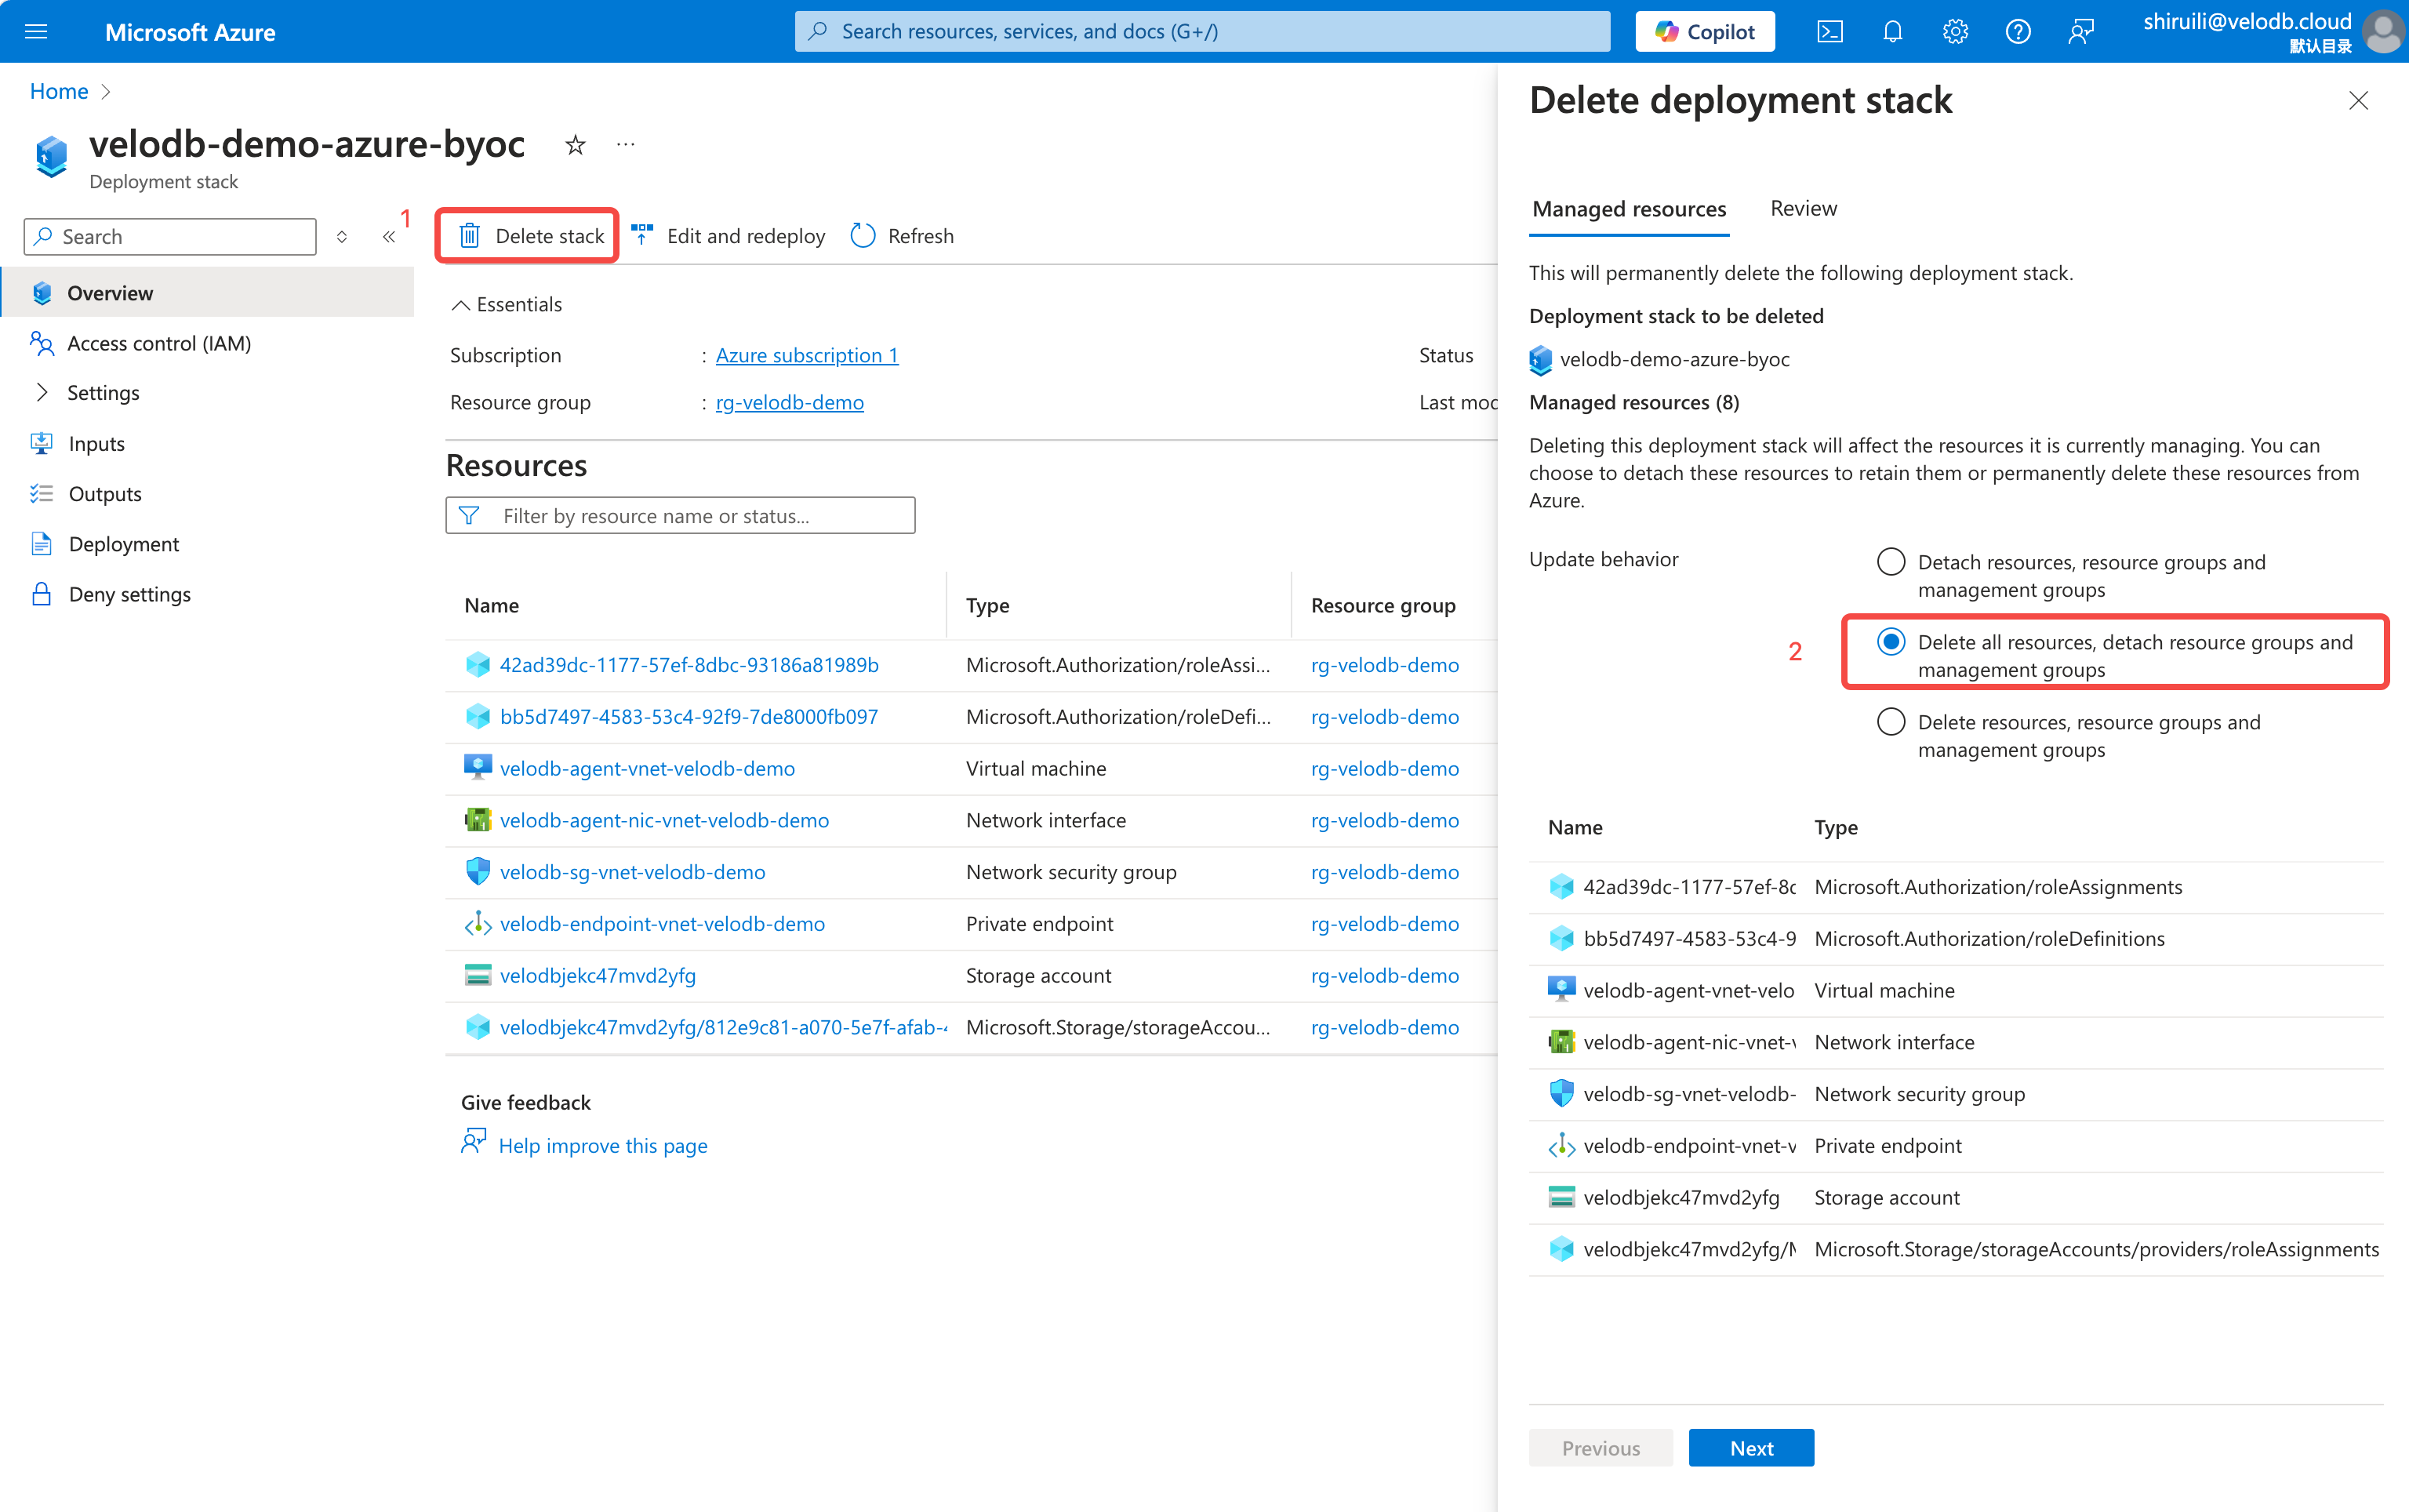
Enter stack name and click Delete.